

- View all, unscheduled, assigned, or unassigned appointments.
- Drag and drop appointments into technician time slots.
- Add or change assignees.
- Reschedule appointments.
- Clear a schedule while keeping the appointment available for later planning.
- Open the parent job or the selected appointment for more details.
- Create another appointment when the job requires an additional visit.
Note: Once your organization uses Appointments, the Dispatch Board always dispatches by appointment. You can’t switch back to dispatching by job.
Understanding the Dispatch Board
The Dispatch Board contains four primary areas.- Appointment Queue
- Users
- Scheduler
- Map
Find appointments that need attention
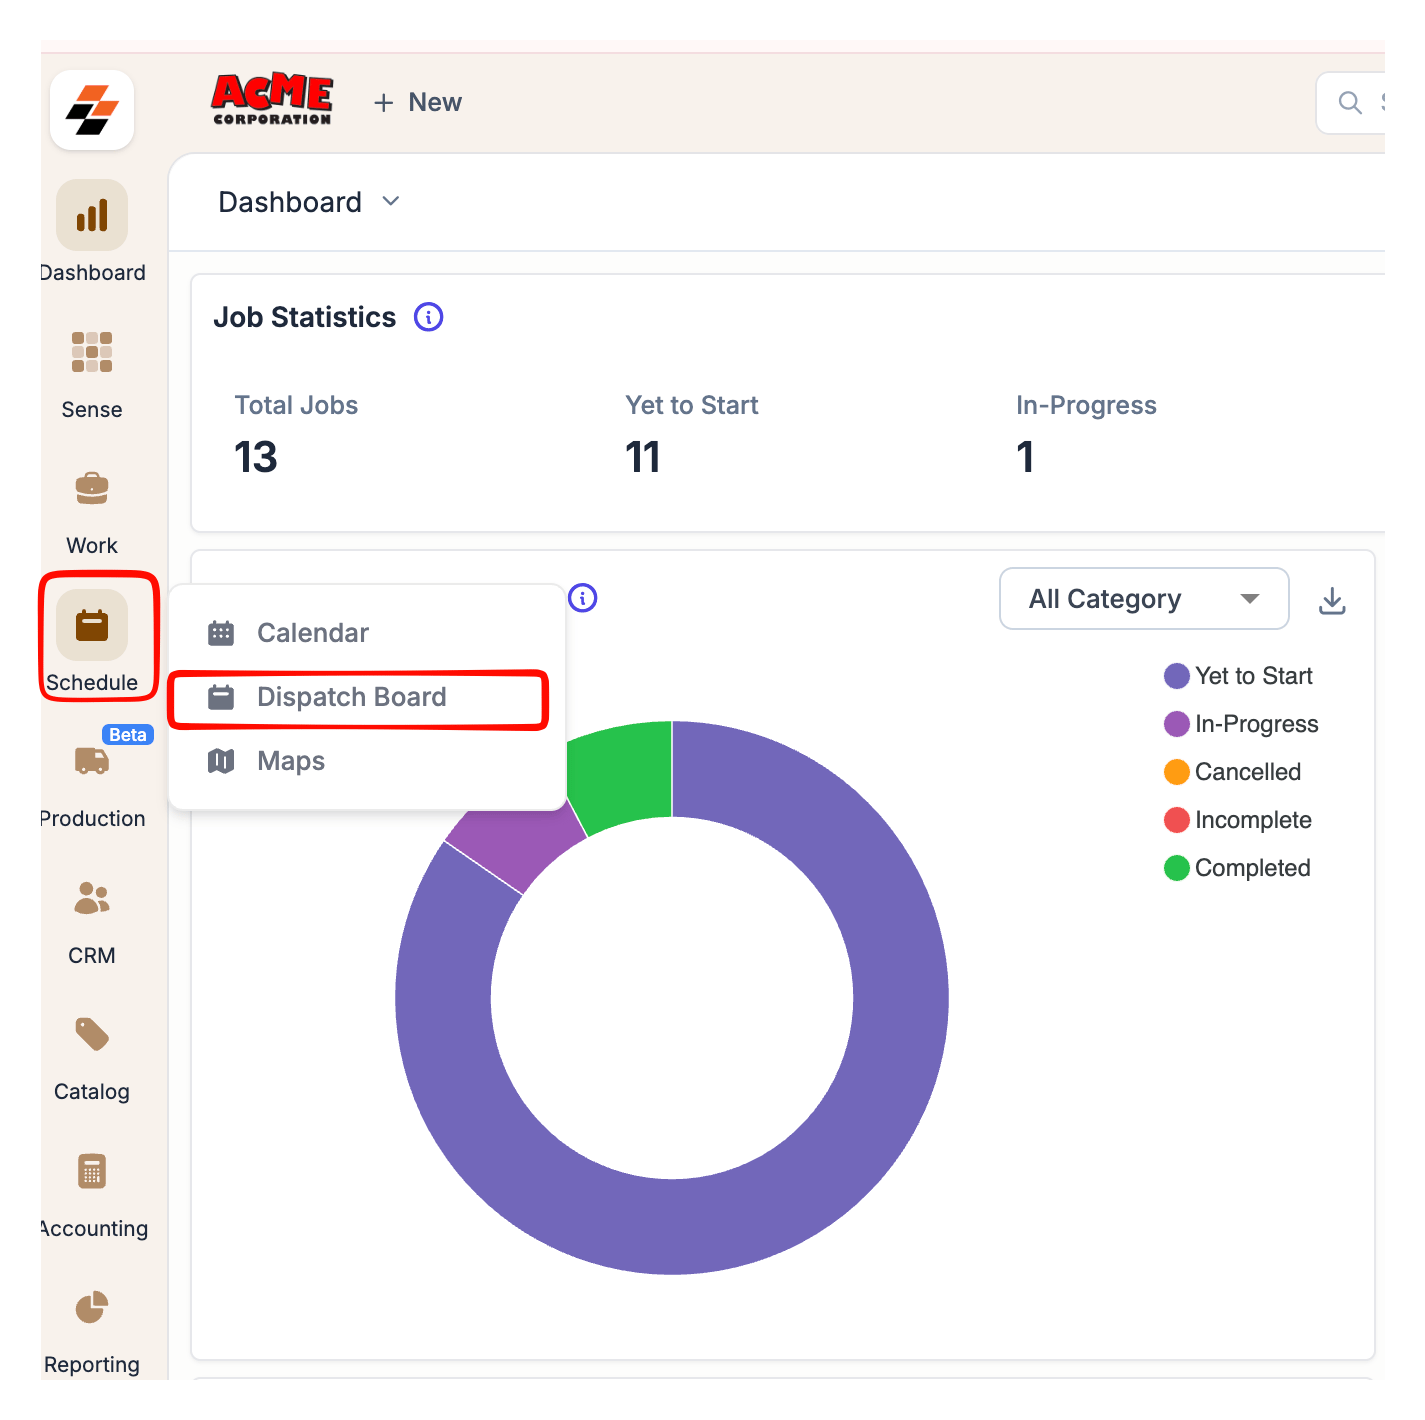
The appointment queue helps you identify work that still requires action. Depending on your workflow, you may need to schedule appointments, assign technicians, or review appointments that have already been allocated.- Click the Scheduling and Dispatching module and select Dispatch Board.
- Select the required time zone.
- Select a Trade Type when applicable.
- (Optional) Select a Service Territory.
- Select the required team.
- Select the date you want to manage.
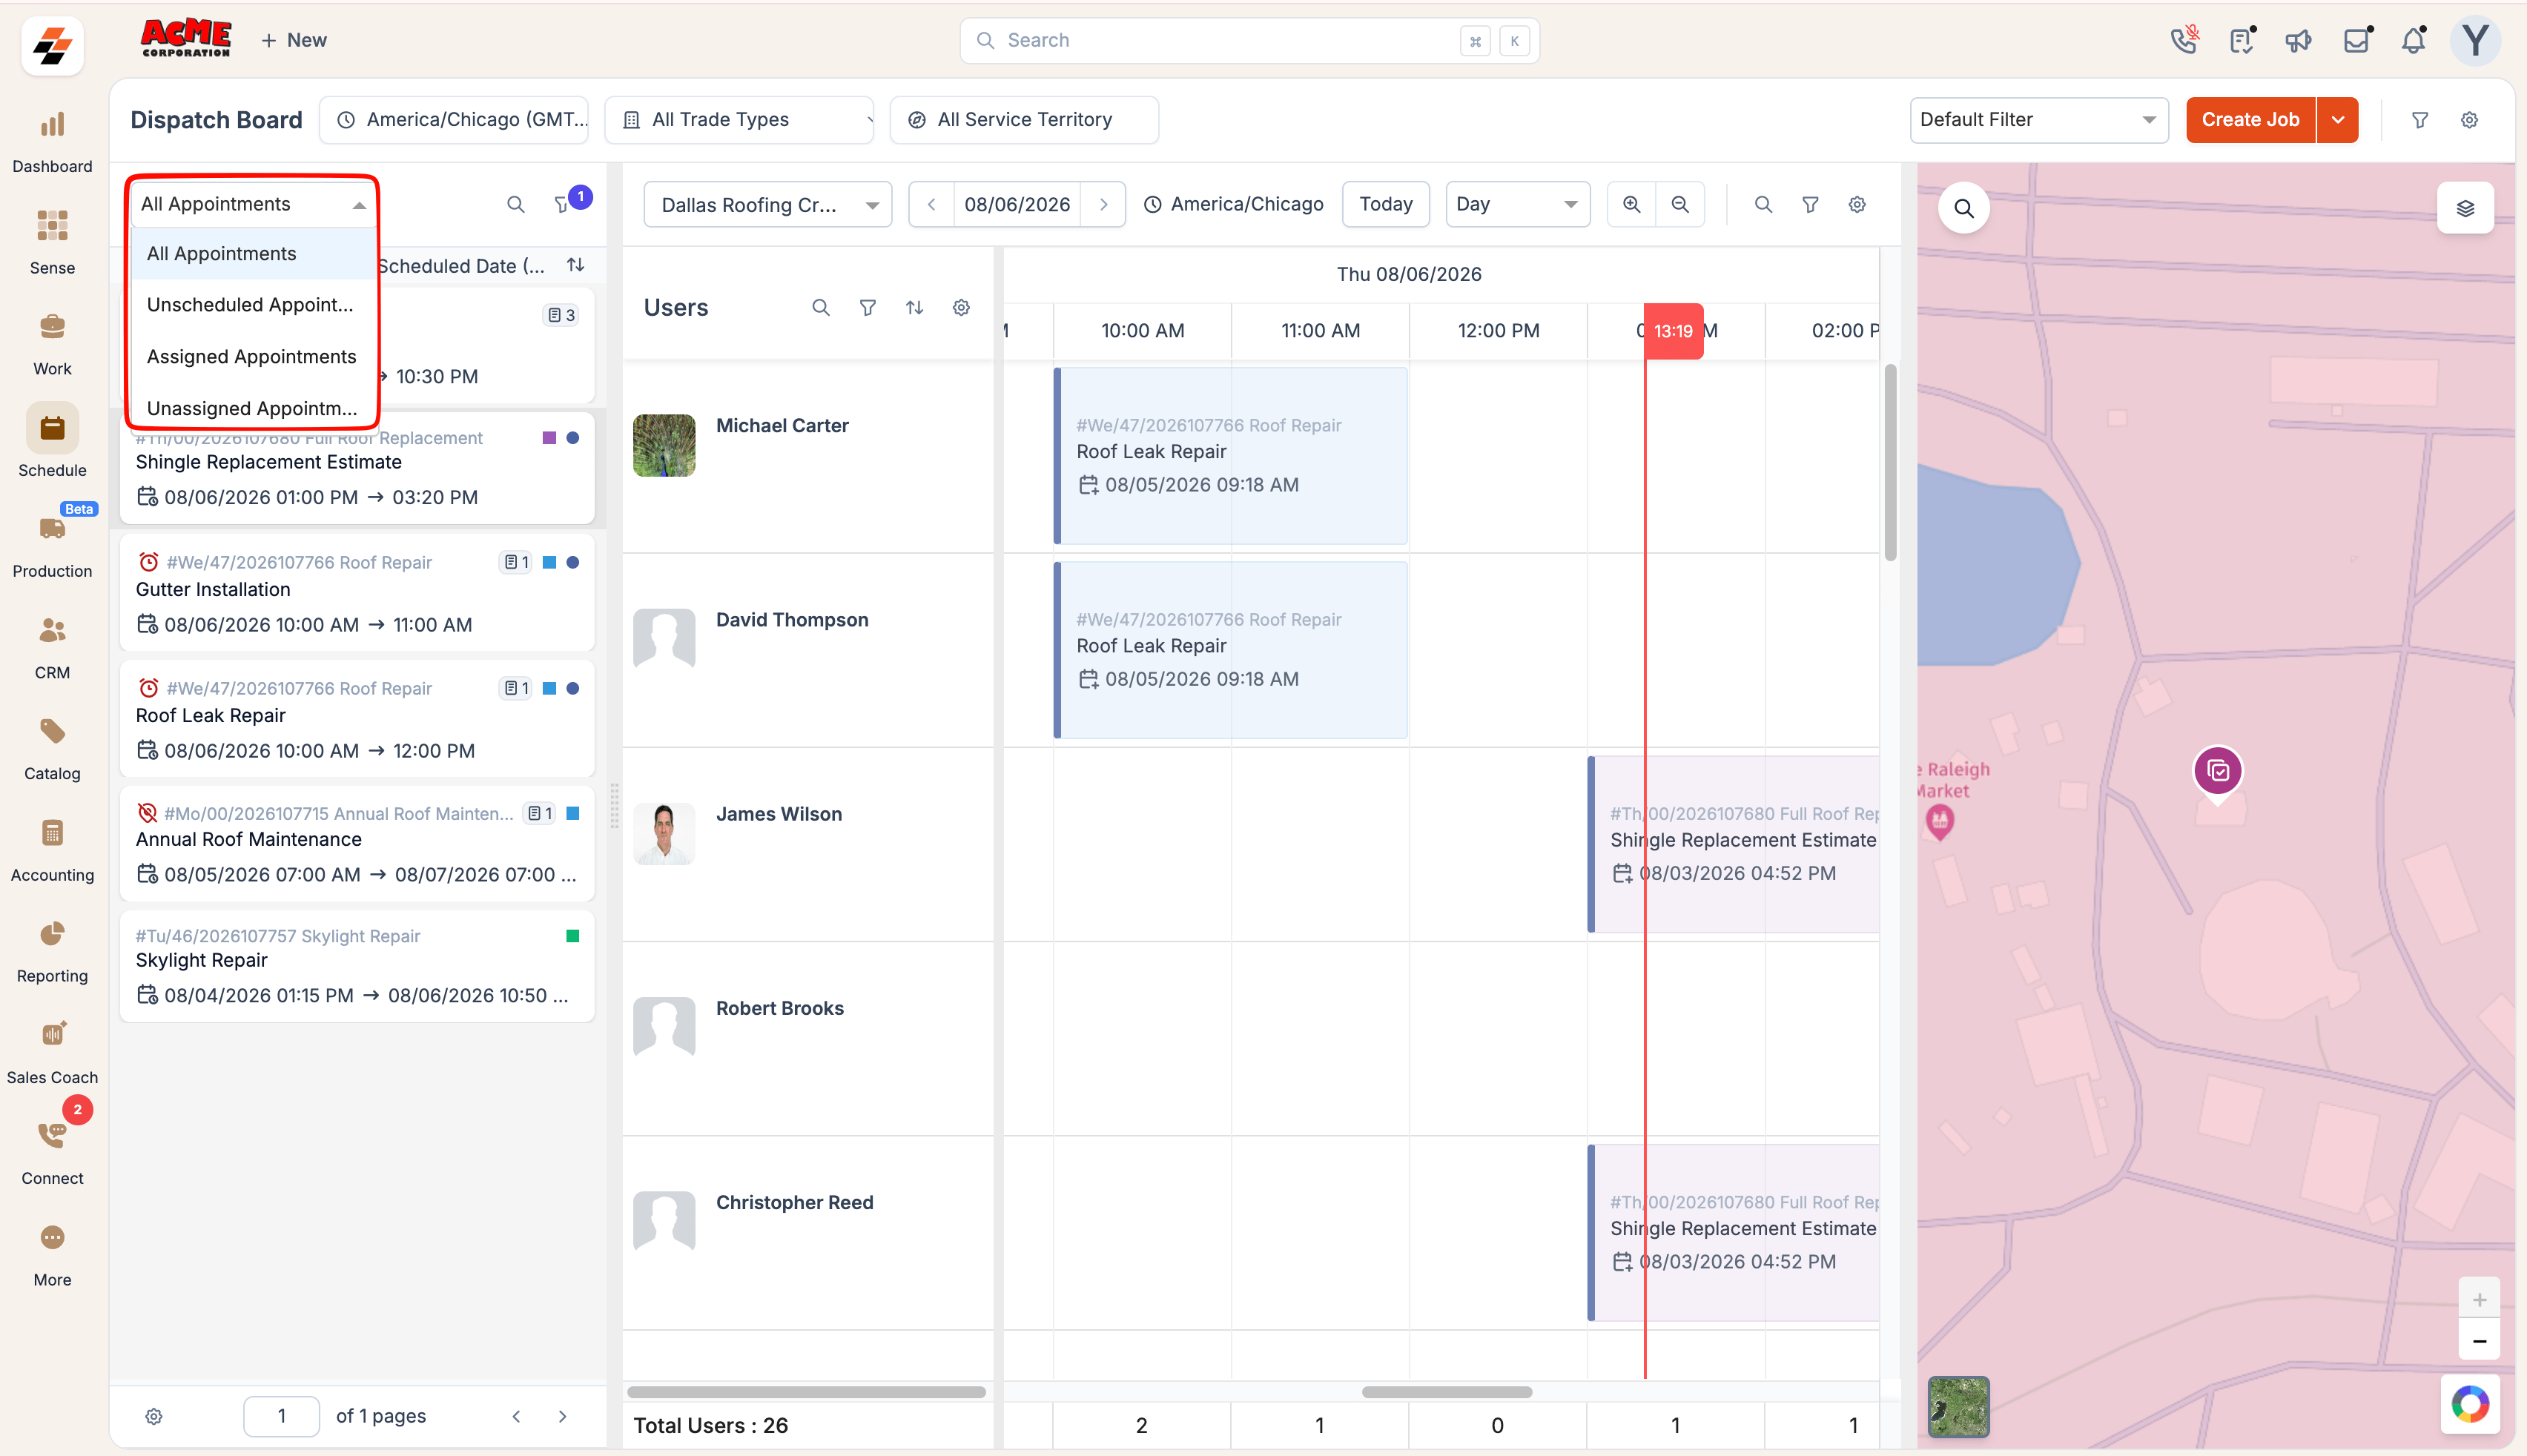
- Open the appointment queue in the upper-left corner.
- Select one of the following options:
- All Appointments - Displays all the appointments available to you.
- Unscheduled Appointments - Displays appointments without a confirmed start and end date and time. You can use this queue to schedule appointments.
- Assigned Appointments - Displays appointments assigned to one or more users. You can use this queue to review work that has already been allocated.
- Unassigned Appointments - Displays appointments that do not currently have an assigned user or team. You can use this queue when appointments need technicians.
View job and appointment details
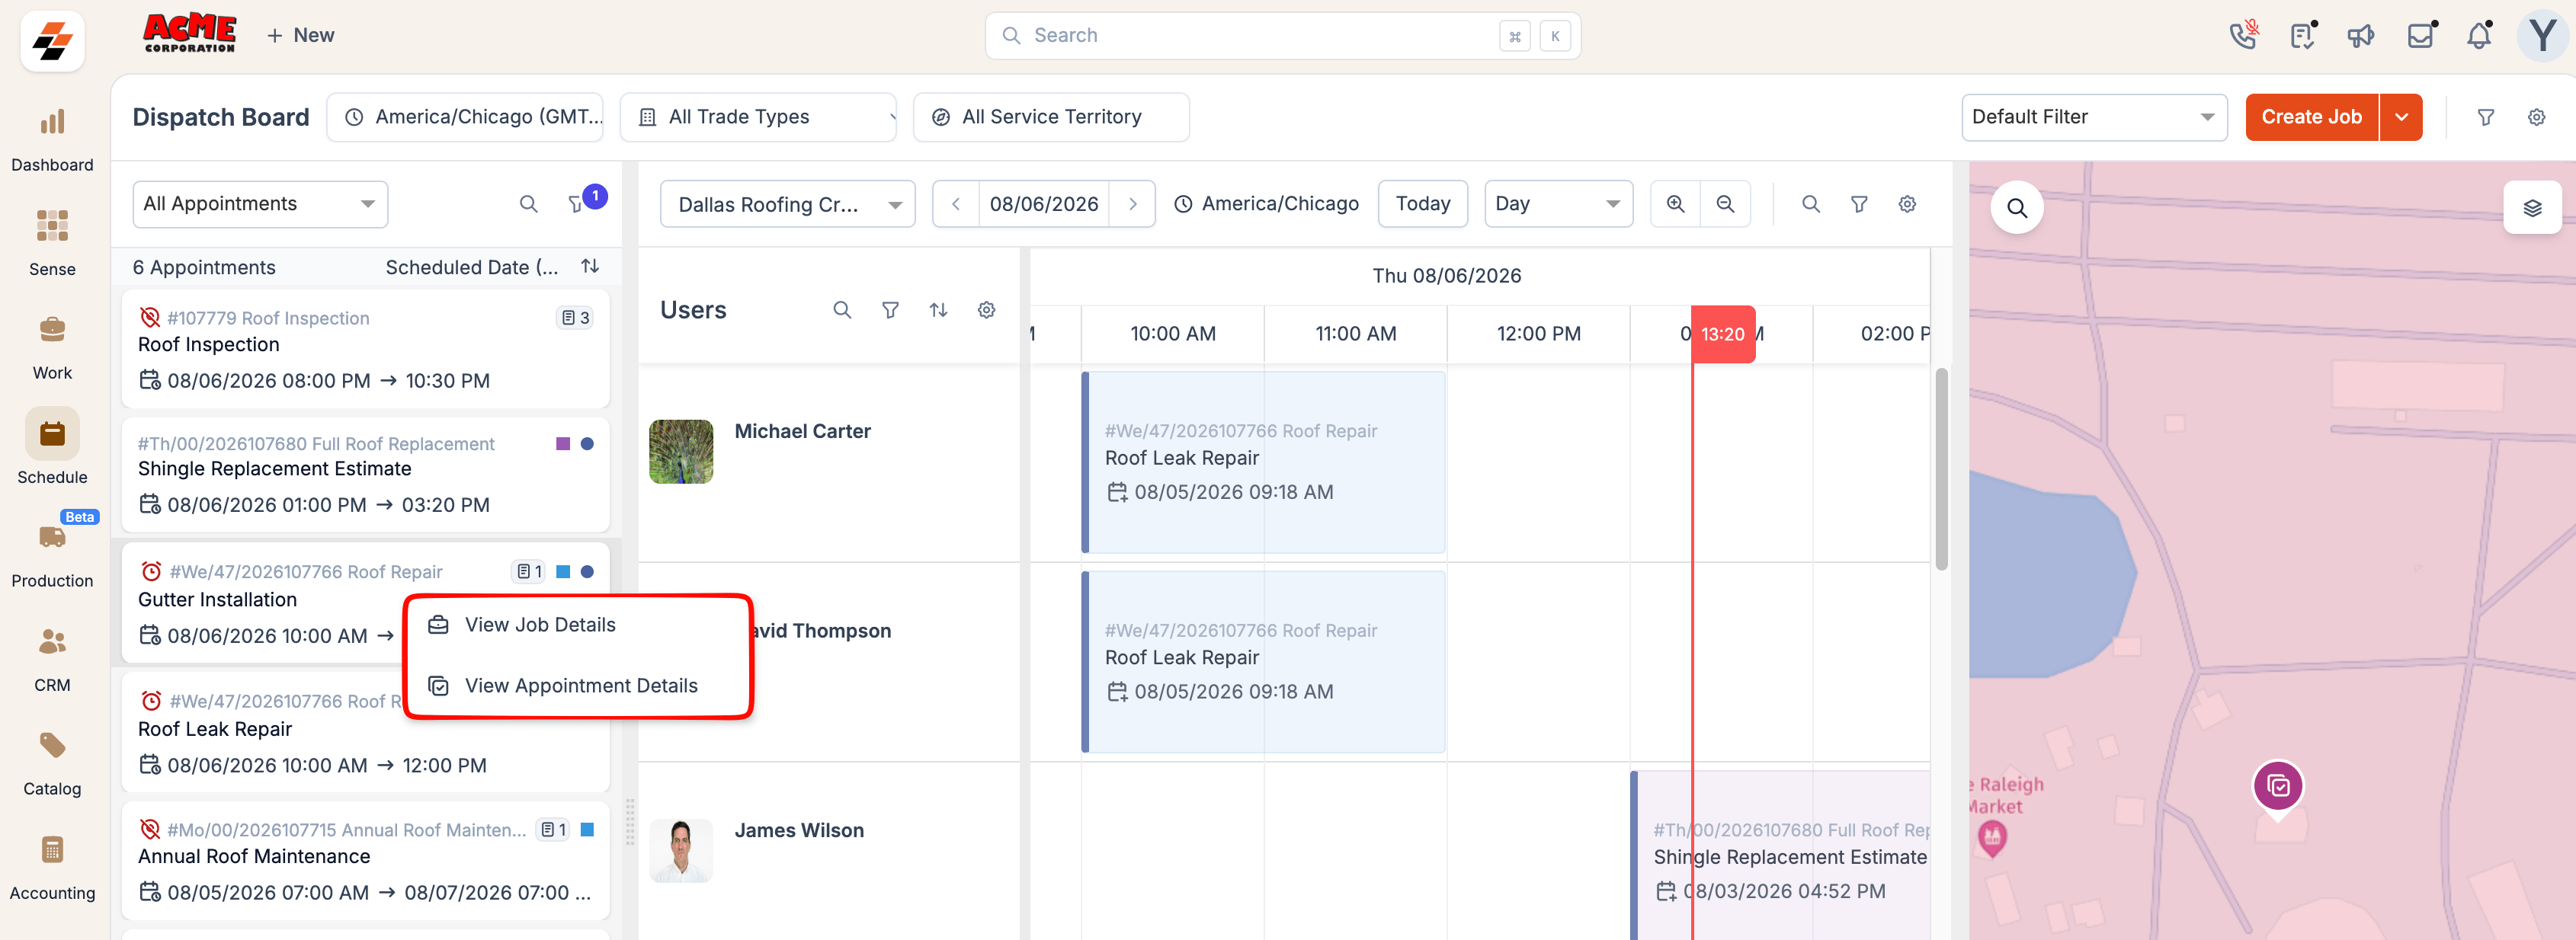
Before scheduling or assigning work, you may need additional information about the job or appointment. The Dispatch Board allows you to review details without leaving your current view.- Locate the appointment in the dispatcher queue and right-click on it.
- Select one of the following options:
- View Job Details
- View Appointment Details
View all appointments associated with a job
- Select View Job Details.
- Click the Appointments tab.
- Review all appointments associated with the job.
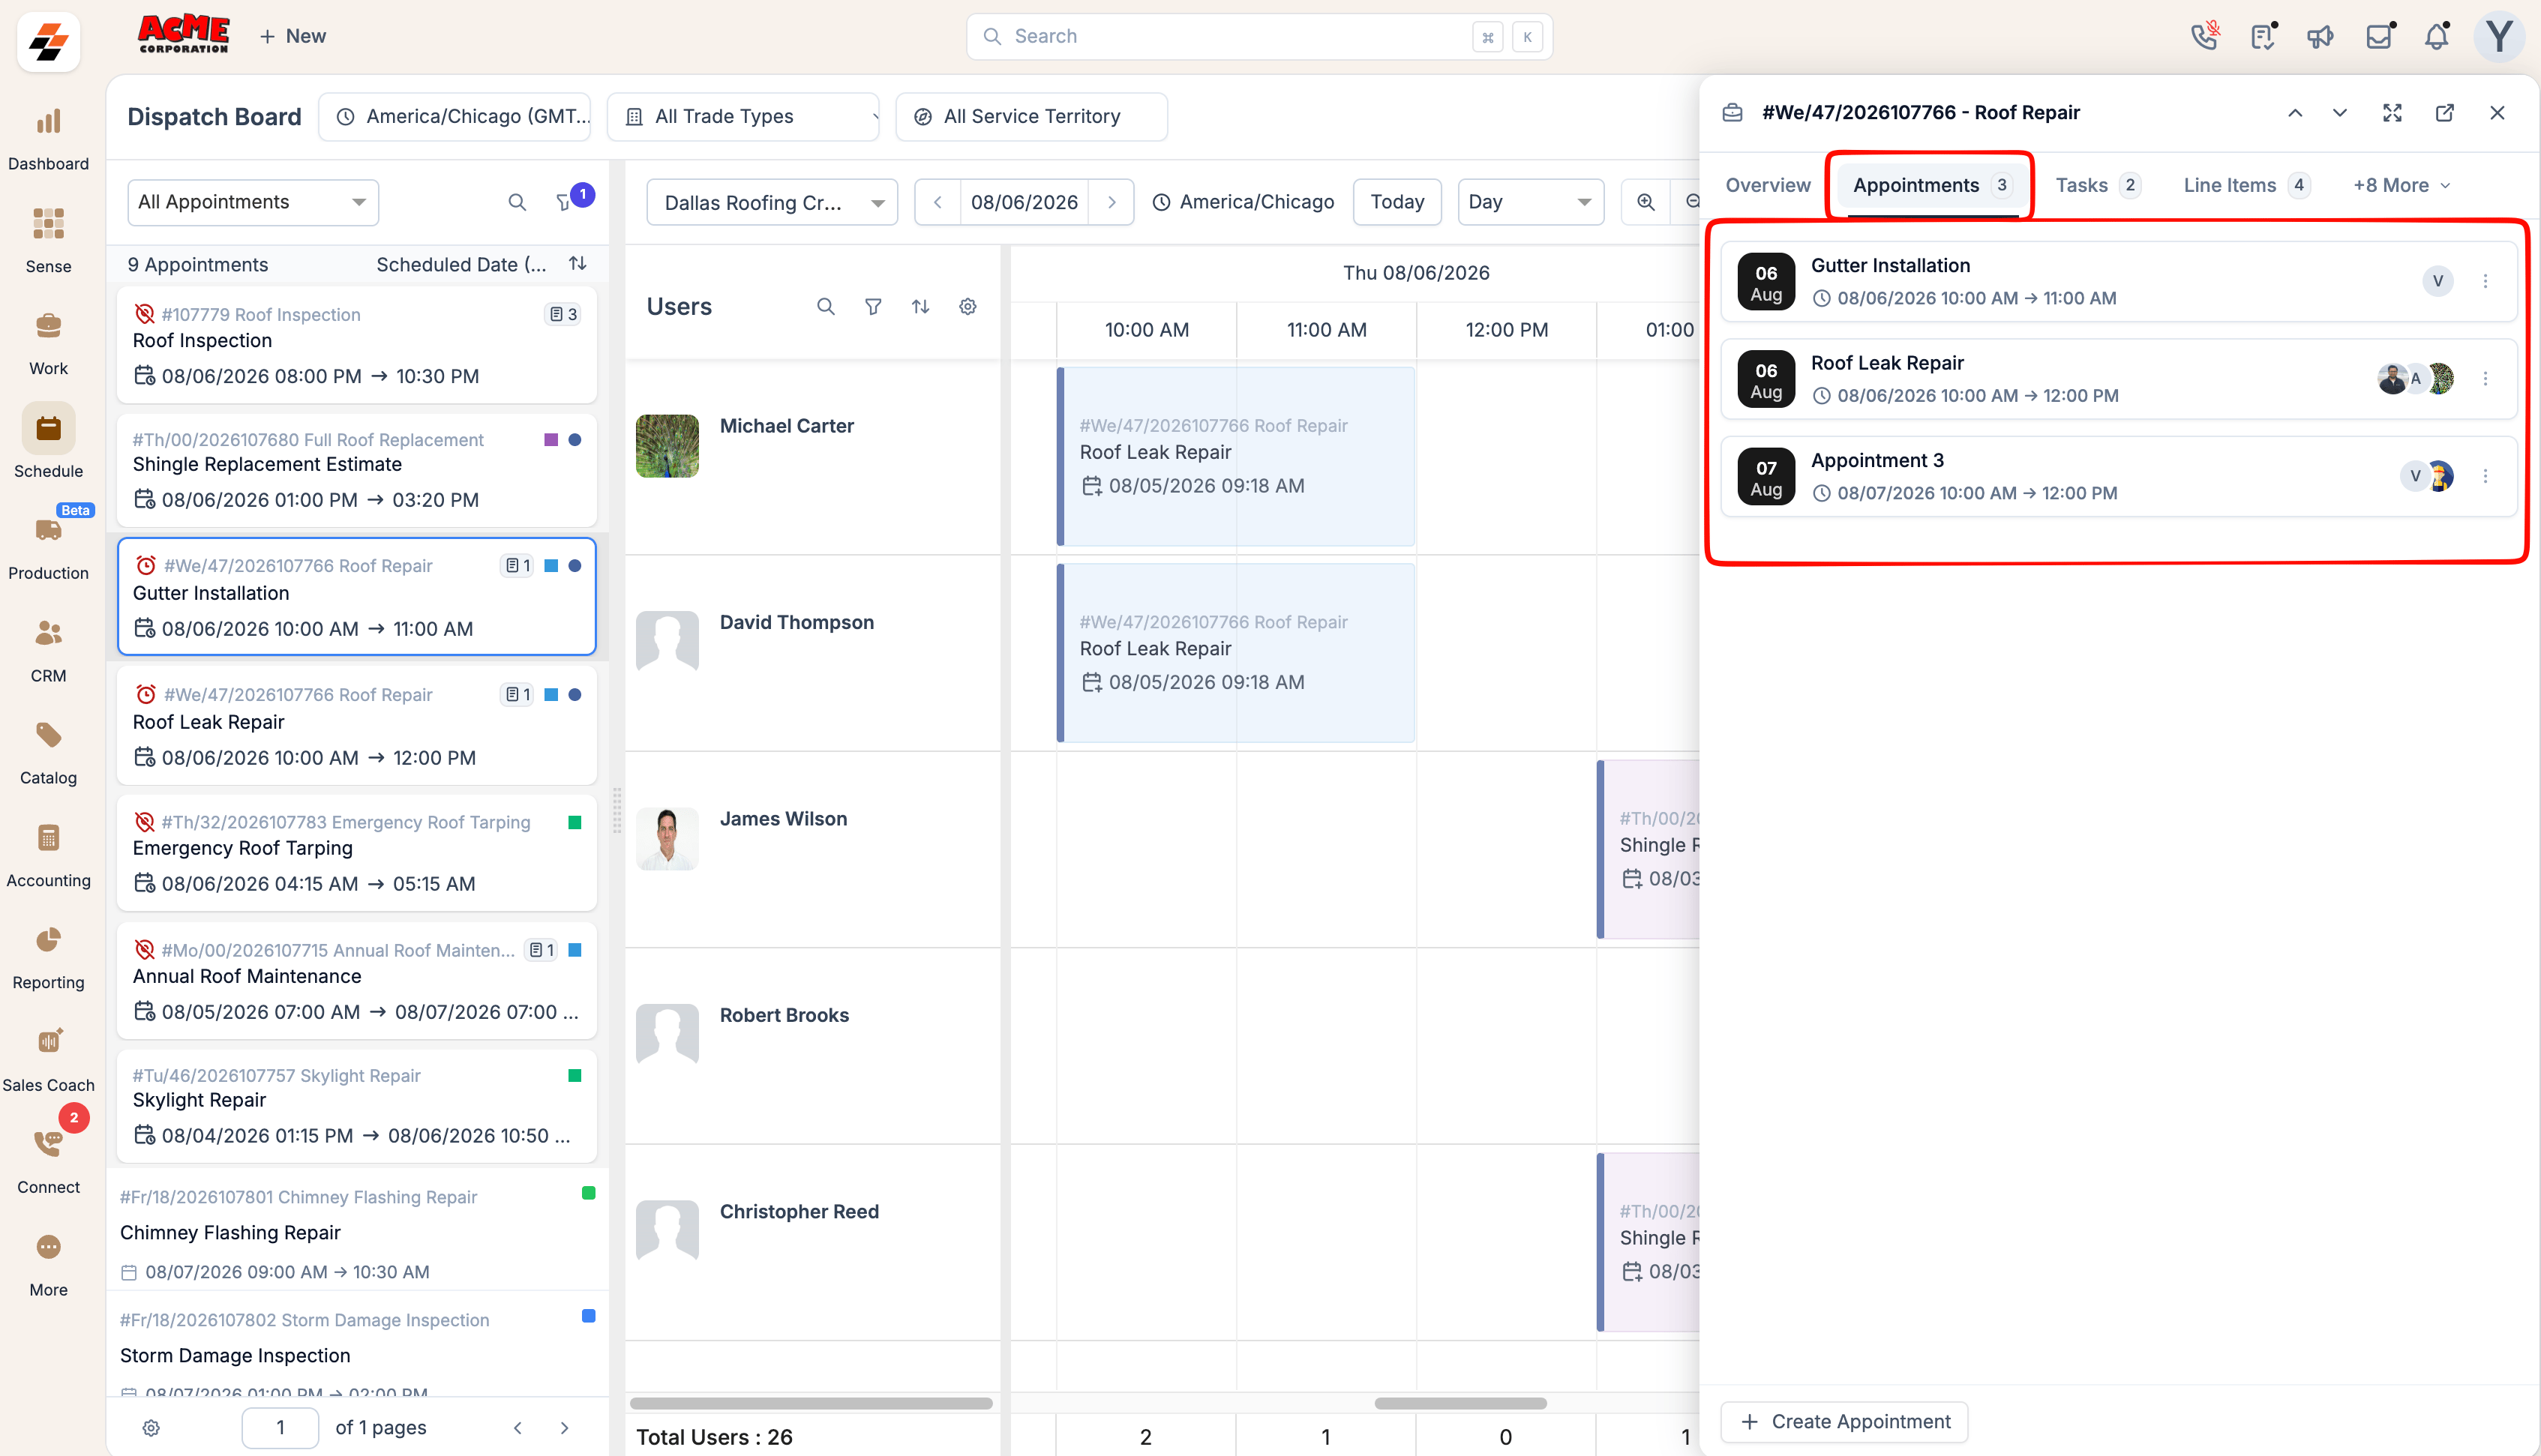
- Select an appointment to view its details.
Create a new appointment
When an existing job requires an additional appointment, you can create it from the Dispatch Board itself. To do so, click the + Create Appointment on the View Detail page. See Add Appointments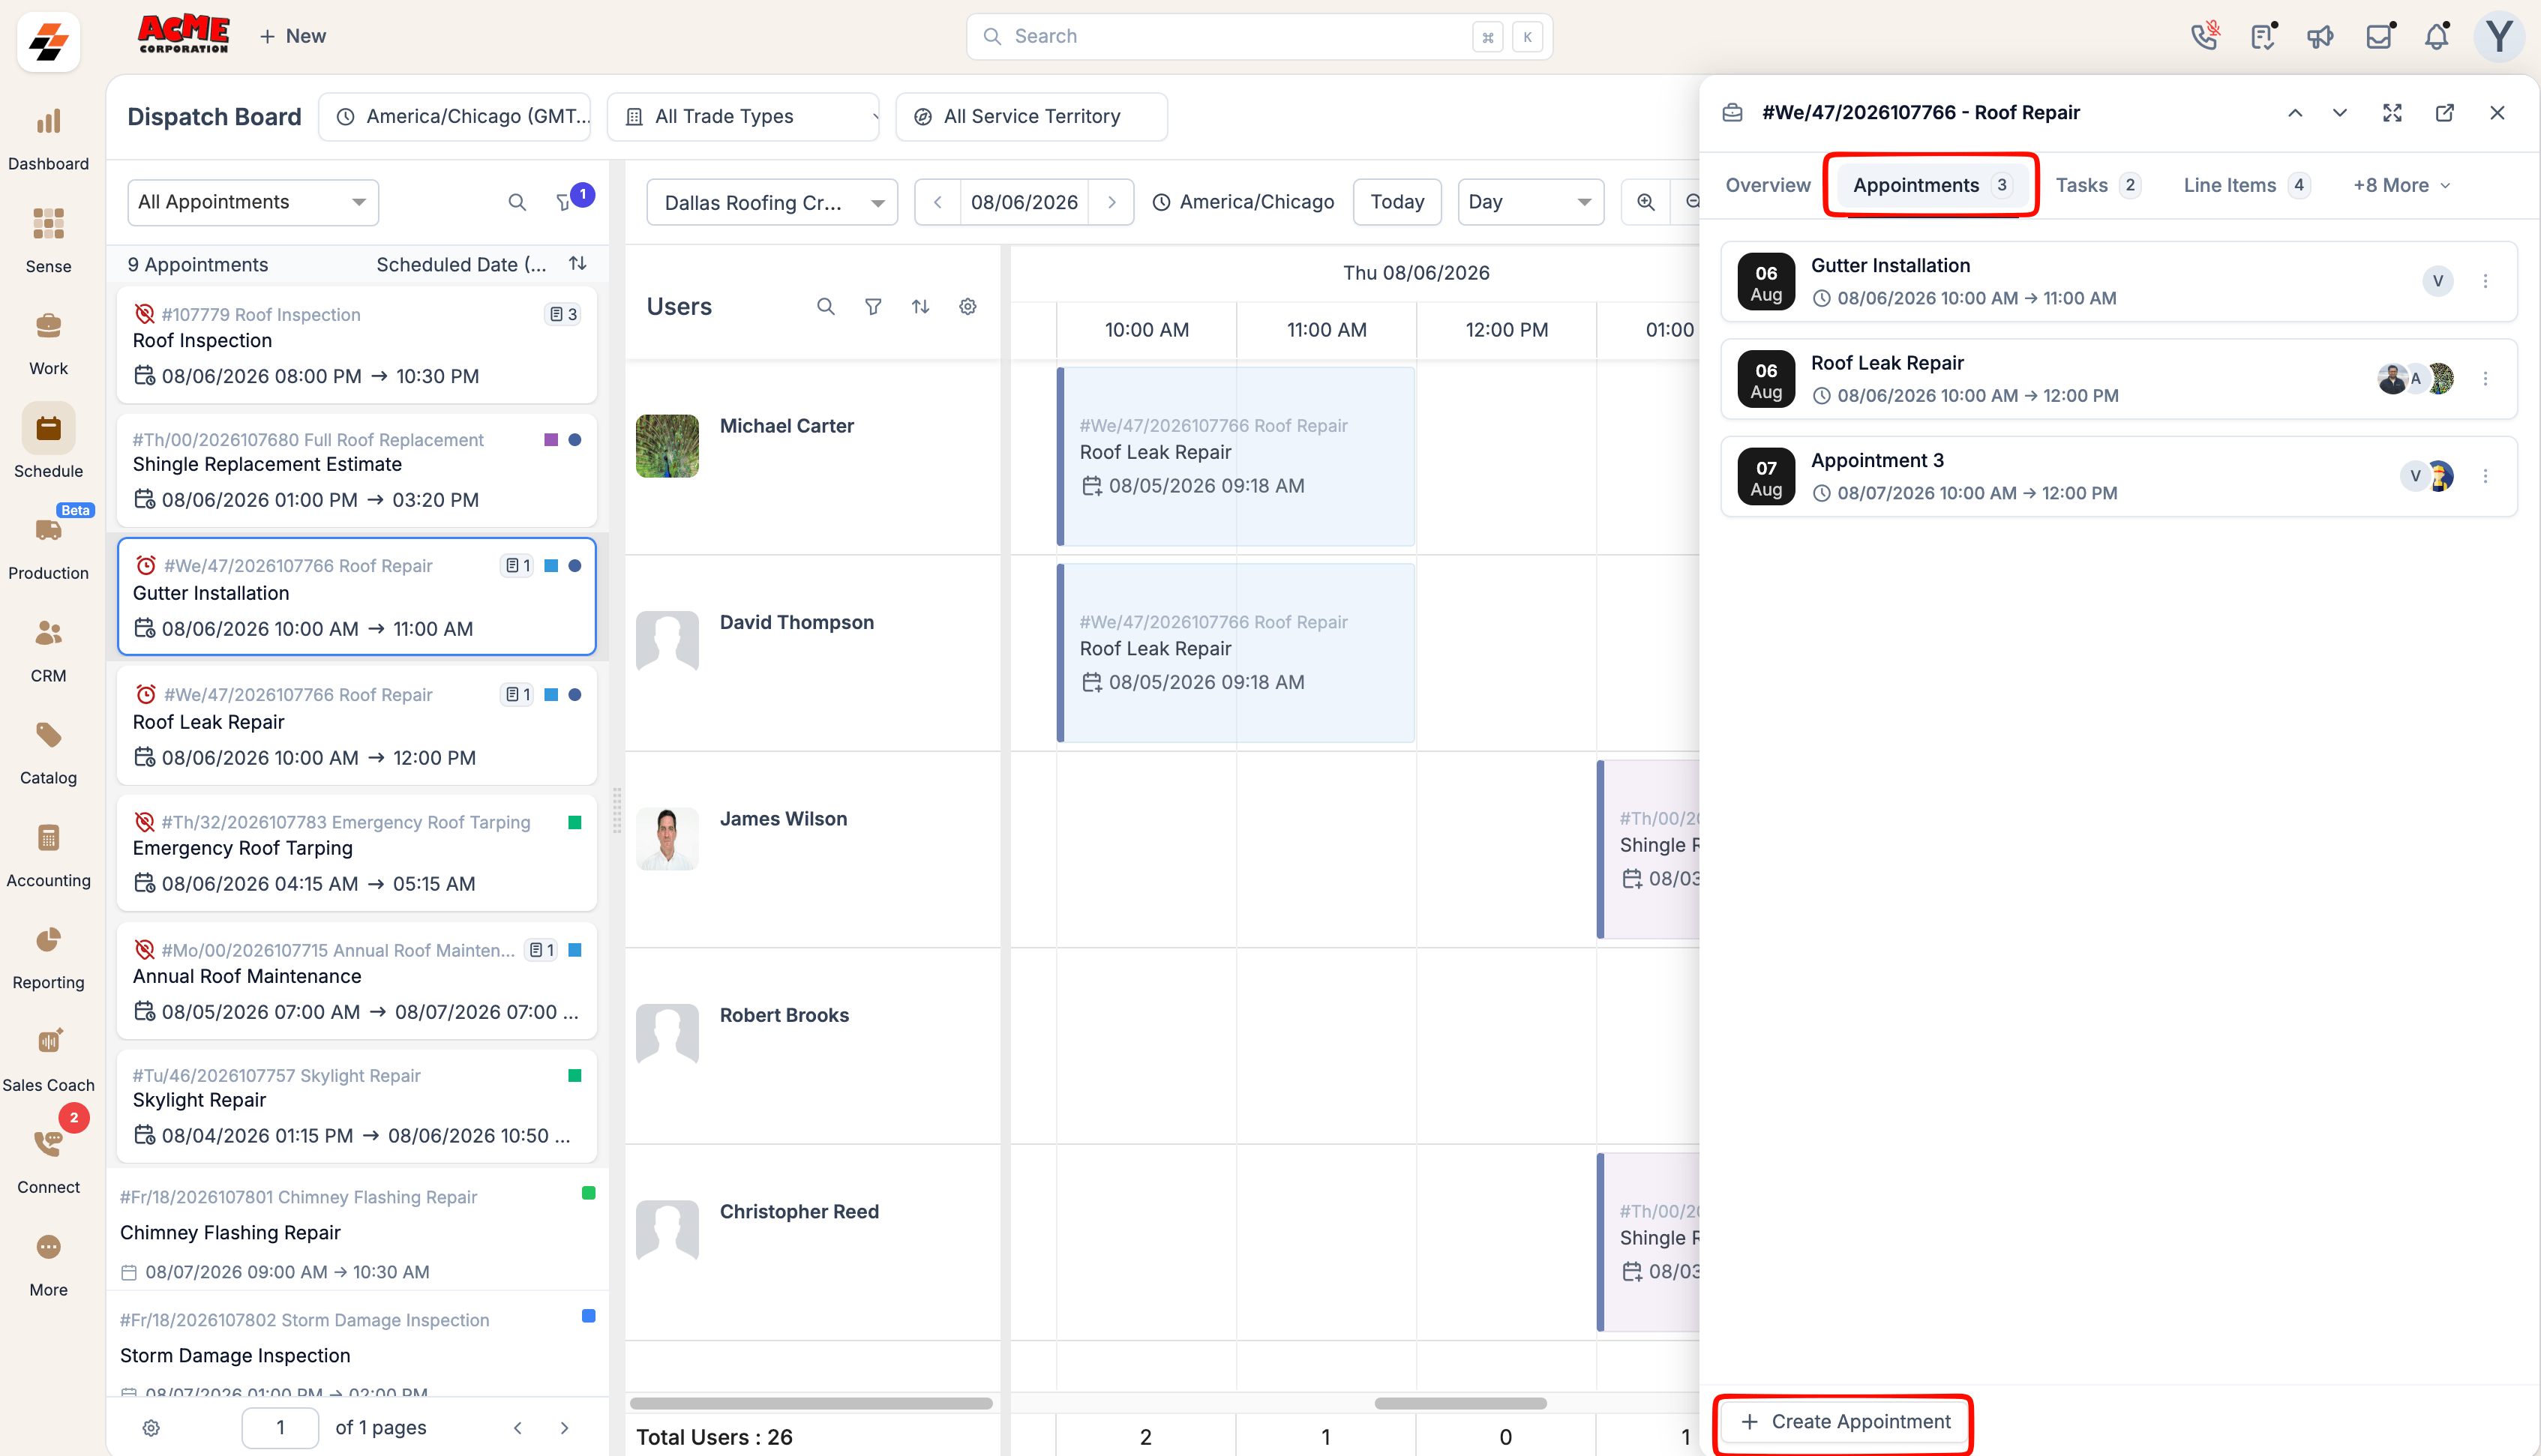
Schedule an appointment
Unscheduled appointments appear in the appointment queue and are ready to be placed for a technician. Scheduling an appointment reserves a time slot and assigns responsibility for the visit.- On the appointment queue, select Unscheduled Appointments.
- Select the required team and date.
- Review the appointment details, including the parent’s job, trade type, and due date.
- Locate an available technician in the Users section.
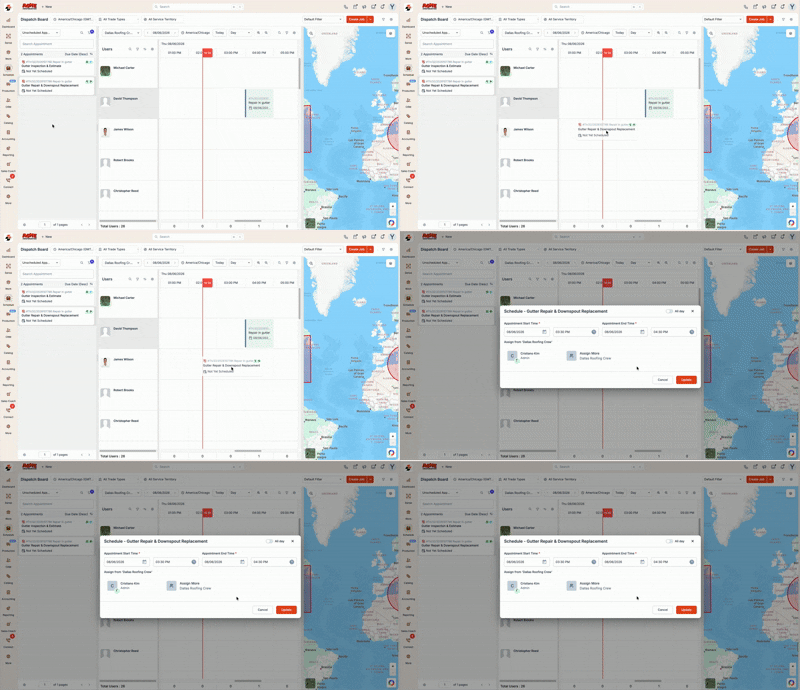
- Drag the appointment from the queue to an available time slot in the technician’s scheduler row. The Schedule dialog opens.
- Enter or review the Appointment Start Time.
- Enter or review the Appointment End Time.
- Turn on All Day when the appointment should cover the entire day.
- Click Assign to add technicians when required.
- Click Update.
Assign or reassign technicians
As schedules change throughout the day, you may need to add technicians or move work between team members. The Dispatch Board allows you to update assignments.Assign additional technicians
- Drag the appointment to a technician’s scheduler row.
- In the Schedule or Reschedule dialog, click Assign More.
- Select the additional users.
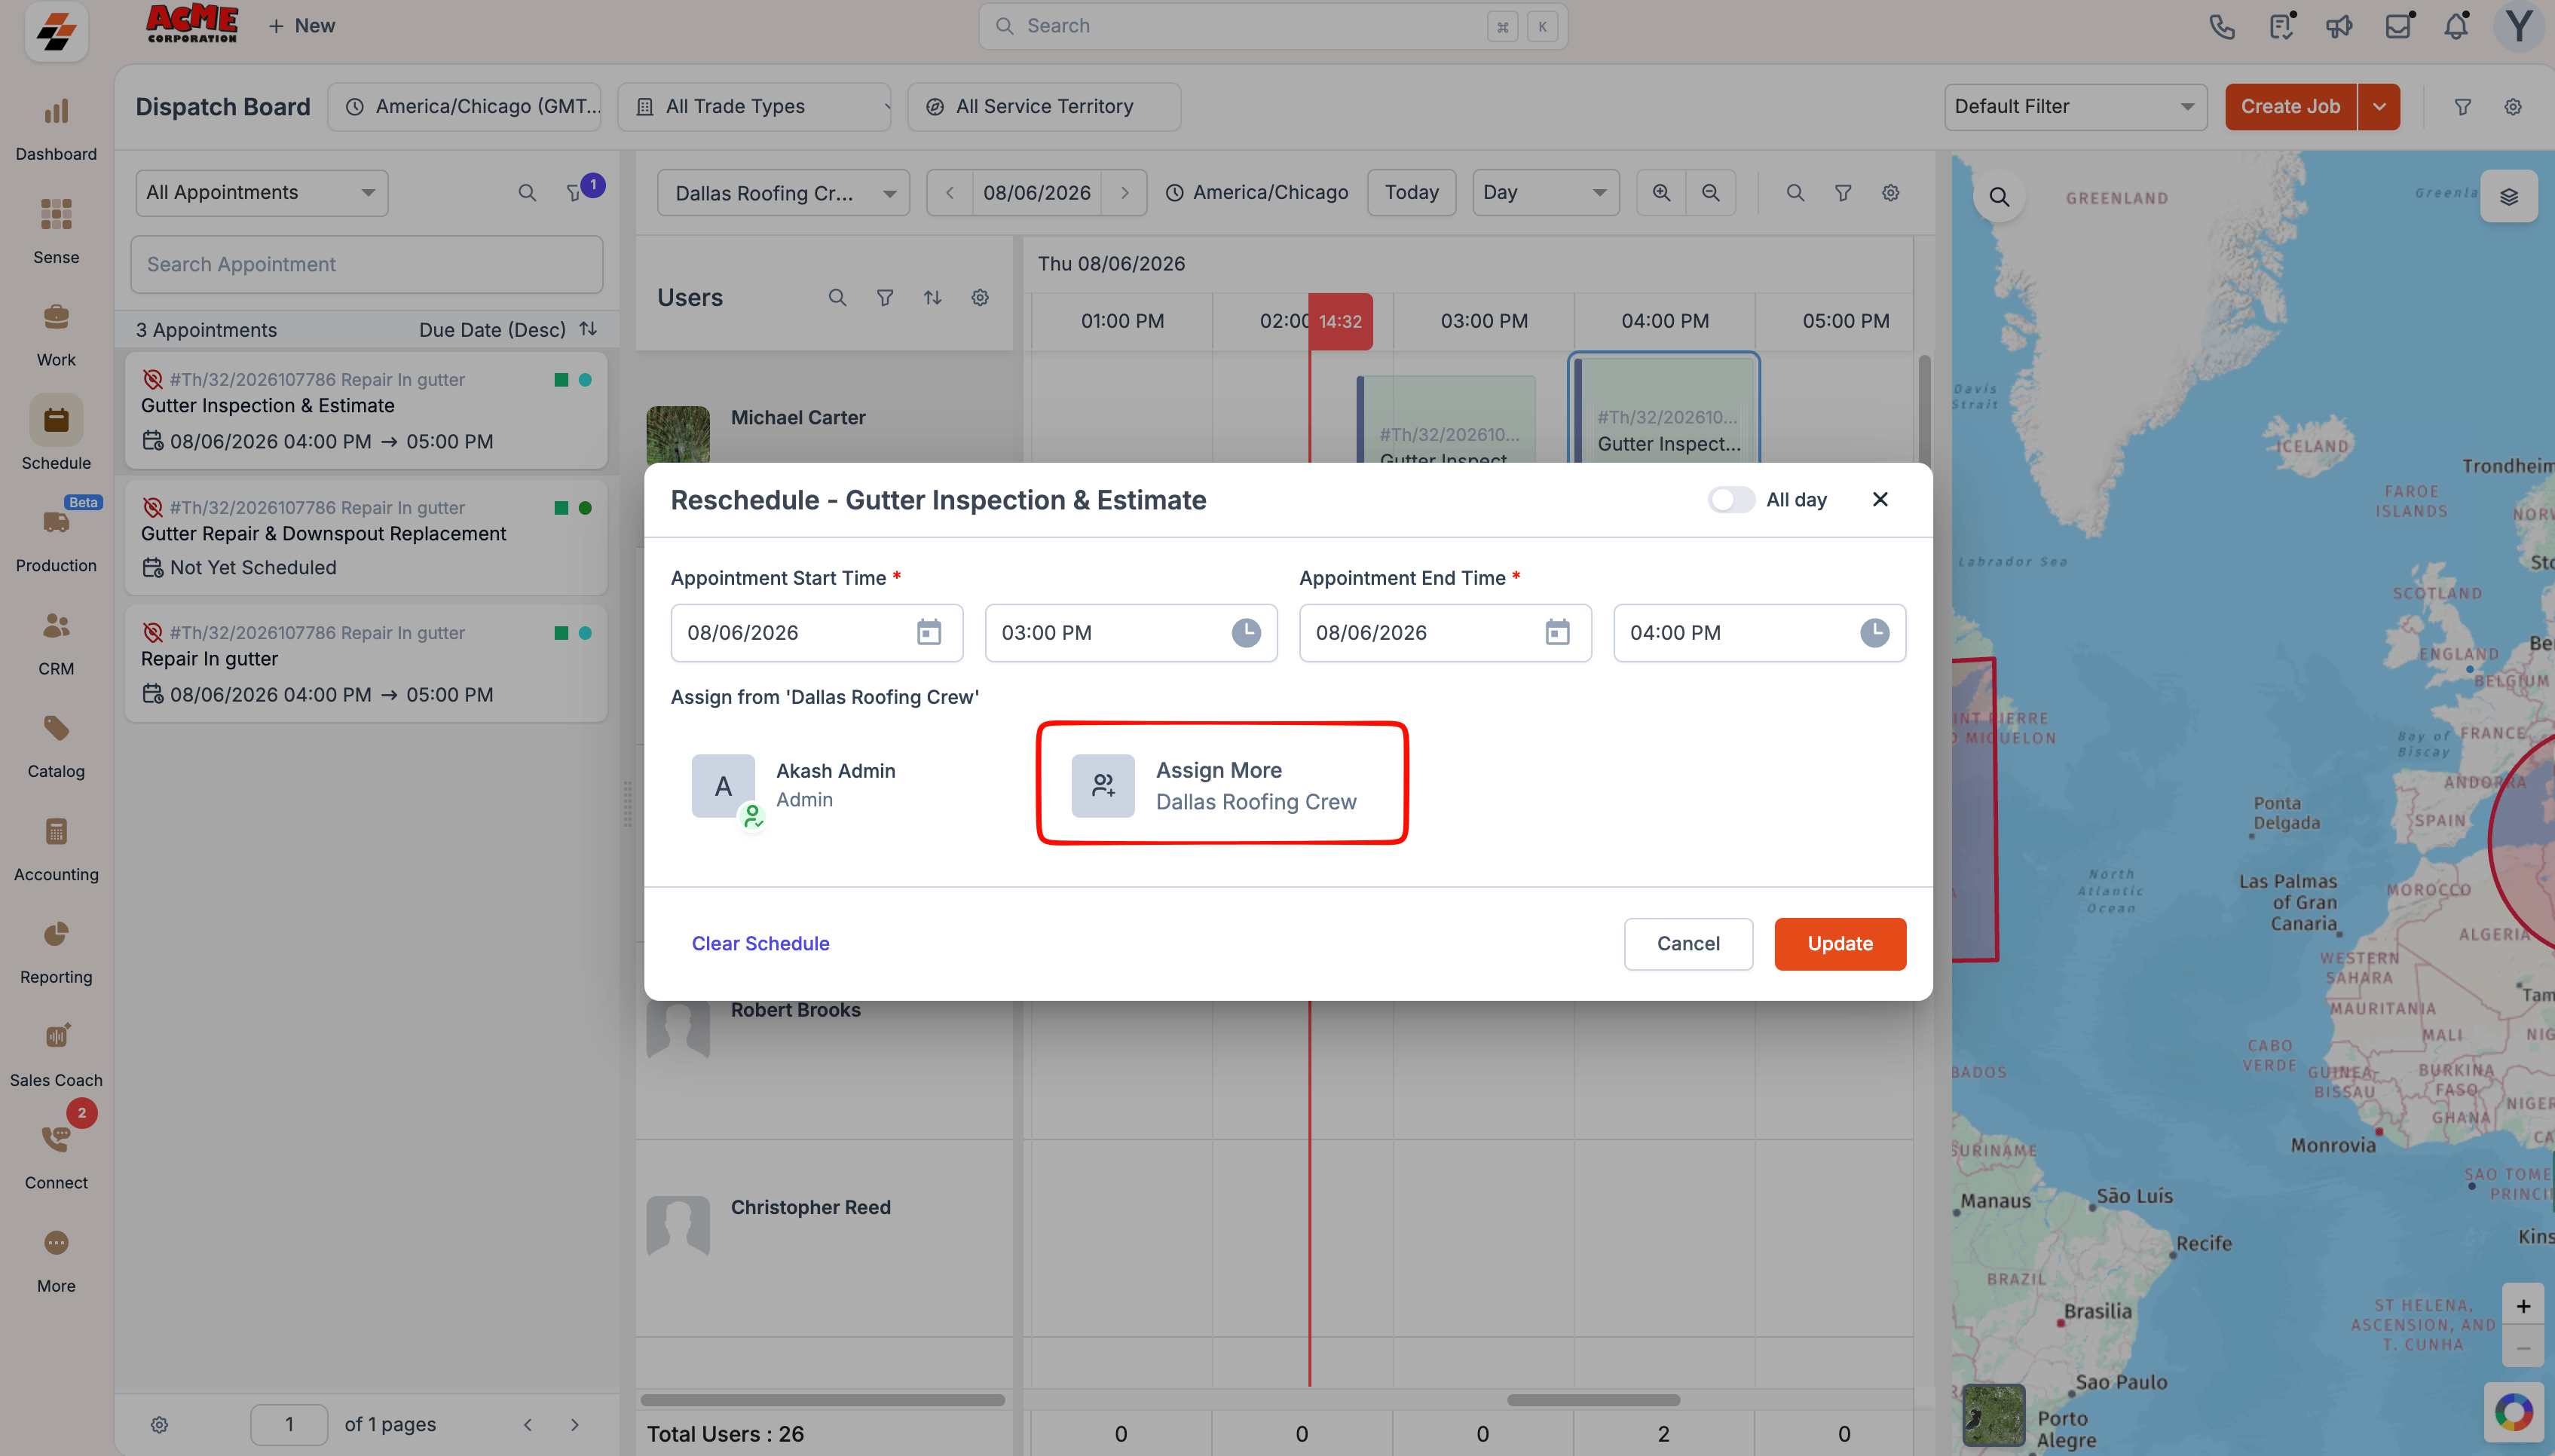
- Review the appointment start and end times.
- Click Update.
Reassign an appointment
- Locate the appointment in the scheduler.
- Drag the appointment from the current technician’s row to another technician’s row. The Reschedule dialog opens.
- Review the new technician assignment.
- Confirm the appointment start and end times.
- Click Update.
Reschedule an appointment
Schedules often change because of customer availability, technician workload, weather conditions, or project timelines. You can reschedule an appointment without affecting any other appointments associated with the same job.- Select Assigned Appointments or locate the appointment in the scheduler.
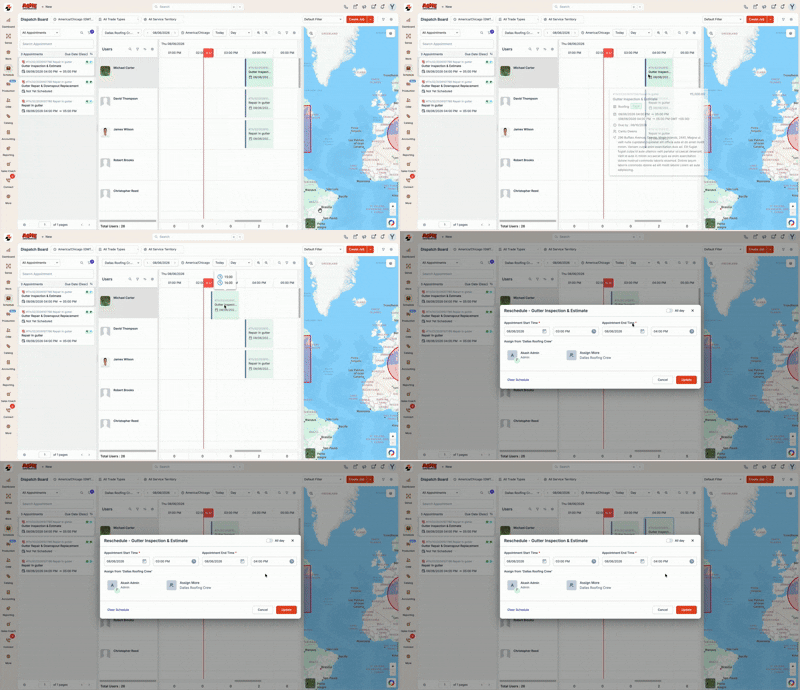
- Drag the appointment to a different time slot or technician. The Reschedule dialog opens.
- Update the Appointment Start Time.
- Update the Appointment End Time.
- Turn on All Day when required.
- Review the assigned users.
- Click Assign More to add additional users when needed.
- Click Update.
Clear an appointment schedule
If an appointment is still required but the date and time are no longer confirmed, you can remove the schedule and return the appointment to the queue for future planning.- Open the Reschedule dialog for the appointment.
- Click Clear Schedule.
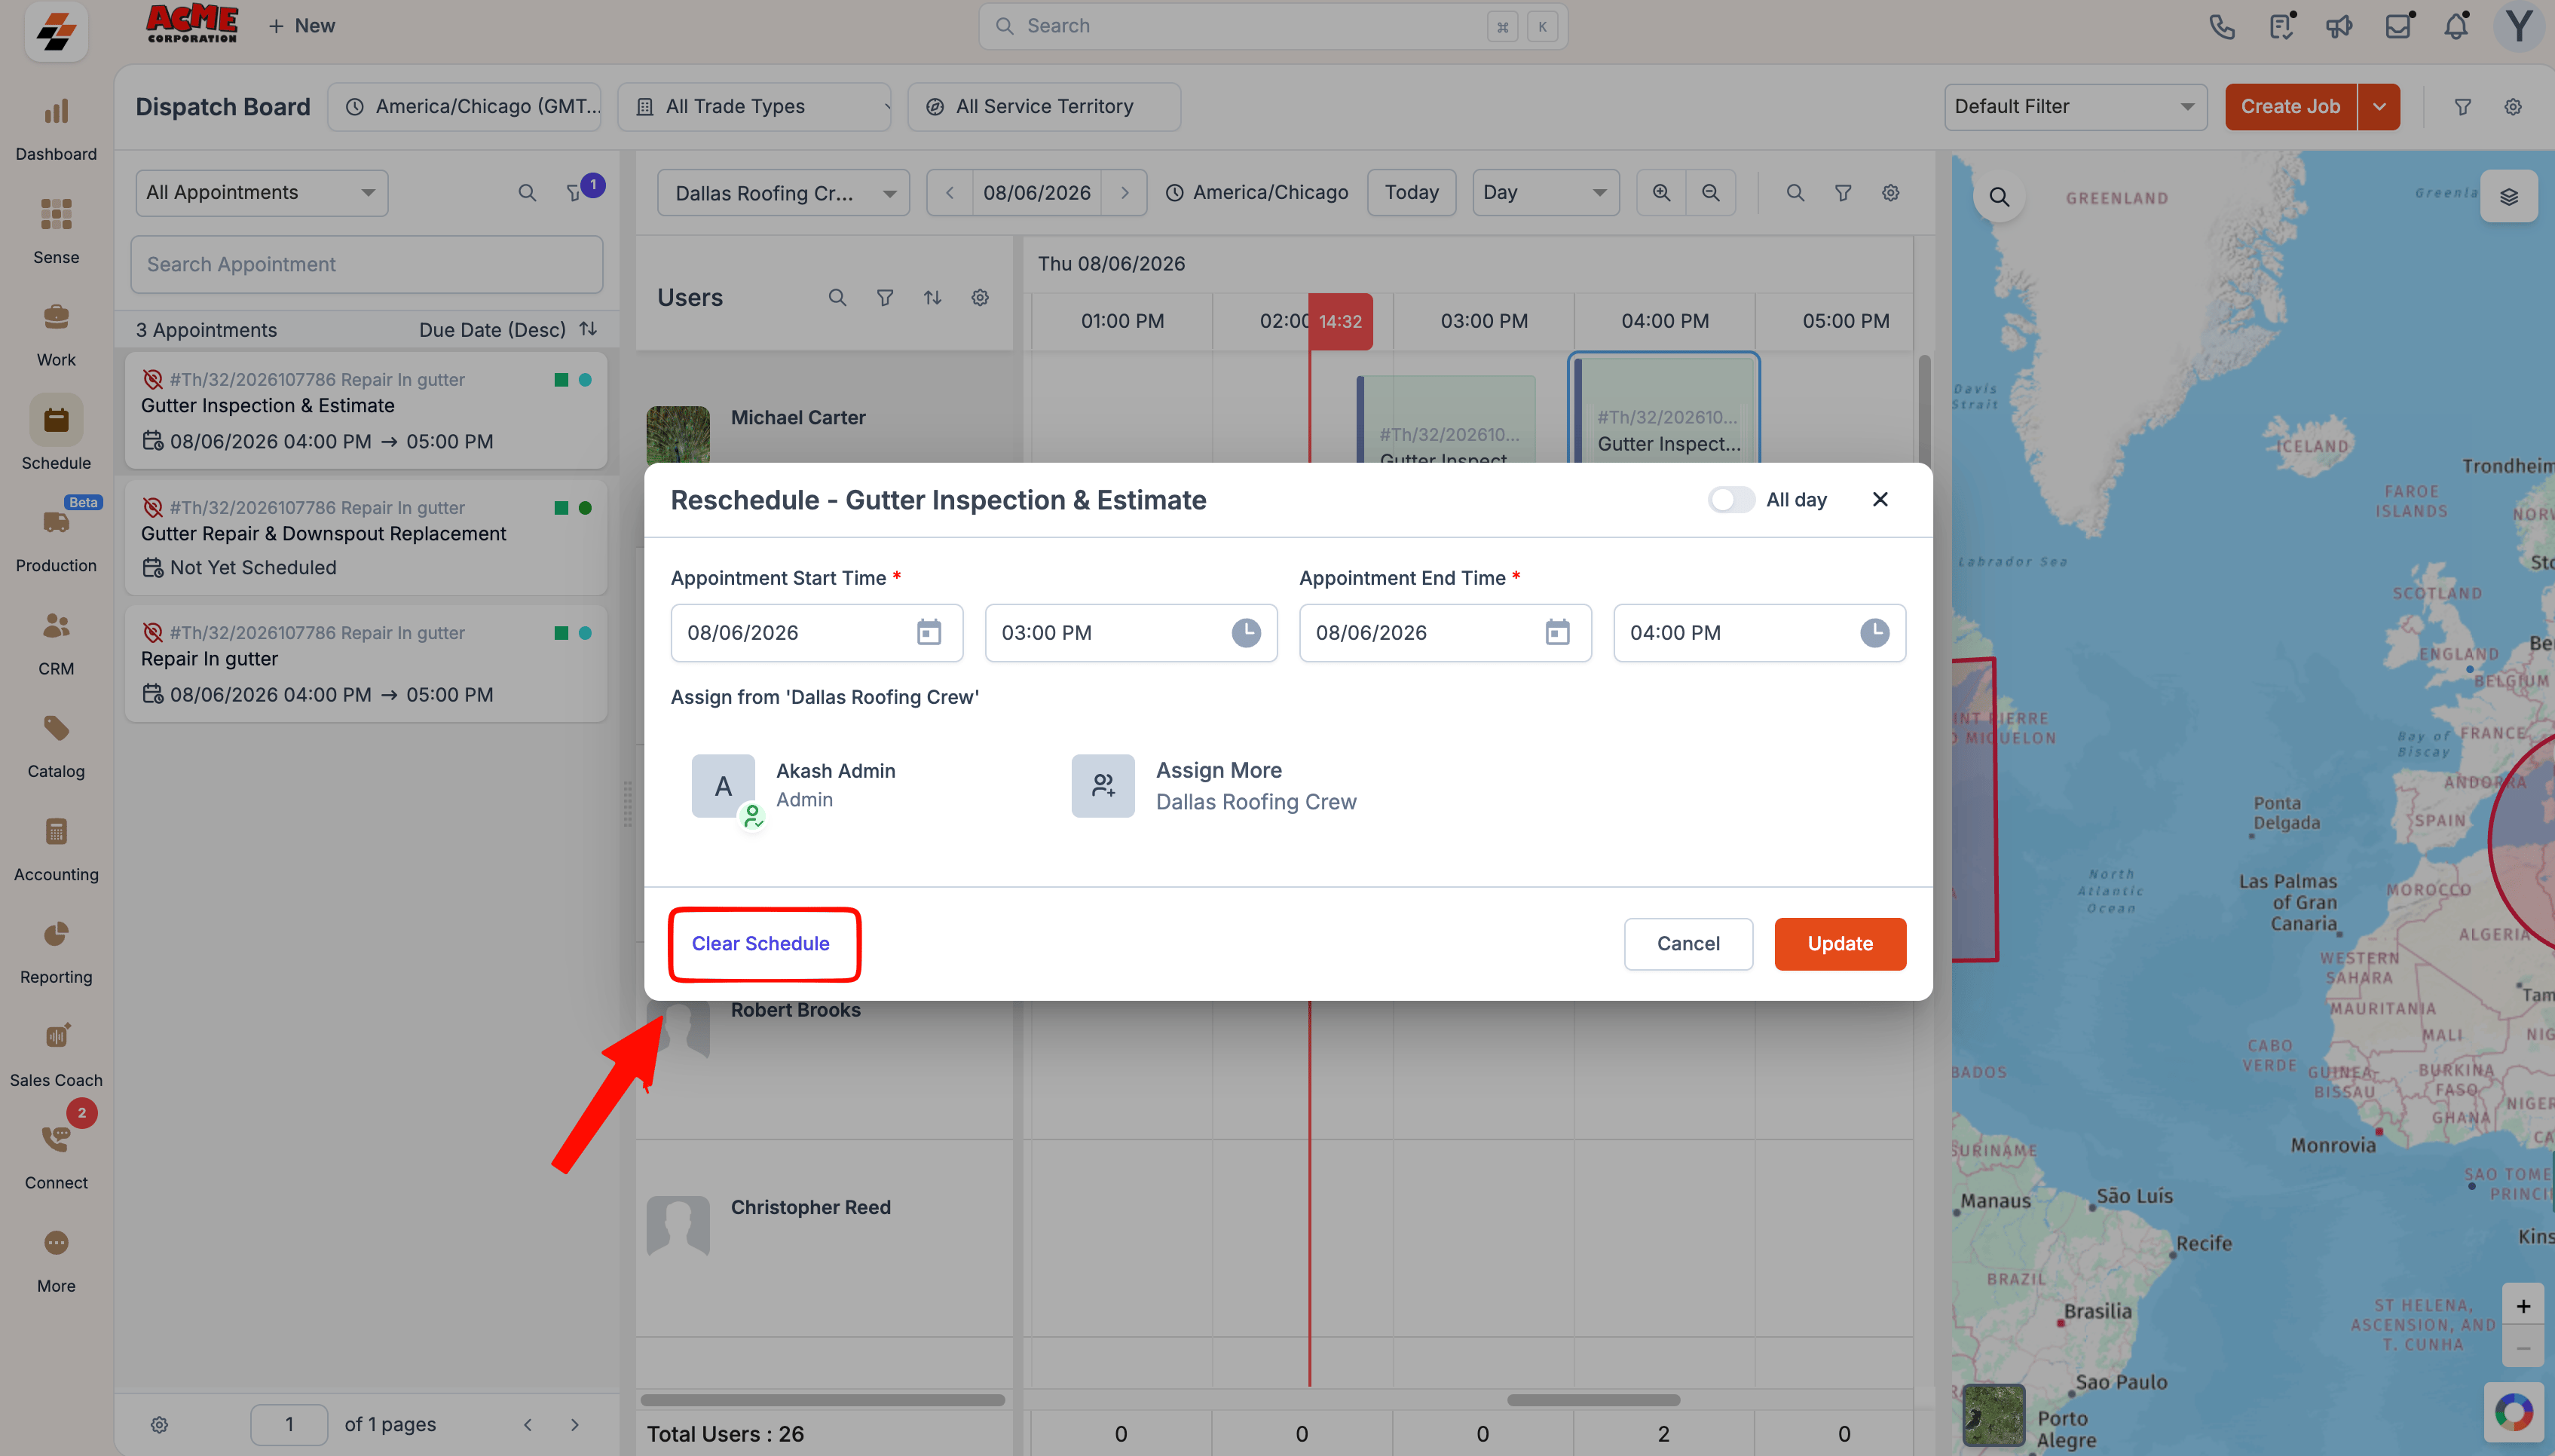
- Confirm the action when prompted. The appointment returns to the Unscheduled Appointments queue.
Clearing the schedule removes only the scheduled date and time. The appointment remains associated with the job and can be scheduled again later.