

Navigation: Jobs > + New Job
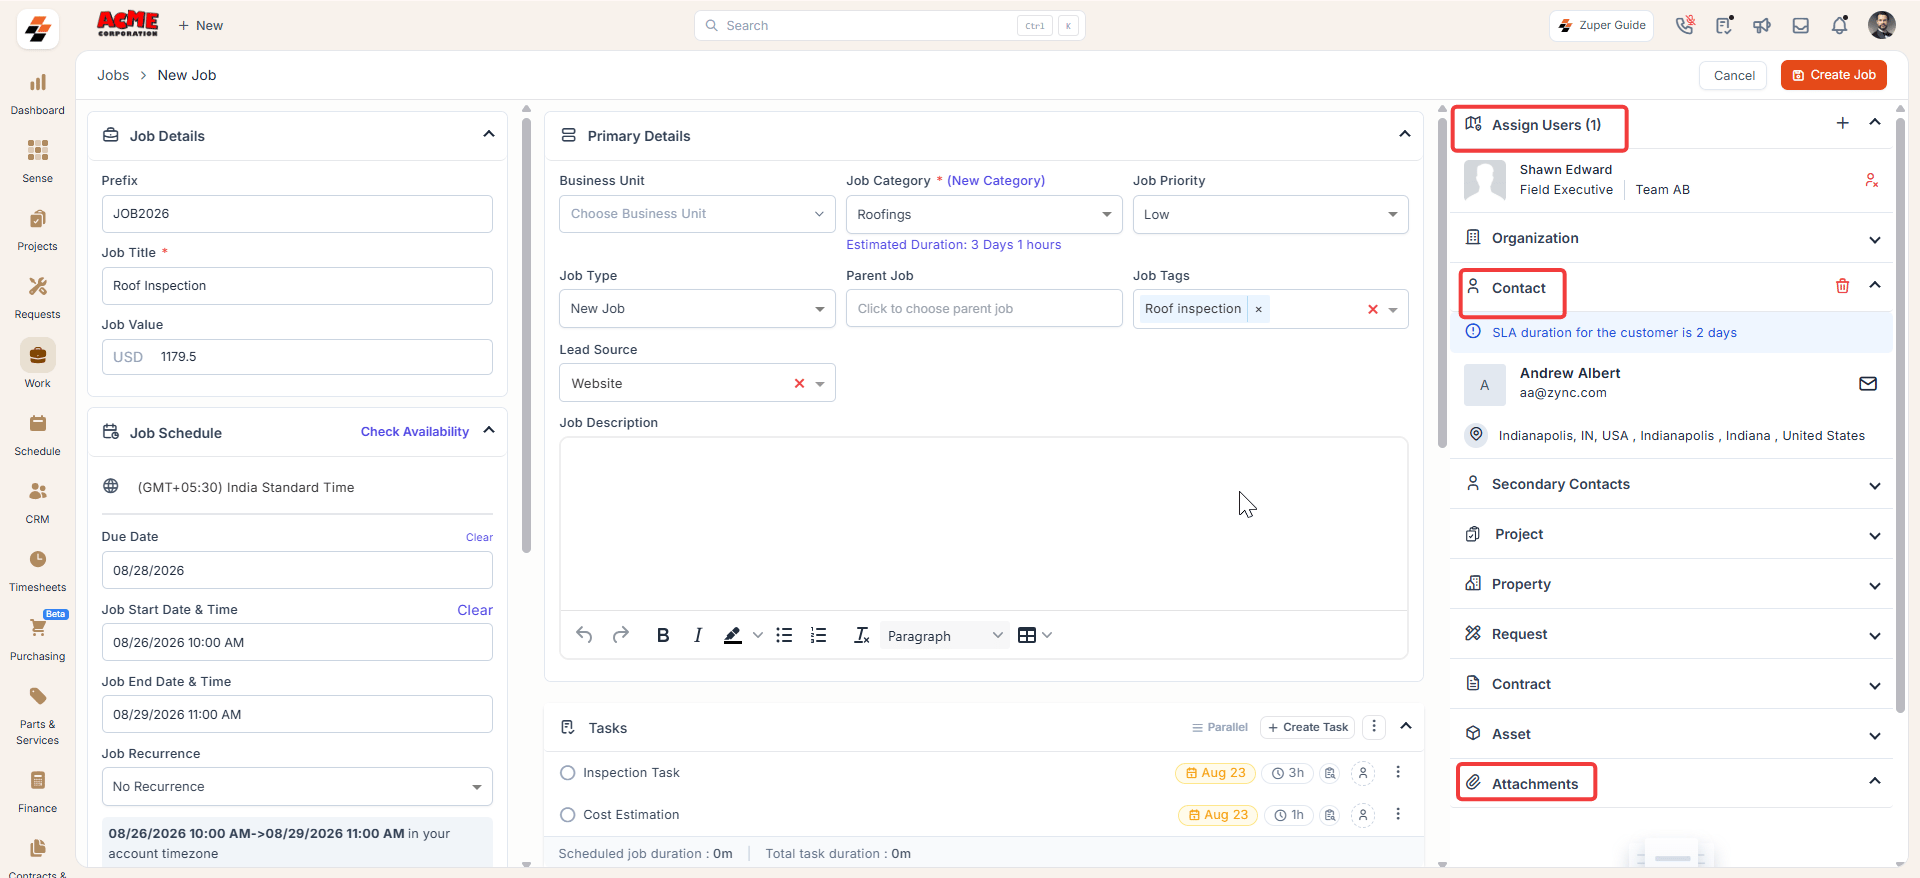
Open the job creation page
- Select Jobs from the left navigation menu.
- Select + New Job in the top right corner of the jobs listing page.
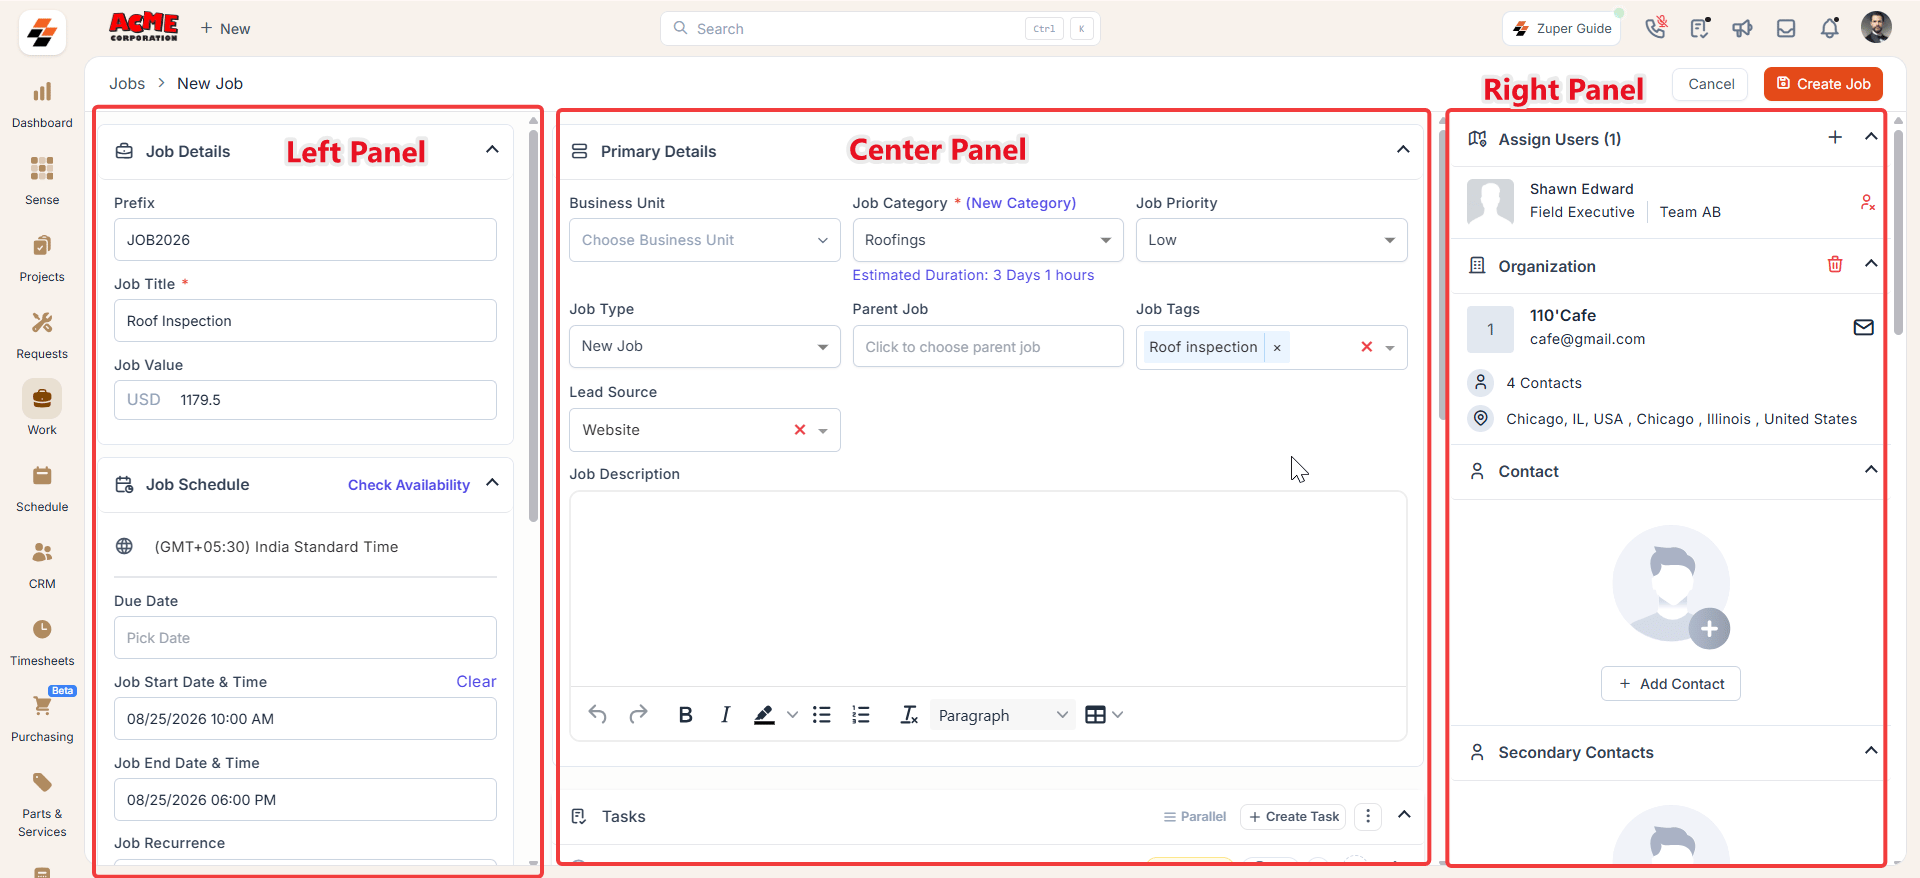
A. Job details (left panel)
Start by entering the core details that identify the job.- Enter a prefix for the job, if your organization uses one.
- Enter the job title. This field is mandatory.
- Enter the job value in USD, if you know it at this stage. You might update this later, once the inspection and estimate are complete.
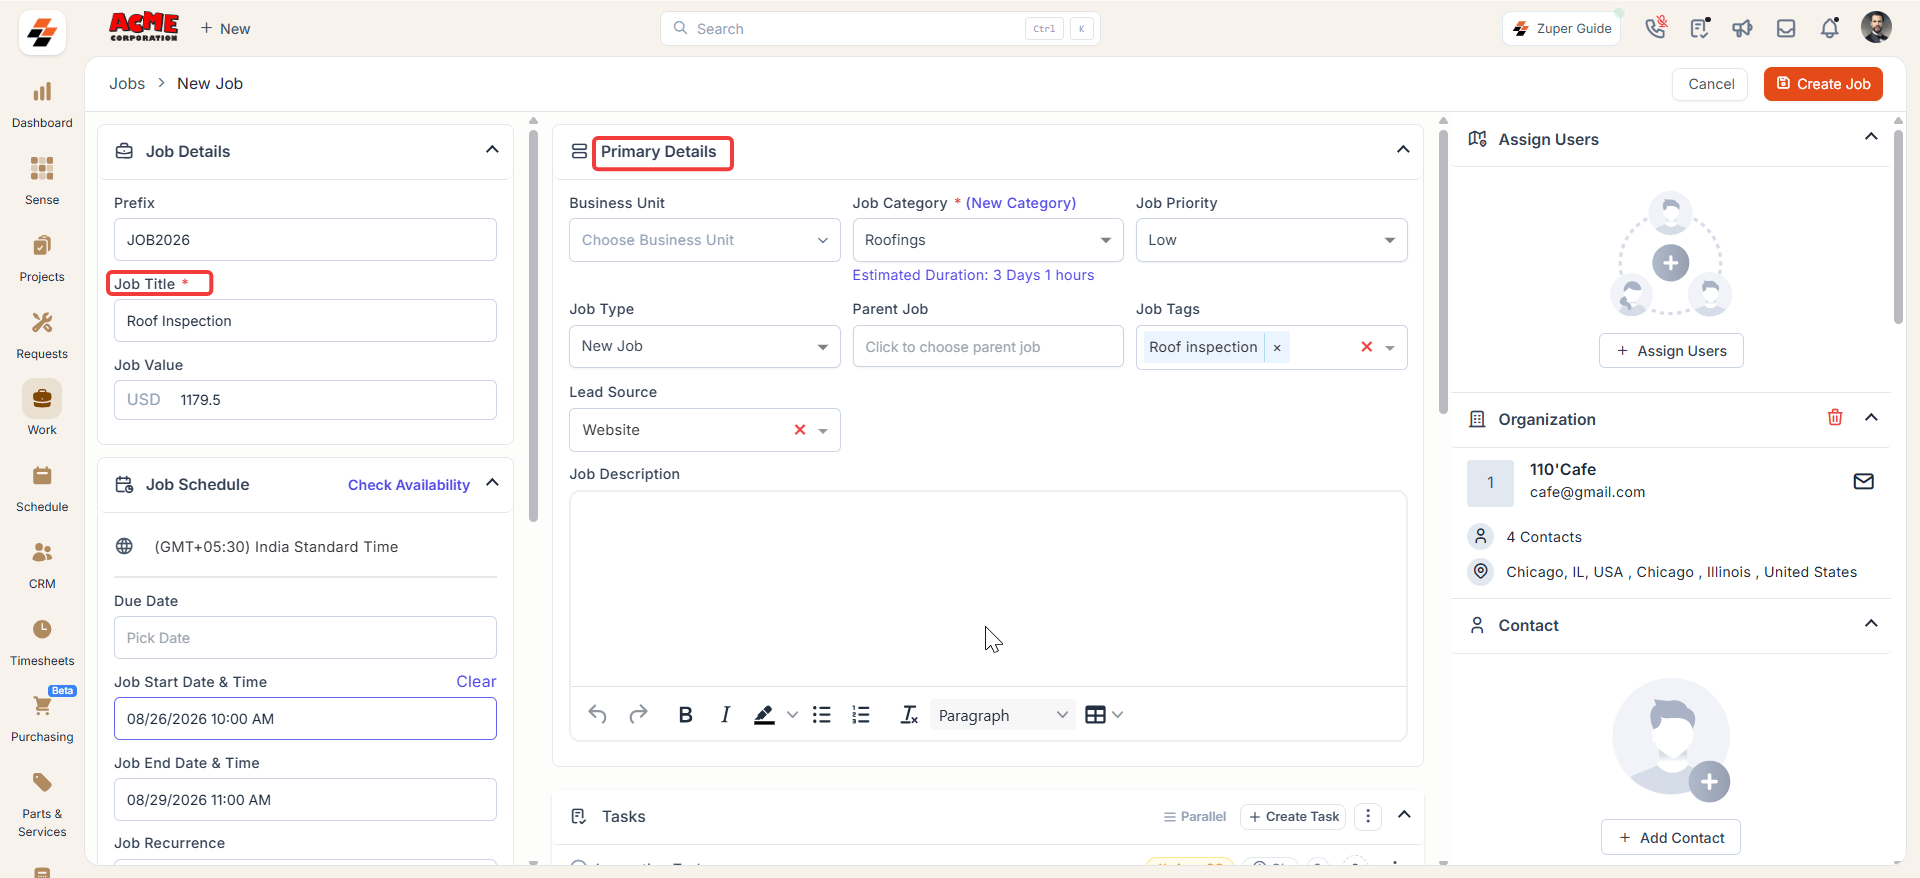
B. Job schedule (left panel)
Next, schedule the inspection based on your customer’s availability.Enter either a due date or both a job start date and time and a job end date and time. Zuper needs at least one of these to schedule the job.
- Confirm the time zone. It defaults to your account setting, so adjust it if the inspection happens elsewhere.
- Enter a due date, if you do not set a start and end date.
- Enter the job start date and time.
- Enter the job end date and time.
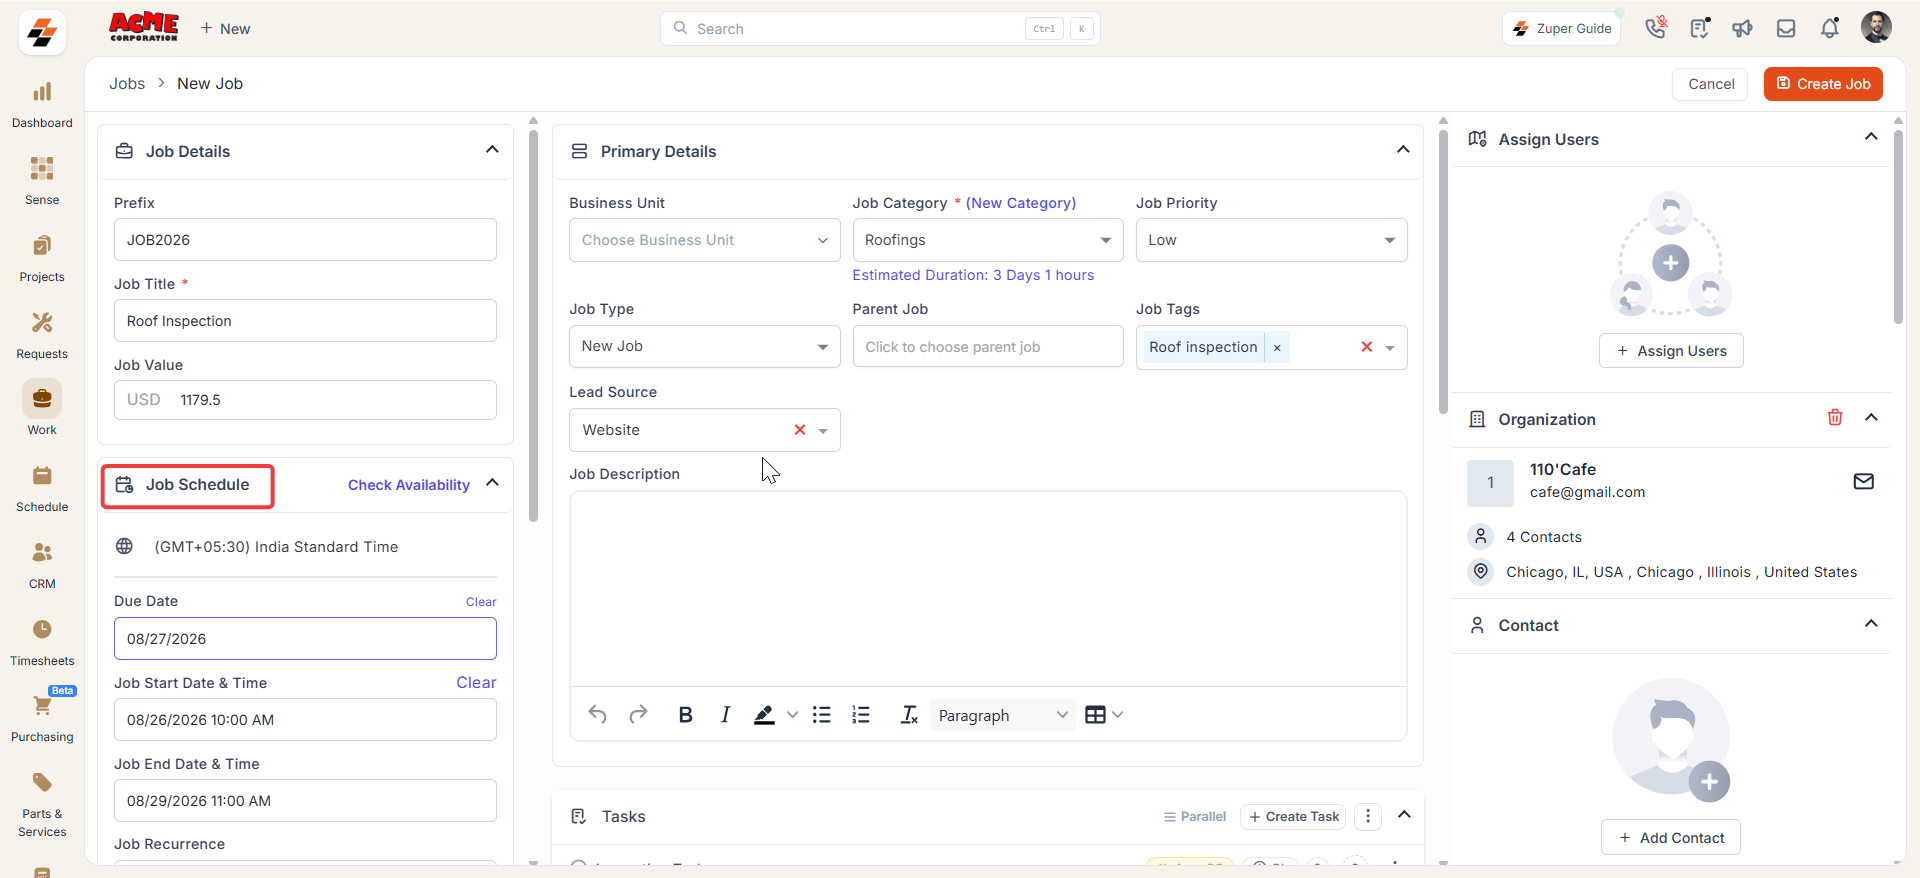
C. Primary details (center panel)
Move to the center panel to describe the job itself.- Select the job category from the dropdown list. This field is mandatory.
- Select the job priority.
- Select the job type.
- Select the lead source to record how the job originated, for example, website or phone call.
- Enter a job description with any details the technician needs before arriving on site.
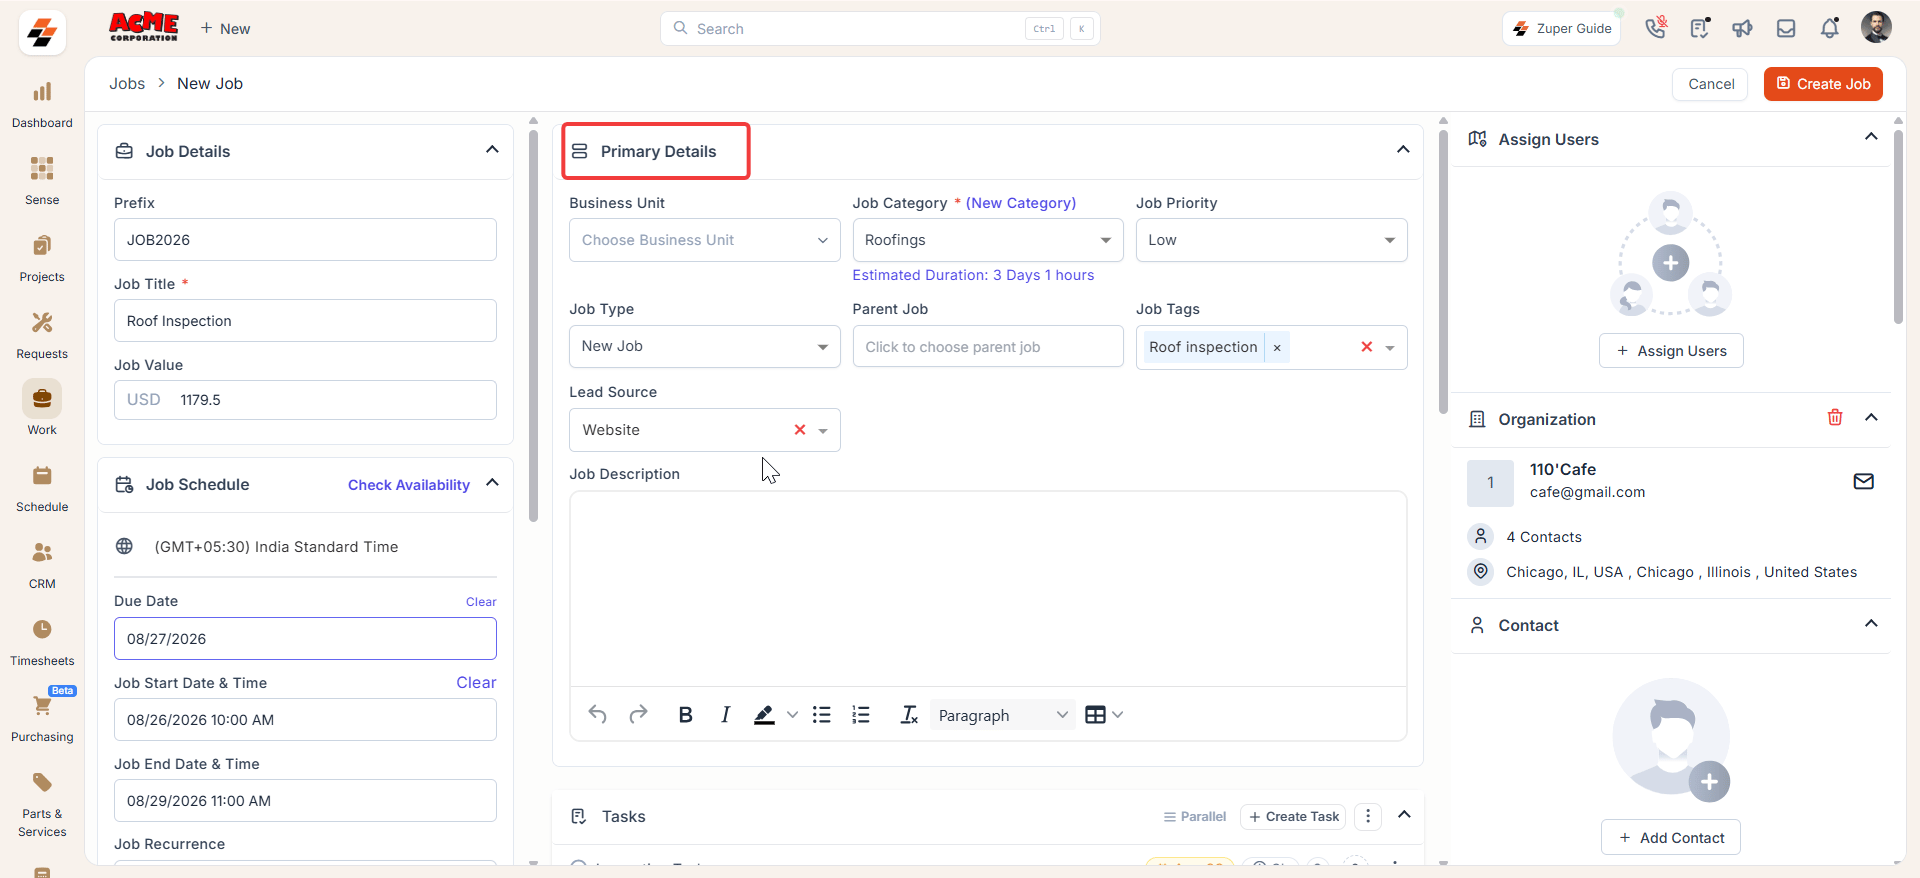
D. Other details (center panel)
These fields capture information specific to roofing-related custom fields, such as approvals and warranties.E. Assign users and associations (right panel)
Use the right panel to bring the right people and records into the job.- Select + next to assign users to add one or more technicians to the job.
- Select + Add Organization/Contact to search for and add the customer.
- Select + under attachments to upload files, such as proposals, permits, or photos.
- Select + next to secondary contacts to add up to ten additional contacts from the same organization.
- Select + next to project to link the job to a project that spans multiple jobs.
- Select + next to property to link the job to the customer’s property.
- Select + next to request to link an existing service request to the job.
- Select + next to contract to link a service contract that covers this job.
- Select + next to asset to link a specific asset the job relates to.
F. Create the job
- Review each panel for completeness.
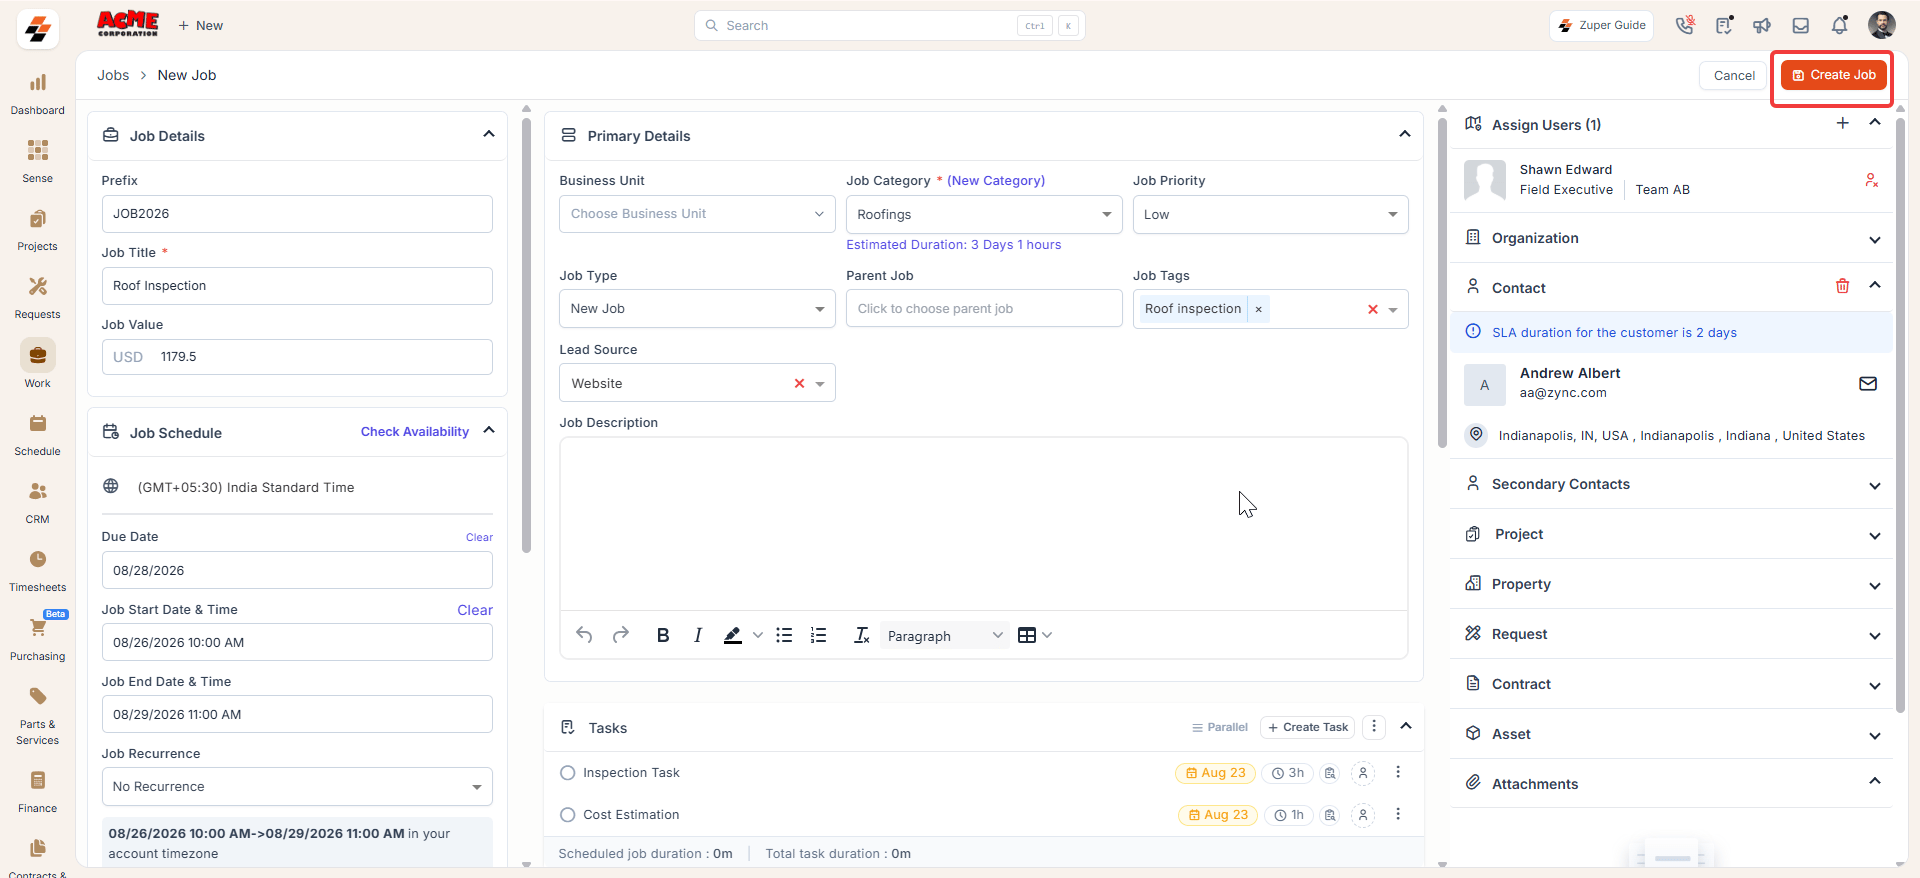
- Select Create Job in the top right corner.
- Select Create in the confirmation dialog box to save the job.
Roof measurements
The field technician’s on-site inspection generates measurement data, which appears under the Measurements tab on the job details page.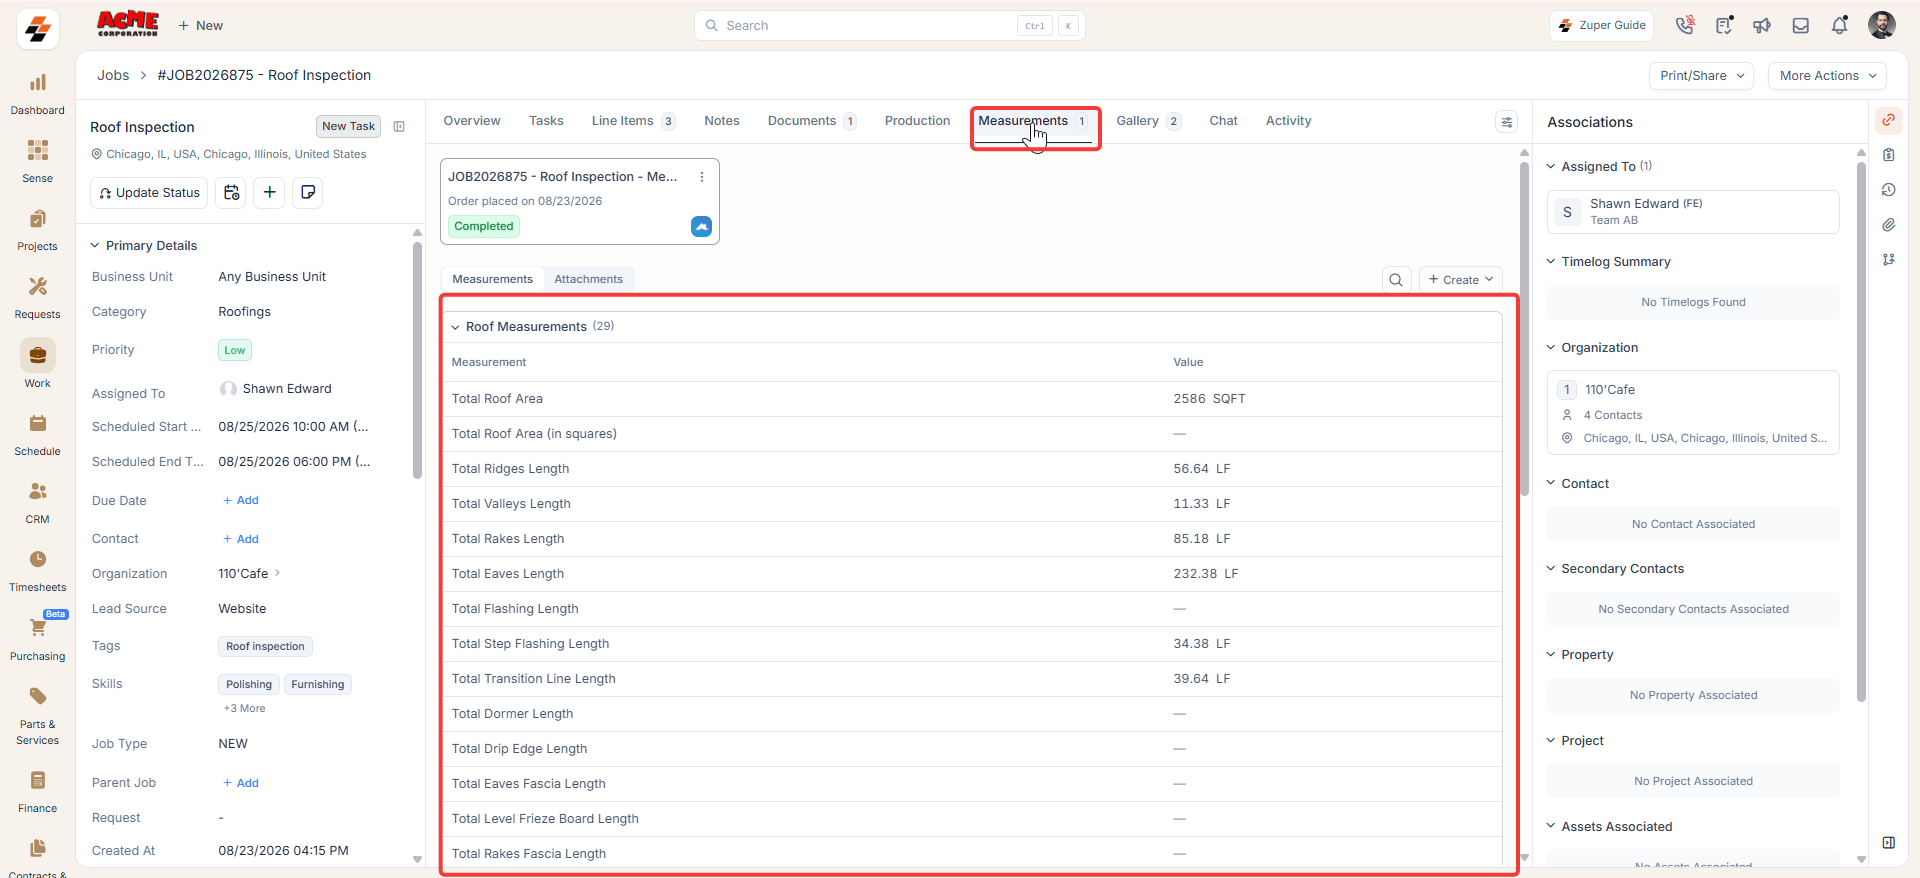
Notes
Add roofing-related photos and notes under the Notes tab.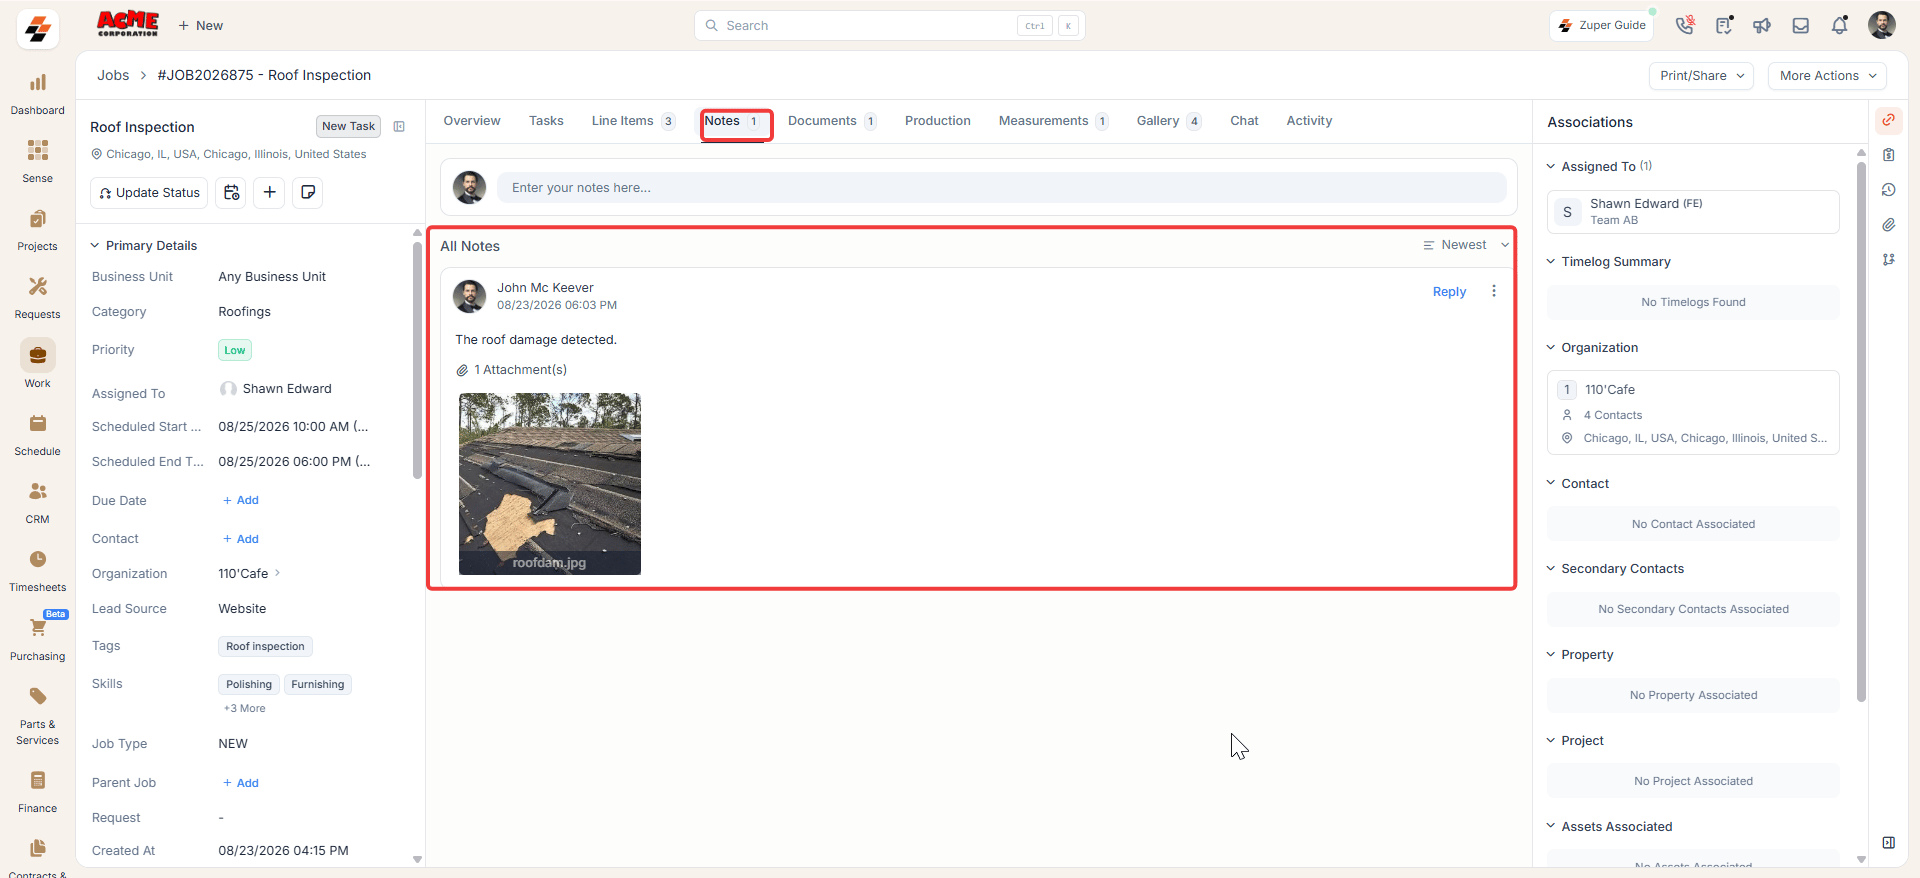
Activity
Select the Activity tab to review every action performed within the job, such as status changes, added notes, and uploaded documents.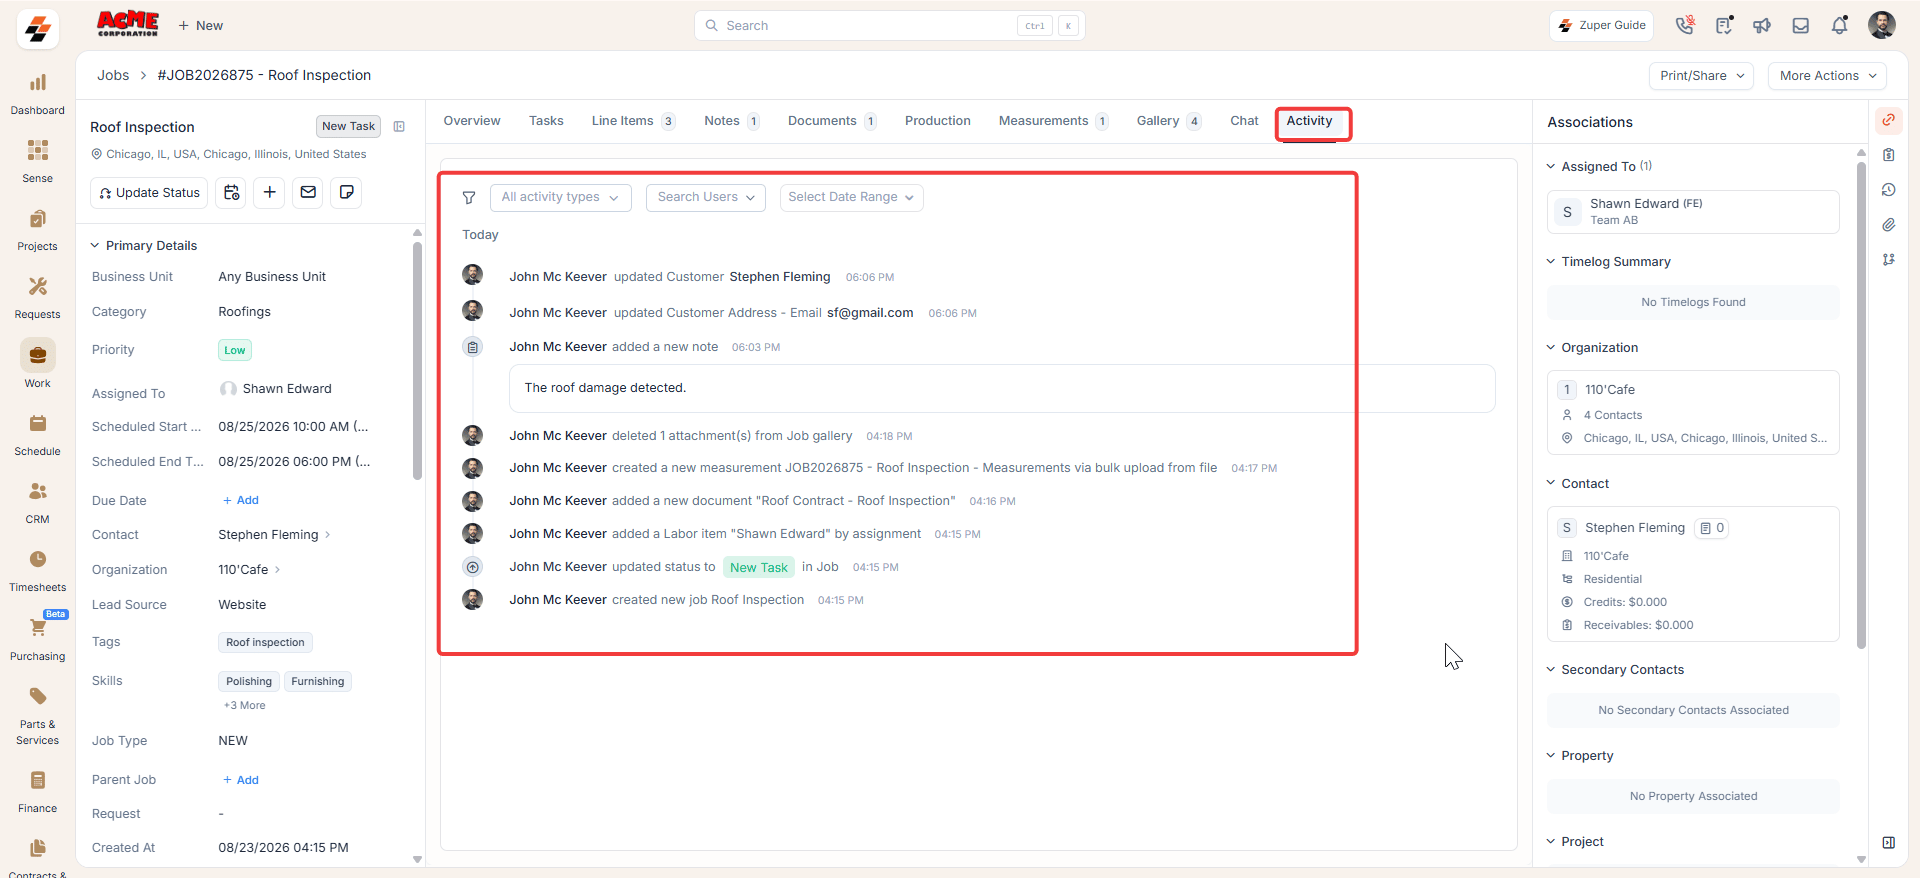
Tips and best practices
- Customization: Your administrator can go to Settings to add custom fields, for example, roof type, to capture roofing-specific details.
- Mobile sync: Changes sync to the Zuper mobile app immediately, so technicians always see the latest job details.
- Permissions: Confirm your user role includes Create Job rights before you start.
- Attachments: Use attachments for proposals, permits, and reports, in addition to photos.
- Mandatory fields: Remember, you need either a due date or a start and end date to create the job.
FAQs
What happens if I set a start and end date but skip the due date?
What happens if I set a start and end date but skip the due date?
Zuper accepts this combination. You only need one of the two: either a due date, or a job start date and time, together with a job end date and time.
Why can I not select Create Job?
Why can I not select Create Job?
Zuper blocks job creation until all mandatory fields are complete. Check the job title, job category, and your schedule fields first, since these are the fields most often missed.If the issue continues, contact Support.