

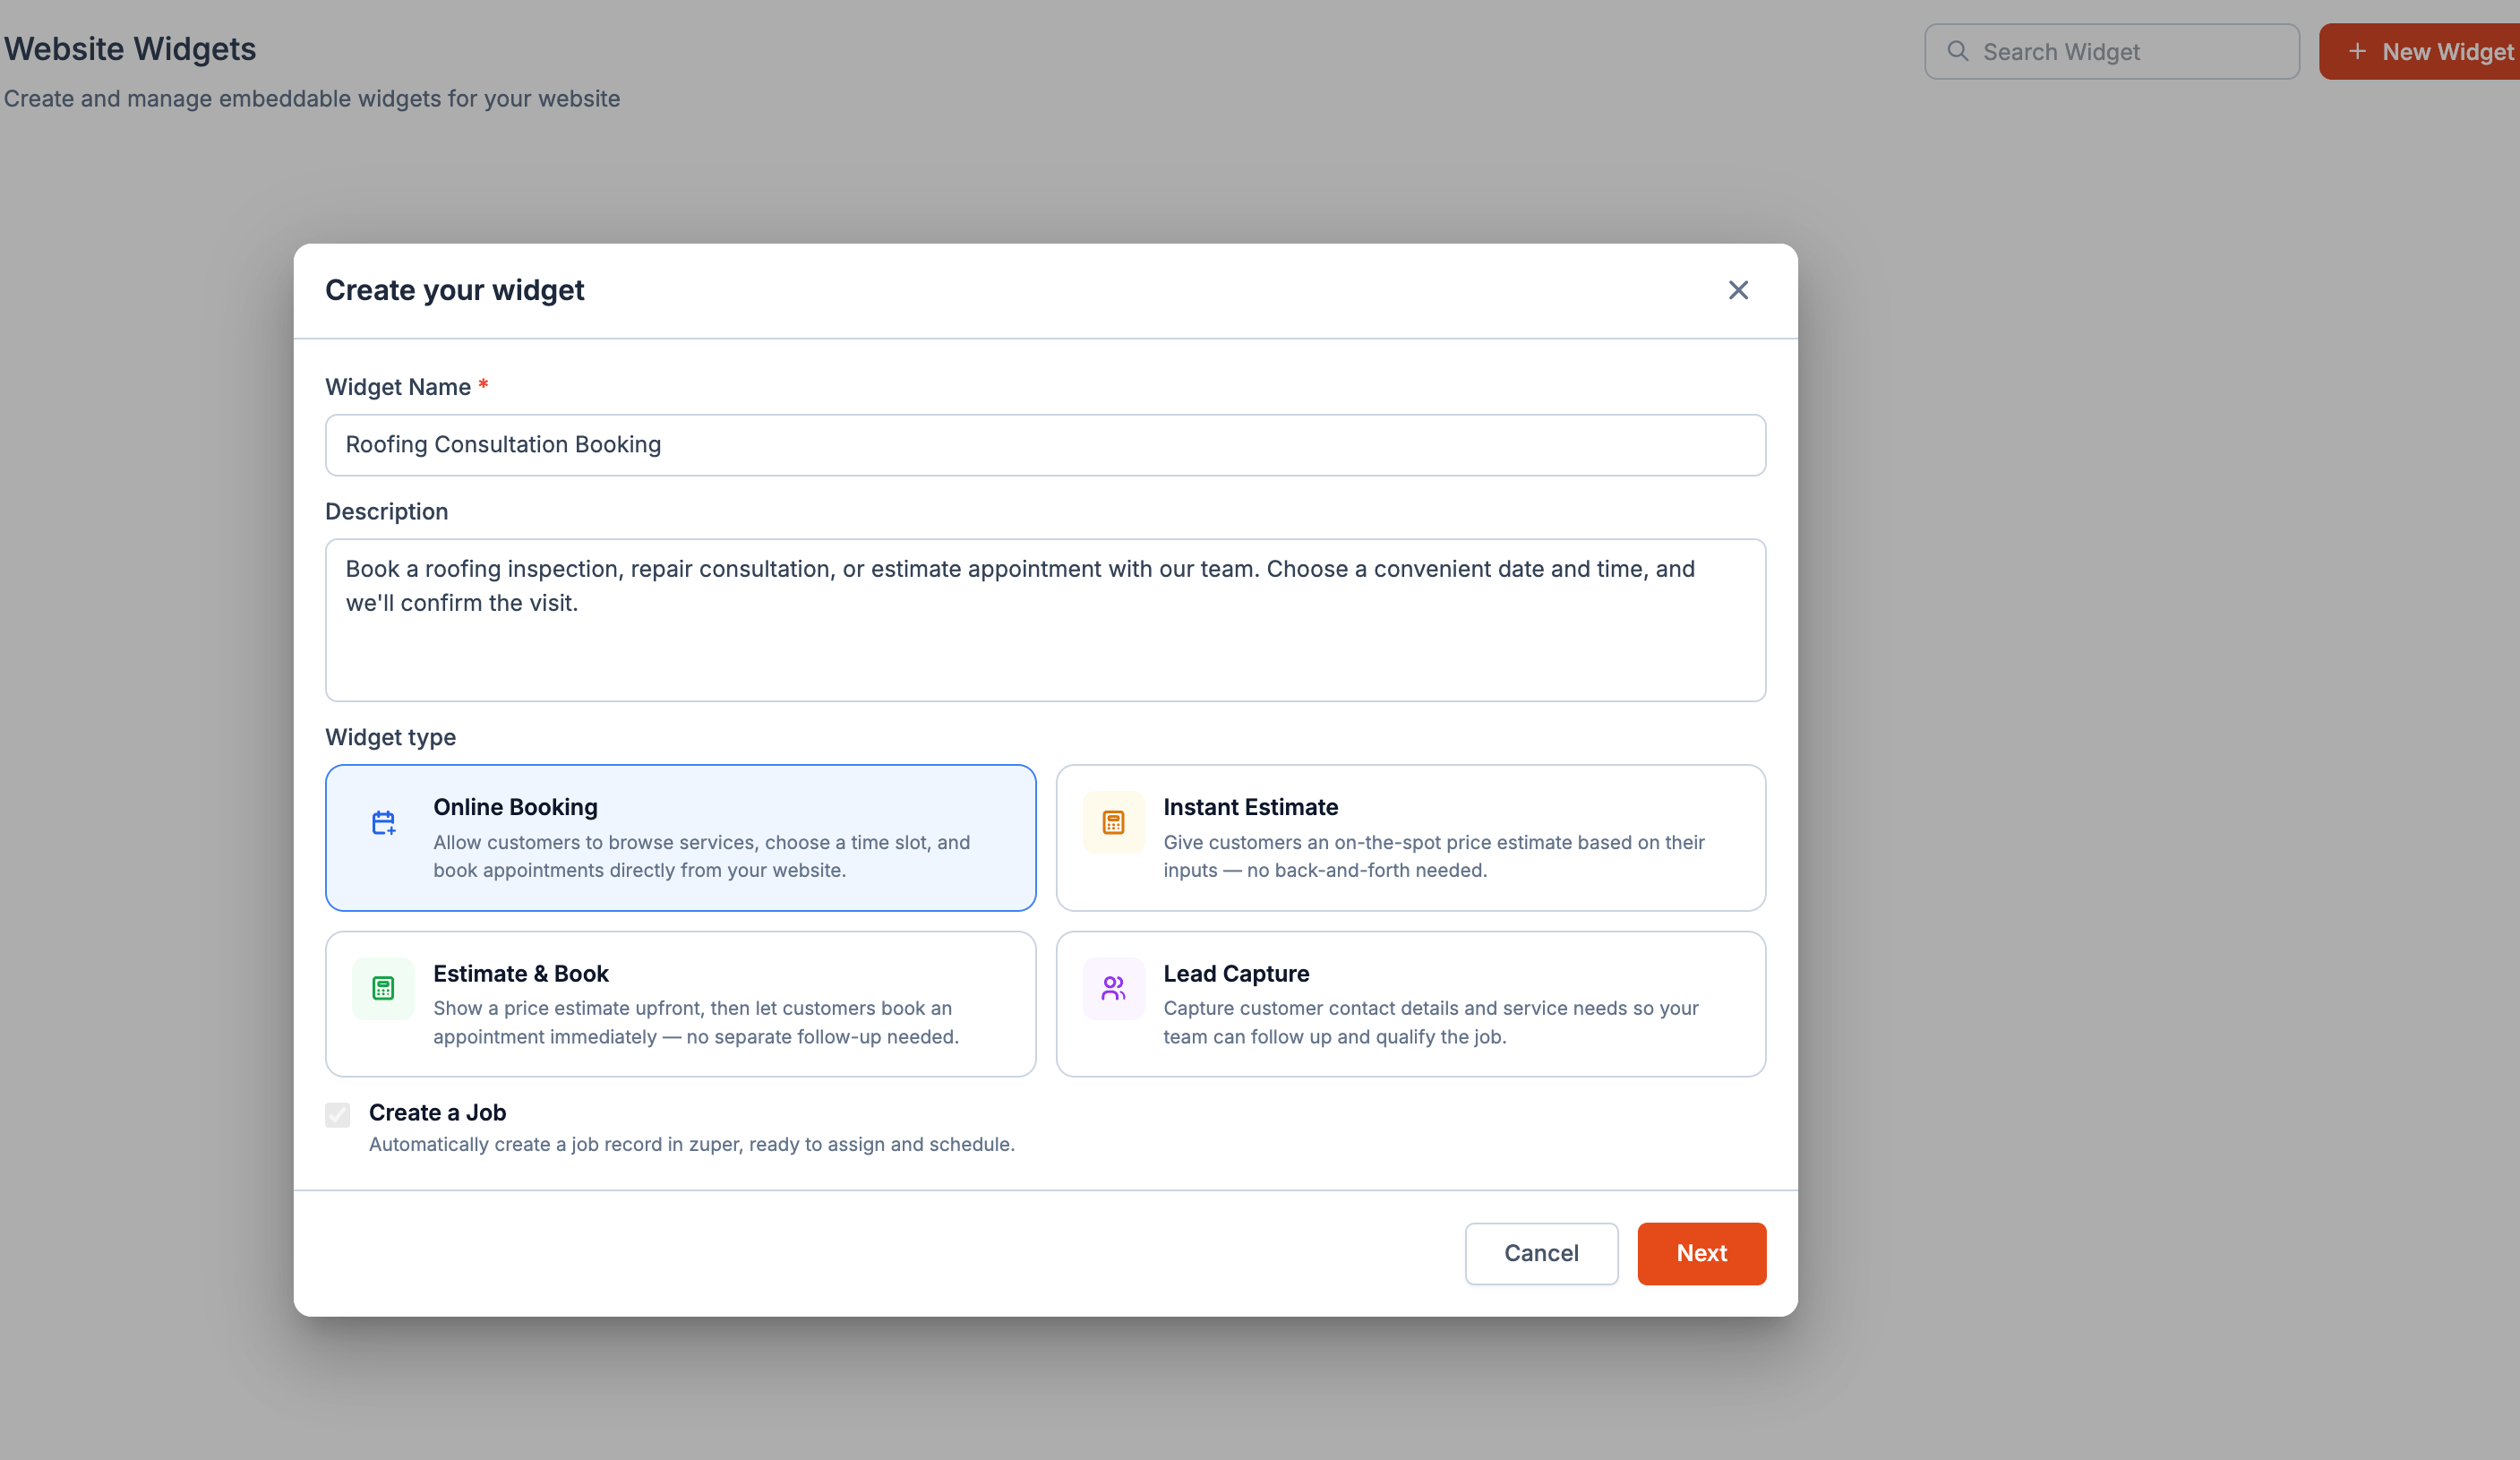
Before you begin
Before you start, decide:- Which roofing services you want homeowners to book online.
- How long each service usually takes.
- Whether homeowners should choose an exact time or only a date.
- Whether homeowners should be able to choose a technician.
- Which teams should be available for online bookings.
Note: For this widget, Create a Job is enabled by default. When a customer completes a booking, Zuper automatically creates a job with the booking details.
Step-1: Design the homeowner experience
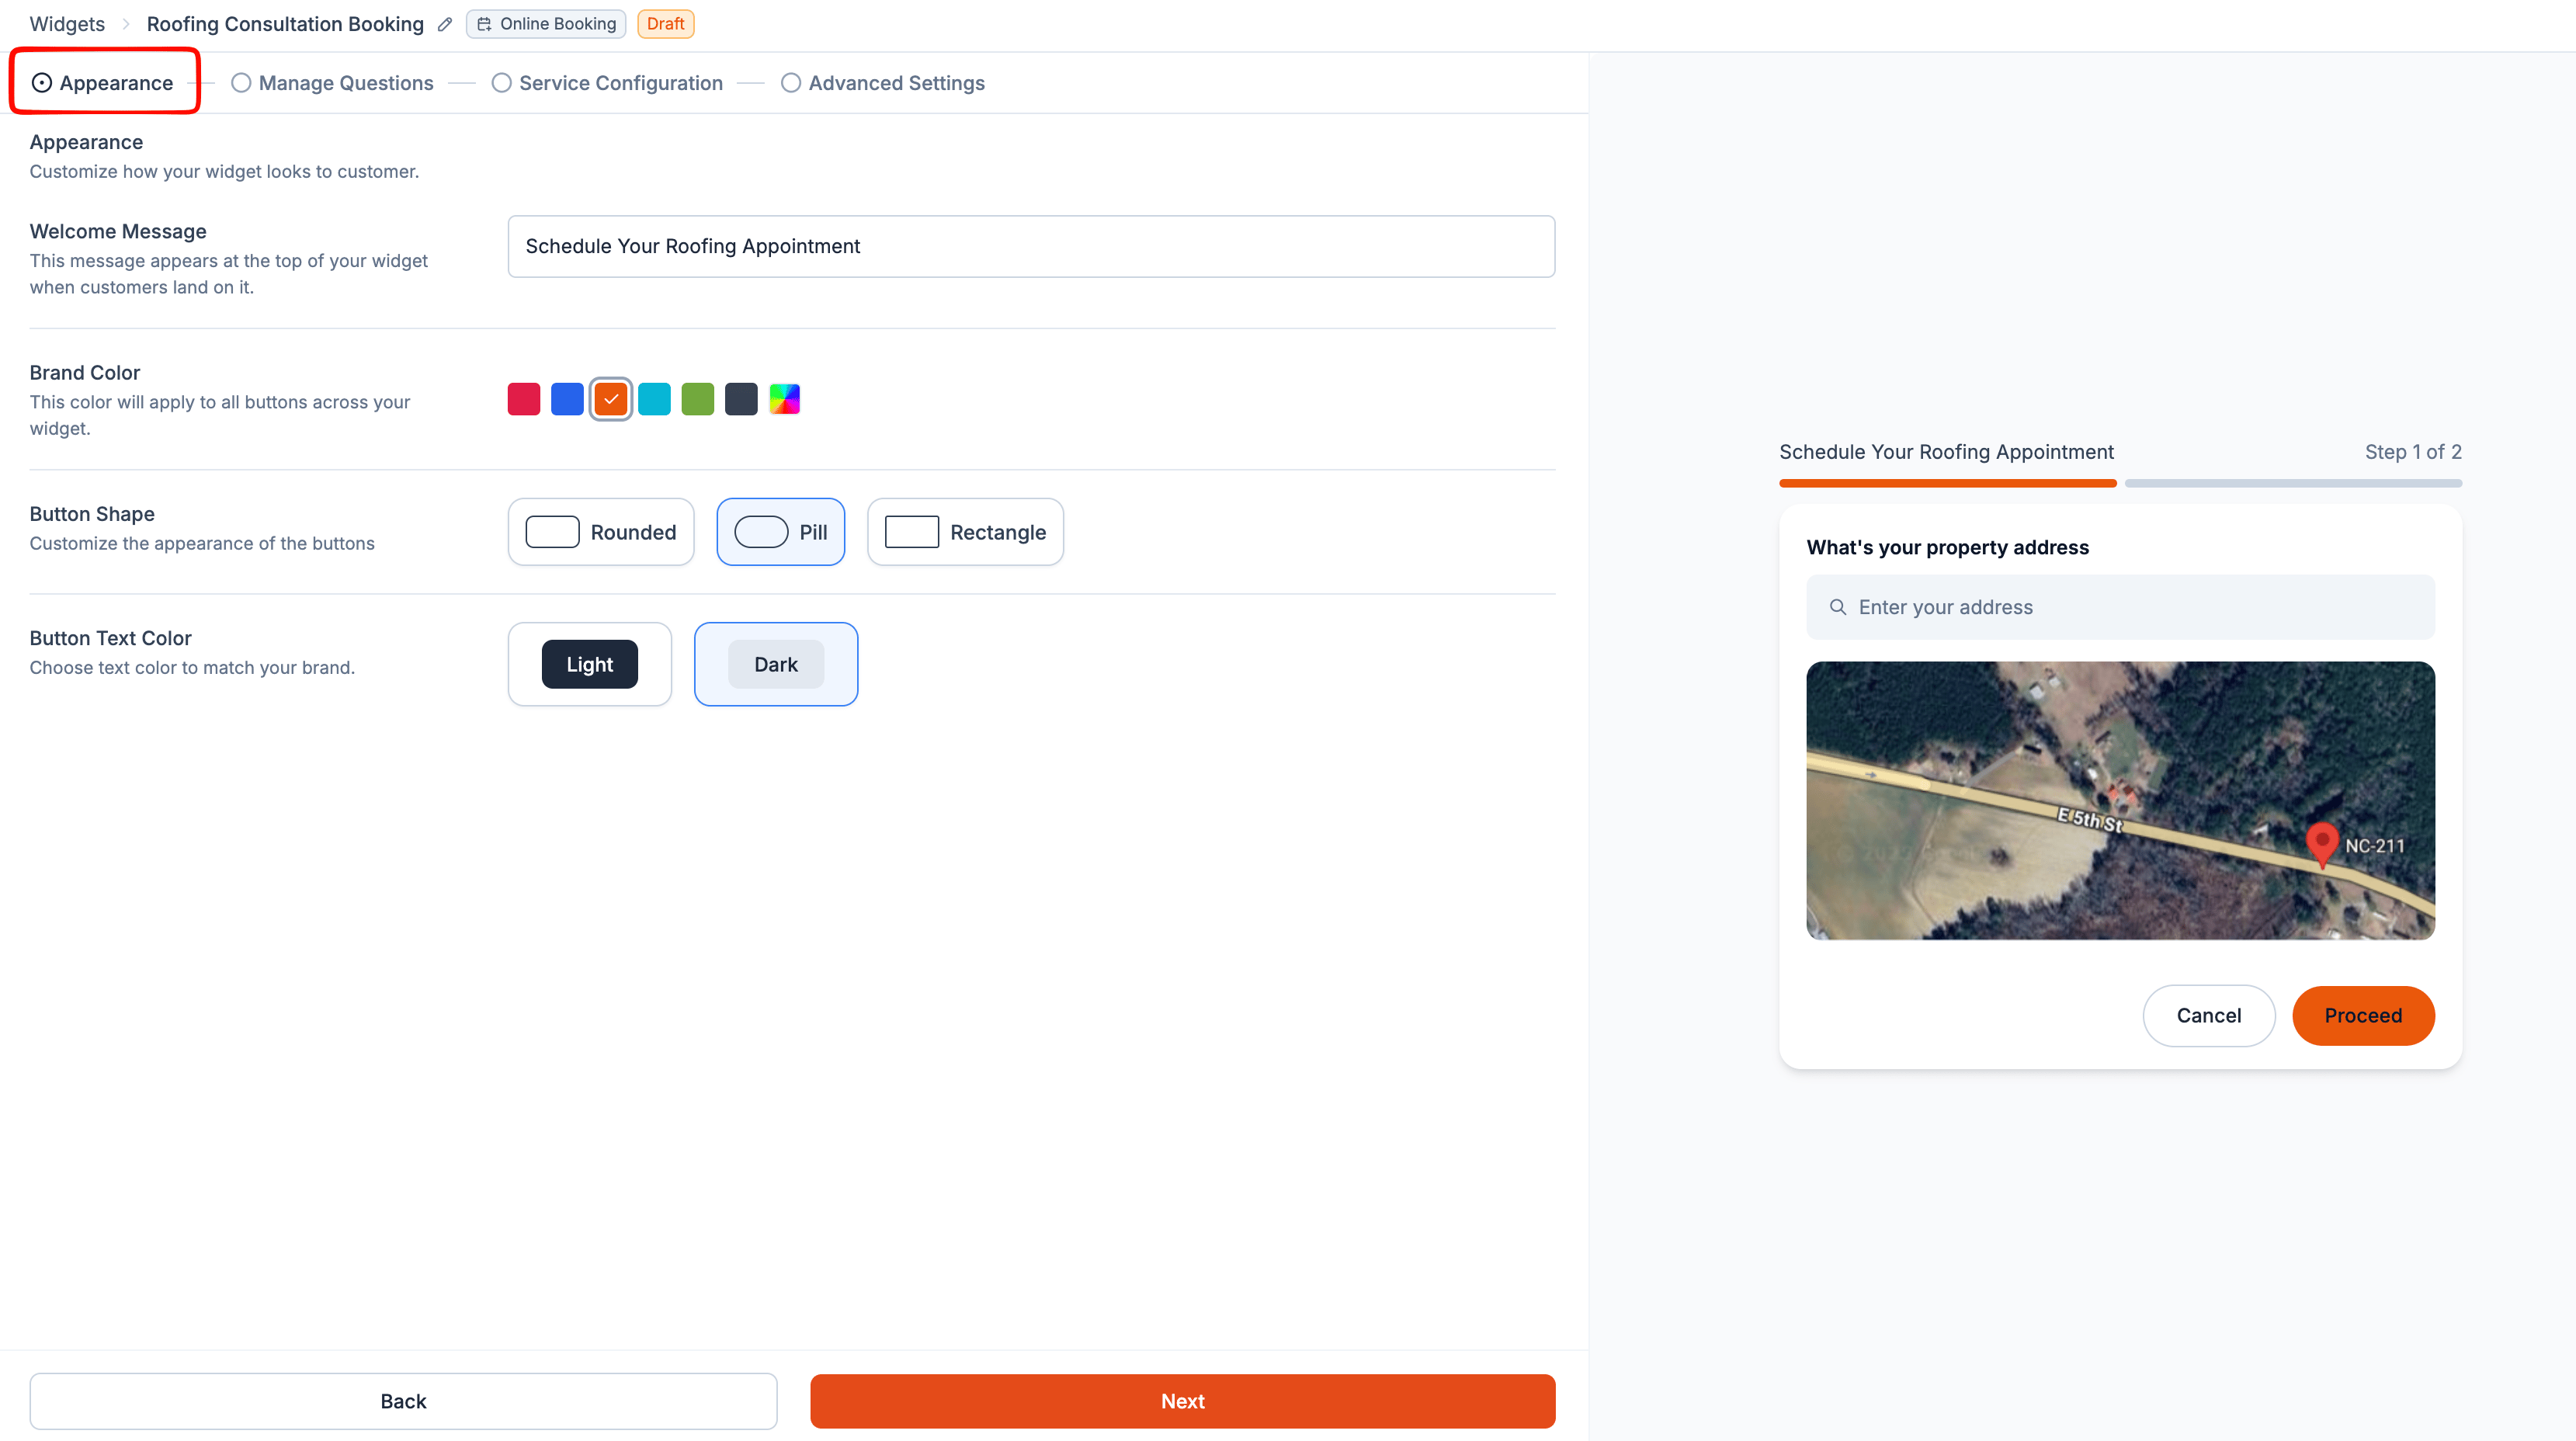
The Appearance step controls how the booking widget looks on your website. The preview updates as you make changes, so you can see the experience homeowners will have.- Enter a Welcome Message. This appears at the top of the widget. Use a message that tells homeowners what they can do, such as Book Your Roofing Service!
- Choose a Brand Color. This color is applied to the widget’s buttons. Select a preset color or use the multicolor swatch to choose a custom color.
- Choose a Button Shape: Rounded, Pill, or Rectangle.
- Choose a Button Text Color: Light or Dark. Select the option that provides enough contrast with your brand color.
- Select Next to continue to Manage Questions.
Step-2: Decide what information to collect
Before a homeowner can book, you need to collect the information your team needs to work with the request. Online Booking widgets include two default questions:- Property Address
- Contact Information
Add custom questions
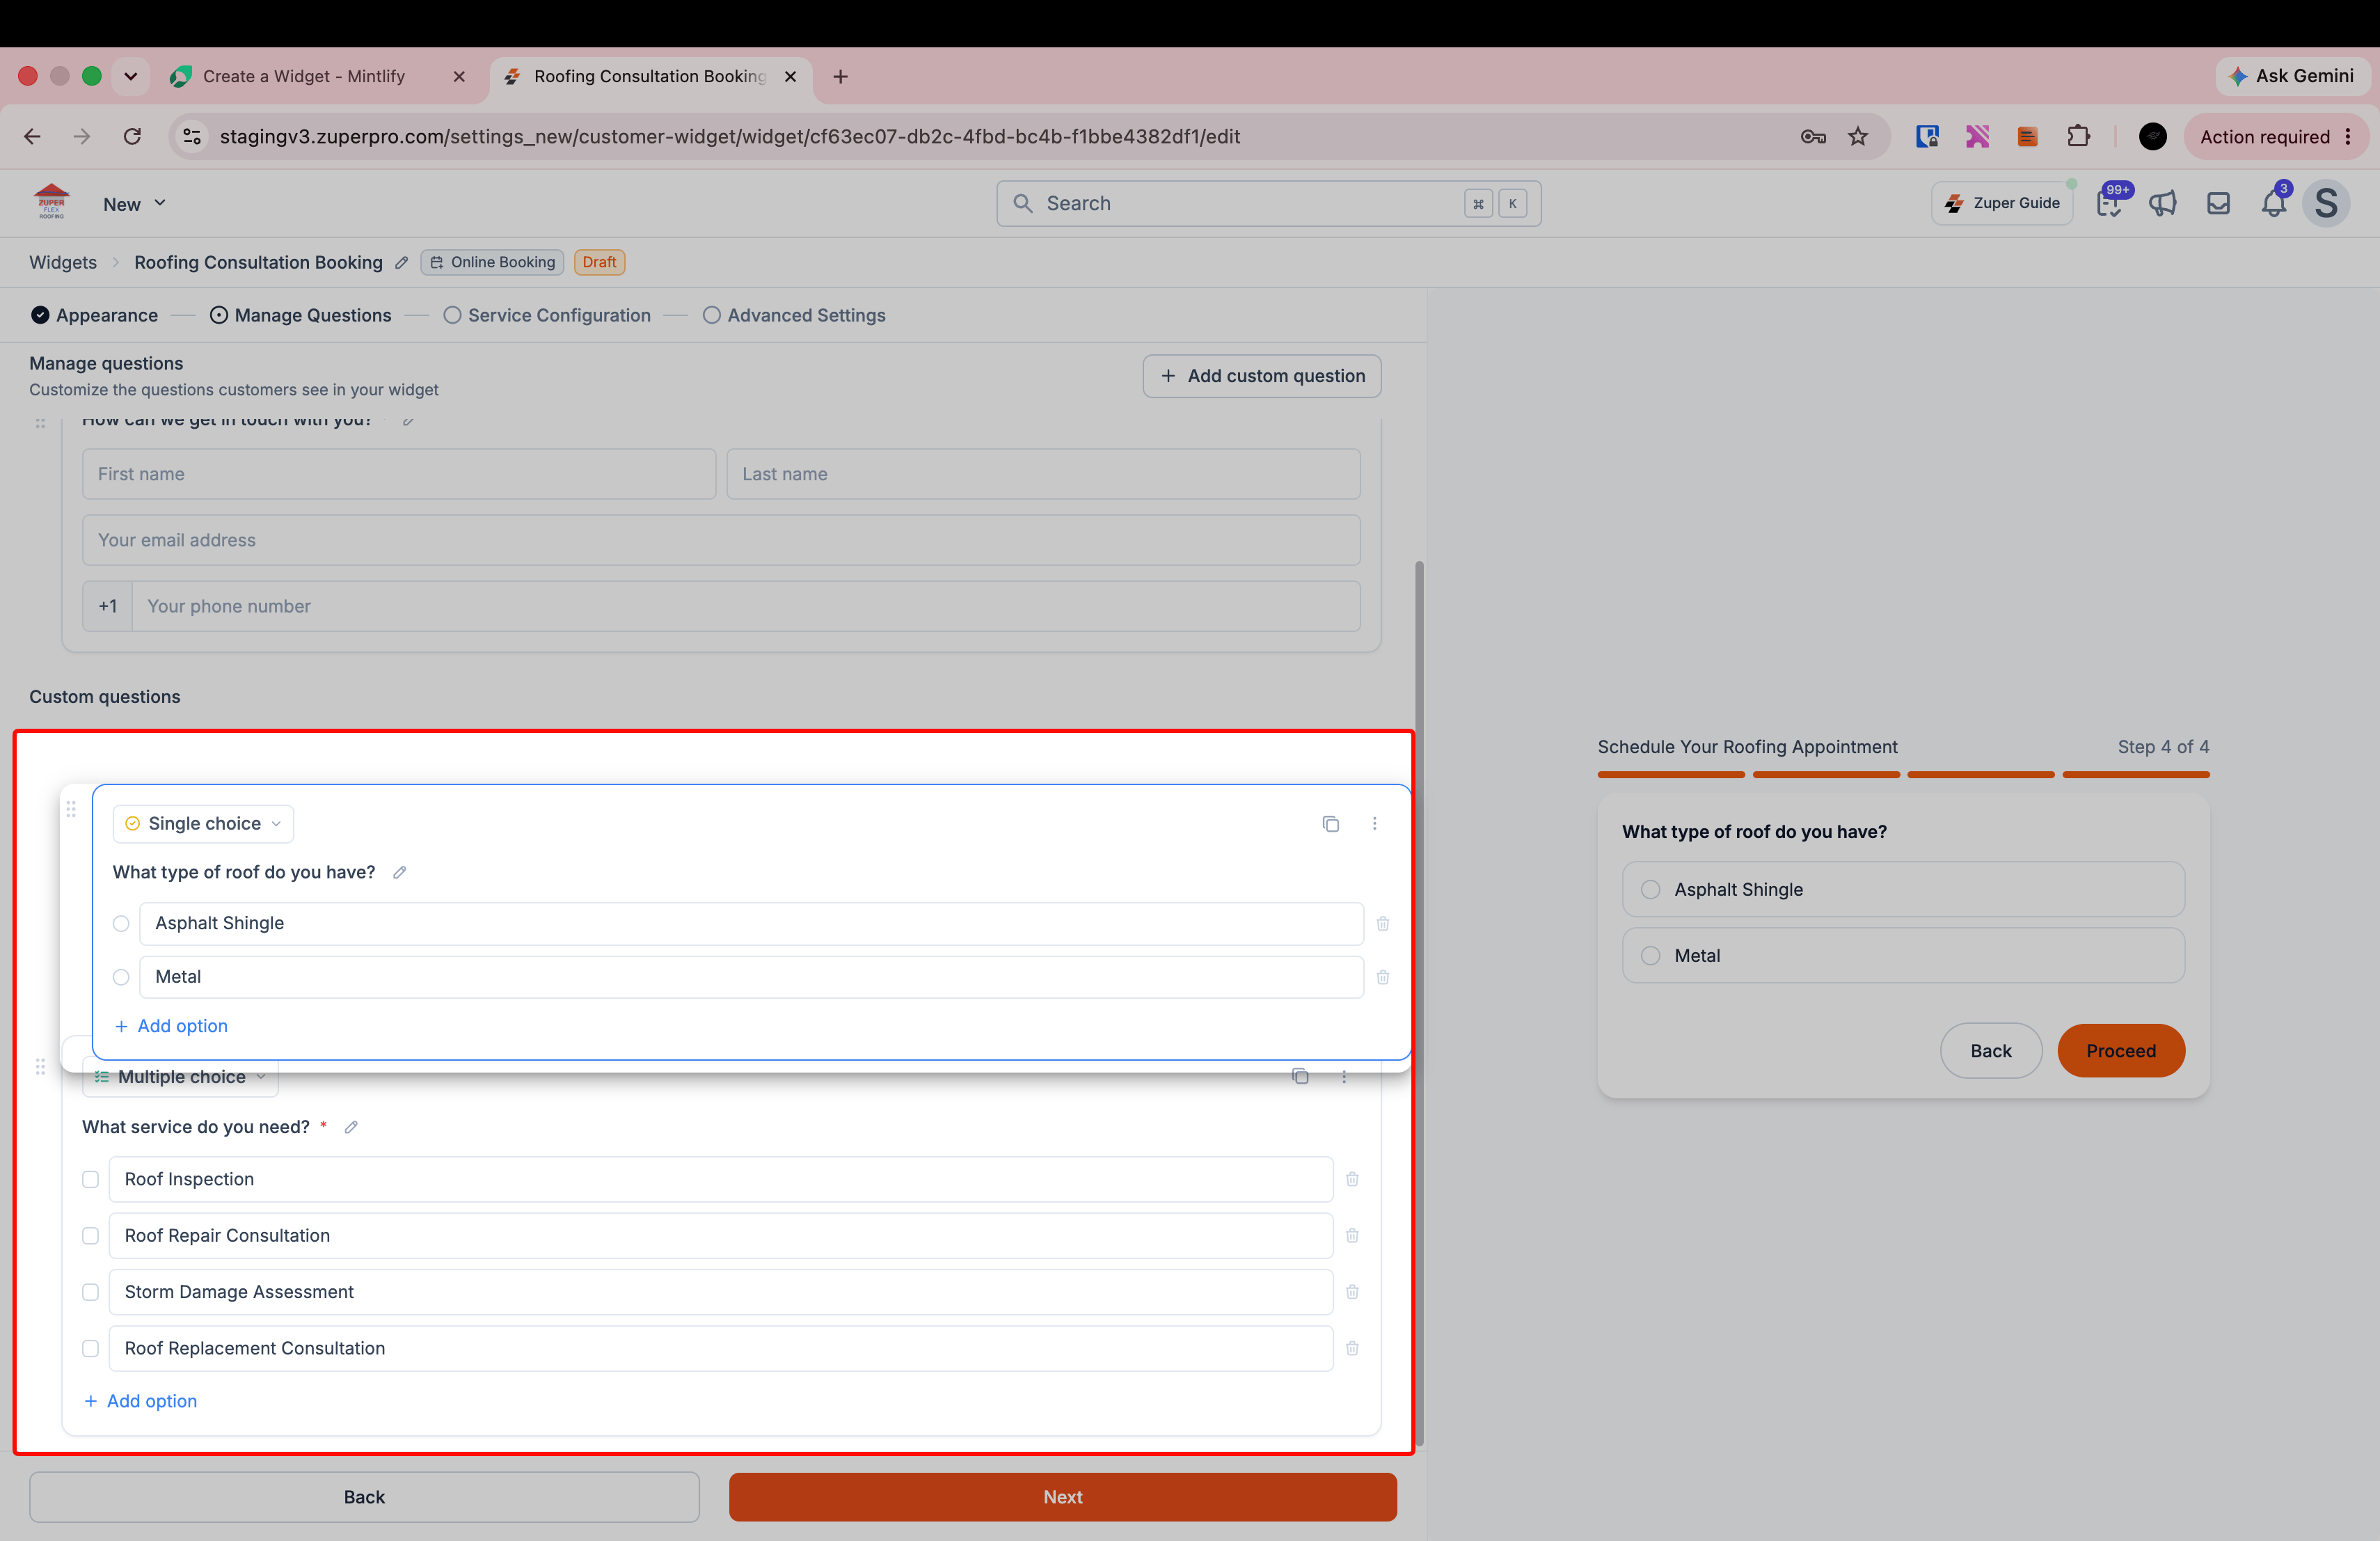
Add questions when you need more information about the homeowner’s request. For example, you might ask whether the homeowner needs an inspection, repair, or replacement.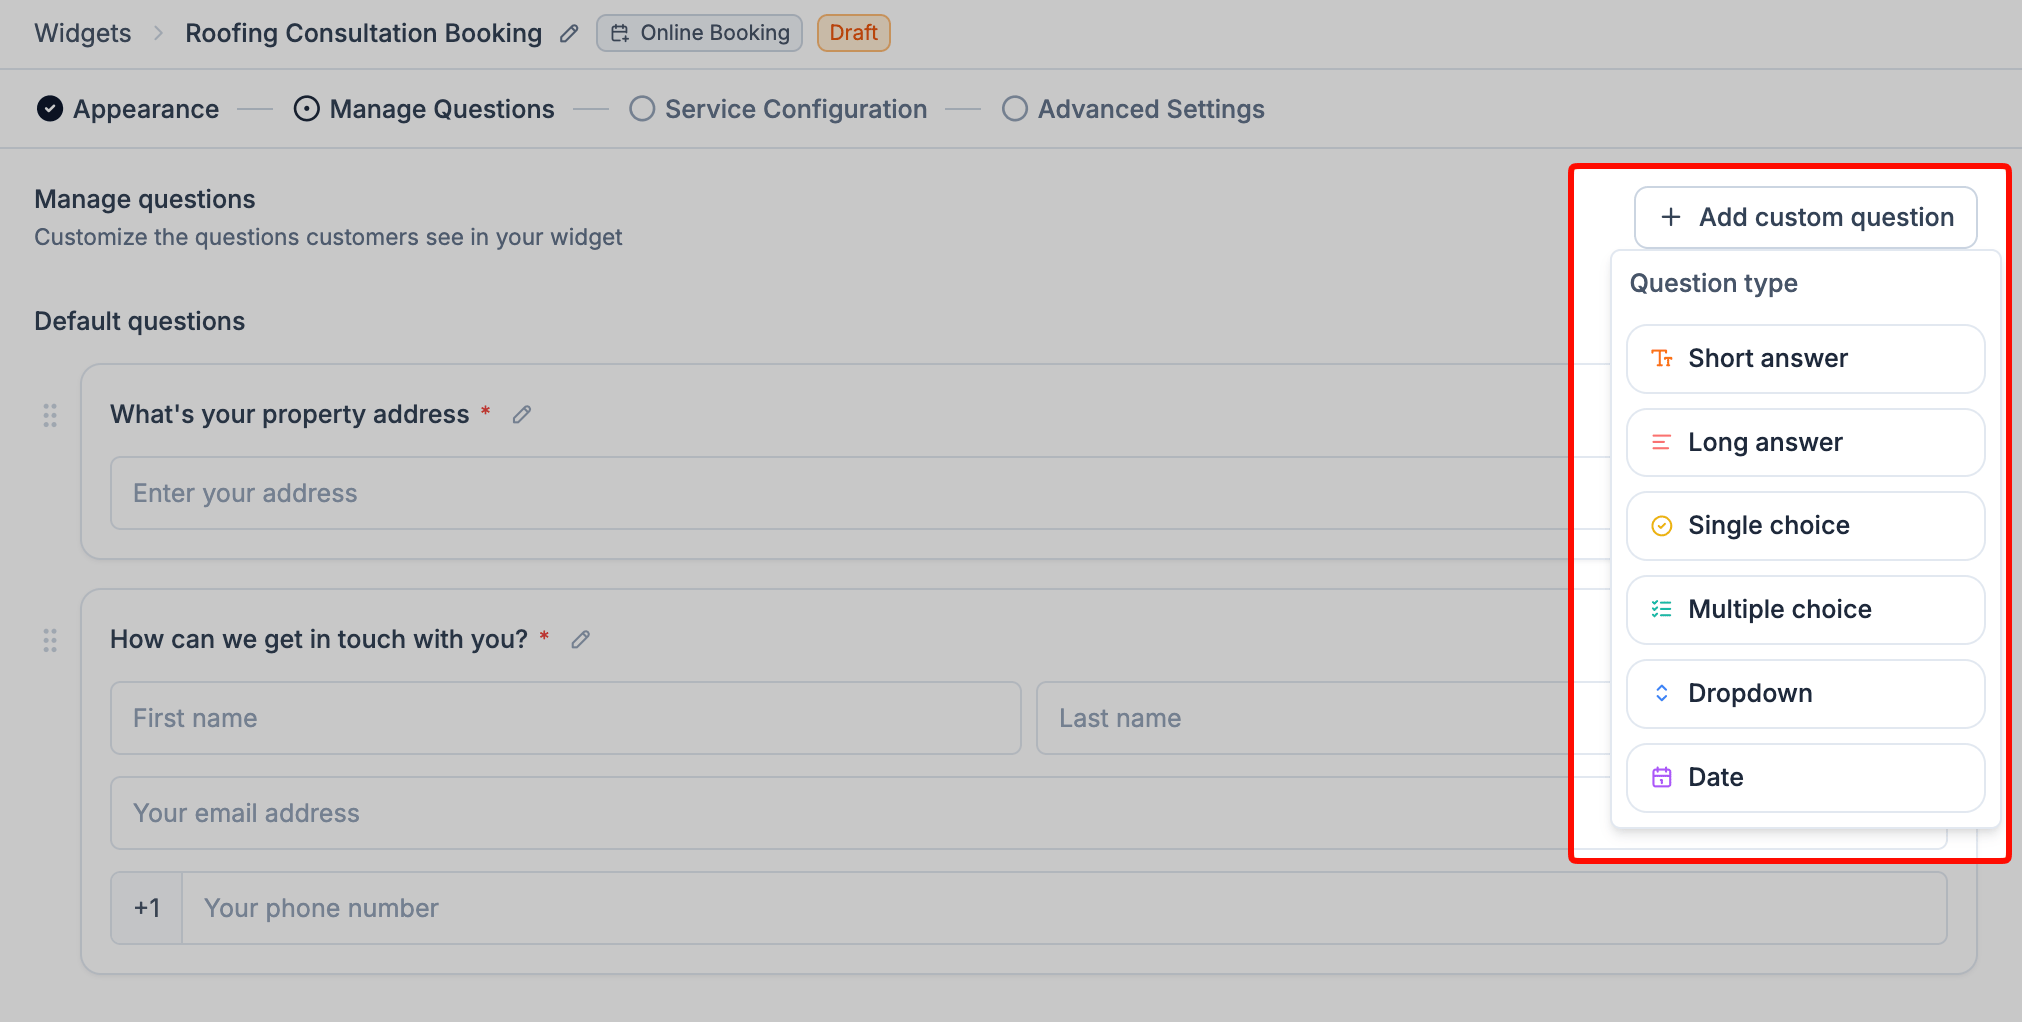
- Select + Add custom question.
- Select a question type:
- Short Answer
- Long Answer
- Single Choice
- Multiple Choice
- Dropdown
- Date
- Select the pencil icon next to Untitled question and enter your question.
- For Single Choice, Multiple Choice, and Dropdown, add at least two answer options.
- Change type: Switch the question to another question type.
- Duplicate: Create a copy of the question, including its answer options.
- Required: Require the homeowner to answer the question before they can continue.
- Update Field: Save the homeowner’s response to a Contact or Job custom field.
- Dependent Field: Show the question only when the homeowner selects a specific answer to another Single Choice, Multiple Choice, or Dropdown question.
- Delete: Remove a custom question.
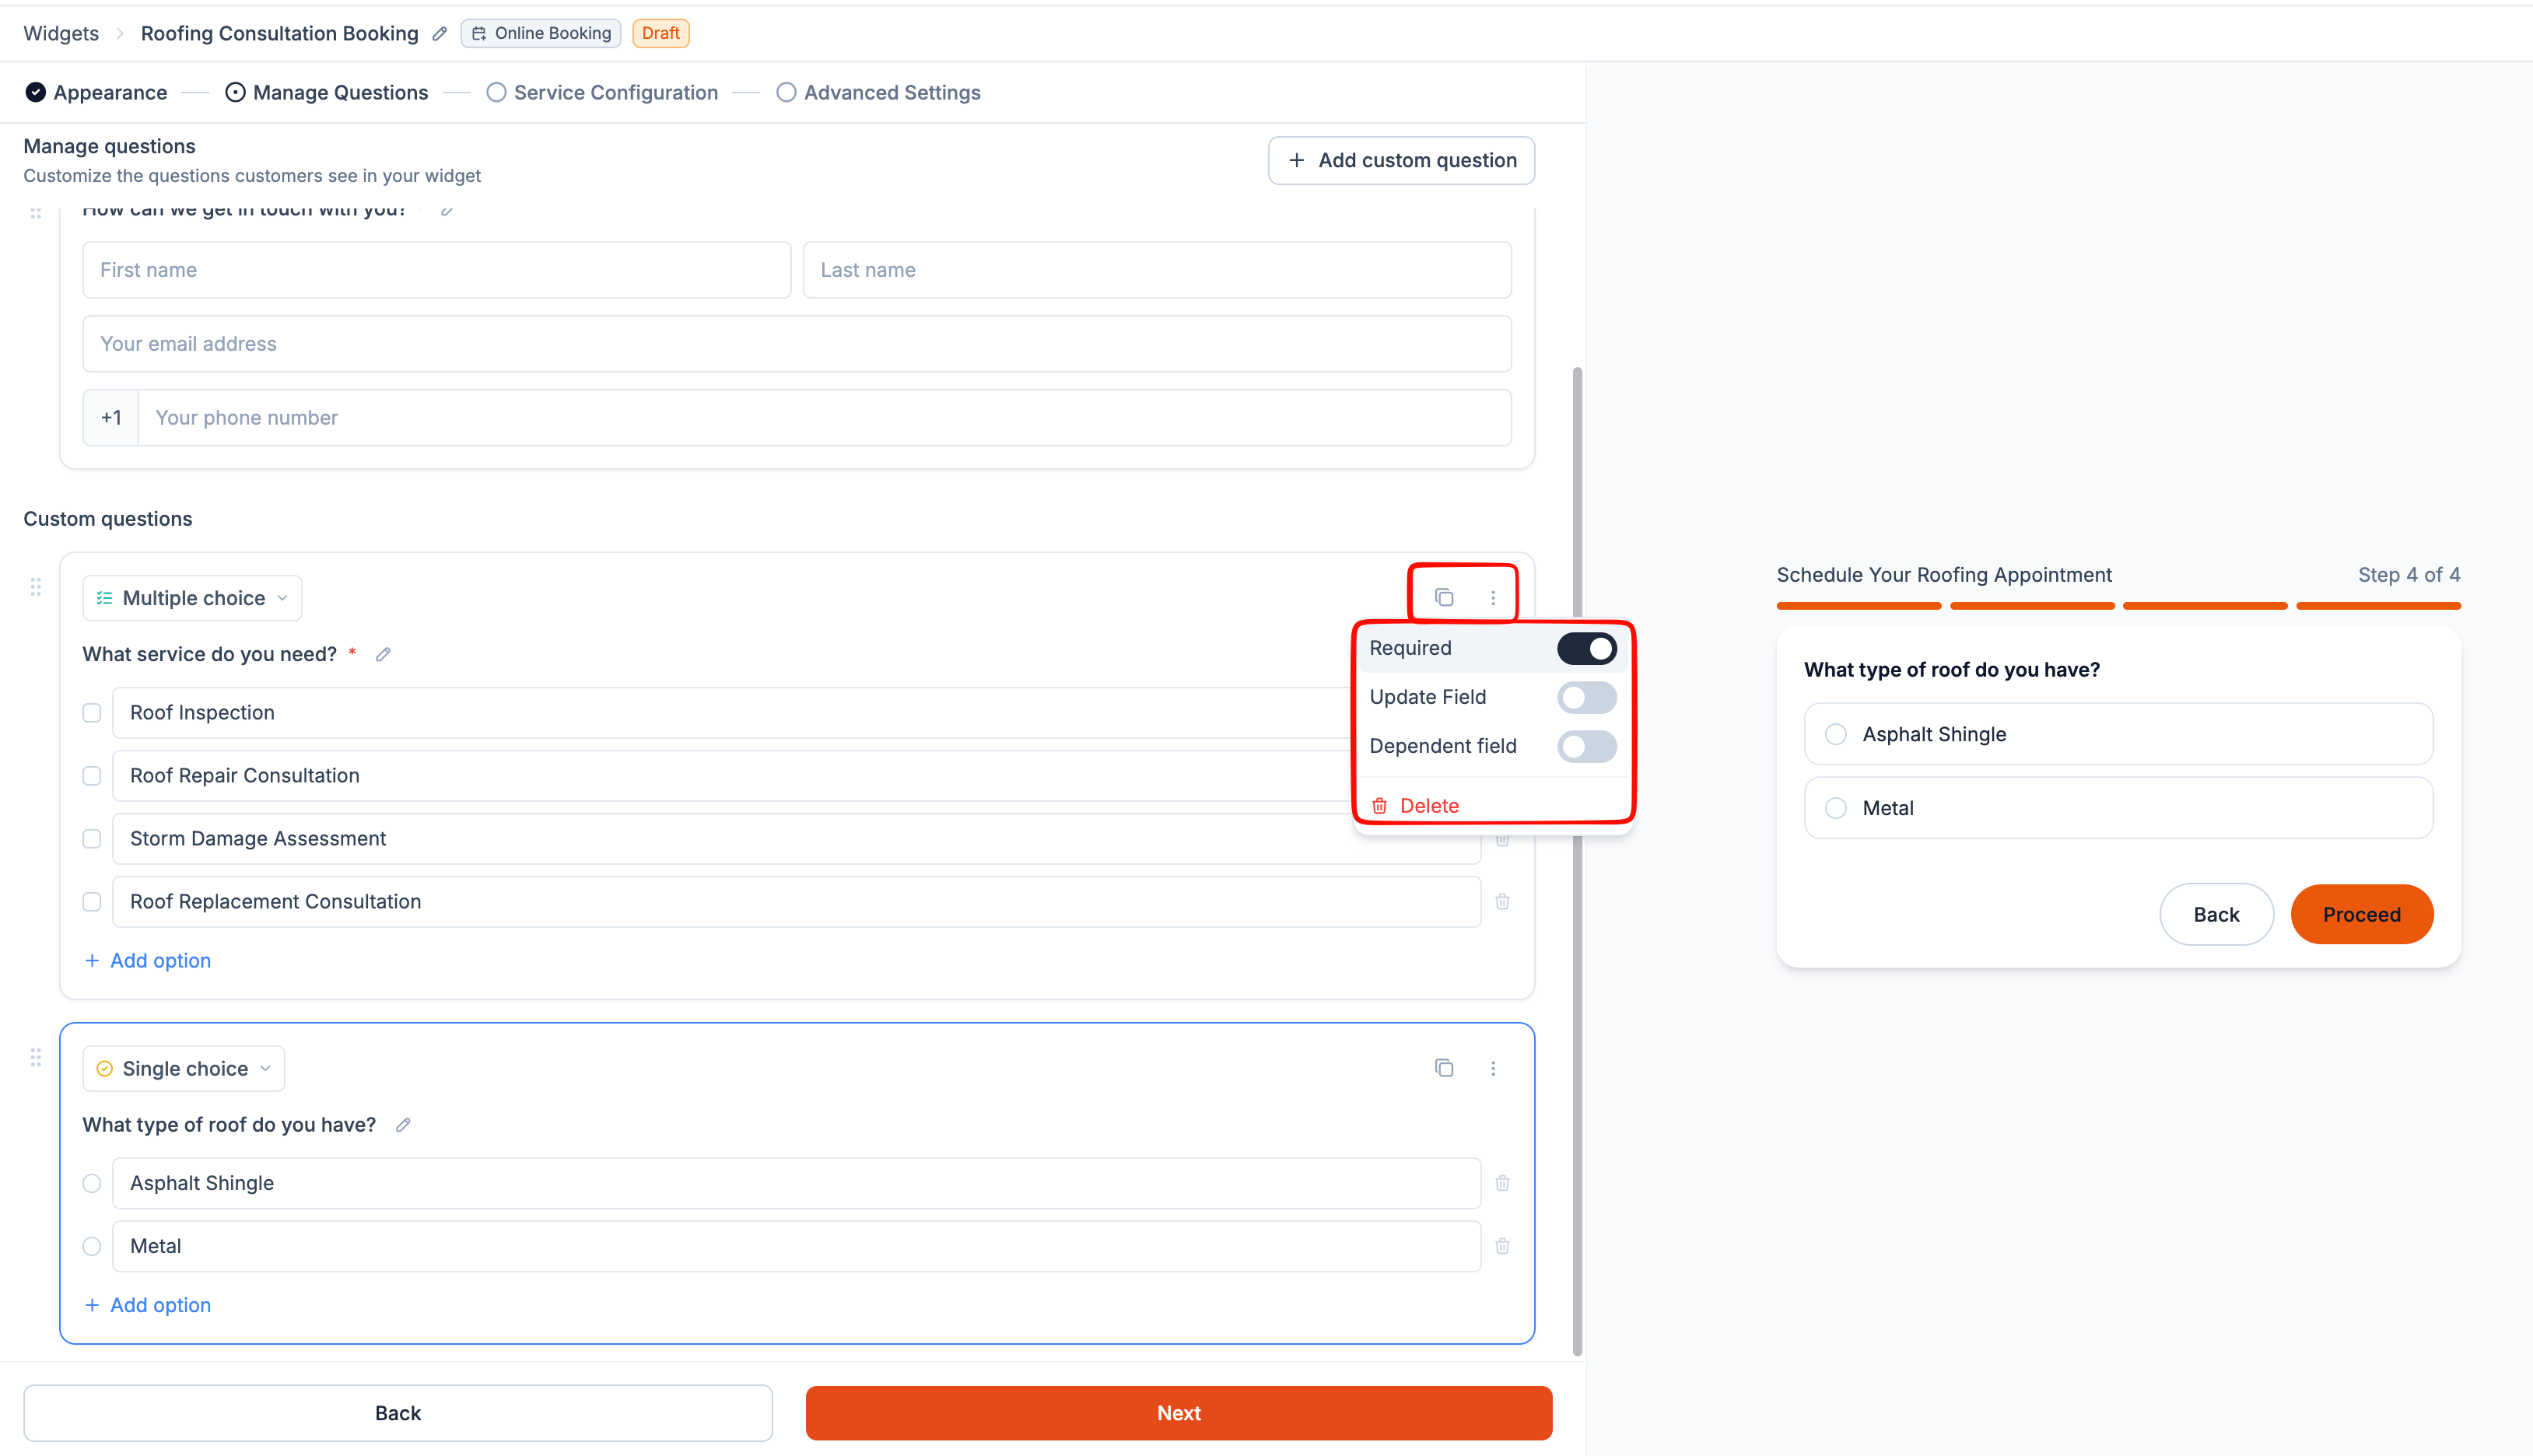
Tip: Drag a question using its handle to change the order in which homeowners see it.
- Select Next to continue to Service Configuration.
Step-3: Decide what homeowners can book
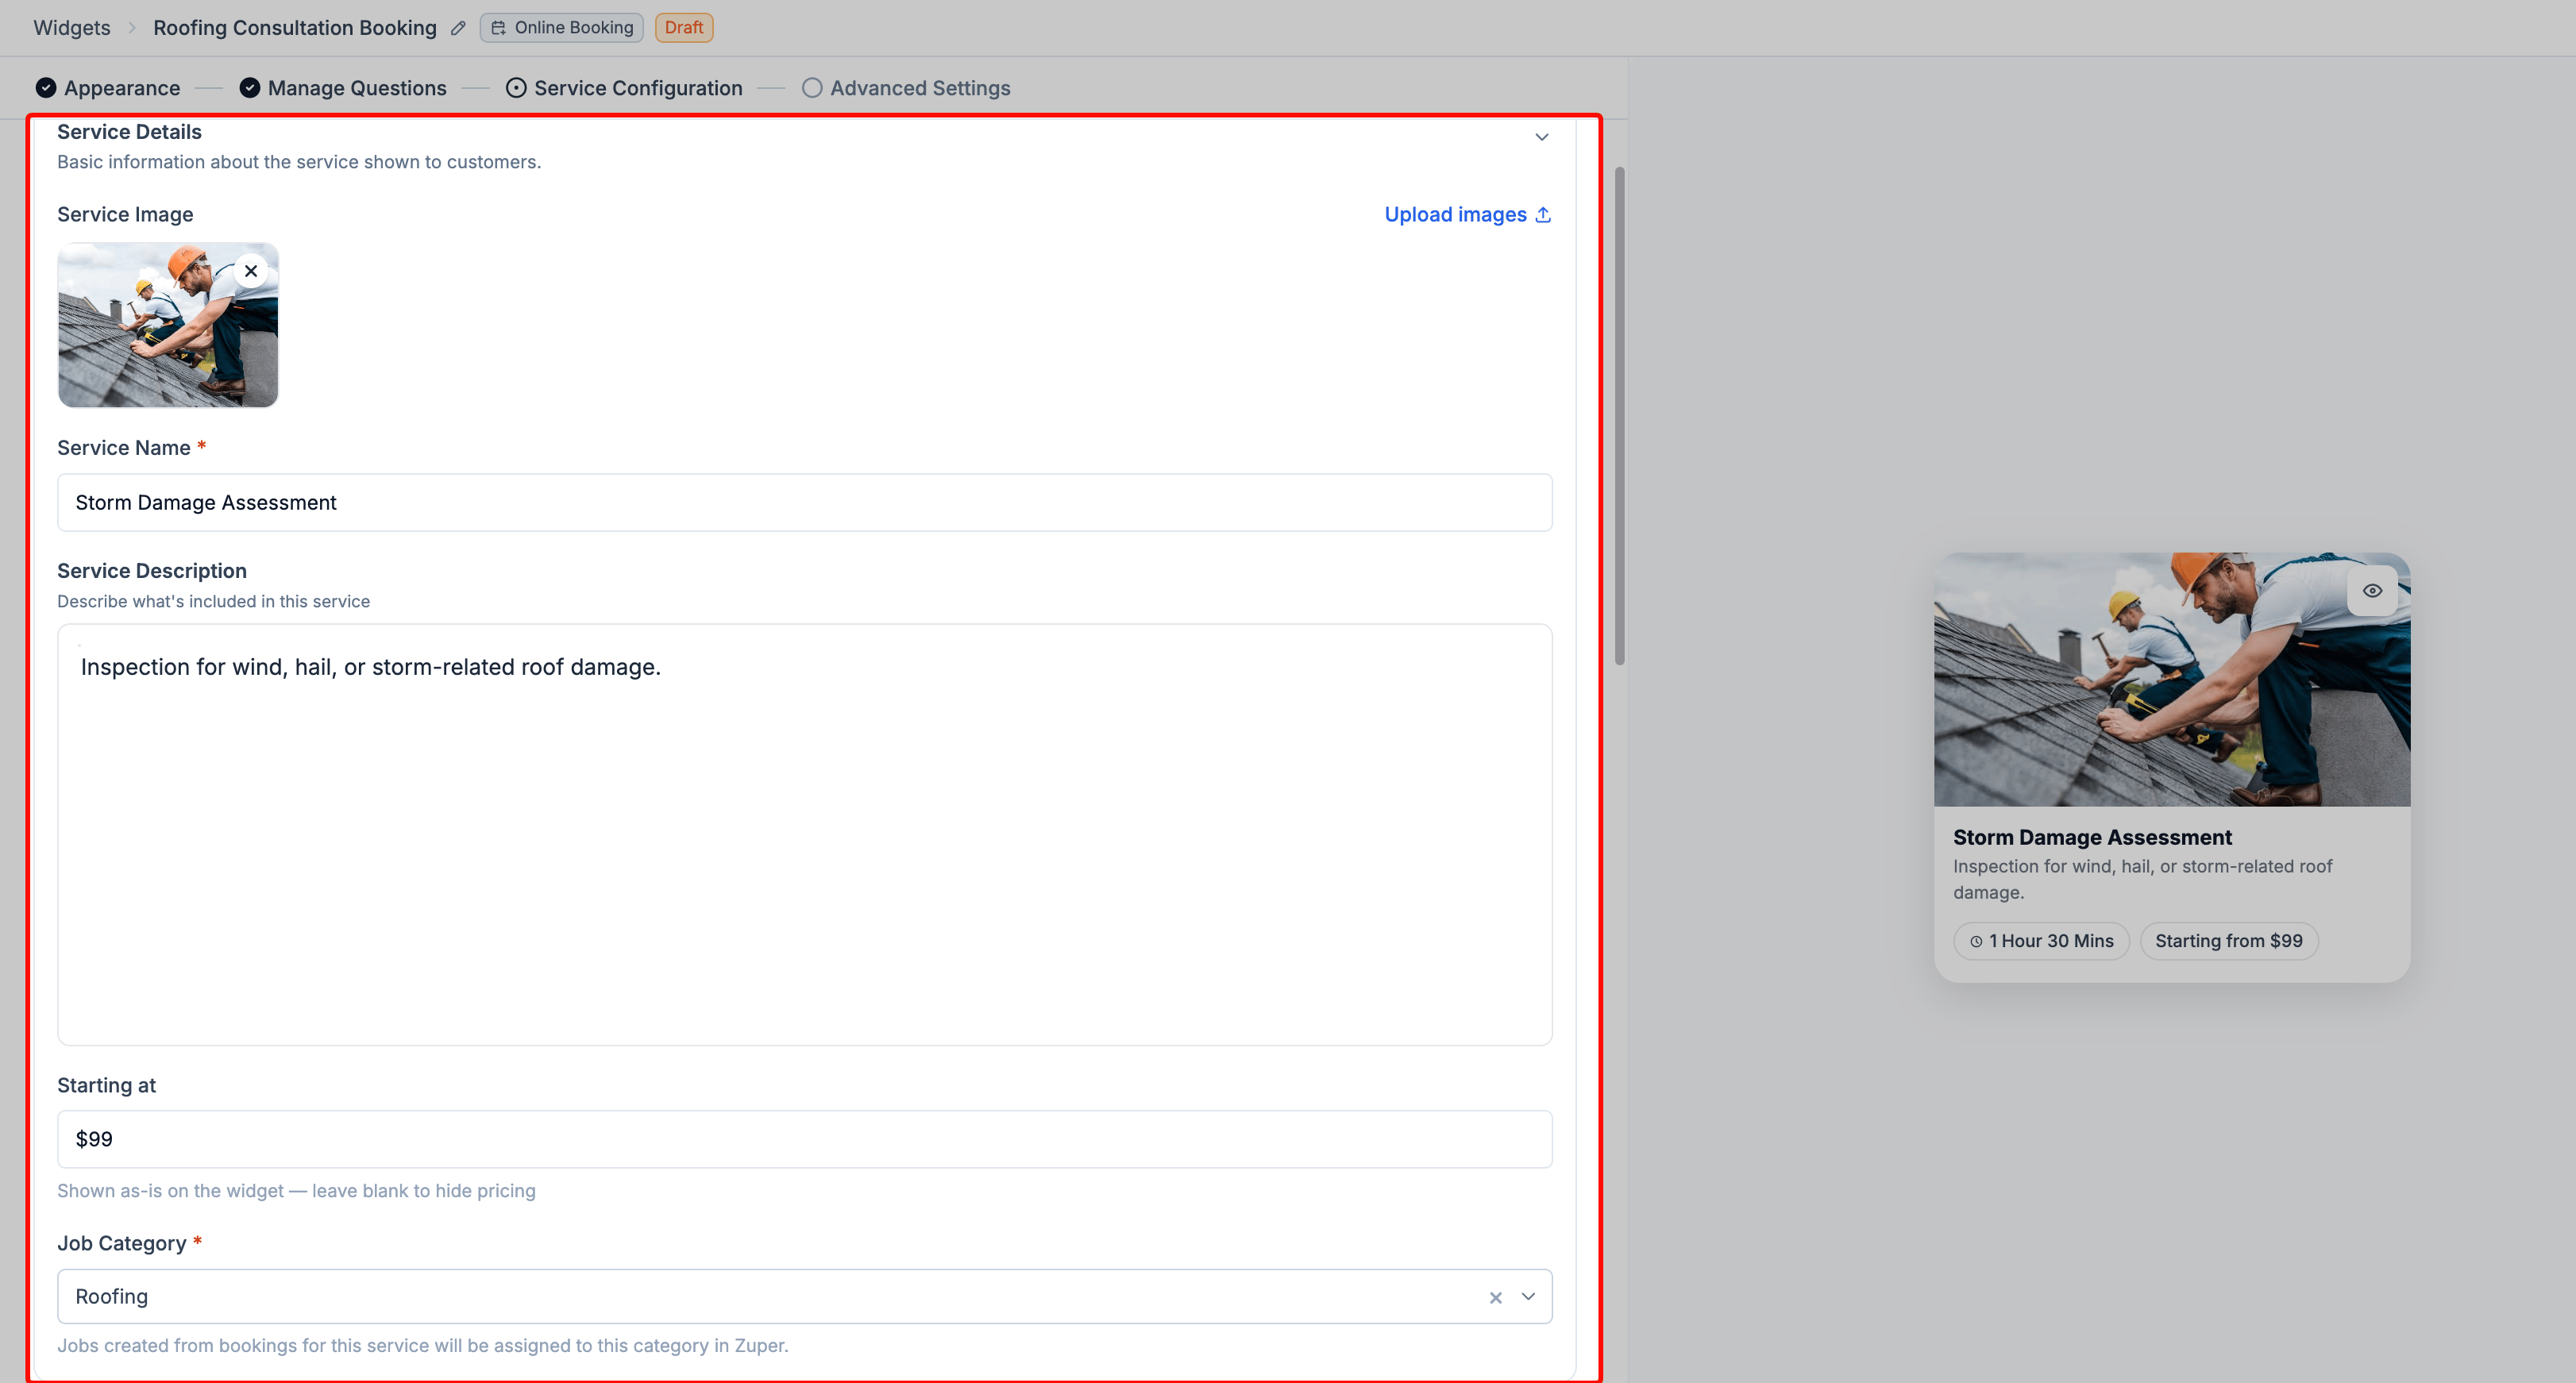
The Service Configuration step defines what appears on your booking page. Each service becomes a card that homeowners can browse, with its own description, image, price, duration, and scheduling rules. Sample services may be available to help you get started, such as Roof Inspection, Roof Repair & Replacement, and Emergency Tarping. Replace these with the services your business actually offers before activating the widget.Add or edit a service
Select the pencil icon on an existing service to edit it, or select + Add a new service to create one. Add service details Configure the information homeowners see when they browse your services:- Service Image: Upload an image for the service card.
- Service Name: Enter the name of the service. This field is required.
- Service Description: Explain what the service includes so homeowners can choose the right service.
- Starting At: Enter the starting price to display for the service. Leave this blank if you don’t want to show a price.
- Job Category: Select the job category to use when Zuper creates a job from a booking. This field is required.
Set the appointment duration and buffer
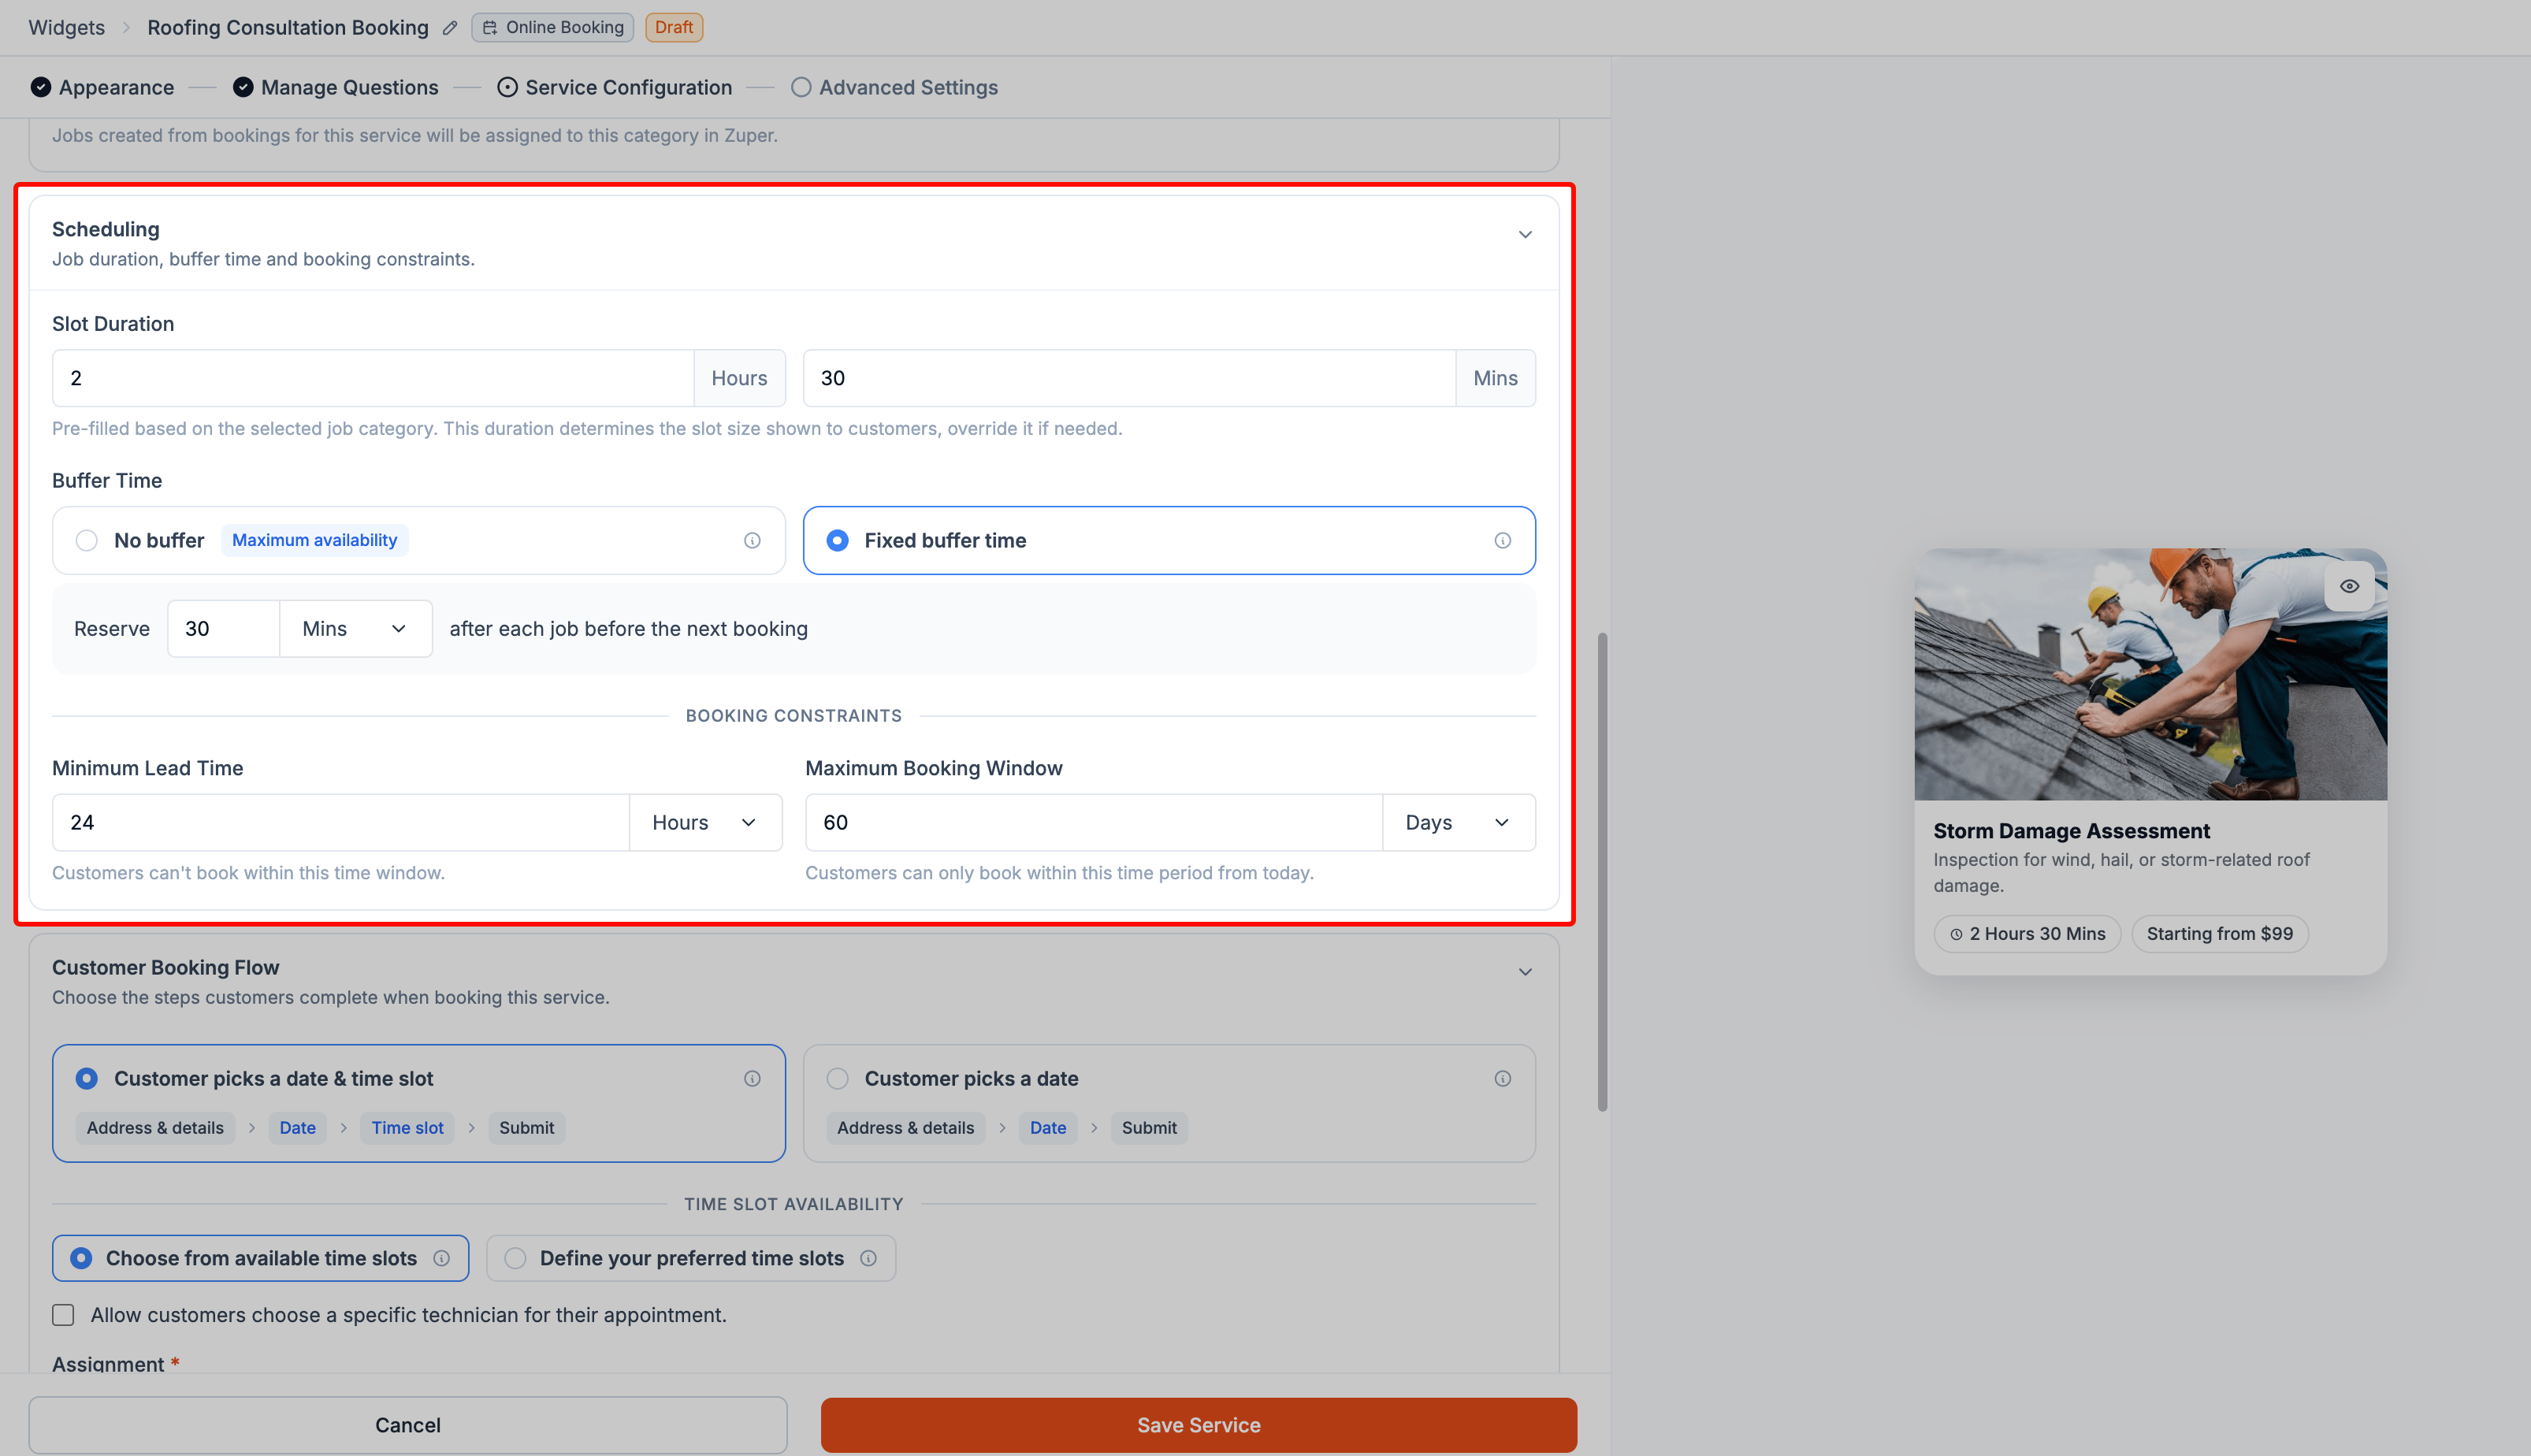
The duration you configure determines how much time a homeowner books on your calendar.- Set the Slot Duration. Zuper pre-fills this based on the selected job category. Change it if the service takes more or less time than the default.
- Set the Buffer Time:
- No buffer: Allows appointments to be scheduled back-to-back.
- Fixed buffer time: Adds a set amount of time between appointments, such as 30 minutes or 1 hour. This gives your team time between appointments.
Control when homeowners can book
Use Booking Constraints to control how far in advance homeowners can make appointments.- Minimum Lead Time: Prevents bookings within a specified period from the current time. For example, a 24-hour lead time prevents same-day bookings.
- Maximum Booking Window: Limits how far into the future homeowners can book. For example, a 60-day window allows bookings only within the next 60 days.
Set either value to 0 to remove the restriction.
Choose how homeowners select an appointment
Under Customer Booking Preference, decide how much control homeowners have over scheduling.- Customer picks a date & time slot
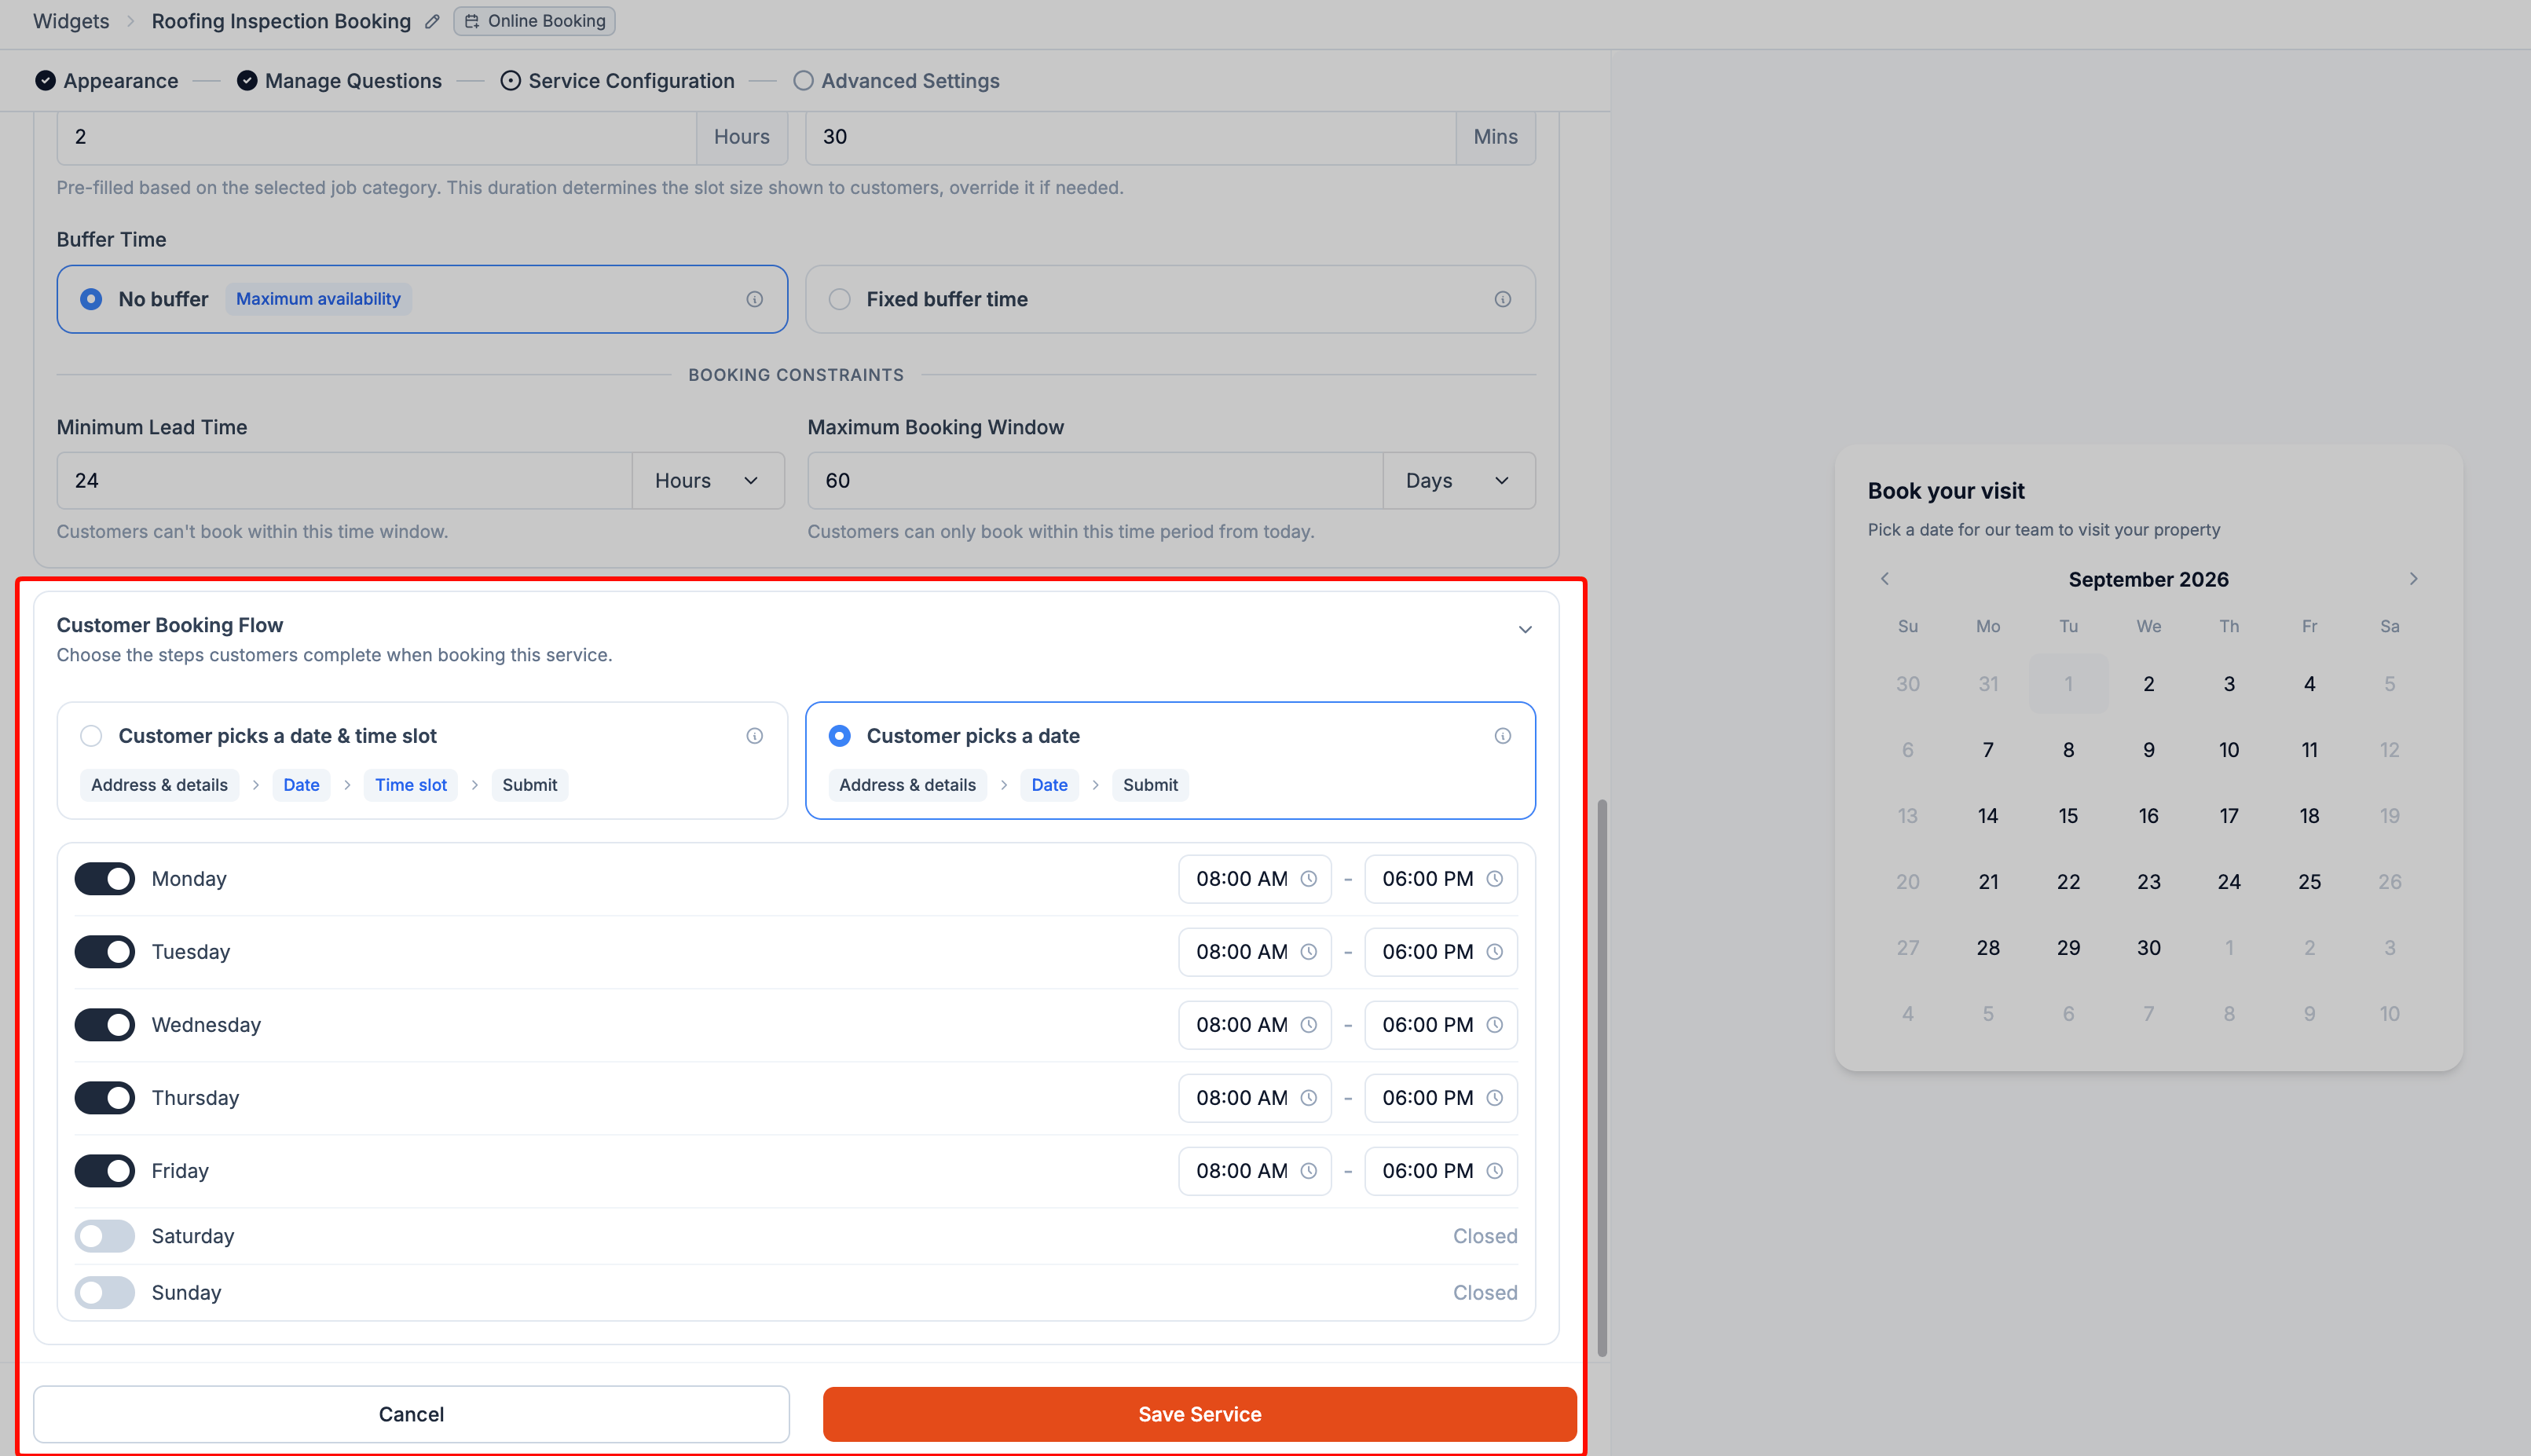
- Customer picks a date
Choose this option when you want homeowners to select a specific appointment time. You can also let them choose a technician.Set Time Slot Availability to decide how Zuper determines the time slots homeowners can book.
Choose from available time slots
Choose from available time slots
Use your teams’ actual calendars to show homeowners when your technicians are available.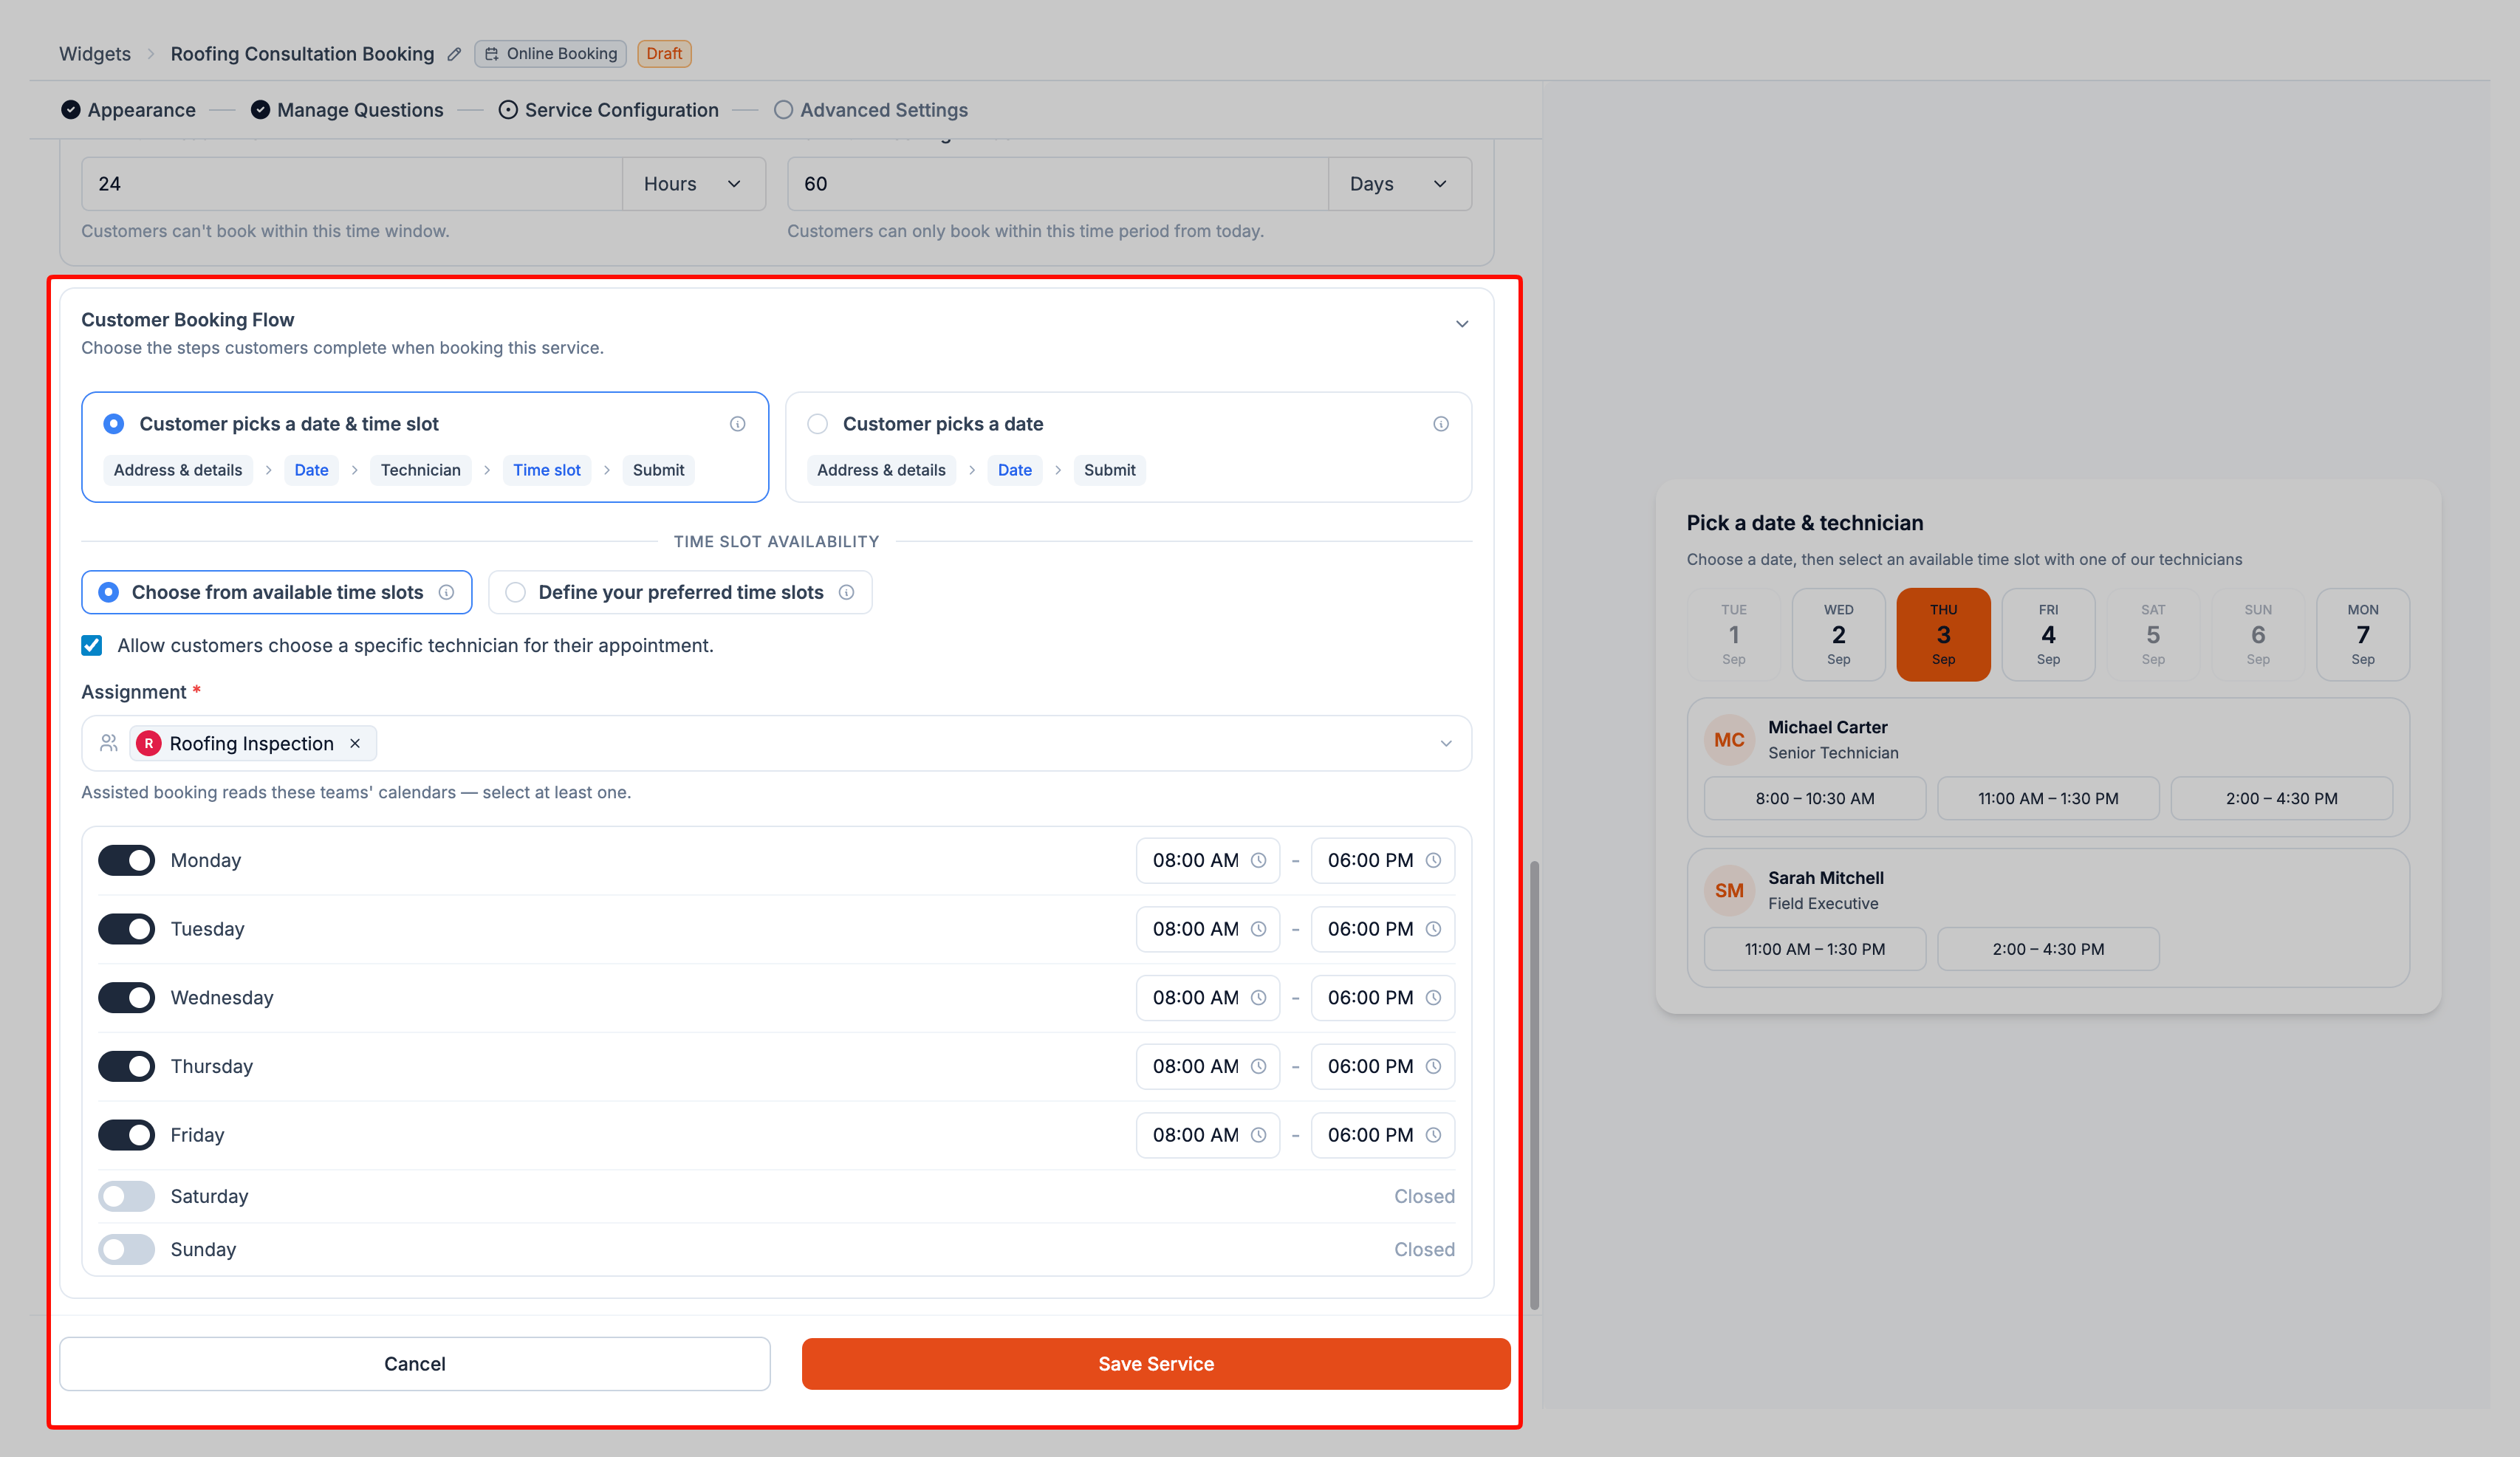
- Choose whether homeowners can select a technician. Turn on Allow customers to choose a specific technician for their appointment to let homeowners see available technicians with their name, role, and open time slots. Leave it off to let Zuper assign the technician automatically.
- Set Assignment. Select the teams whose calendars Zuper should use to determine availability. You must select at least one team. You can select multiple teams, and bookings can draw from technicians across all selected teams.
- Set your weekly availability. Turn on each day when you accept bookings for this service, then set the start and end time for that day. Leave a day turned off to show it as Closed. Zuper offers time slots only within these hours and when the assigned teams have availability.
Define your preferred time slots
Define your preferred time slots
Create fixed booking windows instead of using your teams’ calendars.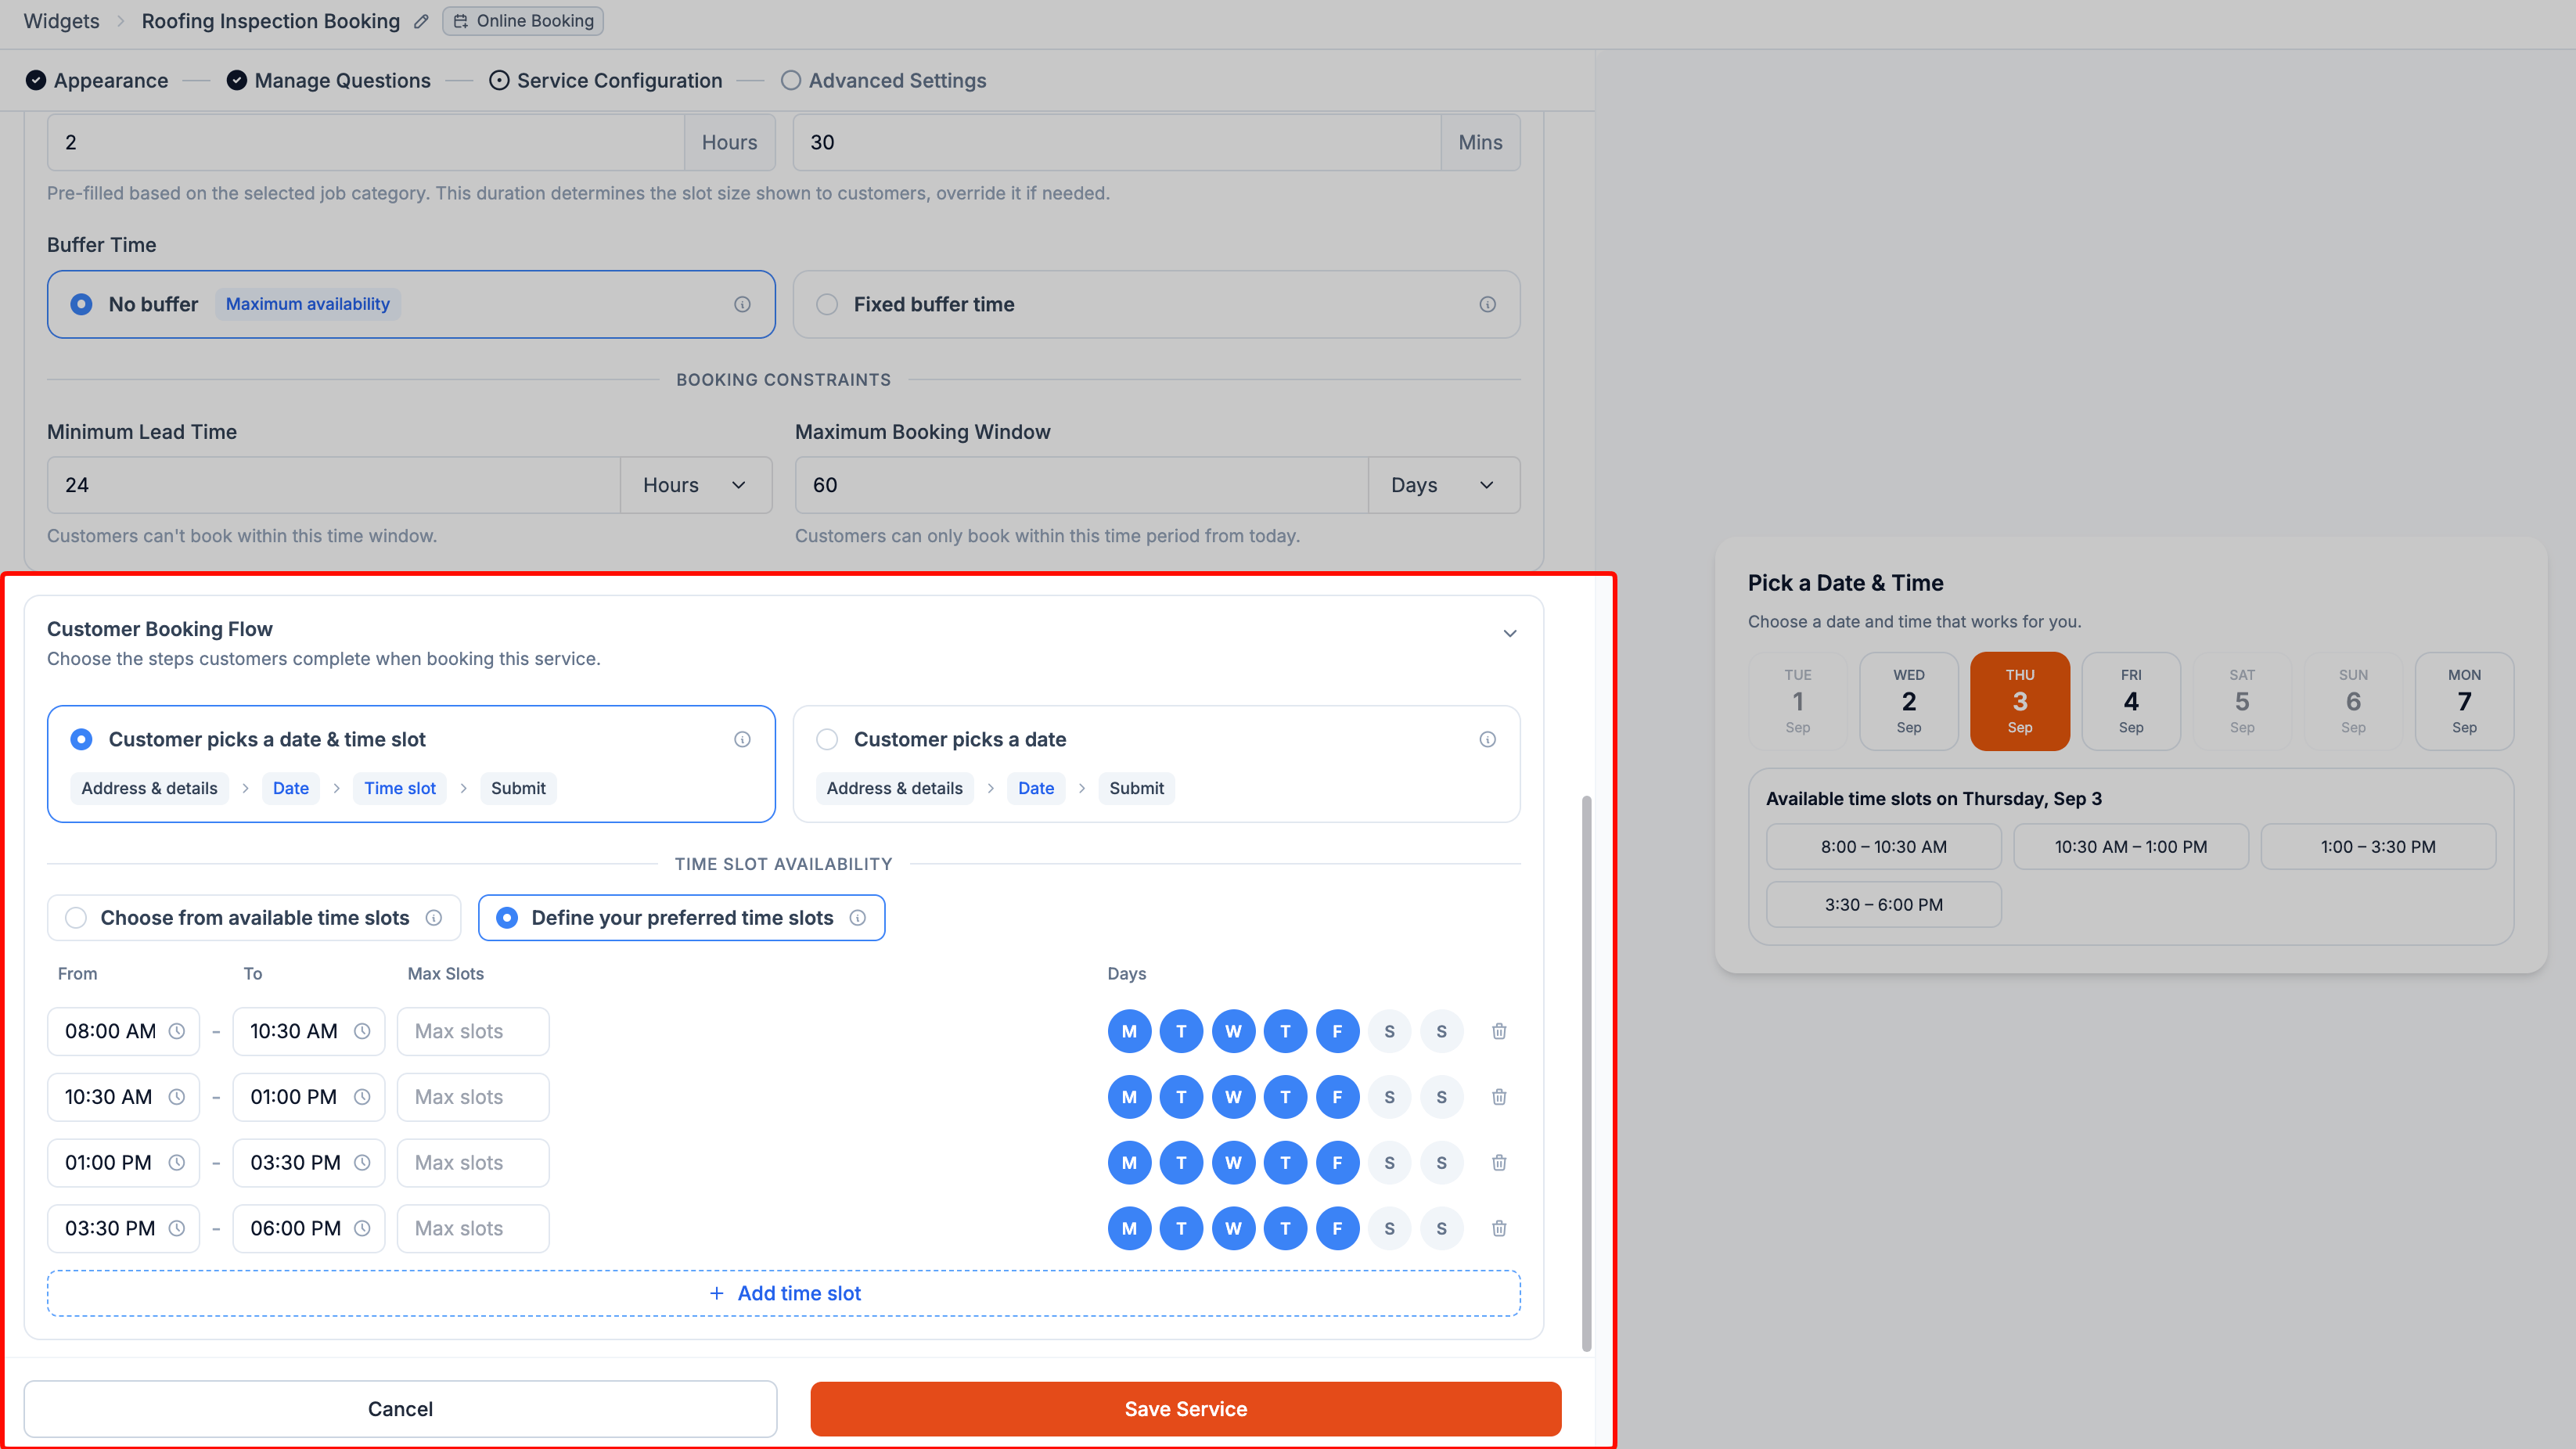
- Select + Add time slot.
- Set the From and To times for the booking window.
- Optionally set Max Slots to limit the number of bookings allowed during that time range.
- Select the days when the time slot should be available.
Manage your services
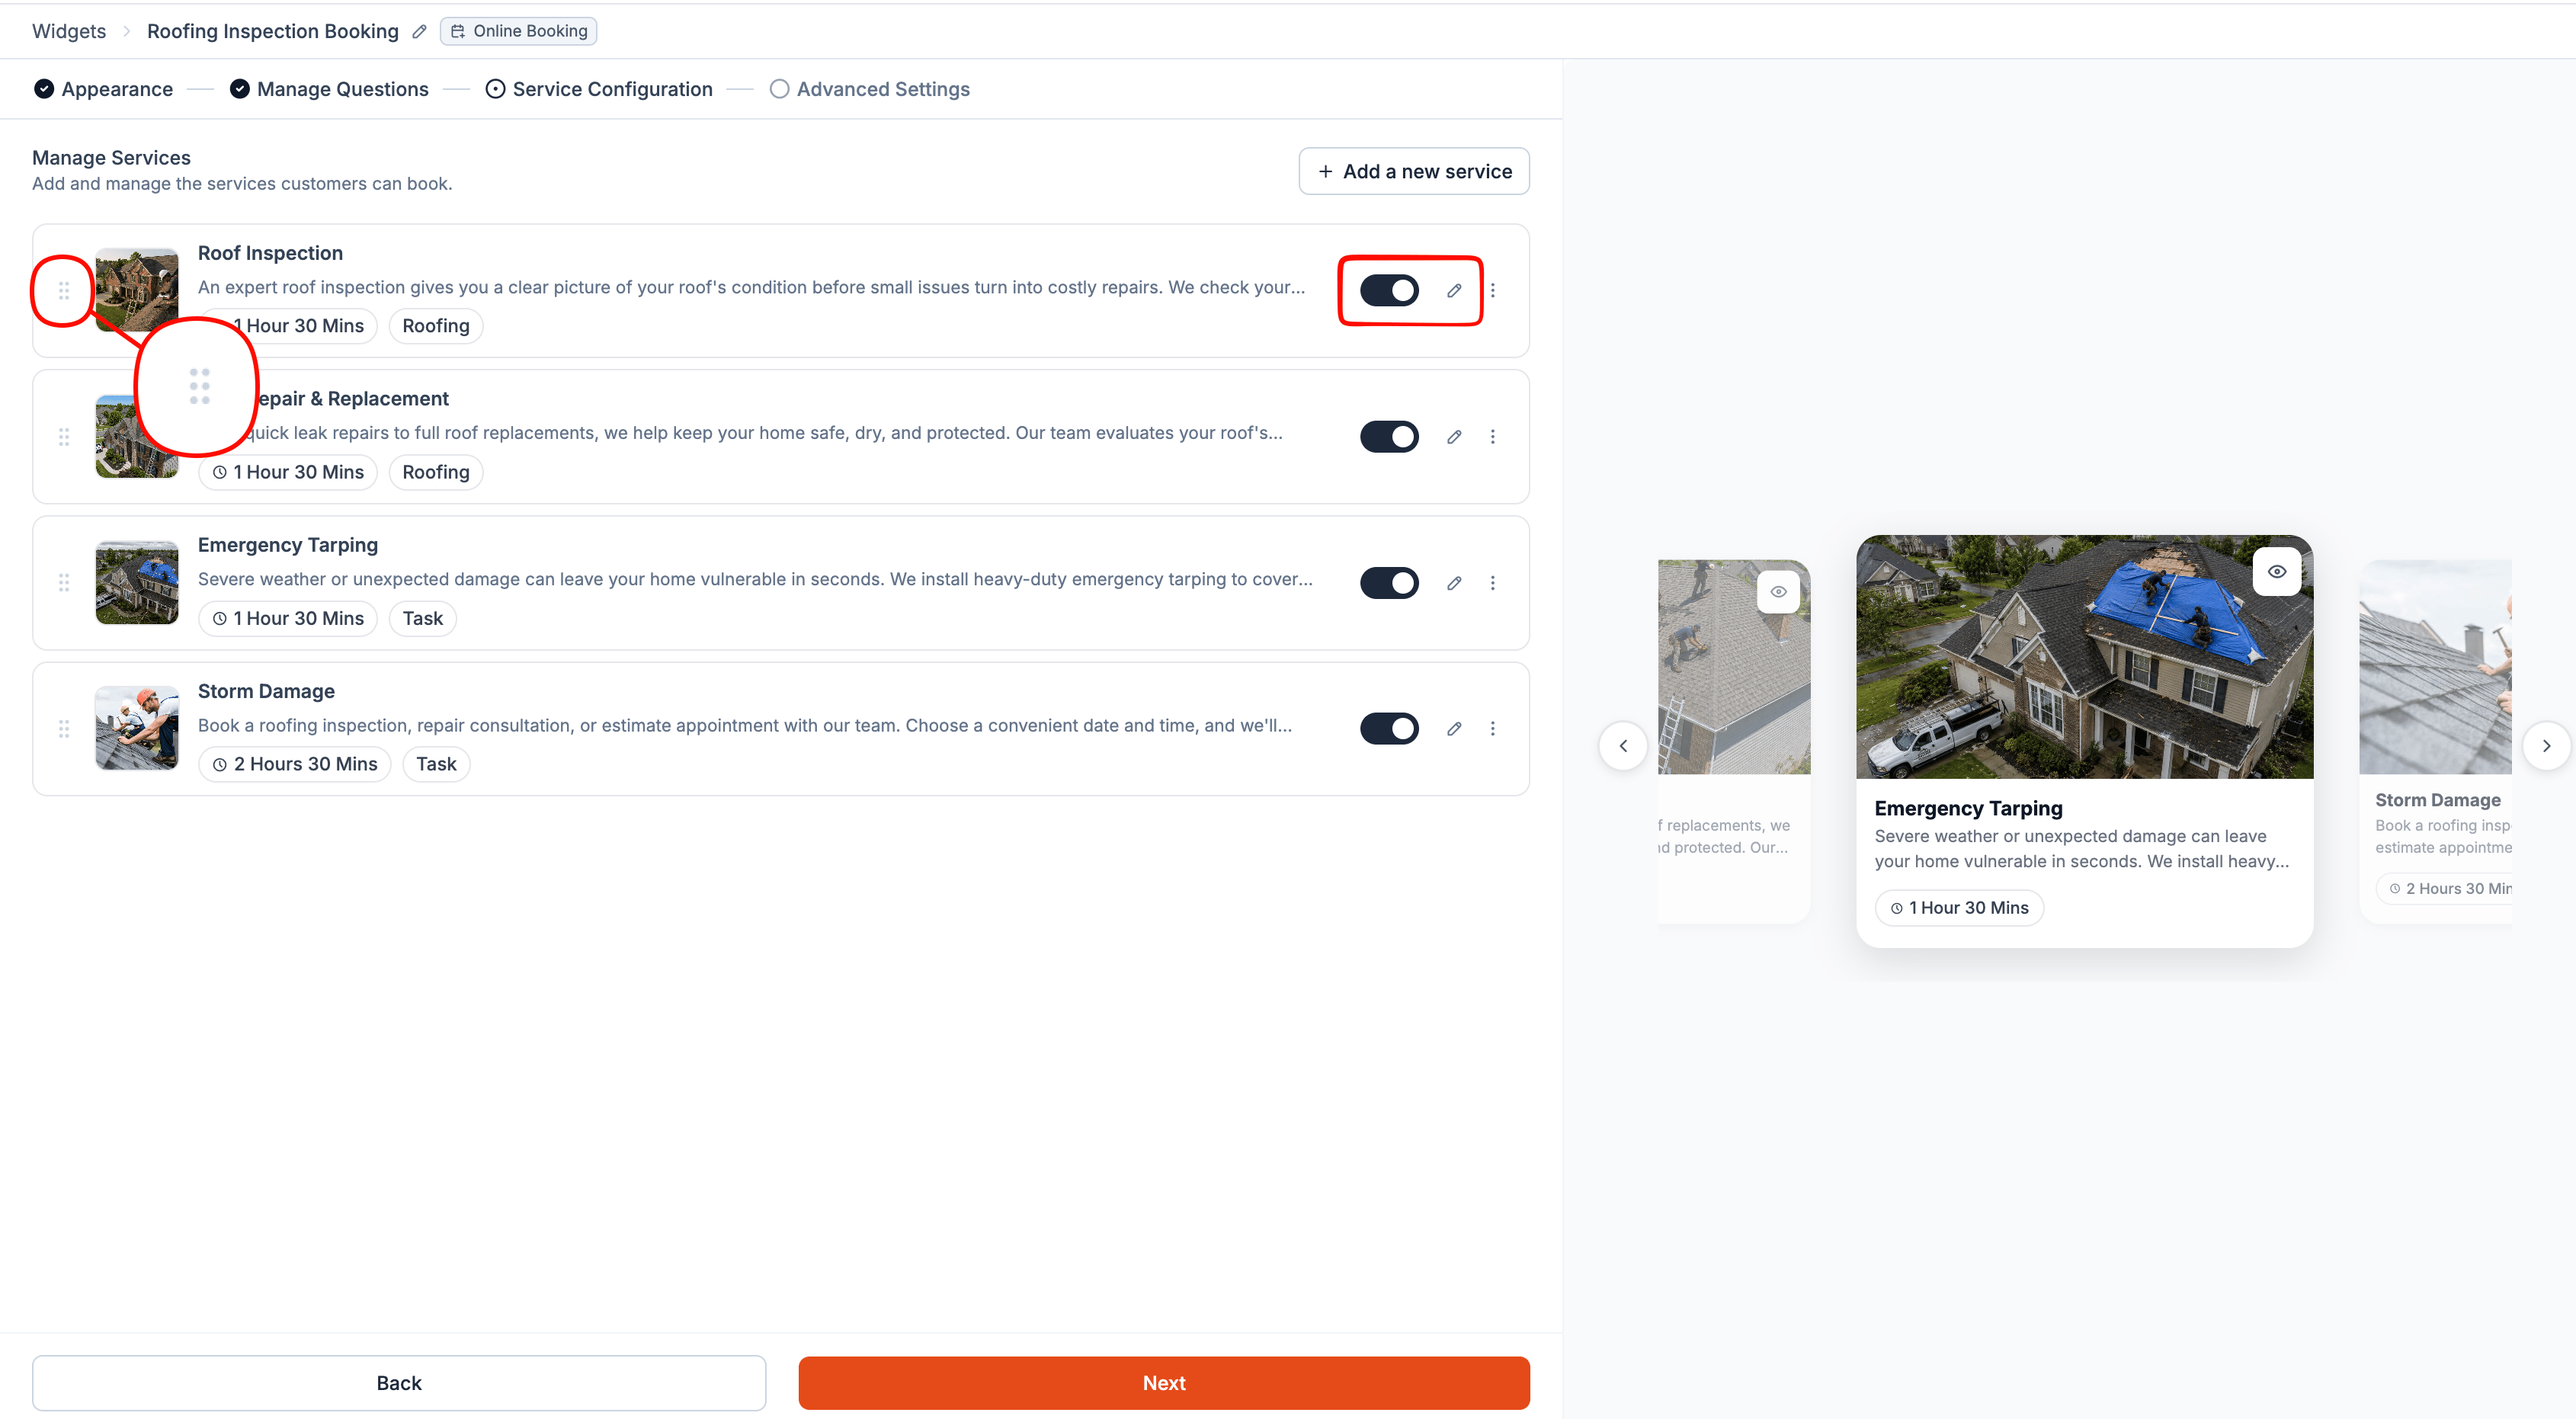
After adding your services, you can manage them from the service list.- Turn off a service to temporarily remove it from the booking widget. Existing bookings aren’t affected.
- Drag a service using its handle to change the order in which homeowners see it.
- Select the pencil icon to edit a service.
Step-4: Decide what happens around the booking
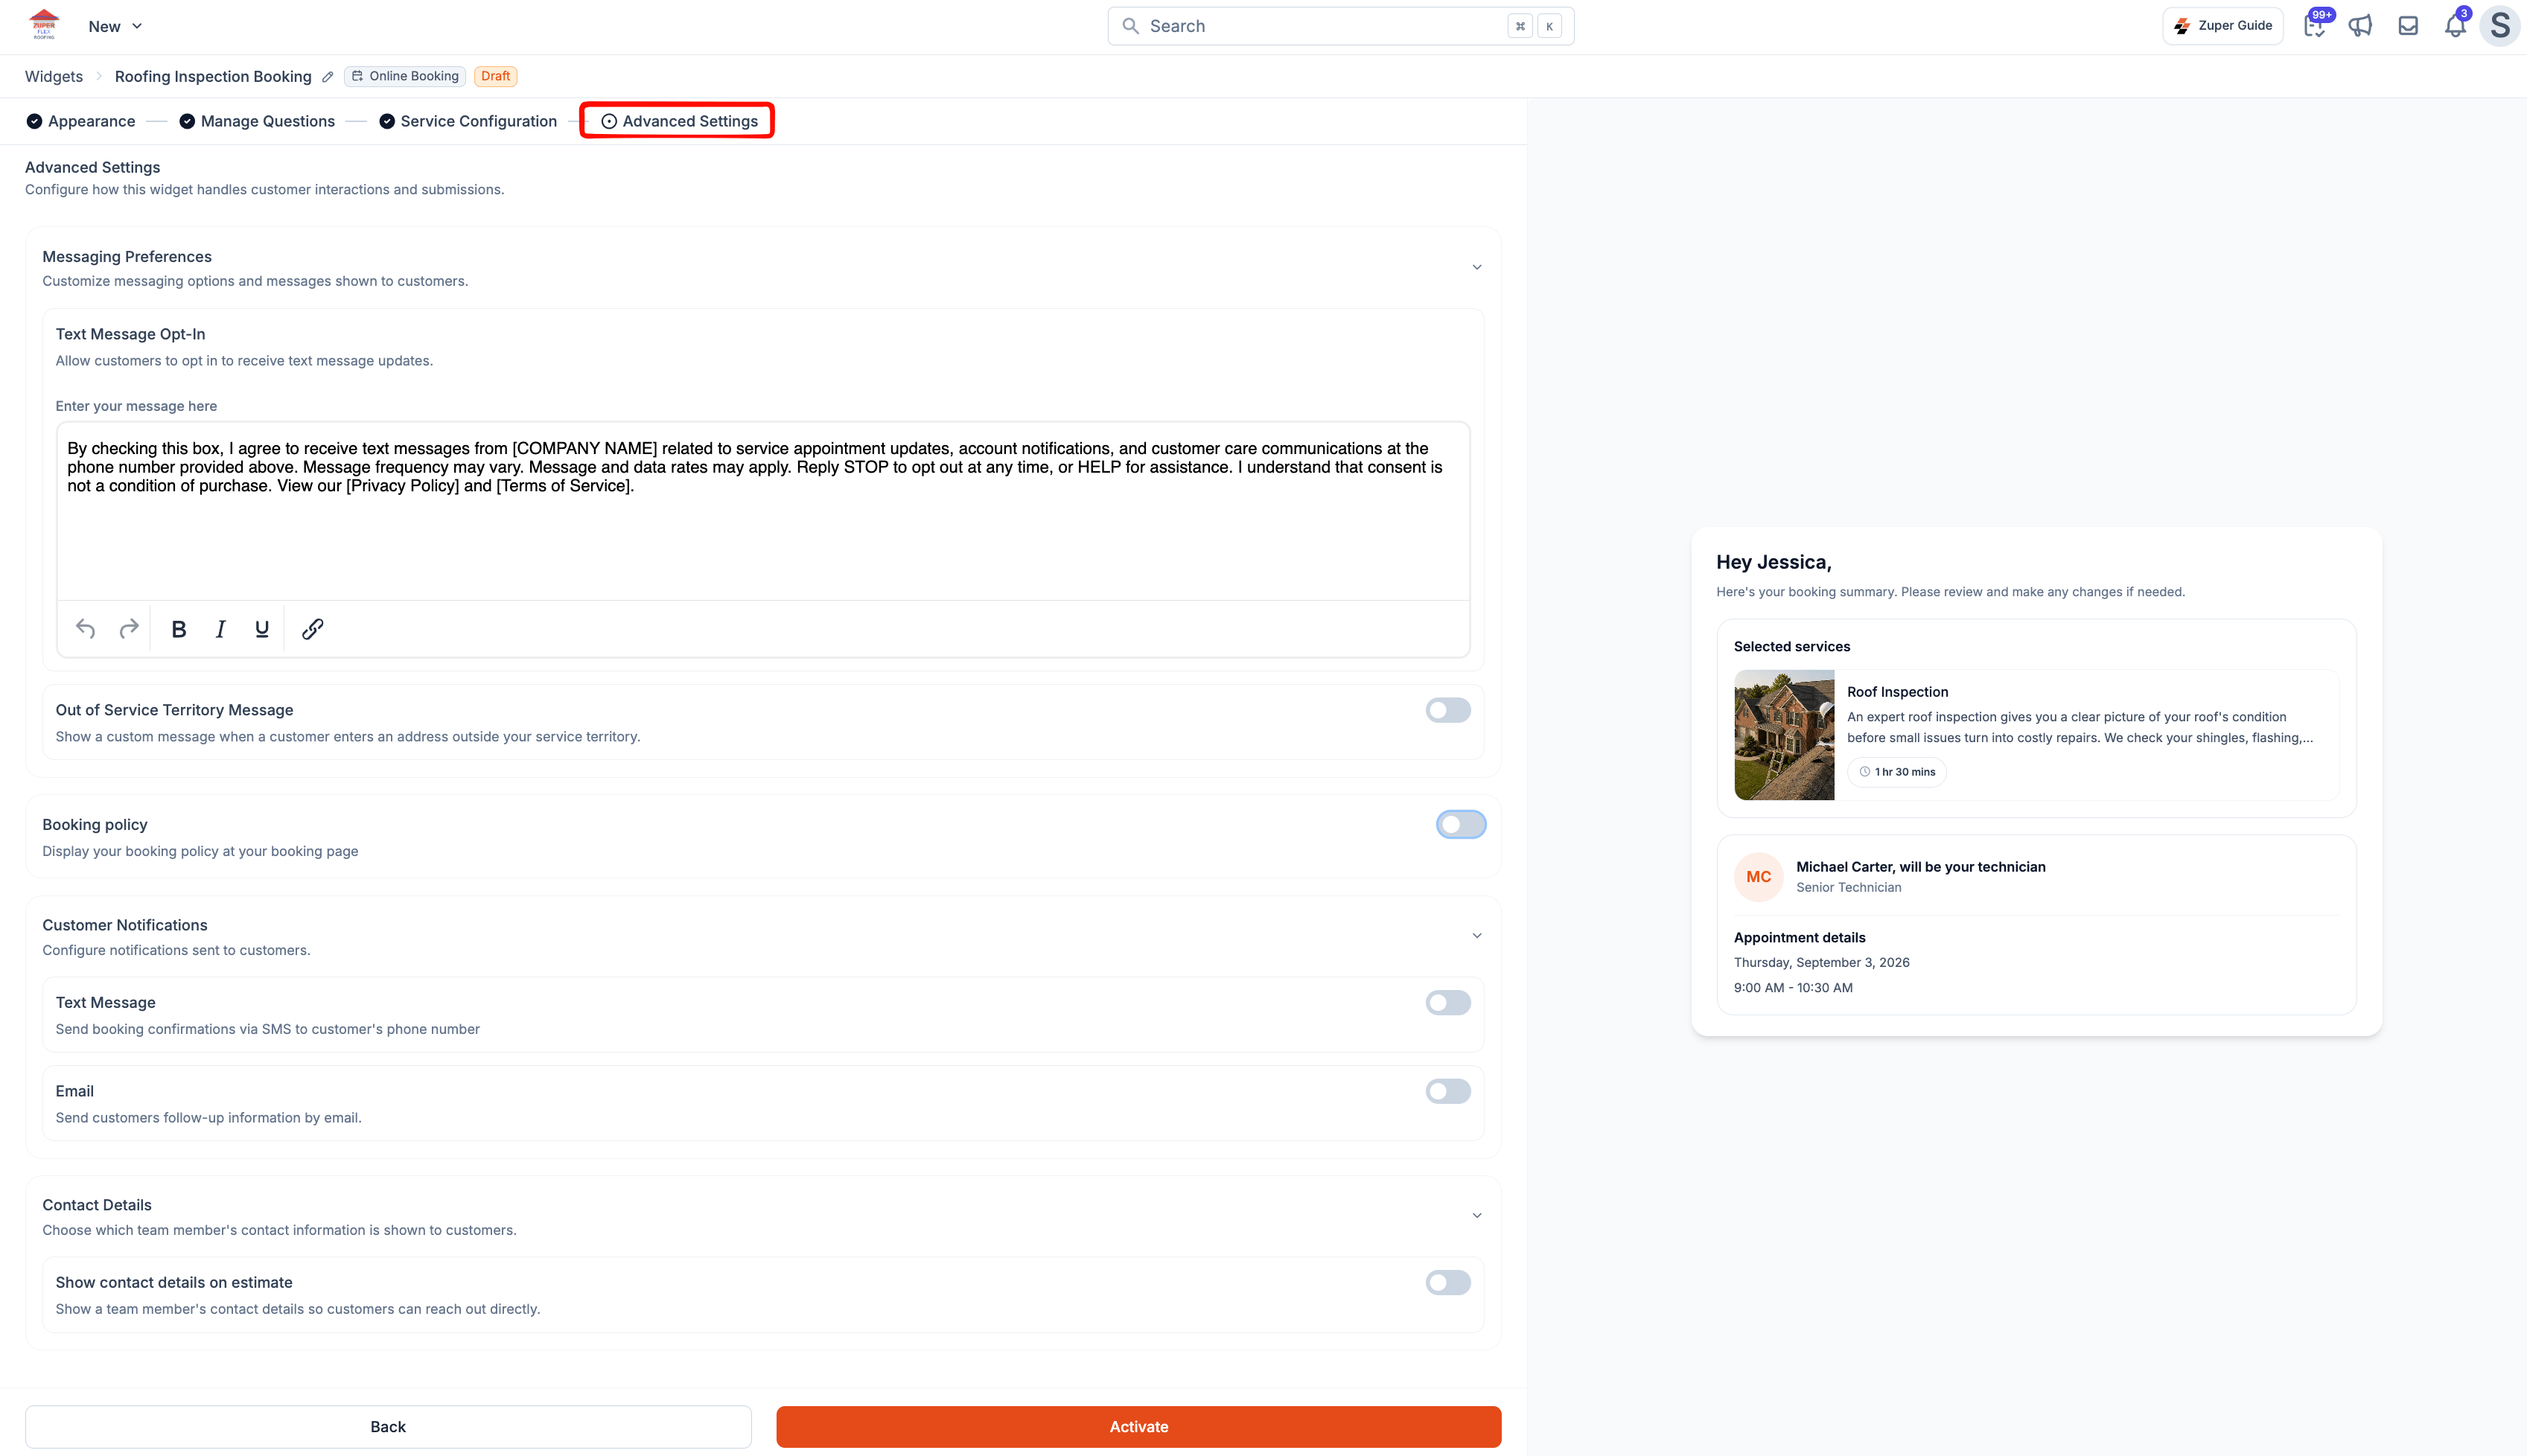
Use Advanced Settings to control customer consent, booking policies, notifications, and the contact information homeowners see.Messaging preferences
Messaging preferences
Text Message Opt-In adds a consent checkbox to the contact step. Enter the message you want homeowners to see with the checkbox. Selecting the checkbox isn’t required to complete a booking. It records whether the homeowner has opted in to receive text messages.Out of Service Territory Message lets you display a custom message when a homeowner enters an address outside your service area.
The text editor supports bold, italic, and underline formatting, as well as links.
Booking policy
Booking policy
Turn on Booking Policy to display your booking policy during the booking process. You can use this for cancellation terms, deposit requirements, arrival windows, or other booking conditions.
Customer notifications
Customer notifications
Choose how homeowners receive confirmation after they book:
- Text Message: Sends a booking confirmation by SMS.
- Email: Sends booking information by email.
Contact details
Contact details
Enter the team member’s name, phone number, and email address that you want homeowners to see.
Activate your widget
Once you’ve configured the booking experience, review it from the live preview before making it available to homeowners.- Review your settings across all four steps.
- Check the live preview to make sure the booking experience looks and works as expected.
- Select Activate.
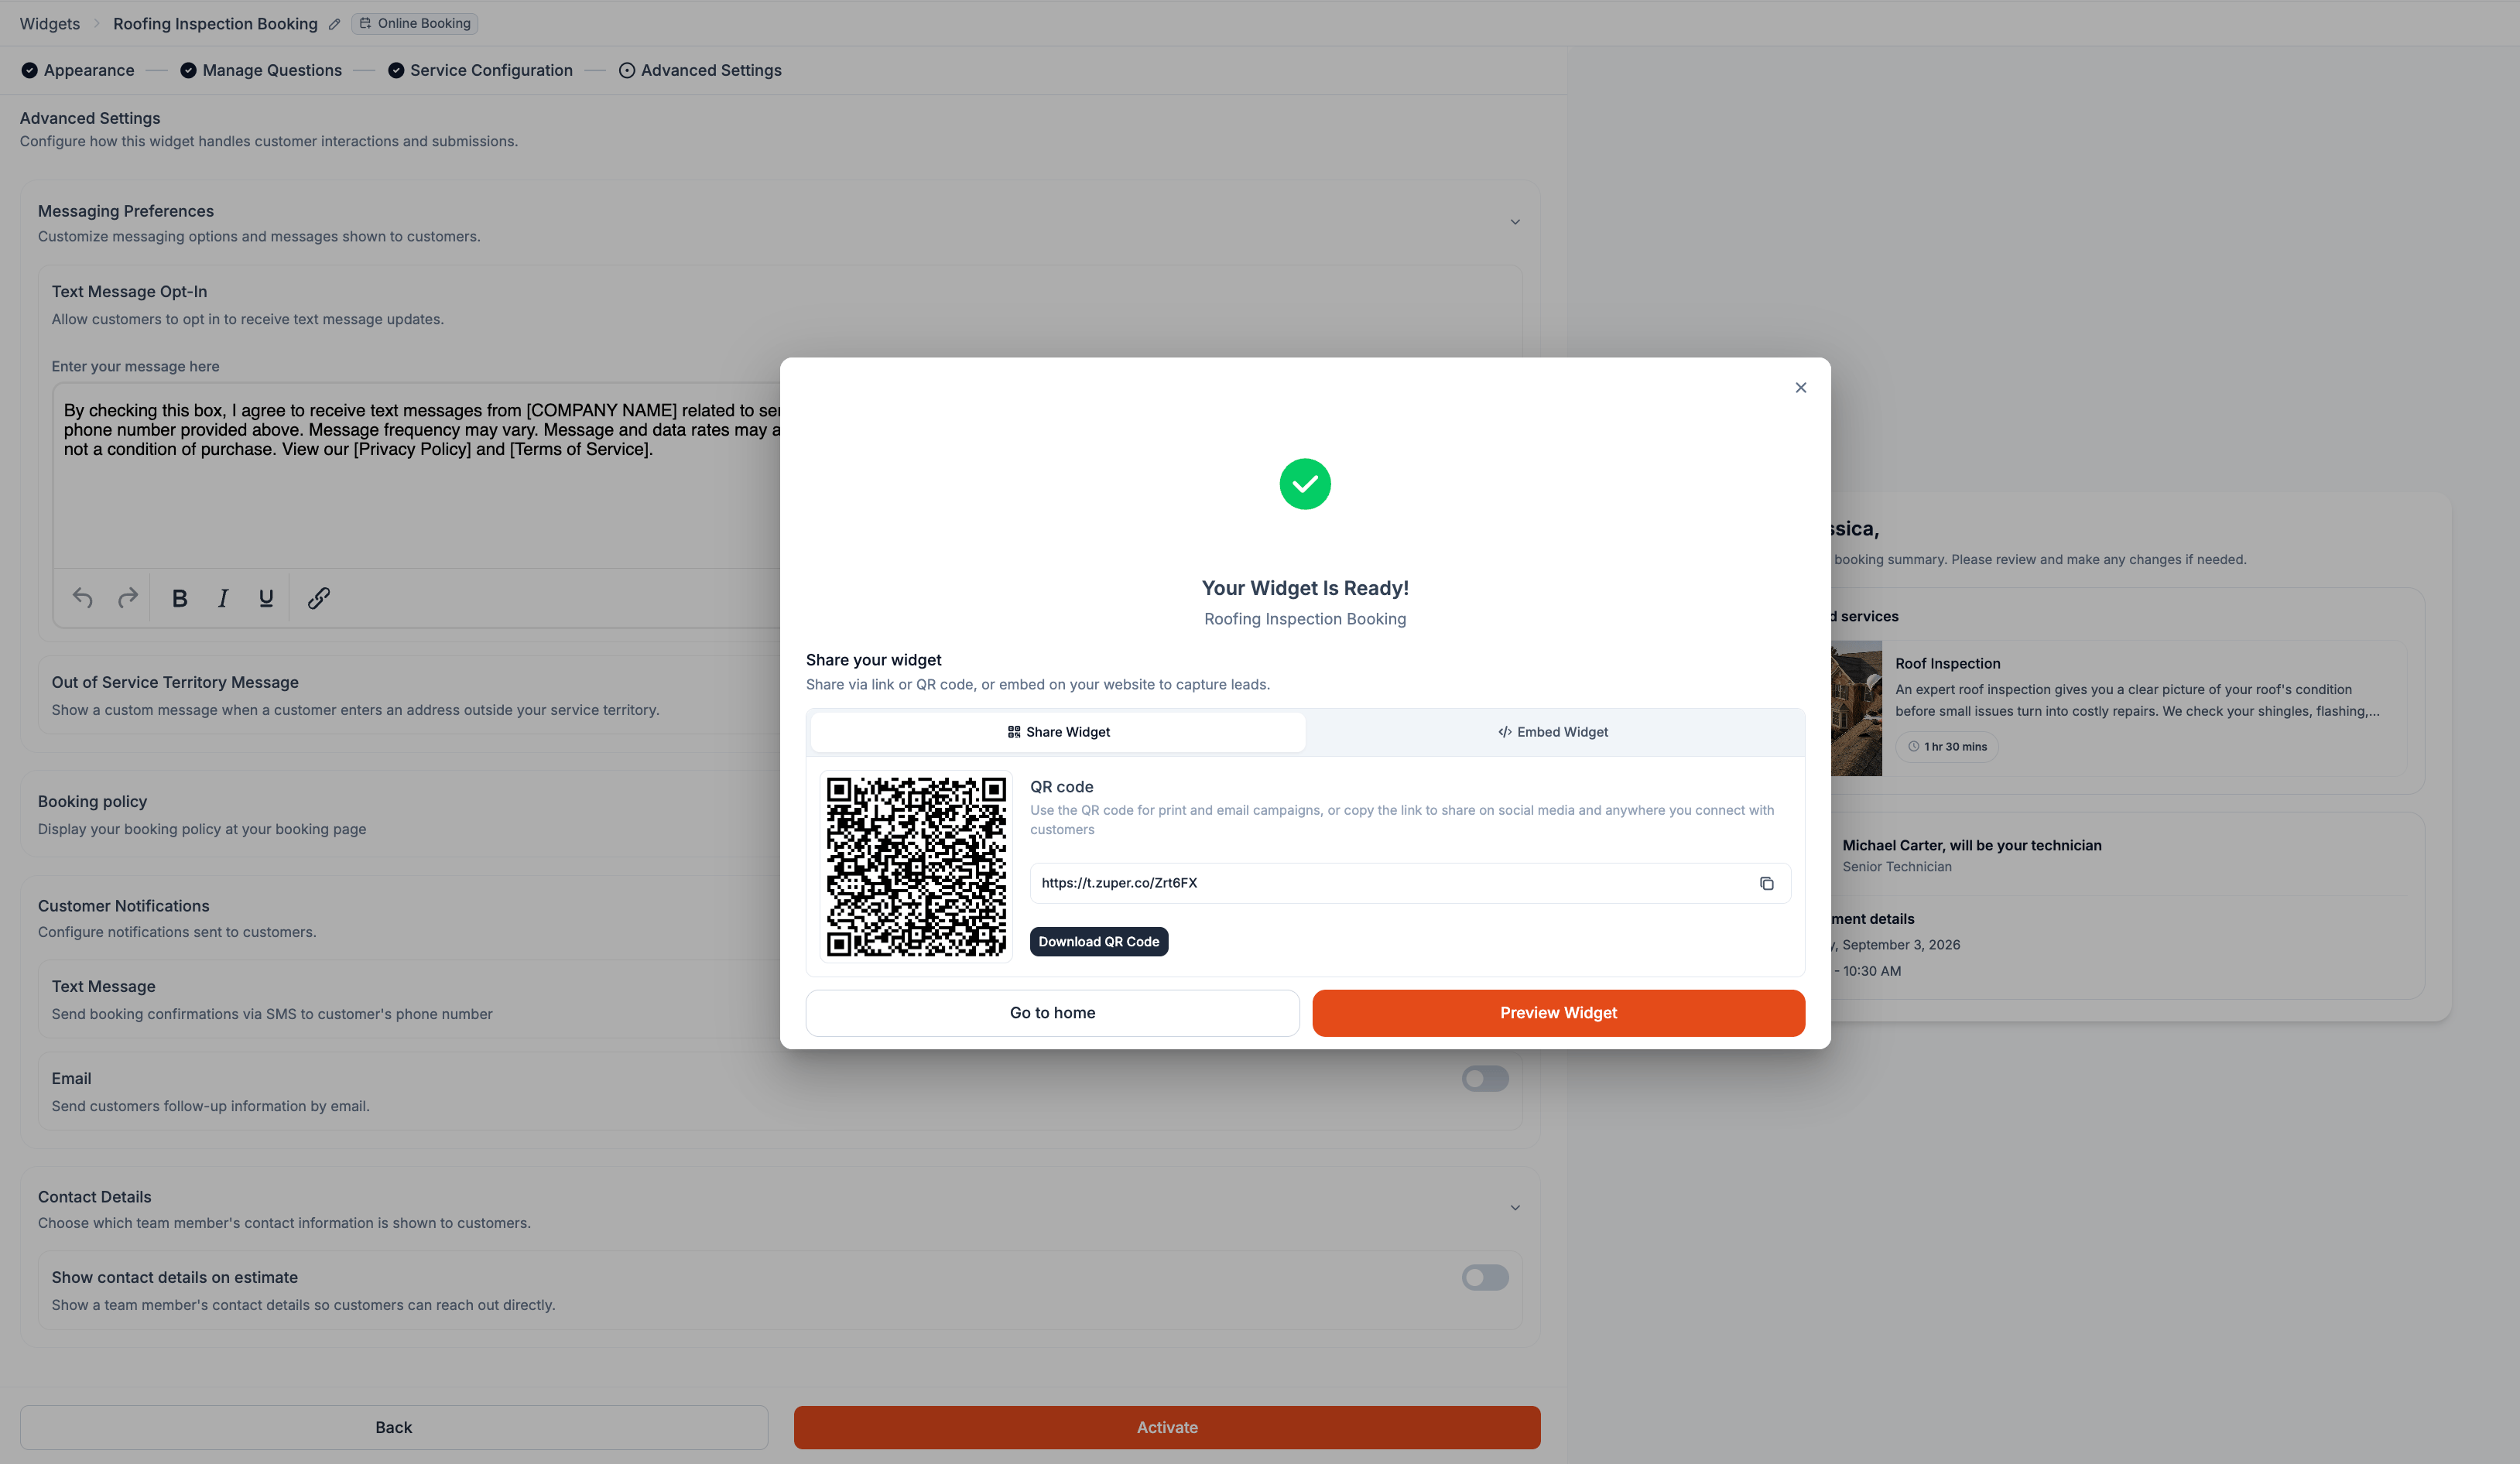
What happens after a homeowner books?
When a homeowner completes a booking, Zuper automatically creates a job using the service and job category configured for the widget. The booking is scheduled according to the homeowner’s selected date and time, or according to the scheduling rules you’ve configured when the homeowner selects only a date. The job then appears in Zuper for your team to manage, assign, and follow through your normal workflow.Frequently asked questions
Can homeowners book outside my working hours?
Can homeowners book outside my working hours?
Homeowners can open the widget at any time, but they can only select dates and times that meet the availability and booking rules configured for the service.
Can I temporarily stop taking bookings for one service?
Can I temporarily stop taking bookings for one service?
Yes. Turn off the service from the service list. The service is removed from the widget, while existing bookings remain unaffected.
Do homeowners see prices on an Online Booking widget?
Do homeowners see prices on an Online Booking widget?
If you enter a Starting At price for a service, the price is displayed on the service card. Leave the field blank if you don’t want to display a price.
What happens if a homeowner's address is outside my service area?
What happens if a homeowner's address is outside my service area?
If you configure an Out of Service Territory Message, the homeowner sees your custom message when their address is outside your service area.
Can I let homeowners choose their technician?
Can I let homeowners choose their technician?
Yes. When Customer picks a date & time slot is selected, turn on Allow customers to choose a specific technician for their appointment. Homeowners can then choose from the technicians available for the selected appointment.