

Create a new widget
- Go to Settings from the left navigation menu.
- Under Customer Experience, select Website Widget.
- Select + New Widget at the top right.
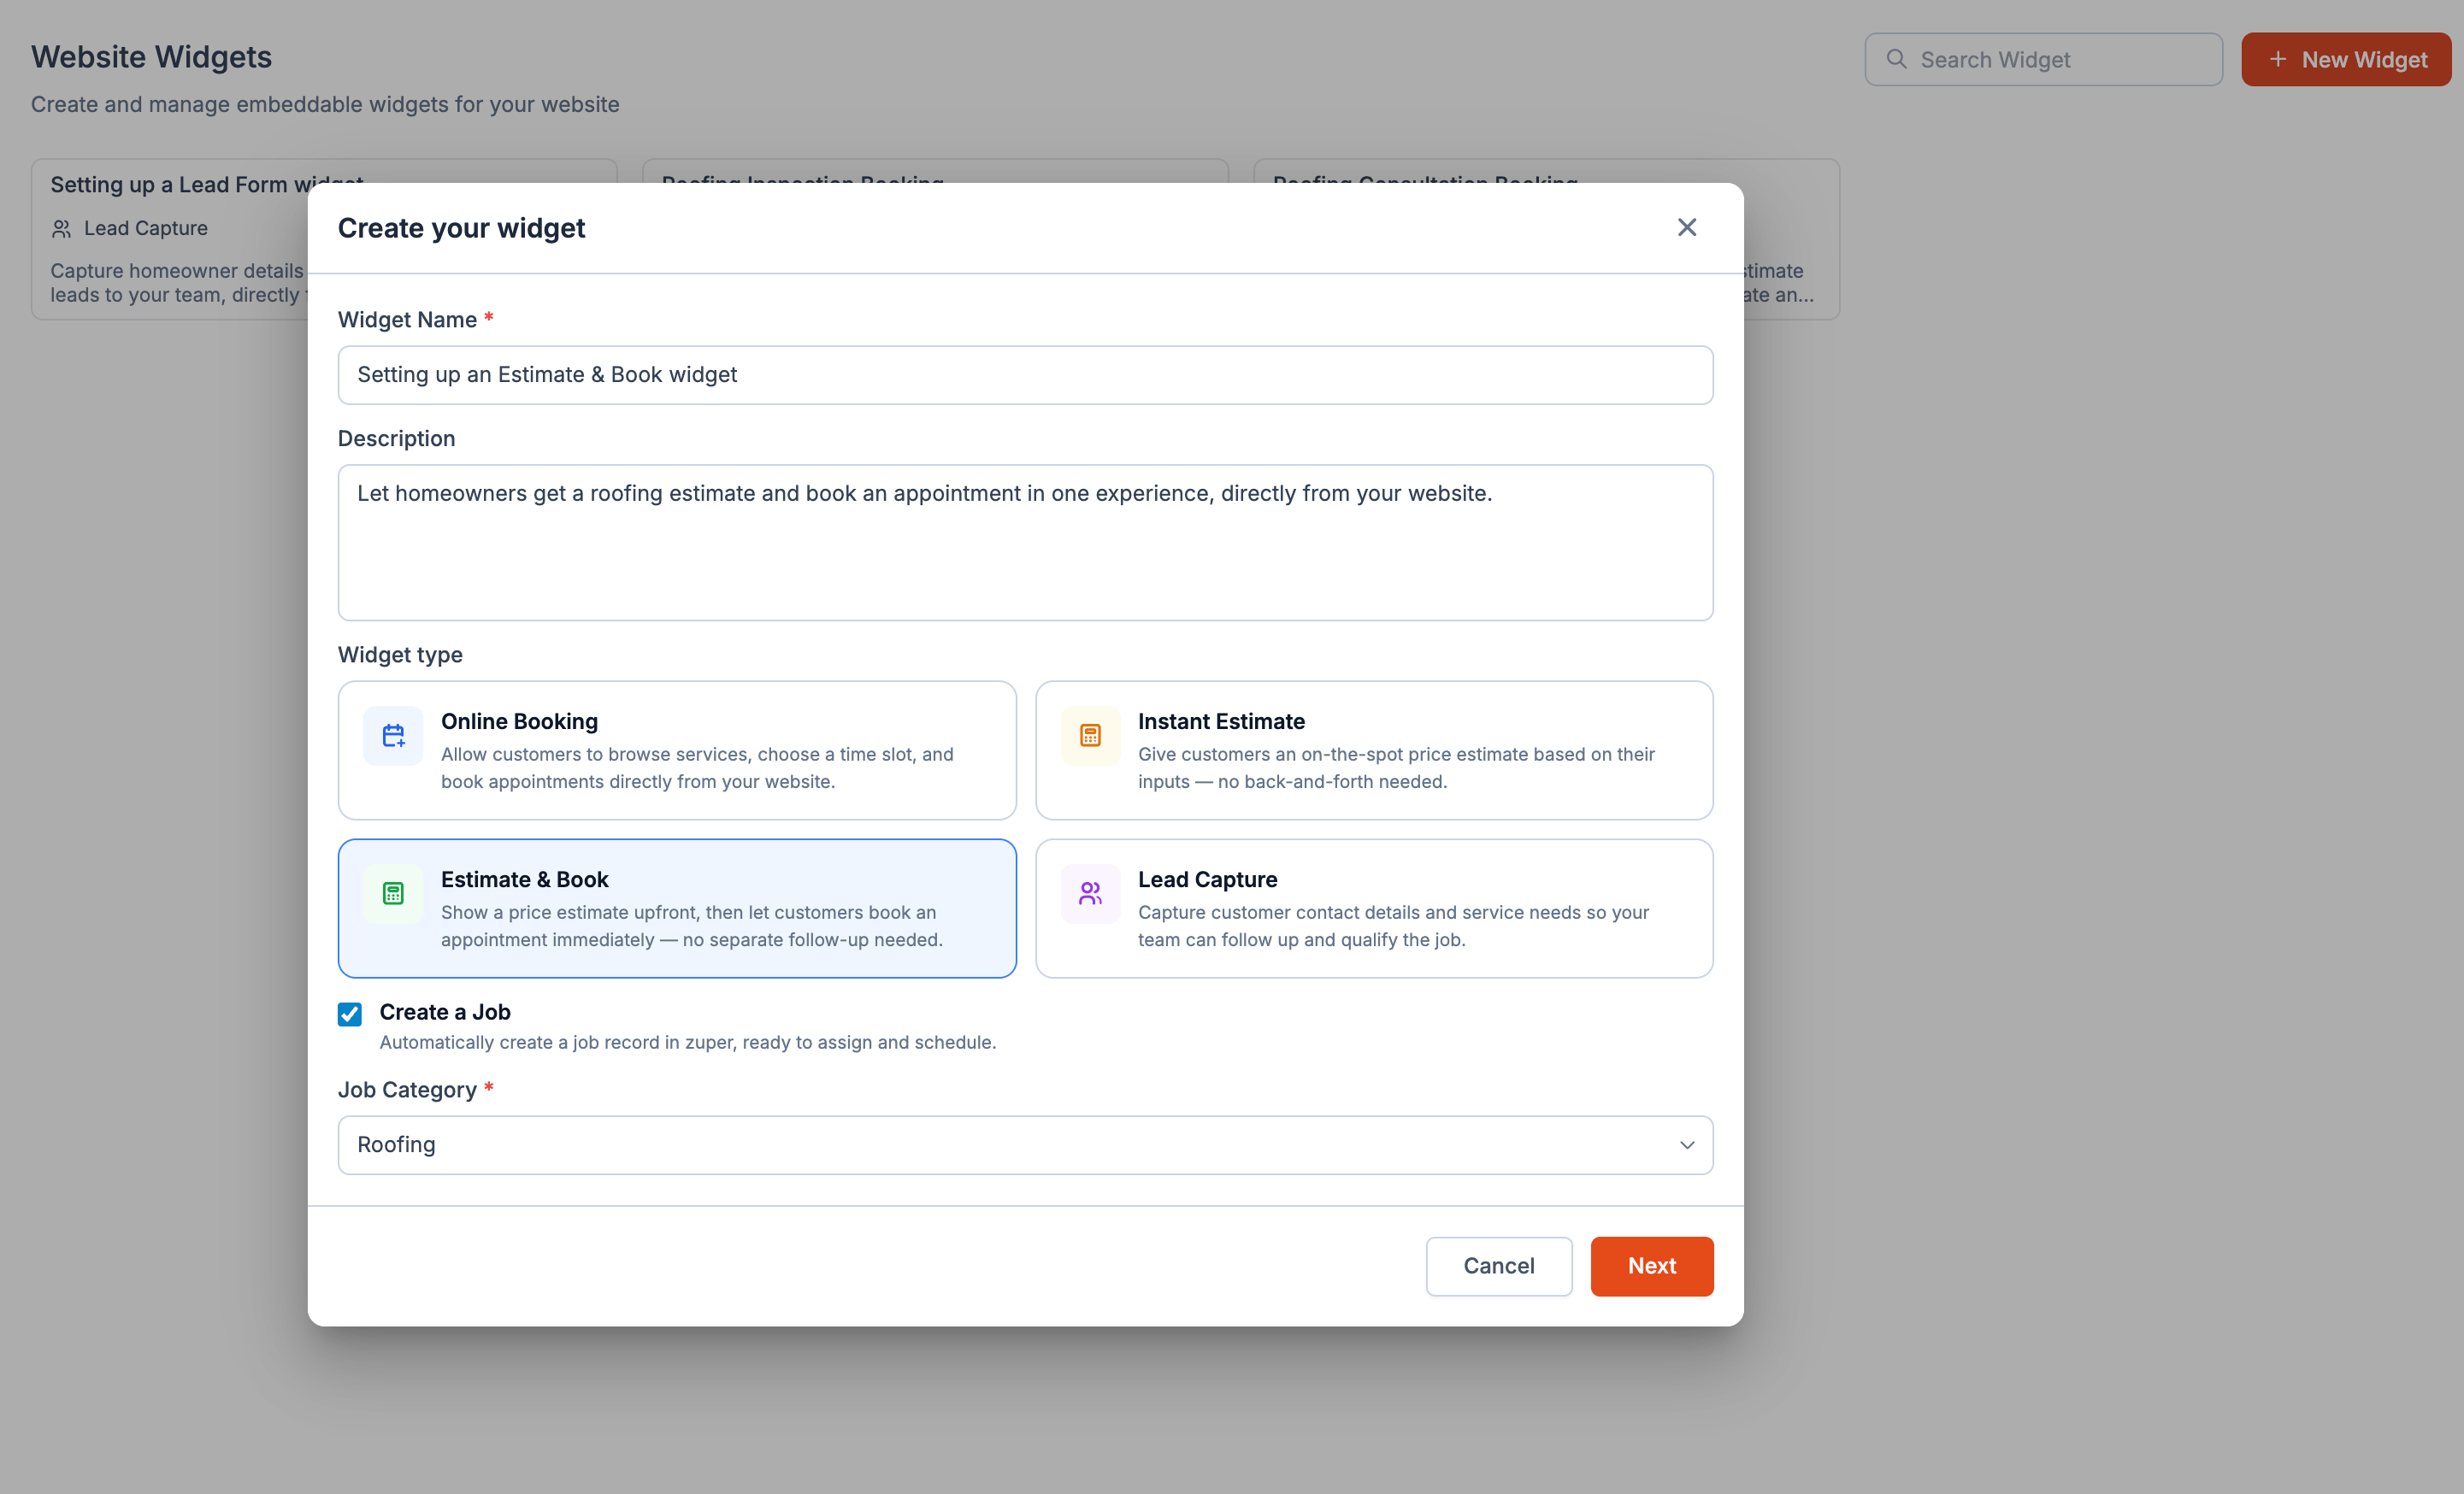
- Enter a Widget Name. This name is for internal reference and isn’t shown to homeowners. Zuper also uses the widget name as a tag to help identify and manage submissions created through the widget.
- Optionally, add a Description for your team’s reference.
- Select a Widget Type: Online Booking, Instant Estimate, Estimate & Book, or Lead Capture.
- Turn on Create a Job if you want Zuper to automatically create a job for every submission. When enabled, a Job Category field appears, allowing you to select the category assigned to those jobs. Leave this setting turned off if you prefer to review submissions before creating jobs manually.
- Select Next. Zuper saves the widget as a draft and opens the next step, Appearance.
What’s next
Continue through the setup to configure the experience for homeowners. The remaining steps depend on the widget type and may include appearance, questions, roofing options/service, and other settings. Choose the setup guide for your widget:Online Booking
Let homeowners choose a service and book directly.
Instant Estimate
Show or share pricing options before a homeowner calls.
Estimate & Book
Combine a price estimate with scheduling a visit.
Lead Capture
Collect project details for your team to follow up.
Frequently asked questions
How many widgets can I create?
How many widgets can I create?
You can create up to 20 widgets. Each widget is independent, with its own type, branding, questions, and settings, allowing you to tailor widgets for different customer journeys and campaigns.
Should I turn on Create a Job?
Should I turn on Create a Job?
Turn it on if you want every submission to become a job automatically, ready for your team to schedule without an extra step. Leave it off if you’d rather review each submission first, for example, to confirm scope or filter out low-quality leads, before it becomes a job.
Note: For Estimate & Book widgets, Zuper creates a job once a homeowner books a visit, regardless of this setting.
Will Zuper create a contact and property from a submission?
Will Zuper create a contact and property from a submission?
Yes. When a homeowner submits a response, Zuper checks your account for a matching contact and property. If a match already exists, Zuper links the submission to those existing records instead of creating duplicates. If no match exists, Zuper creates a new contact and property as a lead intake.