Navigation: Settings → Website Widget → Instant Estimate → + New Widget
Before you begin
A few things need to be in place in Zuper before you start. You do not need all of them, it depends on how you want the widget to work.- At least one job category is set up under Settings → Jobs: needed only if you want Zuper to automatically create a job each time a homeowner submits an estimate request.
- Financing providers and plans are set up under Settings → Quotes & Invoicing: needed only if you want to display financing options on the widget.
- An email template is set up under Settings → Email Templates: Zuper uses it to automatically send homeowners their estimate.
Create a new widget
Start by giving your widget a name. This is for your internal reference only; homeowners never see it. If you plan to run multiple widgets (for example, one for residential and one for commercial), pick names that make them easy to tell apart.- Go to Settings from the left navigation menu.
- Under Customer Experience, select Website Widget. The Website Widgets page opens.
- Select + New Widget at the top right of the page.
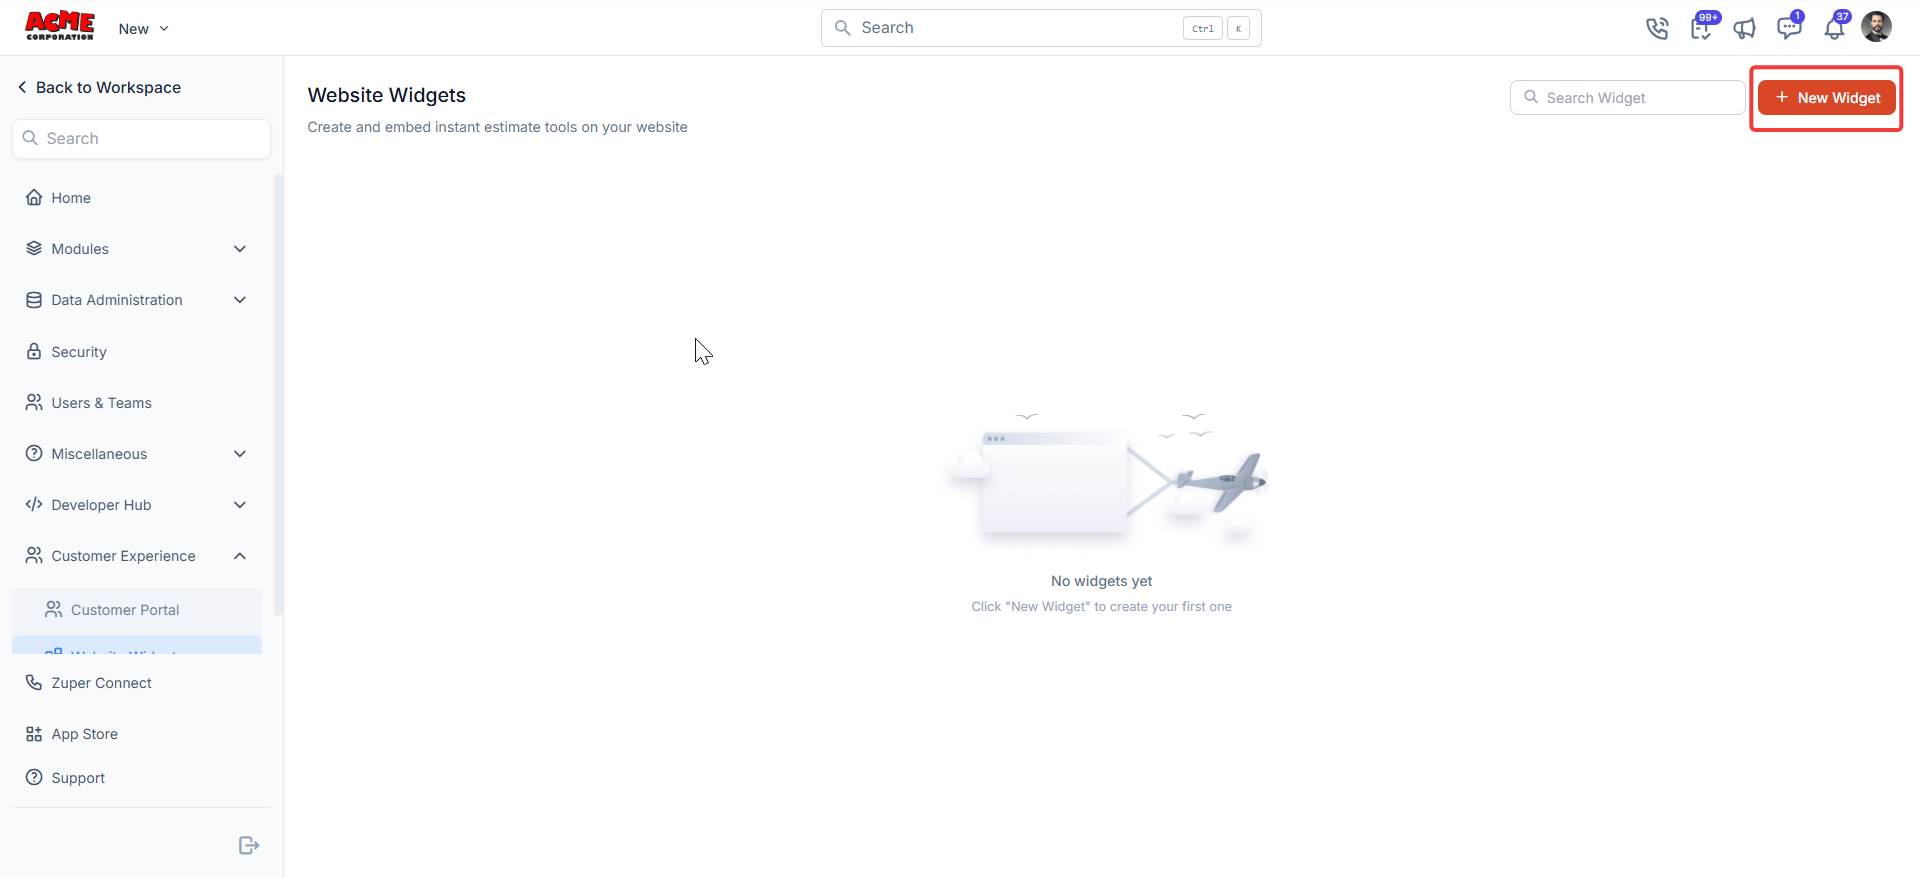
- The Create your widget modal appears.
- Enter a name in the Widget Name field.
- Optionally, enter a short description in the Description field.
- Select Next. Zuper saves the widget as a draft and opens the setup wizard at Appearance.
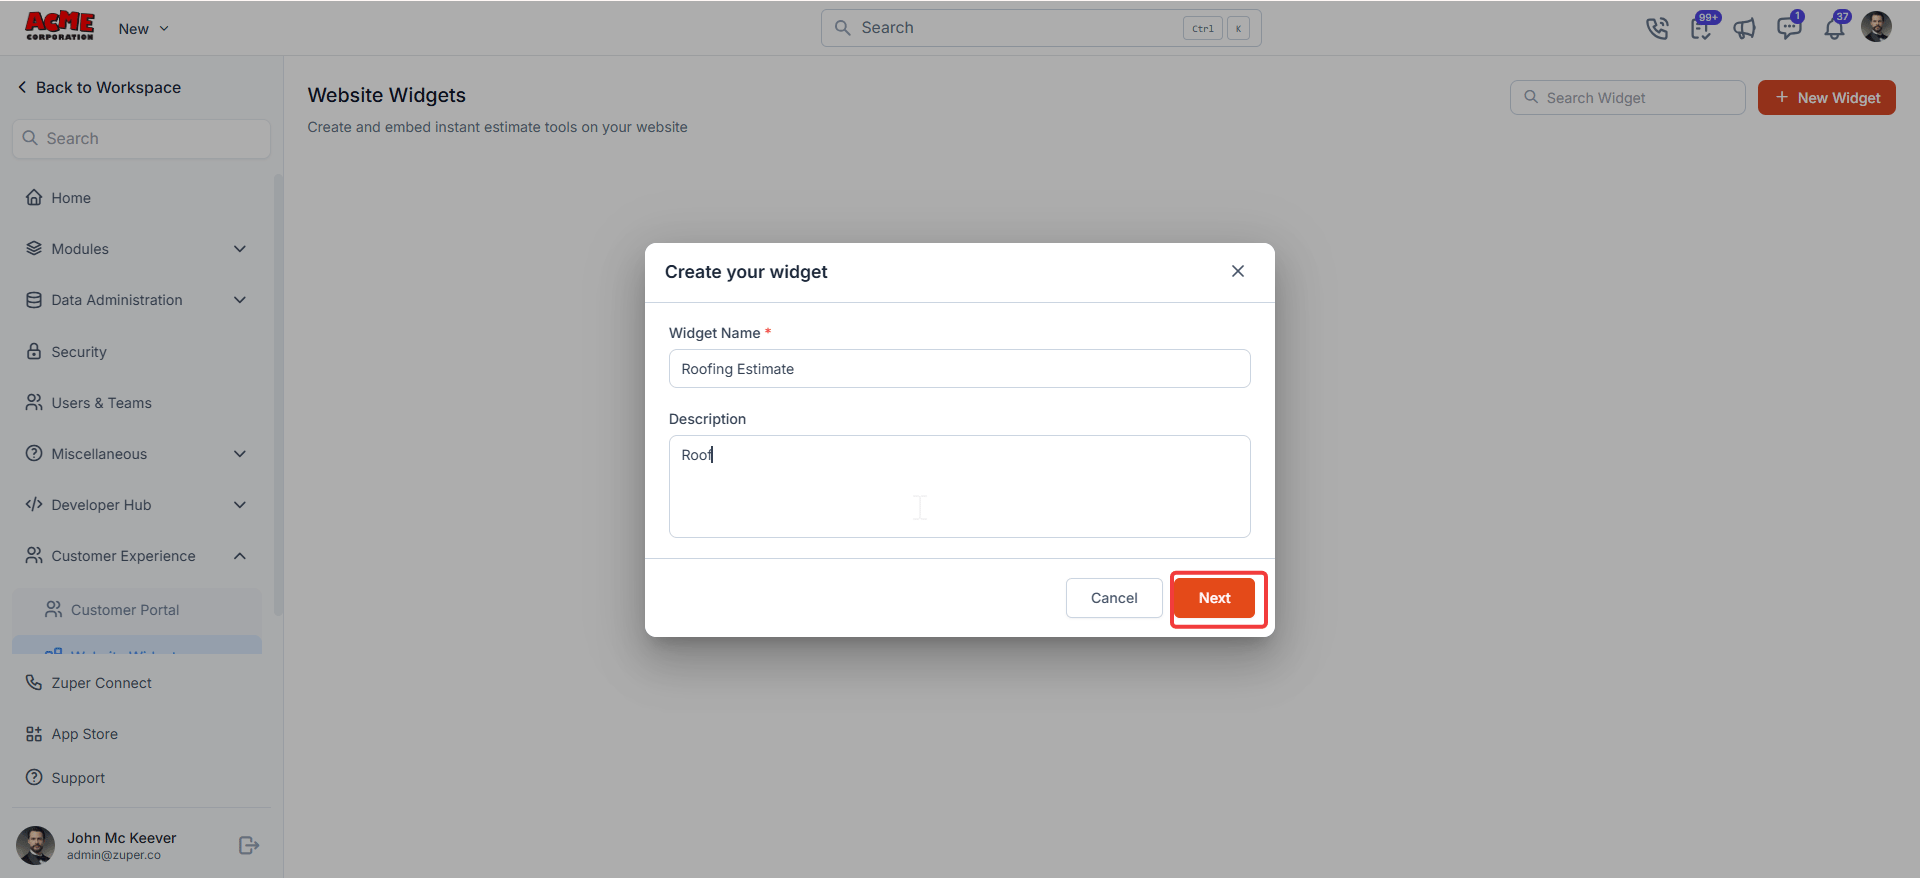
Note: The Widget Name field is required. Selecting Next without entering a name shows an inline error and prevents you from continuing.
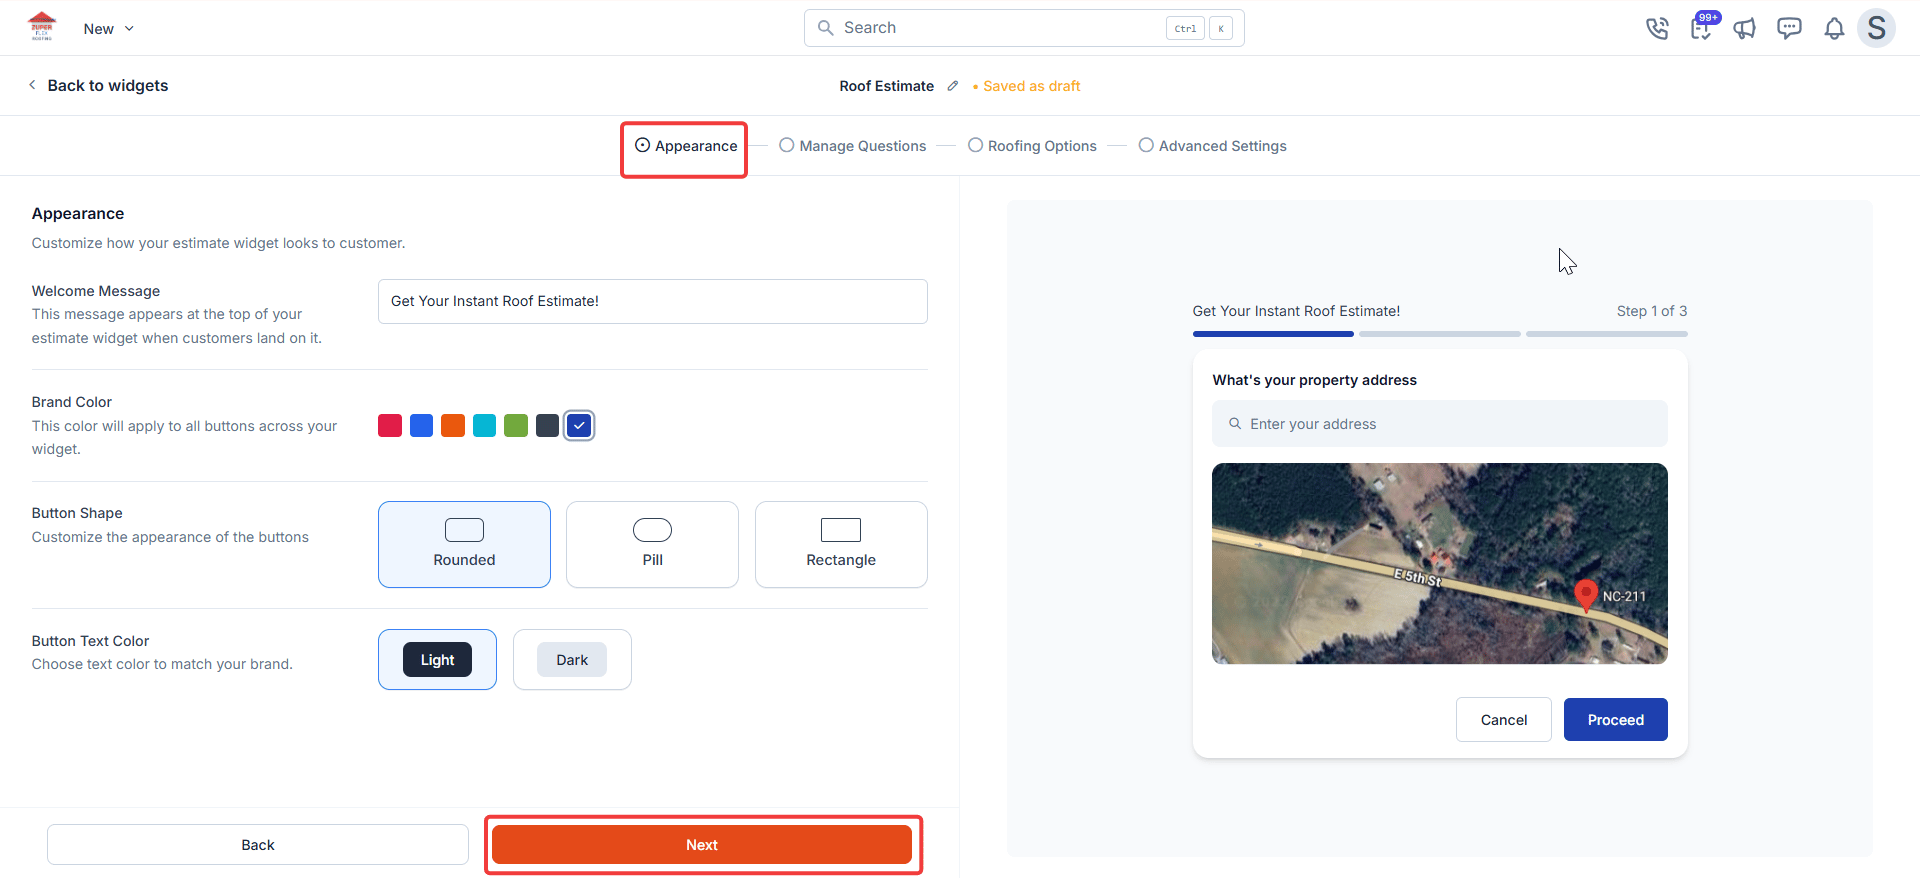
Appearance
The Appearance step controls how your widget looks to homeowners. A live preview on the right updates as you make each change.- Enter your headline in the Welcome Message field. This is the first thing homeowners see when they open your widget.
- Select your Brand Color. This applies to all buttons across the widget.
- Under Button Shape, select Rounded for soft corners, Pill for fully rounded ends, or Rectangle for sharp corners.
- Select your Button Text Color: Light for white text or Dark for black text.
- Review the live preview on the right to confirm the widget looks correct.
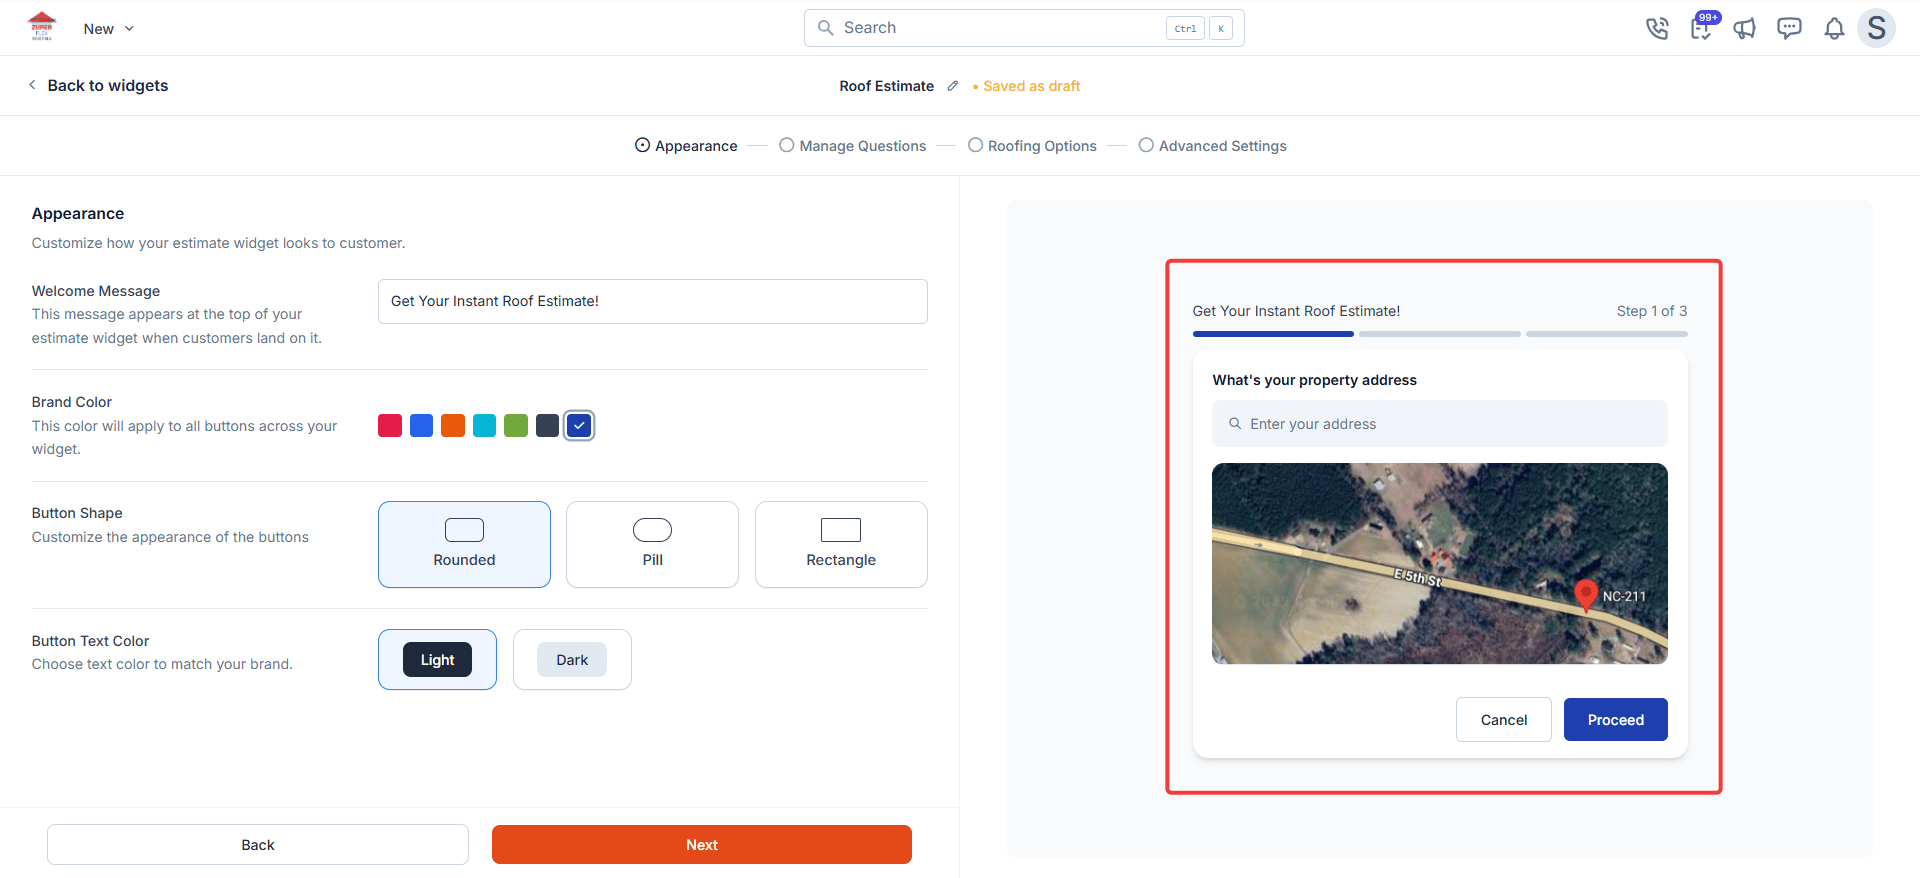
- Select Next to save and proceed to Manage Questions.
Manage questions
The Manage Questions step lets you control what homeowners are asked before they see their estimate. Their answers help Zuper calculate pricing and filter which roofing options to show.Default questions
Three questions are included by default and cannot be deleted or changed to a different type. You can rename the label text by selecting the pencil icon next to each question.- What’s your property address? : Zuper uses this address to calculate the approximate roof area for pricing. This is the foundation of every estimate.
- Where should we send your estimate? : Collects the homeowner’s first name, last name, email address, and phone number. Zuper saves this immediately, so even if a homeowner drops off before completing the estimate, you still have their contact details.
- Select your roof type: Captures the roof slope. Zuper uses this answer to apply steep-slope pricing automatically if you have configured it.

Note: You cannot delete or change the type of a default question. You can only rename the label text.
Custom questions
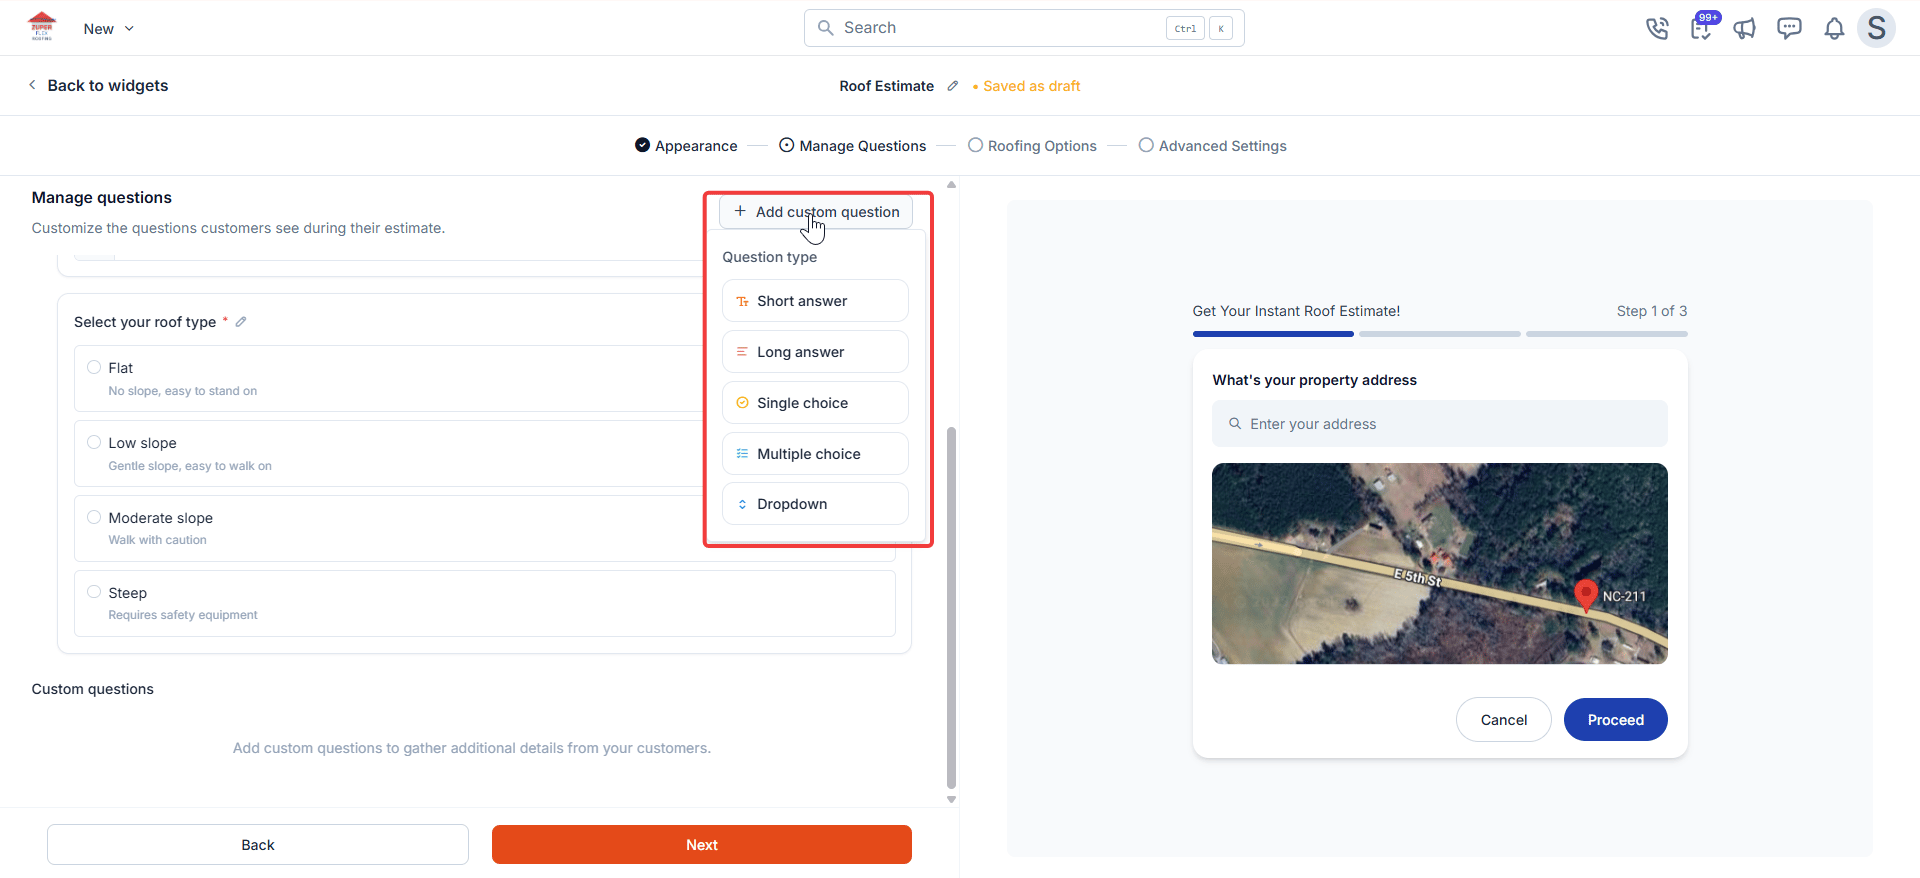
Add custom questions when you need information that affects which options you show or how you price the job. For example, a question about the type of service needed full replacement versus repair lets you use visibility conditions to show only the options relevant to that answer. Keep the list short; every extra question is another moment where a homeowner might drop off.- Select + Add custom question. A question-type menu appears.
- Select a question type:
- Short answer: A single line of free text
- Long answer: A multiline text field
- Single choice: Homeowner selects one option from a list
- Multiple choice: Homeowner selects one or more options
- Dropdown: Homeowner selects one option from a dropdown list
- Enter the question label text.
- For Single choice, Multiple choice, and Dropdown types, add at least two answer options.
- Select Save question to add it to the list.
Note: To make a custom question mandatory, turn on the Required toggle before saving. Homeowners cannot proceed past that step without answering a required question.
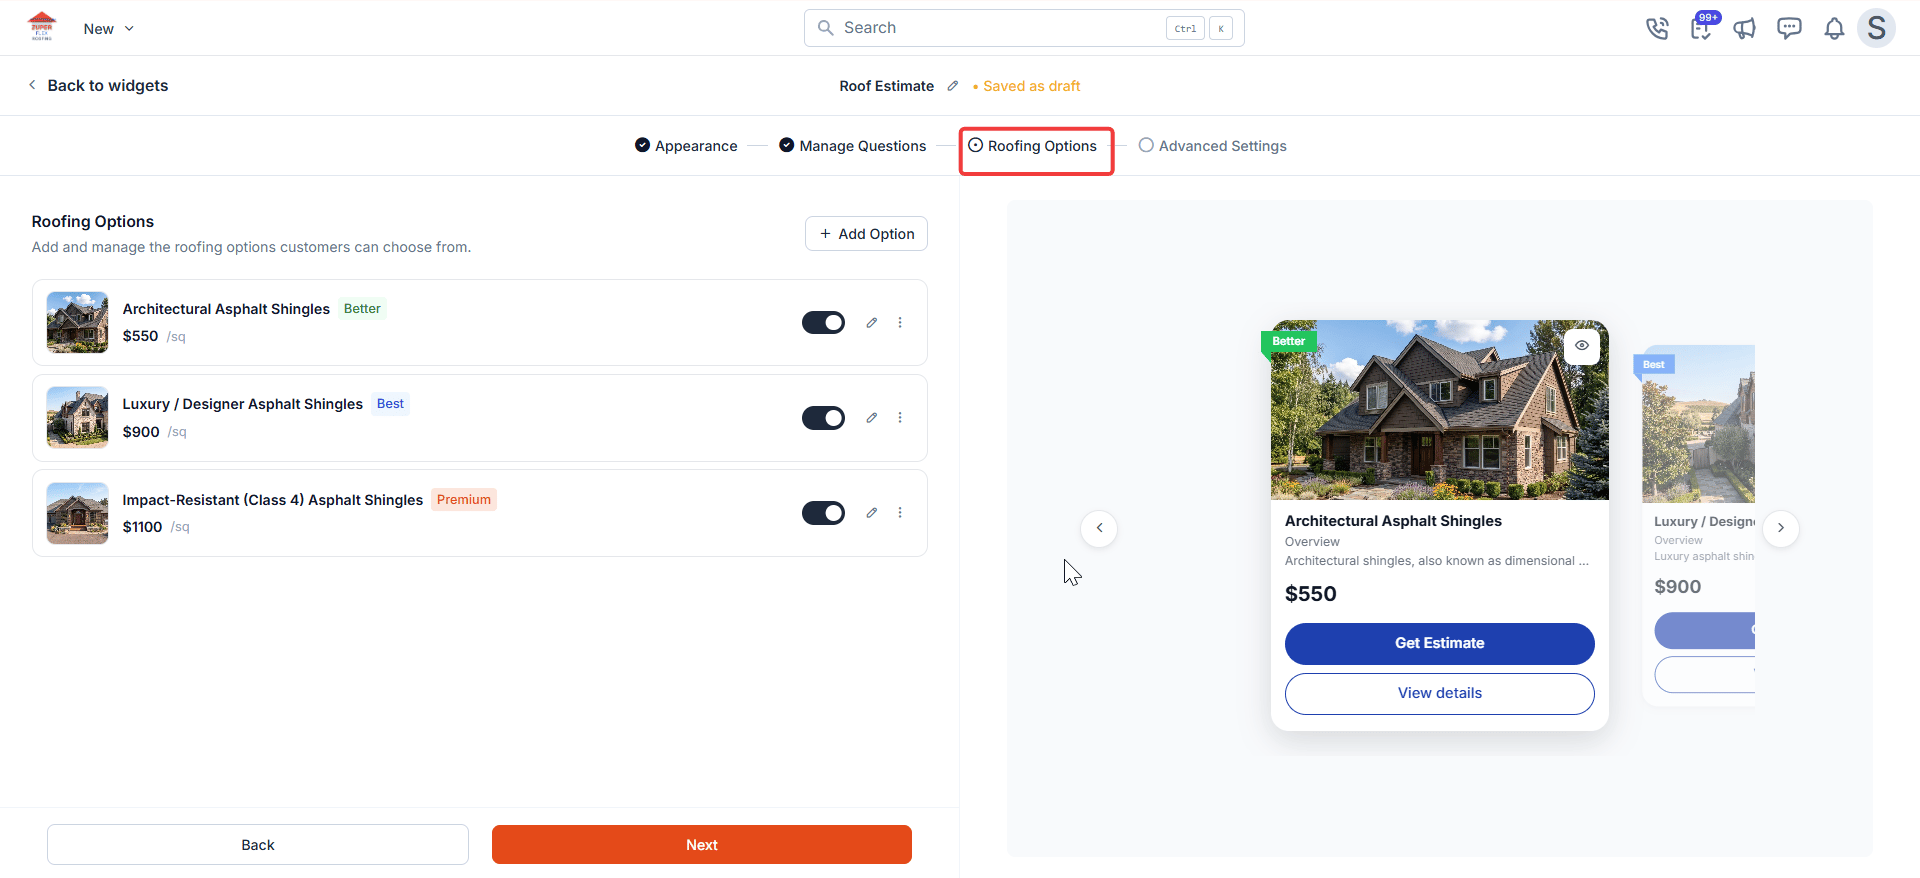
Note: Default options are placeholders. If you activate without updating them, homeowners see placeholder names and pricing on the results page. Select the pencil icon on any default option tile to update it before you activate.
- Enter a name in the Name field. This field is required. Use the product name your team uses.
- Select a label from the Label dropdown. Choose from Good, Better, Best, or enter a custom label. The label appears as a badge on the homeowner estimate card and helps homeowners compare options at a glance.
- Optionally, select Upload images to add a reference photo. The first image you upload becomes the thumbnail on the homeowner estimate card.
Pricing
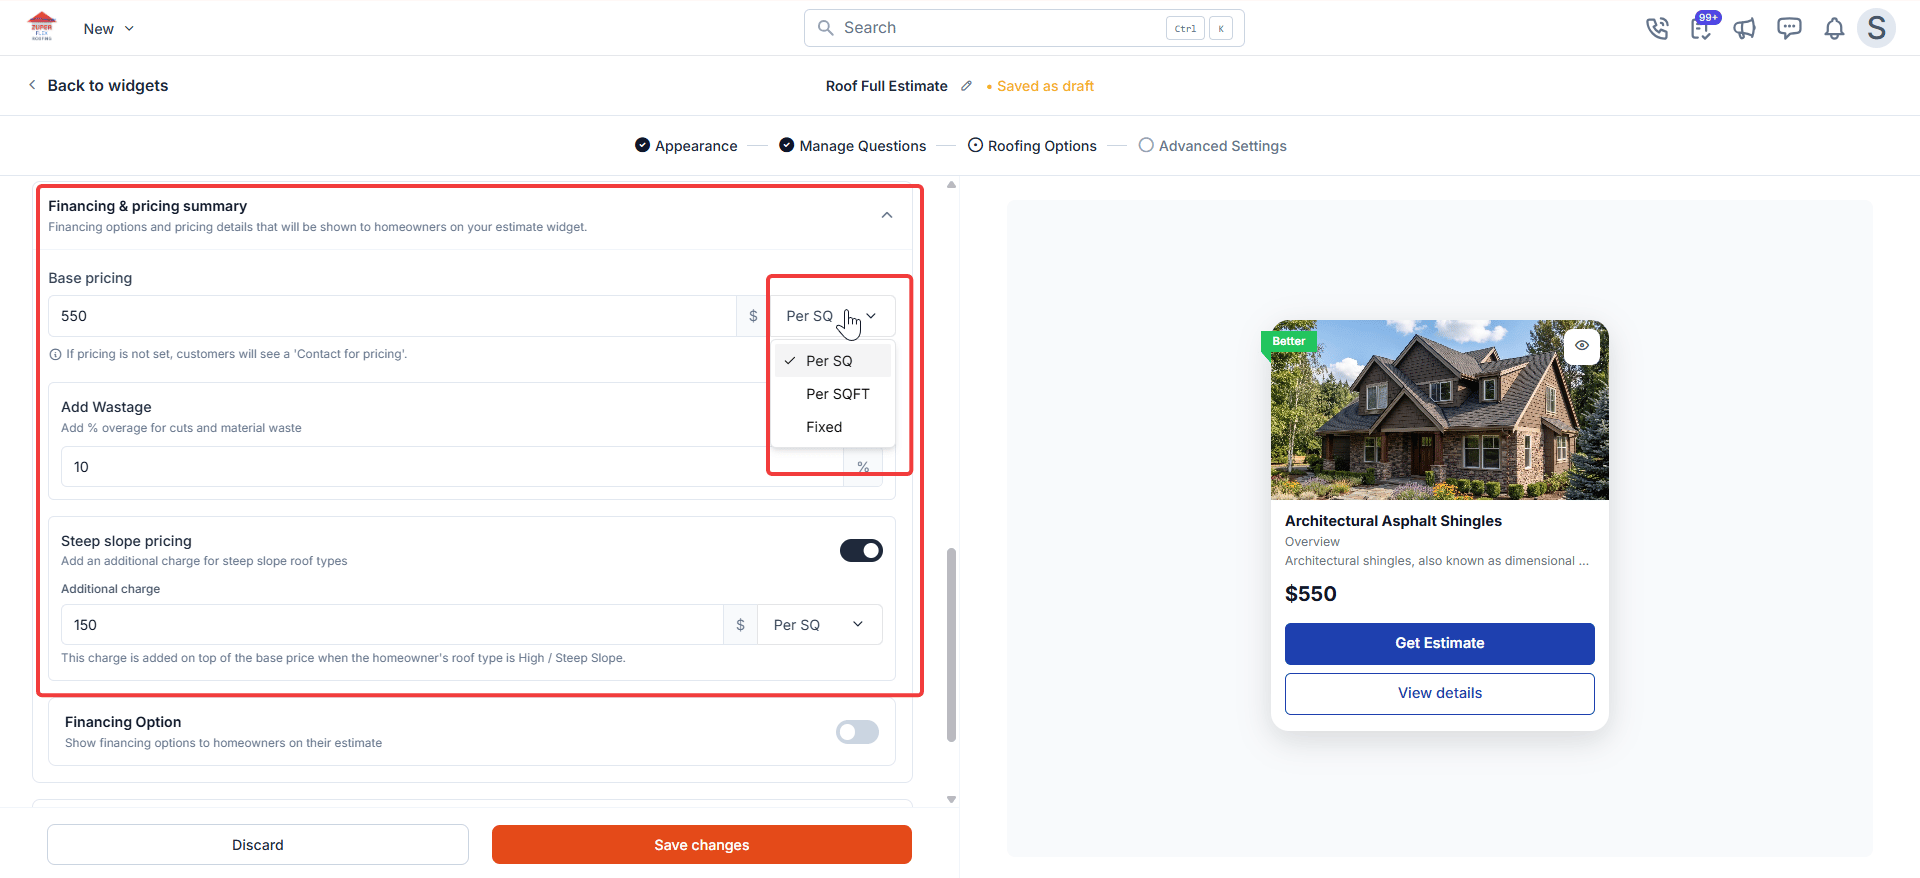
Pricing tells Zuper how to calculate the cost for this option based on the homeowner’s roof size. Choose the model that matches how your business prices jobs.- Enter a value in the Base pricing field.
- Select a pricing model from the dropdown:
| Model | When to use it |
|---|---|
| Per SQ | You price by the roofing square (100 sq ft). Zuper multiplies your rate by the calculated roof area. |
| Per SQFT | You price by the square foot. Zuper multiplies your rate by the calculated roof area. |
| Fixed | You charge a flat price regardless of roof size. Selecting Fixed disables the Add Wastage and Steep slope pricing fields automatically. |
| Percentage | A percentage price regardless of roof size. This does not apply to base pricing. |
- To account for material waste, enter a percentage in the Add Wastage field. Zuper adds this to the calculated roof area before applying your unit price. A wastage factor of 10–15% is typical for most roofing jobs.
Note: Leaving the base price empty affects what homeowners see on the results page:
- If Hide options without pricing is off: The option still appears, but shows a Contact for pricing button instead of a price.
- If Hide options without pricing is on: The option is removed from the results page entirely.
Steep slope pricing
If your pricing changes for steep roofs, turn on the Steep slope pricing toggle and enter the additional amount. Zuper applies this surcharge automatically when a homeowner selects a steep roof type; you do not need a separate option for steep roofs. Select a unit of measure for the surcharge from the dropdown:| Unit of measure | How it works |
|---|---|
| Per SQ | Additional charge per roofing square, added on top of the base price. |
| Per SQFT | Additional charge per square foot, added on top of the base price. |
| Fixed | A flat dollar amount added on top of the base price, regardless of roof size. |
| Percentage | A percentage of the calculated base price, added on top of it. |
Financing
If you offer financing, selecting a plan here shows homeowners a financing summary on their estimate card: For example, Pay as low as $350/mo with financing. It gives homeowners a way to think about affordability before they speak to you.- Under Financing, select one or more providers and plans from the list.
Note: The financing options available here depend on how your account is configured:
- Standard accounts: Financing providers and plans set up under Settings → Quotes & Invoicing appear here.
- CPQ-enabled accounts: Custom financing options configured in your CPQ settings appear here instead. See Configuring financing options for setup instructions.

Details and specifications
Use the rich text editor to add product highlights, what is included, warranty and guarantee details, and any other specifications that matter. This is what homeowners read when they select View details on your option card. Your chance to tell the full story of the product and why it’s worth choosing.Visibility conditions
Visibility conditions let you show or hide an option based on how a homeowner answers your questions. Used well, they make the results page feel tailored to the homeowner rather than a generic list. Turn on the Visibility conditions toggle, then define your rules. Each rule takes the form: Show this option when [question] [operator] [value], or Hide this option when [question] [operator] [value]. Use AND when all conditions must be true, or OR when any one condition is enough.
Manage existing options
Each option tile shows a toggle to activate or deactivate it without deleting it. Select the pencil icon to edit an option, or the three-dot menu to duplicate or delete it. The live preview on the right updates as you make changes. Select any card in the preview carousel to see the full detail view.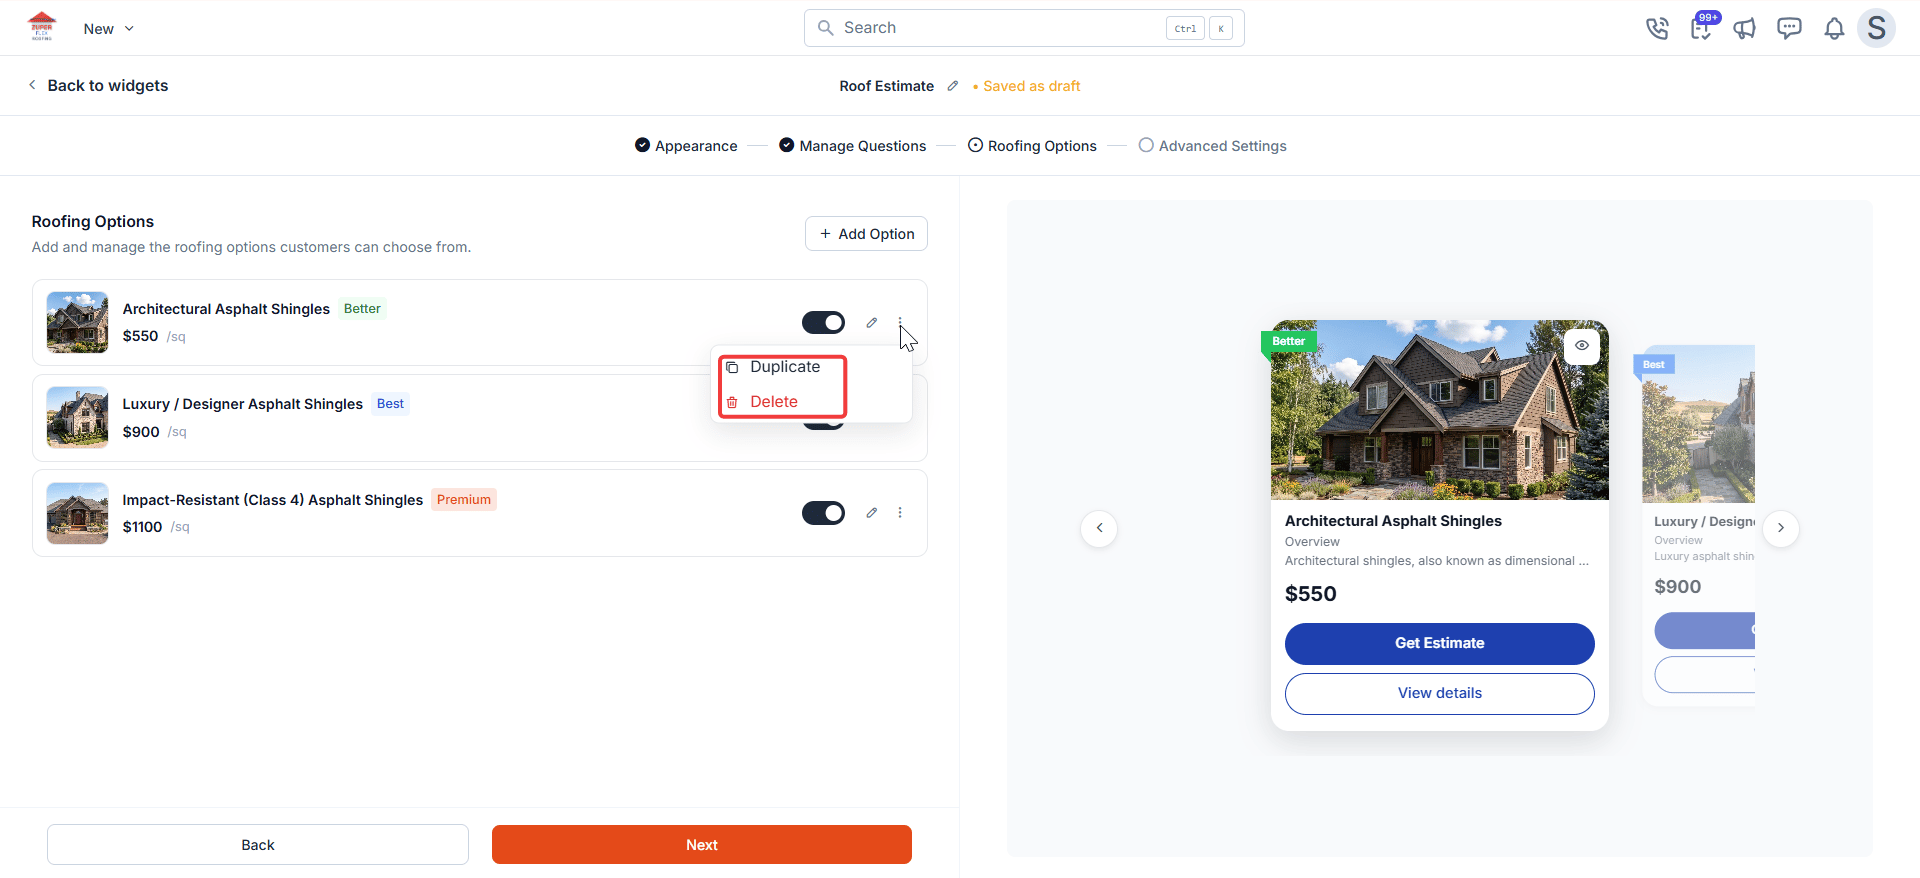
Advanced settings
Advanced Settings is where you decide how prices appear to homeowners, what Zuper creates when someone submits, and how your team gets notified. Most of these are one-time choices you set once and rarely revisit.Price display
By default, the widget shows homeowners an exact calculated price. To show a range instead to - account for variables your team discovers on-site, turn on Price Range and set your buffers.- Lower range (−%): How far below the calculated price the range starts. For example, a 10% lower buffer on a 9,000.
- Upper range (+%): How far above the calculated price the range ends. For example, a 20% upper buffer on a 12,000.

Lead handling
This setting controls what lands in your Zuper account the moment a homeowner submits; before your team has seen the lead.- Select Create a Contact if you want to review leads manually before they enter your pipeline. Zuper captures the homeowner’s details. Nothing else is created until your team acts on it.
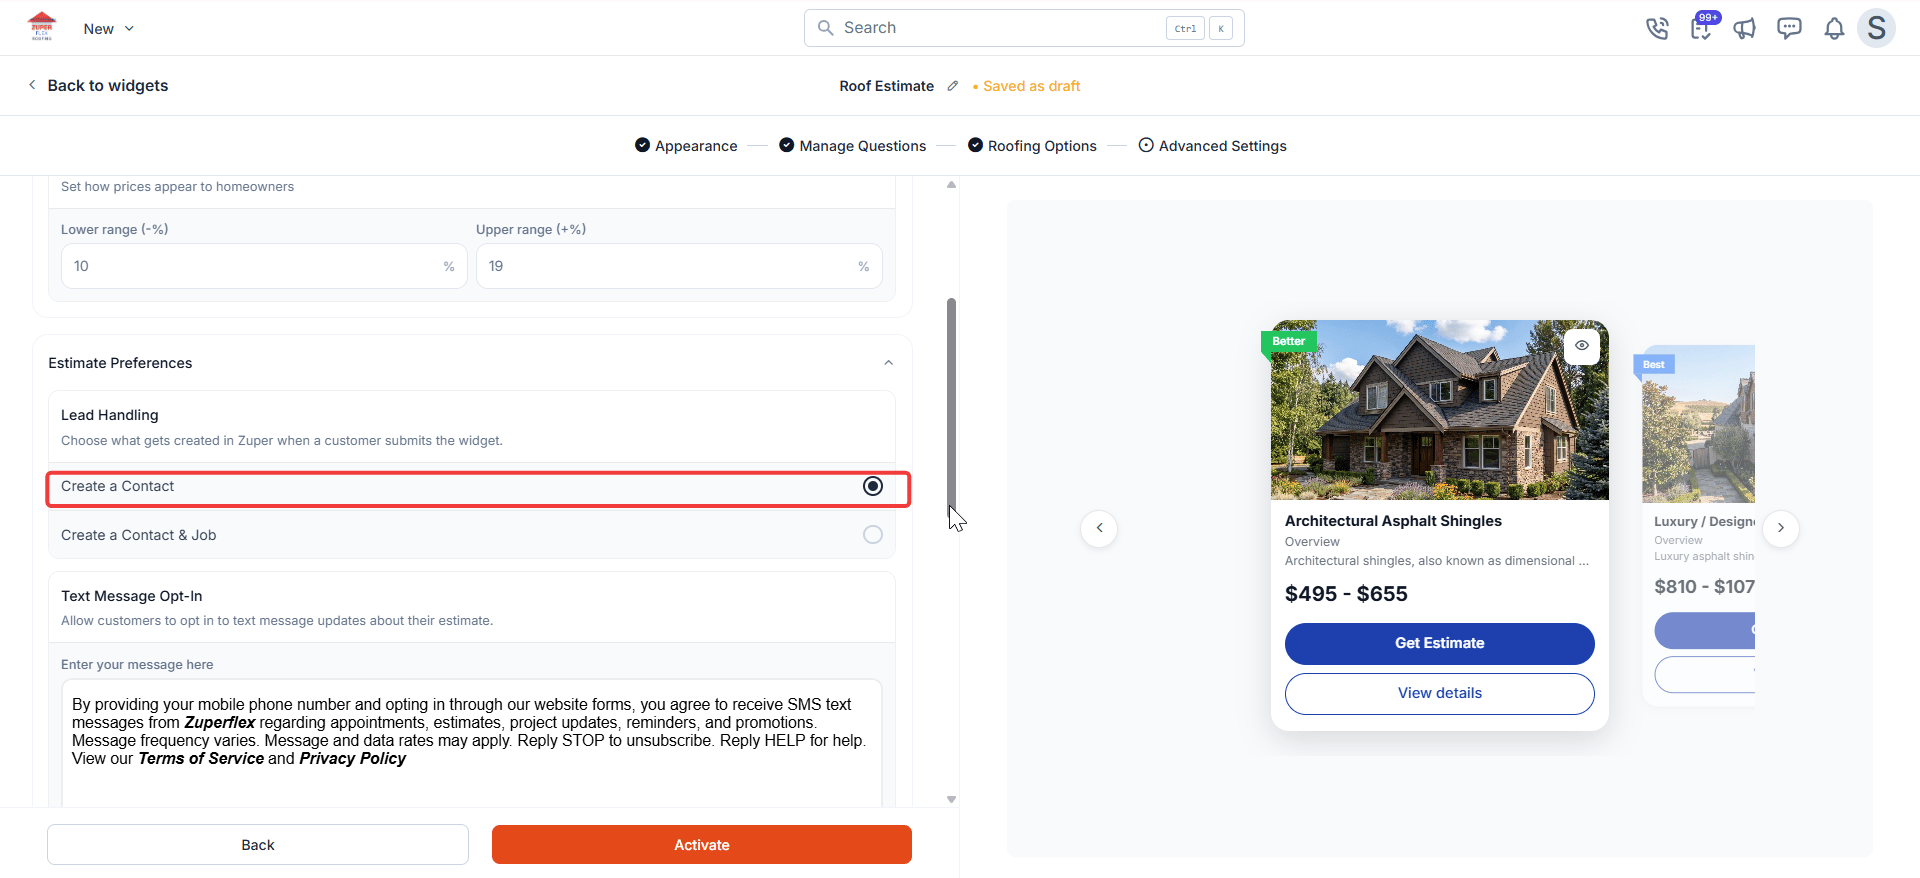
- Select Create a Contact & Job if you want leads to flow straight into your pipeline automatically. Zuper creates the contact, opens a job under the category you choose, and your team can act on it immediately. A Job Category field appears: Select the category the job should be filed under.

Note: Zuper applies deduplication logic on submission. If a contact with the same phone number already exists in your account, Zuper uses the existing record rather than creating a duplicate.
Text message opt-in
If you want homeowners to opt in to text message updates, turn on Text Message Opt-In. A consent message field appears where you write the opt-in text homeowners see at the contact details step. Checking it is optional, homeowners can submit without selecting it, but having it in place means you can legally send SMS follow-ups to those who do opt in.
Out-of-service territory message
If your business only covers certain areas, turn on Out of Service Territory Message and select your service territories from the Include Locations field. Homeowners outside your coverage area see your custom message instead of an estimate. This prevents leads you cannot convert and sets honest expectations upfront.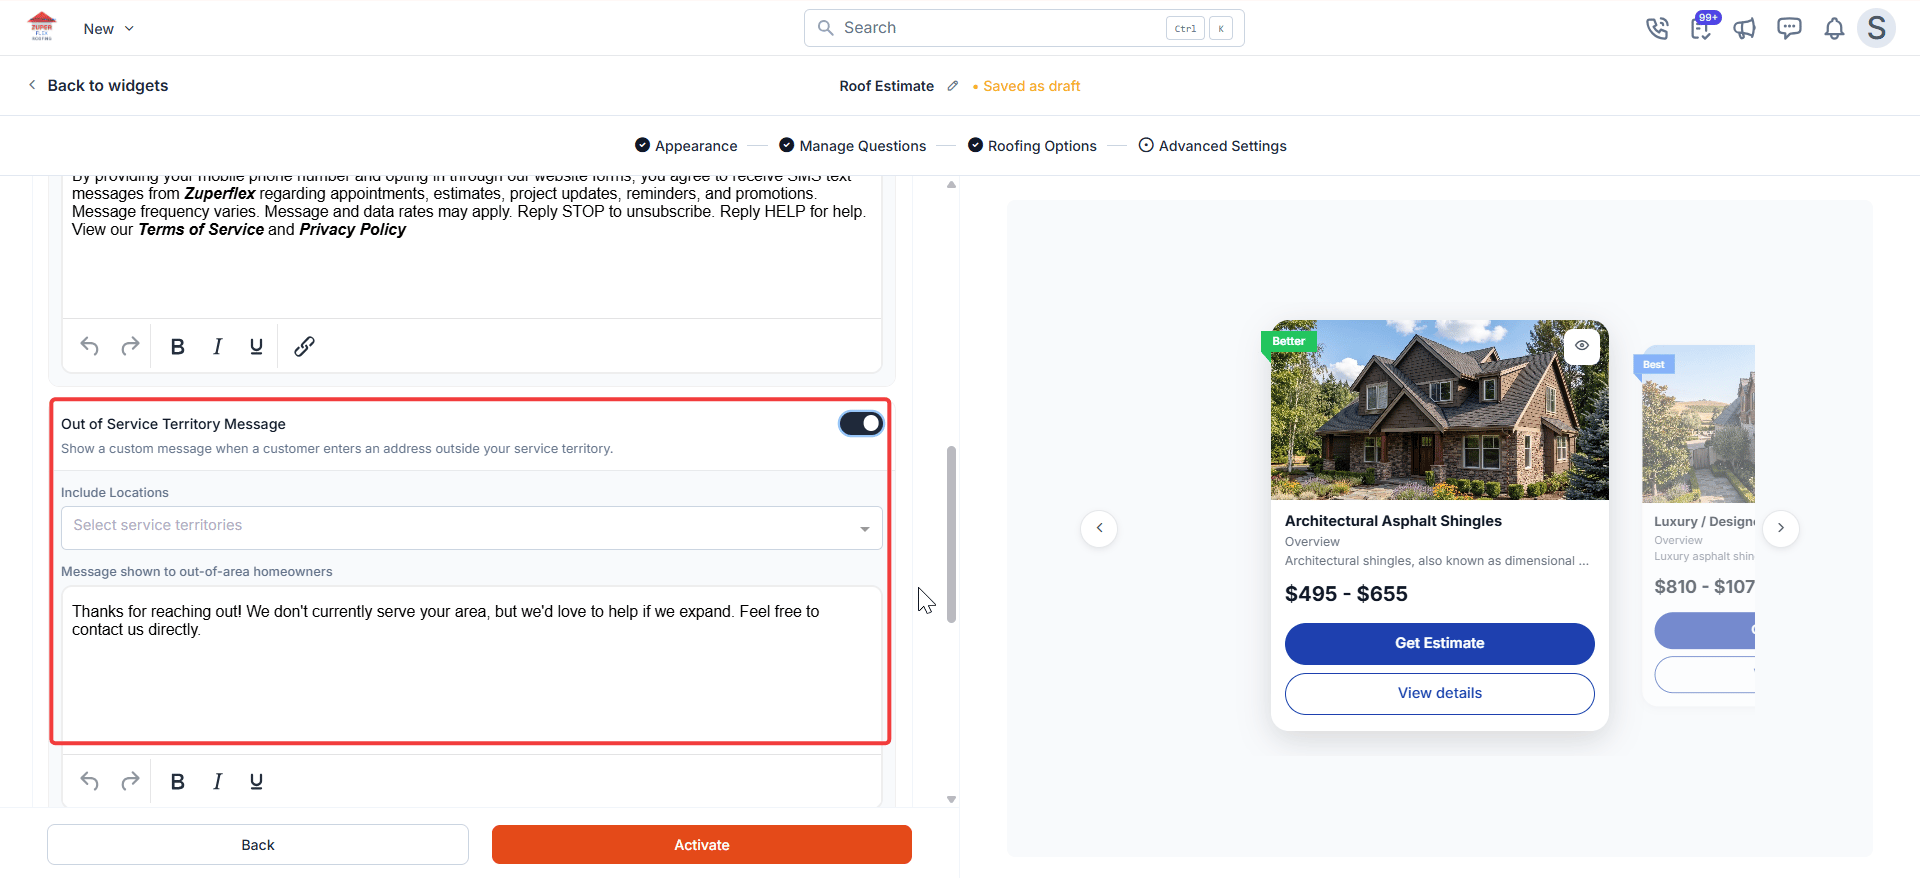
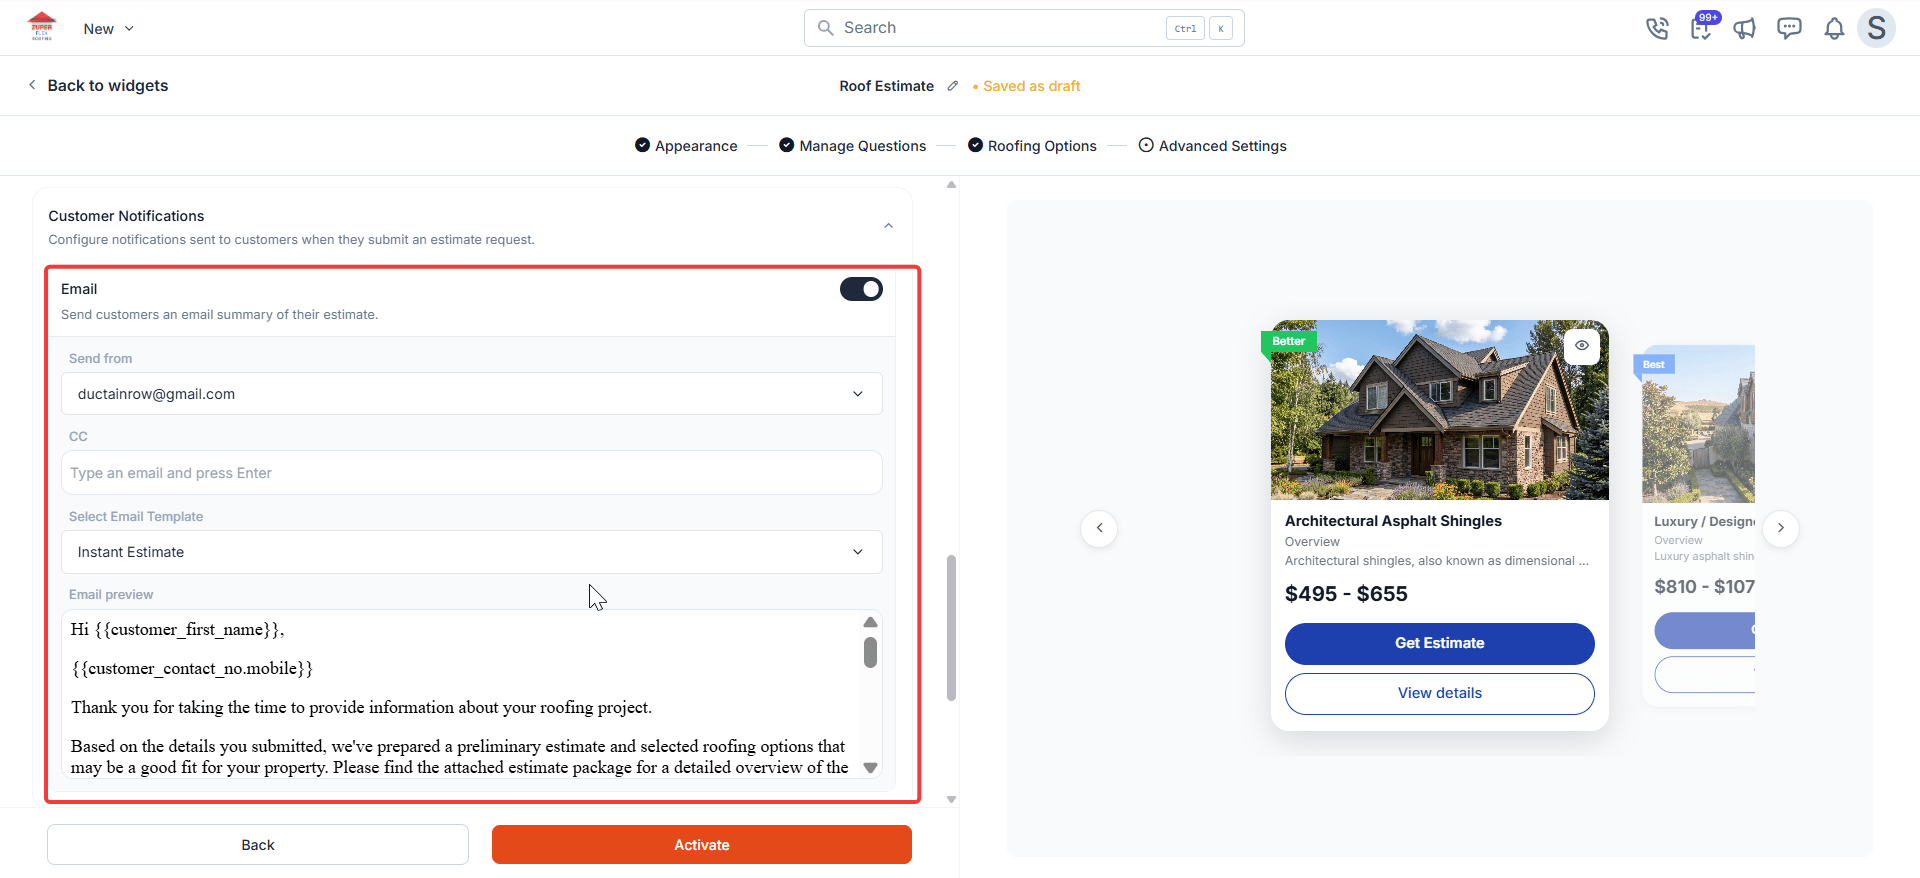
Customer notifications
Set up how Zuper communicates with homeowners and your team after every submission.- From the Send From dropdown, select the email address homeowners see as the sender when they receive their estimate. Only addresses configured under Settings → Notifications appear here.
- In the CC field, enter any internal email addresses that should receive a copy of every homeowner estimate email.
- From the Select Email Template dropdown, choose the template Zuper sends to homeowners after they submit. Select Email preview to review the template content before you activate.
Note: If your account uses a custom SMTP configuration, estimate emails are sent through your own mail server instead of Zuper’s default. The Send From address must be verified in your SMTP settings before it appears here. See Configuring SMTP for outbound email for setup instructions.
Contact details
Turn on Show contact details on estimate to display a team member’s name, photo, phone number, and email on the homeowner results page. The email address and phone number can be modified. Homeowners can reach out directly with questions before selecting an option.- Select the team member from the list.

If the selected team member is later removed from Zuper, the first active user in your account appears as a fallback on the homeowner results page. No action is needed on the job record.
Activate your widget
Before you go live, take a moment to preview the widget as a homeowner would see it. It is much easier to spot something that does not look right now than after you have shared the link.
- Review all settings across the four steps. Use the step indicators at the top to go back and make changes at any time.
- Select Activate at the bottom of the page. A confirmation modal appears showing:
- The public widget URL
- A QR code you can download as a PNG
- An embed code (Script or iFrame) you can copy and paste onto your website
- Select Preview Widget to open the live widget in your browser. Check it on desktop and on your phone, most homeowners will find the widget on mobile.
- Select Go to home to return to the Instant Estimate listing page.
Note: Your widget is now live. Any homeowner who visits the link, scans the QR code, or finds the embed on your website can complete an estimate request immediately.
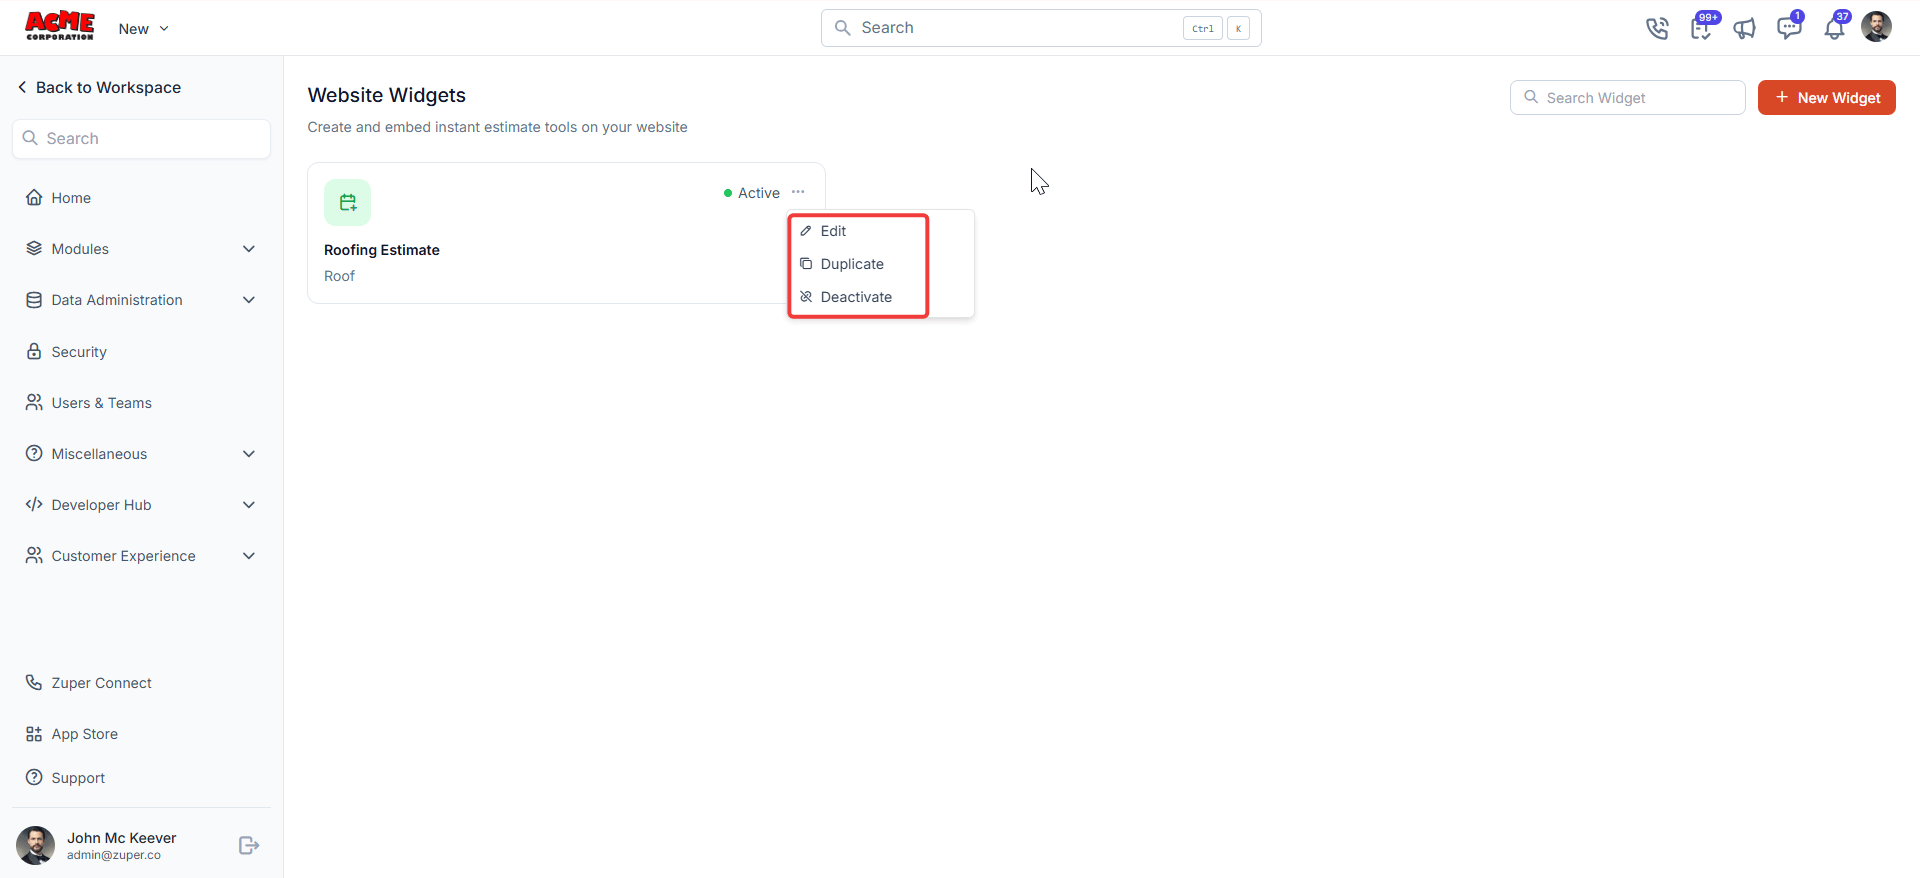
Edit an activated widget
You can edit an activated widget at any time without taking it offline. Changes do not go live until you re-activate.- Go to Settings → Instant Estimate.
- Select the three-dot menu on the widget card and select Edit.
- Make your changes across any step of the wizard.
- Select Activate to push the updated version live.
Note: Until you re-activate, homeowners continue to see the previously activated version of the widget. Unpublished changes are not visible to homeowners.
FAQs
How long does setup take?
How long does setup take?
For most contractors, the first widget takes 15 to 30 minutes. Appearance and questions are quick. Roofing options take the most time because you are entering your actual products and pricing. Once you have done one widget, duplicating and adjusting it for a second takes a fraction of the time.
Can I duplicate an existing widget instead of building one from scratch?
Can I duplicate an existing widget instead of building one from scratch?
Yes. On the Instant Estimate listing page, select the three-dot menu on any widget card and select Duplicate. Zuper creates a copy in Draft status, preserving all settings. Open the duplicate, make your changes, and activate when ready.
Can I edit the label text on the default questions?
Can I edit the label text on the default questions?
Yes. Select the pencil icon next to any default question to edit the label text inline. You cannot change the question type or delete a default question, but you can rename it to match your terminology — for example, changing “Select your roof type” to “What type of roof do you currently have?”
Can I have more than one widget, and do they share settings?
Can I have more than one widget, and do they share settings?
How do I embed the widget on my website?
How do I embed the widget on my website?
After activating, open the widget detail page and select the Share tab, then select Embed code. You see two tabs: Script and iFrame.Paste the Script snippet before the closing
</body> tag on any page where you want the widget to appear. Paste the iFrame anywhere in the page body — this works with most website builders, including WordPress, Wix, and Squarespace, without extra configuration.If you need help placing the code, contact your web developer or the support team for your website platform.What happens to homeowner submissions if I deactivate a widget?
What happens to homeowner submissions if I deactivate a widget?
Deactivating a widget takes it offline immediately. Homeowners who visit the link see a message that the widget is unavailable. Your existing records from previous submissions are not affected.If the issue continues, contact support@zuper.co.