> ## Documentation Index
> Fetch the complete documentation index at: https://docs.zuper.co/llms.txt
> Use this file to discover all available pages before exploring further.
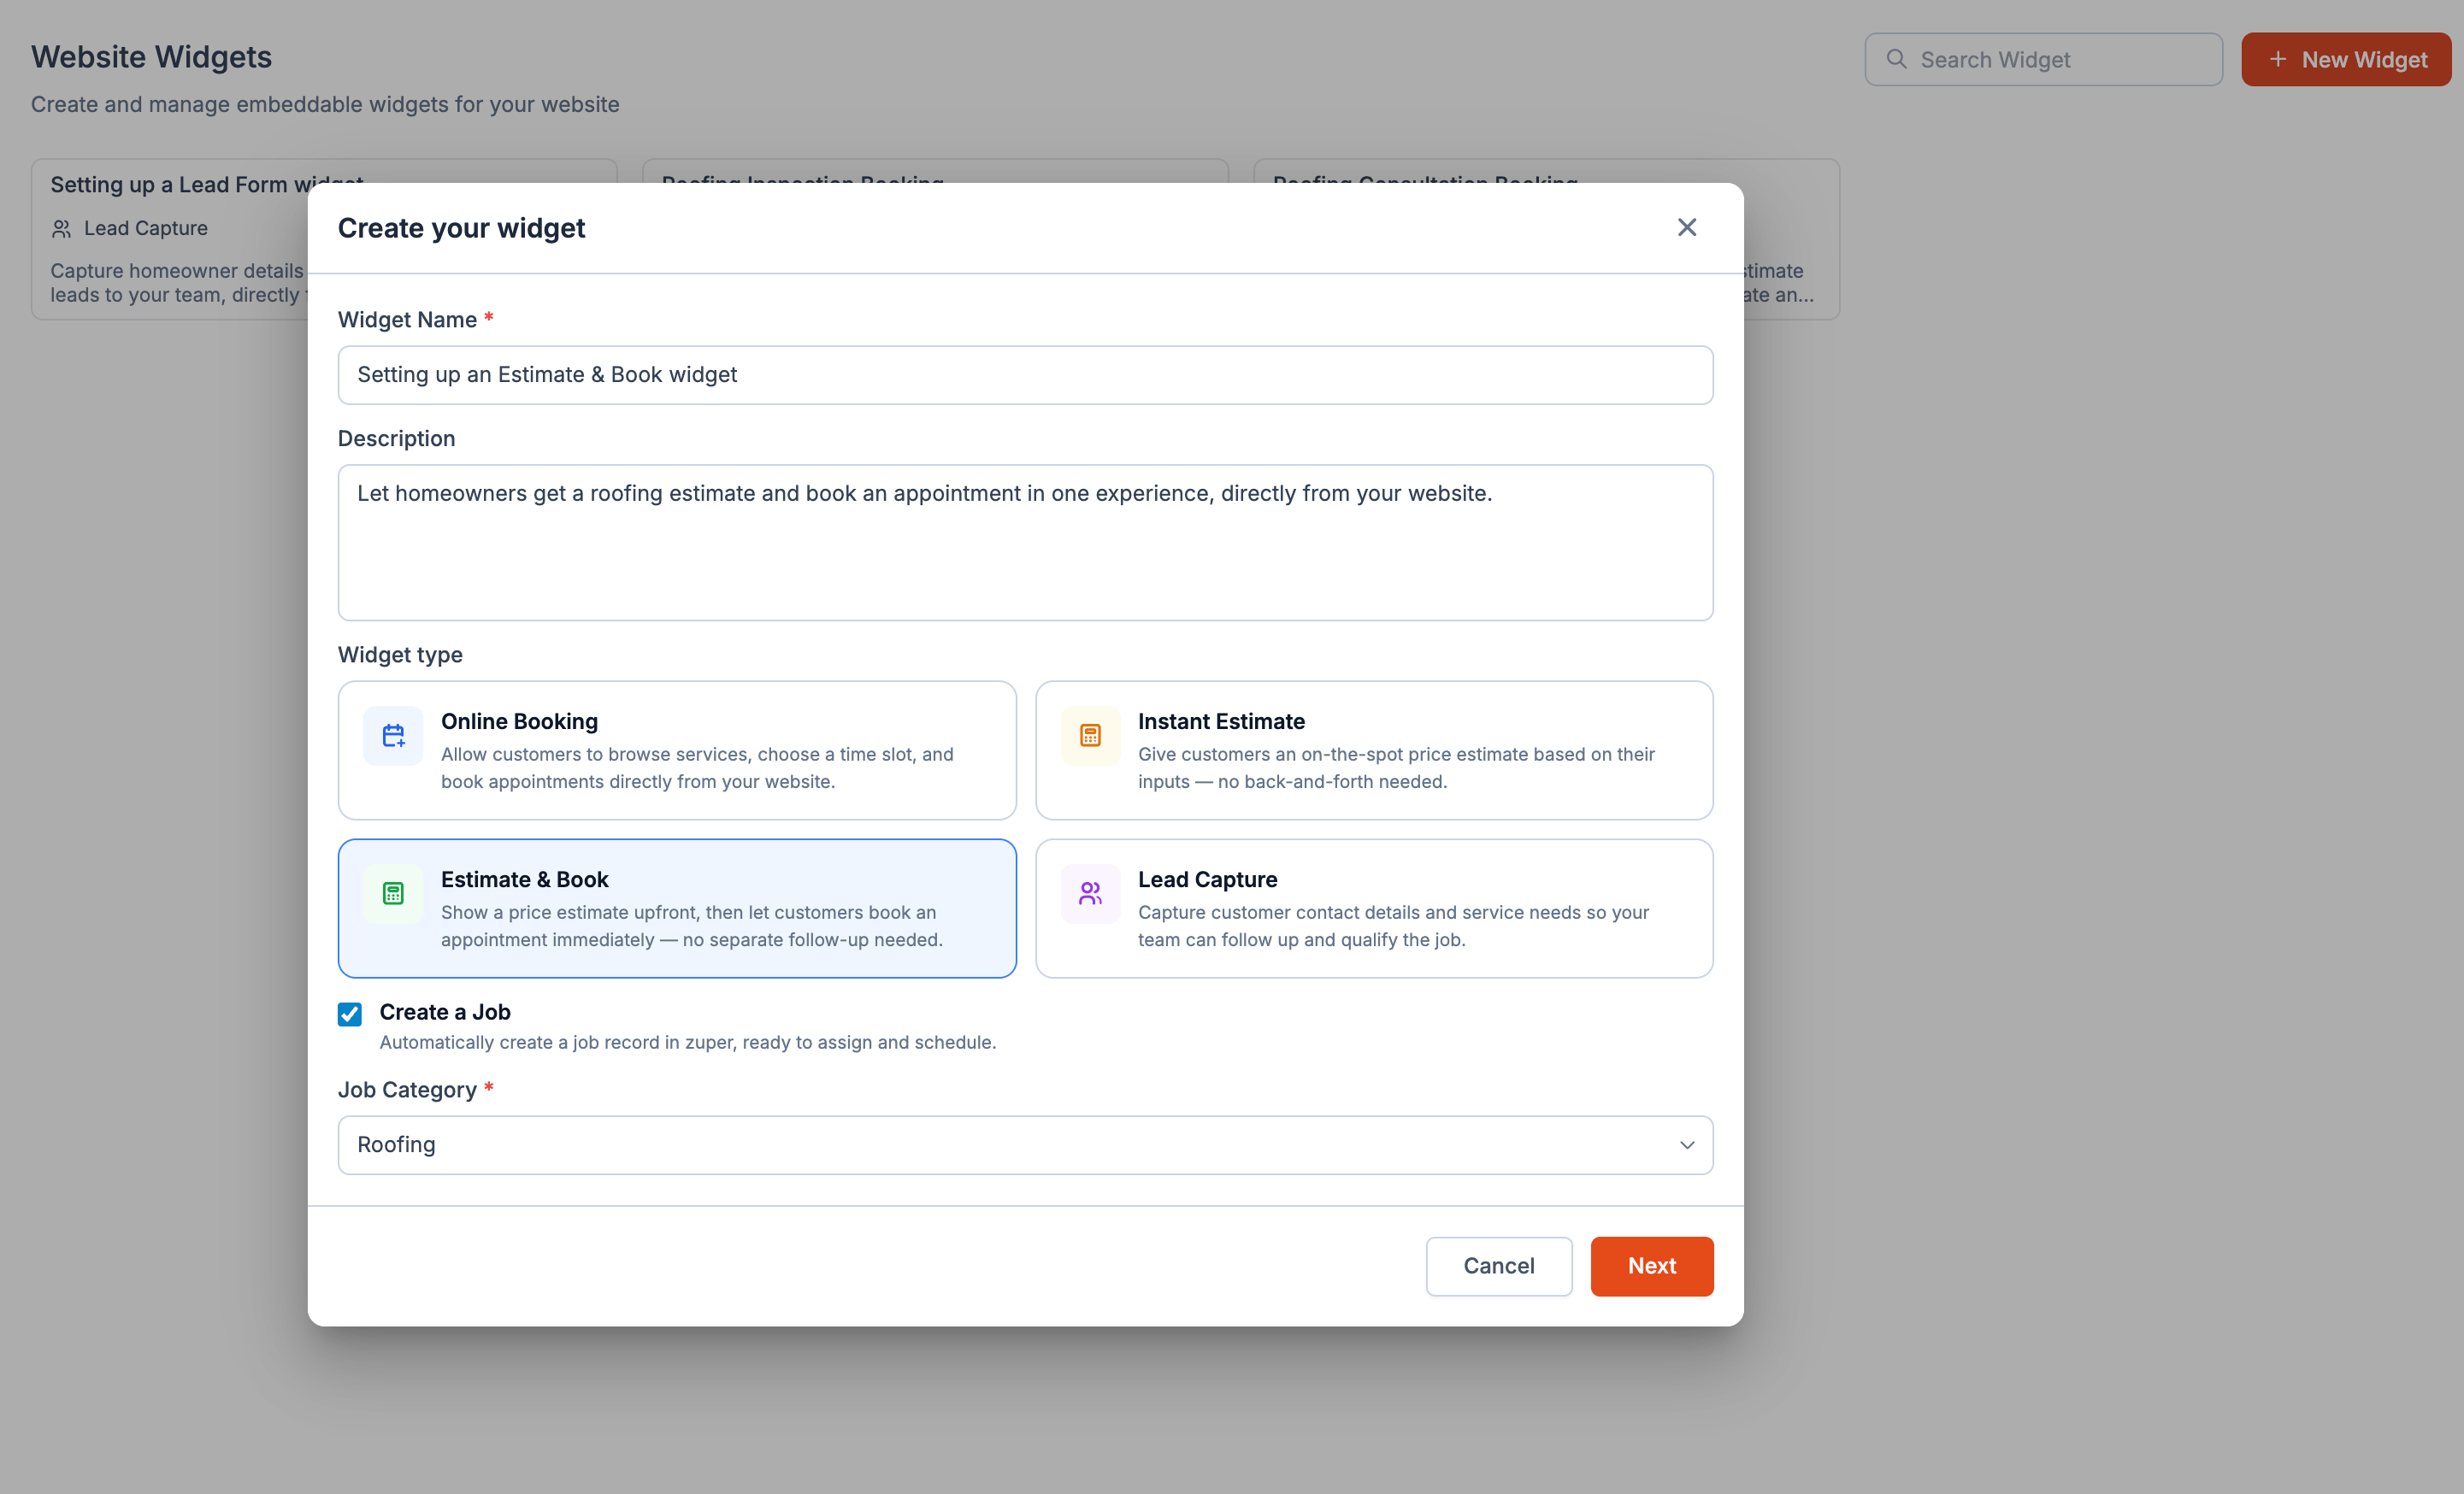
# Setting up an Estimate and Book widget
A homeowner visits your website, enters their address, answers a few questions about their roof, reviews the options you offer, and books an appointment, all in one experience.
That's what an **Estimate & Book** widget is designed to do.
Unlike an Instant Estimate widget, the experience doesn't stop after showing pricing. Homeowners can continue directly to scheduling, choosing a date, time, or technician based on the booking rules you configure.
The result is a smoother path from interest to appointment, with fewer follow-up calls and less back-and-forth scheduling.
When a homeowner submits the widget, Zuper captures their information, generates the estimate, schedules the appointment, and creates the records your team needs to continue the conversation.
 ## Before you begin
Before setting up your widget, decide:
* Which roofing options you want homeowners to compare.
* How each option should be priced.
* Whether financing should be available.
* Whether homeowners should choose an exact appointment time or only a date.
* Whether homeowners should be able to choose a technician.
* Which teams should receive bookings.
**Note**: If you have turned off job creation when selecting the type, your customer's appointment will still create a job.
## What homeowners experience
Every homeowner moves through the widget in the same order:
**Property Address → Roofing Questions → Estimate → Booking → Confirmation**
Each step builds on the previous one.
* The property address helps Zuper calculate roof measurements.
* The answers homeowners provide can influence which roofing options appear.
* The estimate helps homeowners understand available solutions and pricing.
* The booking step lets them schedule the next step immediately.
This combination of estimating and scheduling is what makes the widget different from other Website Widget types.
## Configure your widget
### Step 1: Design the homeowner experience
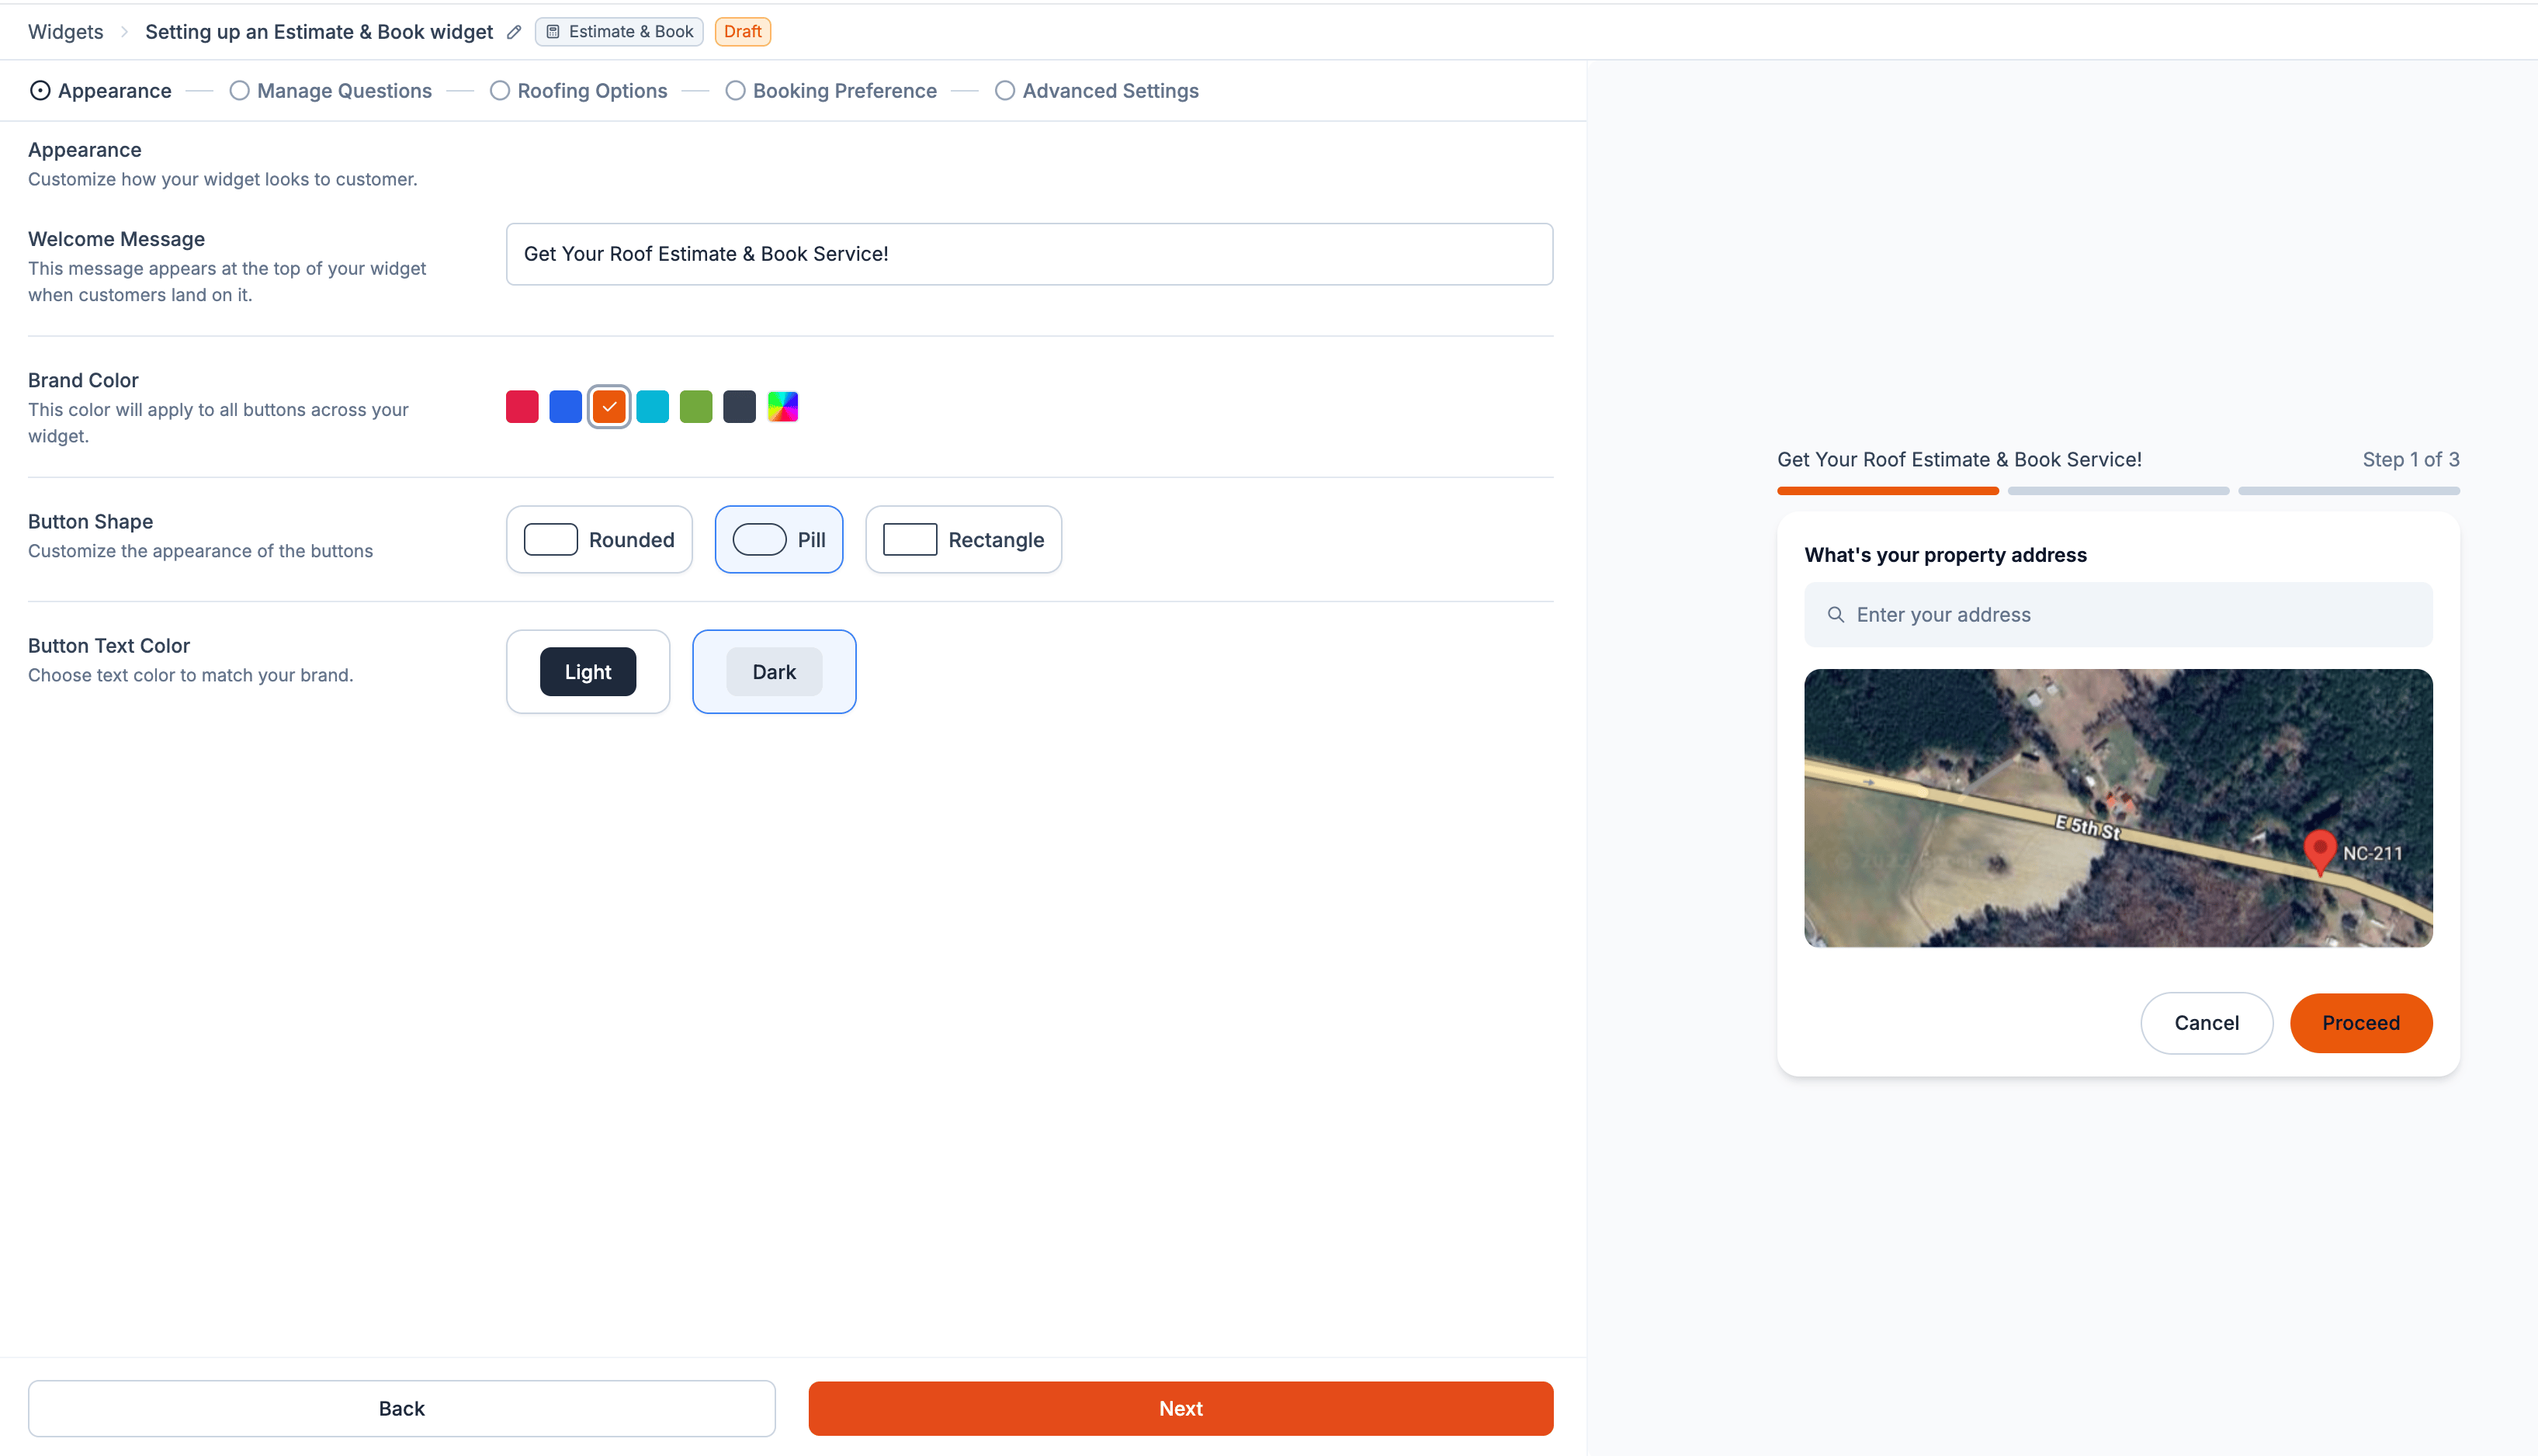
The **Appearance** step controls how the widget looks on your website, including your welcome message, brand color, and button styling.
These settings work the same way across Website Widgets. See Setting up an Instant Estimate widget for detailed instructions.
## Before you begin
Before setting up your widget, decide:
* Which roofing options you want homeowners to compare.
* How each option should be priced.
* Whether financing should be available.
* Whether homeowners should choose an exact appointment time or only a date.
* Whether homeowners should be able to choose a technician.
* Which teams should receive bookings.
**Note**: If you have turned off job creation when selecting the type, your customer's appointment will still create a job.
## What homeowners experience
Every homeowner moves through the widget in the same order:
**Property Address → Roofing Questions → Estimate → Booking → Confirmation**
Each step builds on the previous one.
* The property address helps Zuper calculate roof measurements.
* The answers homeowners provide can influence which roofing options appear.
* The estimate helps homeowners understand available solutions and pricing.
* The booking step lets them schedule the next step immediately.
This combination of estimating and scheduling is what makes the widget different from other Website Widget types.
## Configure your widget
### Step 1: Design the homeowner experience
The **Appearance** step controls how the widget looks on your website, including your welcome message, brand color, and button styling.
These settings work the same way across Website Widgets. See Setting up an Instant Estimate widget for detailed instructions.
 ### Step 2: Decide what information to collect
Before homeowners can receive an estimate, Zuper needs information about the property and project.
Estimate & Book widgets include the same question builder used in Instant Estimate widgets, including the default questions required for roofing estimates.
You can:
* Add custom questions.
* Make questions required.
* Save answers to Contact or Job custom fields.
* Show questions conditionally based on previous responses.
### Step 2: Decide what information to collect
Before homeowners can receive an estimate, Zuper needs information about the property and project.
Estimate & Book widgets include the same question builder used in Instant Estimate widgets, including the default questions required for roofing estimates.
You can:
* Add custom questions.
* Make questions required.
* Save answers to Contact or Job custom fields.
* Show questions conditionally based on previous responses.
 For detailed instructions on creating and managing questions, see Setting up an Instant Estimate widget.
### Step 3: Decide what homeowners can estimate
The Roofing Options step is where you turn your pricing into something homeowners can understand and compare. Each option you add appears as a card on the estimate page, with its own images, description, pricing, and financing information.
For detailed instructions on creating and managing questions, see Setting up an Instant Estimate widget.
### Step 3: Decide what homeowners can estimate
The Roofing Options step is where you turn your pricing into something homeowners can understand and compare. Each option you add appears as a card on the estimate page, with its own images, description, pricing, and financing information.
 For example, you might offer:
* **Good**: Standard Shingle Roof
* **Better**: Architectural Shingle Roof
* **Best**: Premium Impact-Resistant Roof
Homeowners can review these options and choose the one that fits their needs before moving on to booking.
Add the roofing solutions you want homeowners to see, then configure each option with the information they need to make a decision.
For each option, you can configure:
* **Reference Images**: Show homeowners what the roofing option looks like.
* **Name**: Give the option a clear, customer-facing name.
* **Label**: Highlight the option as **Good**, **Better**, **Best**, or use your own label.
* **Details & Specifications**: Explain what is included so homeowners can understand what they're choosing.
You can add as many options as you need and arrange them in the order you want homeowners to see them.
ricing is calculated from the rules you configure for each roofing option.
Choose how the base price is calculated:
* **Per SQ**: Price based on the calculated roof area.
* **Per SQFT**: Price based on square footage.
* **Fixed**: Use one fixed price regardless of roof size.
You can also account for conditions that affect the final price:
* **Add Wastage**: Add a percentage for material waste and cutting.
* **Steep Slope Pricing**: Add an additional charge when the homeowner's roof type qualifies as a high or steep slope.
If you don't want to show a price for an option, leave its pricing blank. Homeowners see **Contact for pricing** instead.
Turn on **Financing Option** when you want homeowners to see available financing plans alongside the option's price.
Select from the financing providers and plans already configured in Zuper. Homeowners can then consider the estimated payment while comparing your roofing options.
Not every roofing option needs to appear for every homeowner.
Use **Visibility Conditions** to control when an option appears based on answers provided earlier in the widget. For example, you could show a premium roofing option only when a homeowner selects a particular roof type.
Select **Add** condition, then choose whether All or Any conditions must match. Set the question, operator, and answer that should control the option's visibility.
For the full details on configuring roofing options, including pricing, financing, and visibility conditions, see \[Setting up an Instant Estimate widget].
Select **Save** changes when you're finished configuring an option.
Once your roofing options are ready, select **Next** to configure Booking Preference and decide how homeowners can turn their estimate into an appointment.
### Step 4: Decide how homeowners can book
Once homeowners have reviewed their roofing options, Booking Preference lets them schedule the next step without leaving the estimate experience.
For example, you might offer:
* **Good**: Standard Shingle Roof
* **Better**: Architectural Shingle Roof
* **Best**: Premium Impact-Resistant Roof
Homeowners can review these options and choose the one that fits their needs before moving on to booking.
Add the roofing solutions you want homeowners to see, then configure each option with the information they need to make a decision.
For each option, you can configure:
* **Reference Images**: Show homeowners what the roofing option looks like.
* **Name**: Give the option a clear, customer-facing name.
* **Label**: Highlight the option as **Good**, **Better**, **Best**, or use your own label.
* **Details & Specifications**: Explain what is included so homeowners can understand what they're choosing.
You can add as many options as you need and arrange them in the order you want homeowners to see them.
ricing is calculated from the rules you configure for each roofing option.
Choose how the base price is calculated:
* **Per SQ**: Price based on the calculated roof area.
* **Per SQFT**: Price based on square footage.
* **Fixed**: Use one fixed price regardless of roof size.
You can also account for conditions that affect the final price:
* **Add Wastage**: Add a percentage for material waste and cutting.
* **Steep Slope Pricing**: Add an additional charge when the homeowner's roof type qualifies as a high or steep slope.
If you don't want to show a price for an option, leave its pricing blank. Homeowners see **Contact for pricing** instead.
Turn on **Financing Option** when you want homeowners to see available financing plans alongside the option's price.
Select from the financing providers and plans already configured in Zuper. Homeowners can then consider the estimated payment while comparing your roofing options.
Not every roofing option needs to appear for every homeowner.
Use **Visibility Conditions** to control when an option appears based on answers provided earlier in the widget. For example, you could show a premium roofing option only when a homeowner selects a particular roof type.
Select **Add** condition, then choose whether All or Any conditions must match. Set the question, operator, and answer that should control the option's visibility.
For the full details on configuring roofing options, including pricing, financing, and visibility conditions, see \[Setting up an Instant Estimate widget].
Select **Save** changes when you're finished configuring an option.
Once your roofing options are ready, select **Next** to configure Booking Preference and decide how homeowners can turn their estimate into an appointment.
### Step 4: Decide how homeowners can book
Once homeowners have reviewed their roofing options, Booking Preference lets them schedule the next step without leaving the estimate experience.
 Start by setting the appointment rules:
* **Job Category**: Determines the category of the job created from the booking.
* **Slot Duration**: Determines how much time the appointment occupies.
* **Buffer Time**: Adds time between appointments when needed.
* **Minimum Lead Time**: Controls how soon a homeowner can book.
* **Maximum Booking Window**: Controls how far ahead they can book.
Then choose how much control homeowners have over scheduling.
Homeowners choose a specific appointment time and, optionally, a technician.
Choose how those time slots are offered:
* **Choose from available time slots**: Show openings based on your teams' calendars.
* **Define your preferred time slots**: Offer booking windows that you define yourself.
You can also control which teams provide availability, the days and hours when bookings are accepted, and whether homeowners can choose a technician.
See \[Setting up an Online Booking widget] for detailed instructions on configuring time-slot availability.
**or,**
Homeowners choose a day, but your team decides the exact time and technician after the booking is submitted.
Set the weekly availability for the days when homeowners can request an appointment.
Choose this option when you want homeowners to request a convenient day but need your team to coordinate the exact appointment afterward.
Select **Next** to continue to Advanced Settings. See Setting up an Online Booking widget for detailed instructions on configuring time-slot availability.
### Step 5: Decide what happens around the booking
The Advanced Settings step controls the information homeowners see before and after booking.
You can configure:
* Text message consent
* Out-of-service territory messaging
* Booking policies
* Email notifications
* SMS notifications
* Contact details displayed on the widget
Start by setting the appointment rules:
* **Job Category**: Determines the category of the job created from the booking.
* **Slot Duration**: Determines how much time the appointment occupies.
* **Buffer Time**: Adds time between appointments when needed.
* **Minimum Lead Time**: Controls how soon a homeowner can book.
* **Maximum Booking Window**: Controls how far ahead they can book.
Then choose how much control homeowners have over scheduling.
Homeowners choose a specific appointment time and, optionally, a technician.
Choose how those time slots are offered:
* **Choose from available time slots**: Show openings based on your teams' calendars.
* **Define your preferred time slots**: Offer booking windows that you define yourself.
You can also control which teams provide availability, the days and hours when bookings are accepted, and whether homeowners can choose a technician.
See \[Setting up an Online Booking widget] for detailed instructions on configuring time-slot availability.
**or,**
Homeowners choose a day, but your team decides the exact time and technician after the booking is submitted.
Set the weekly availability for the days when homeowners can request an appointment.
Choose this option when you want homeowners to request a convenient day but need your team to coordinate the exact appointment afterward.
Select **Next** to continue to Advanced Settings. See Setting up an Online Booking widget for detailed instructions on configuring time-slot availability.
### Step 5: Decide what happens around the booking
The Advanced Settings step controls the information homeowners see before and after booking.
You can configure:
* Text message consent
* Out-of-service territory messaging
* Booking policies
* Email notifications
* SMS notifications
* Contact details displayed on the widget
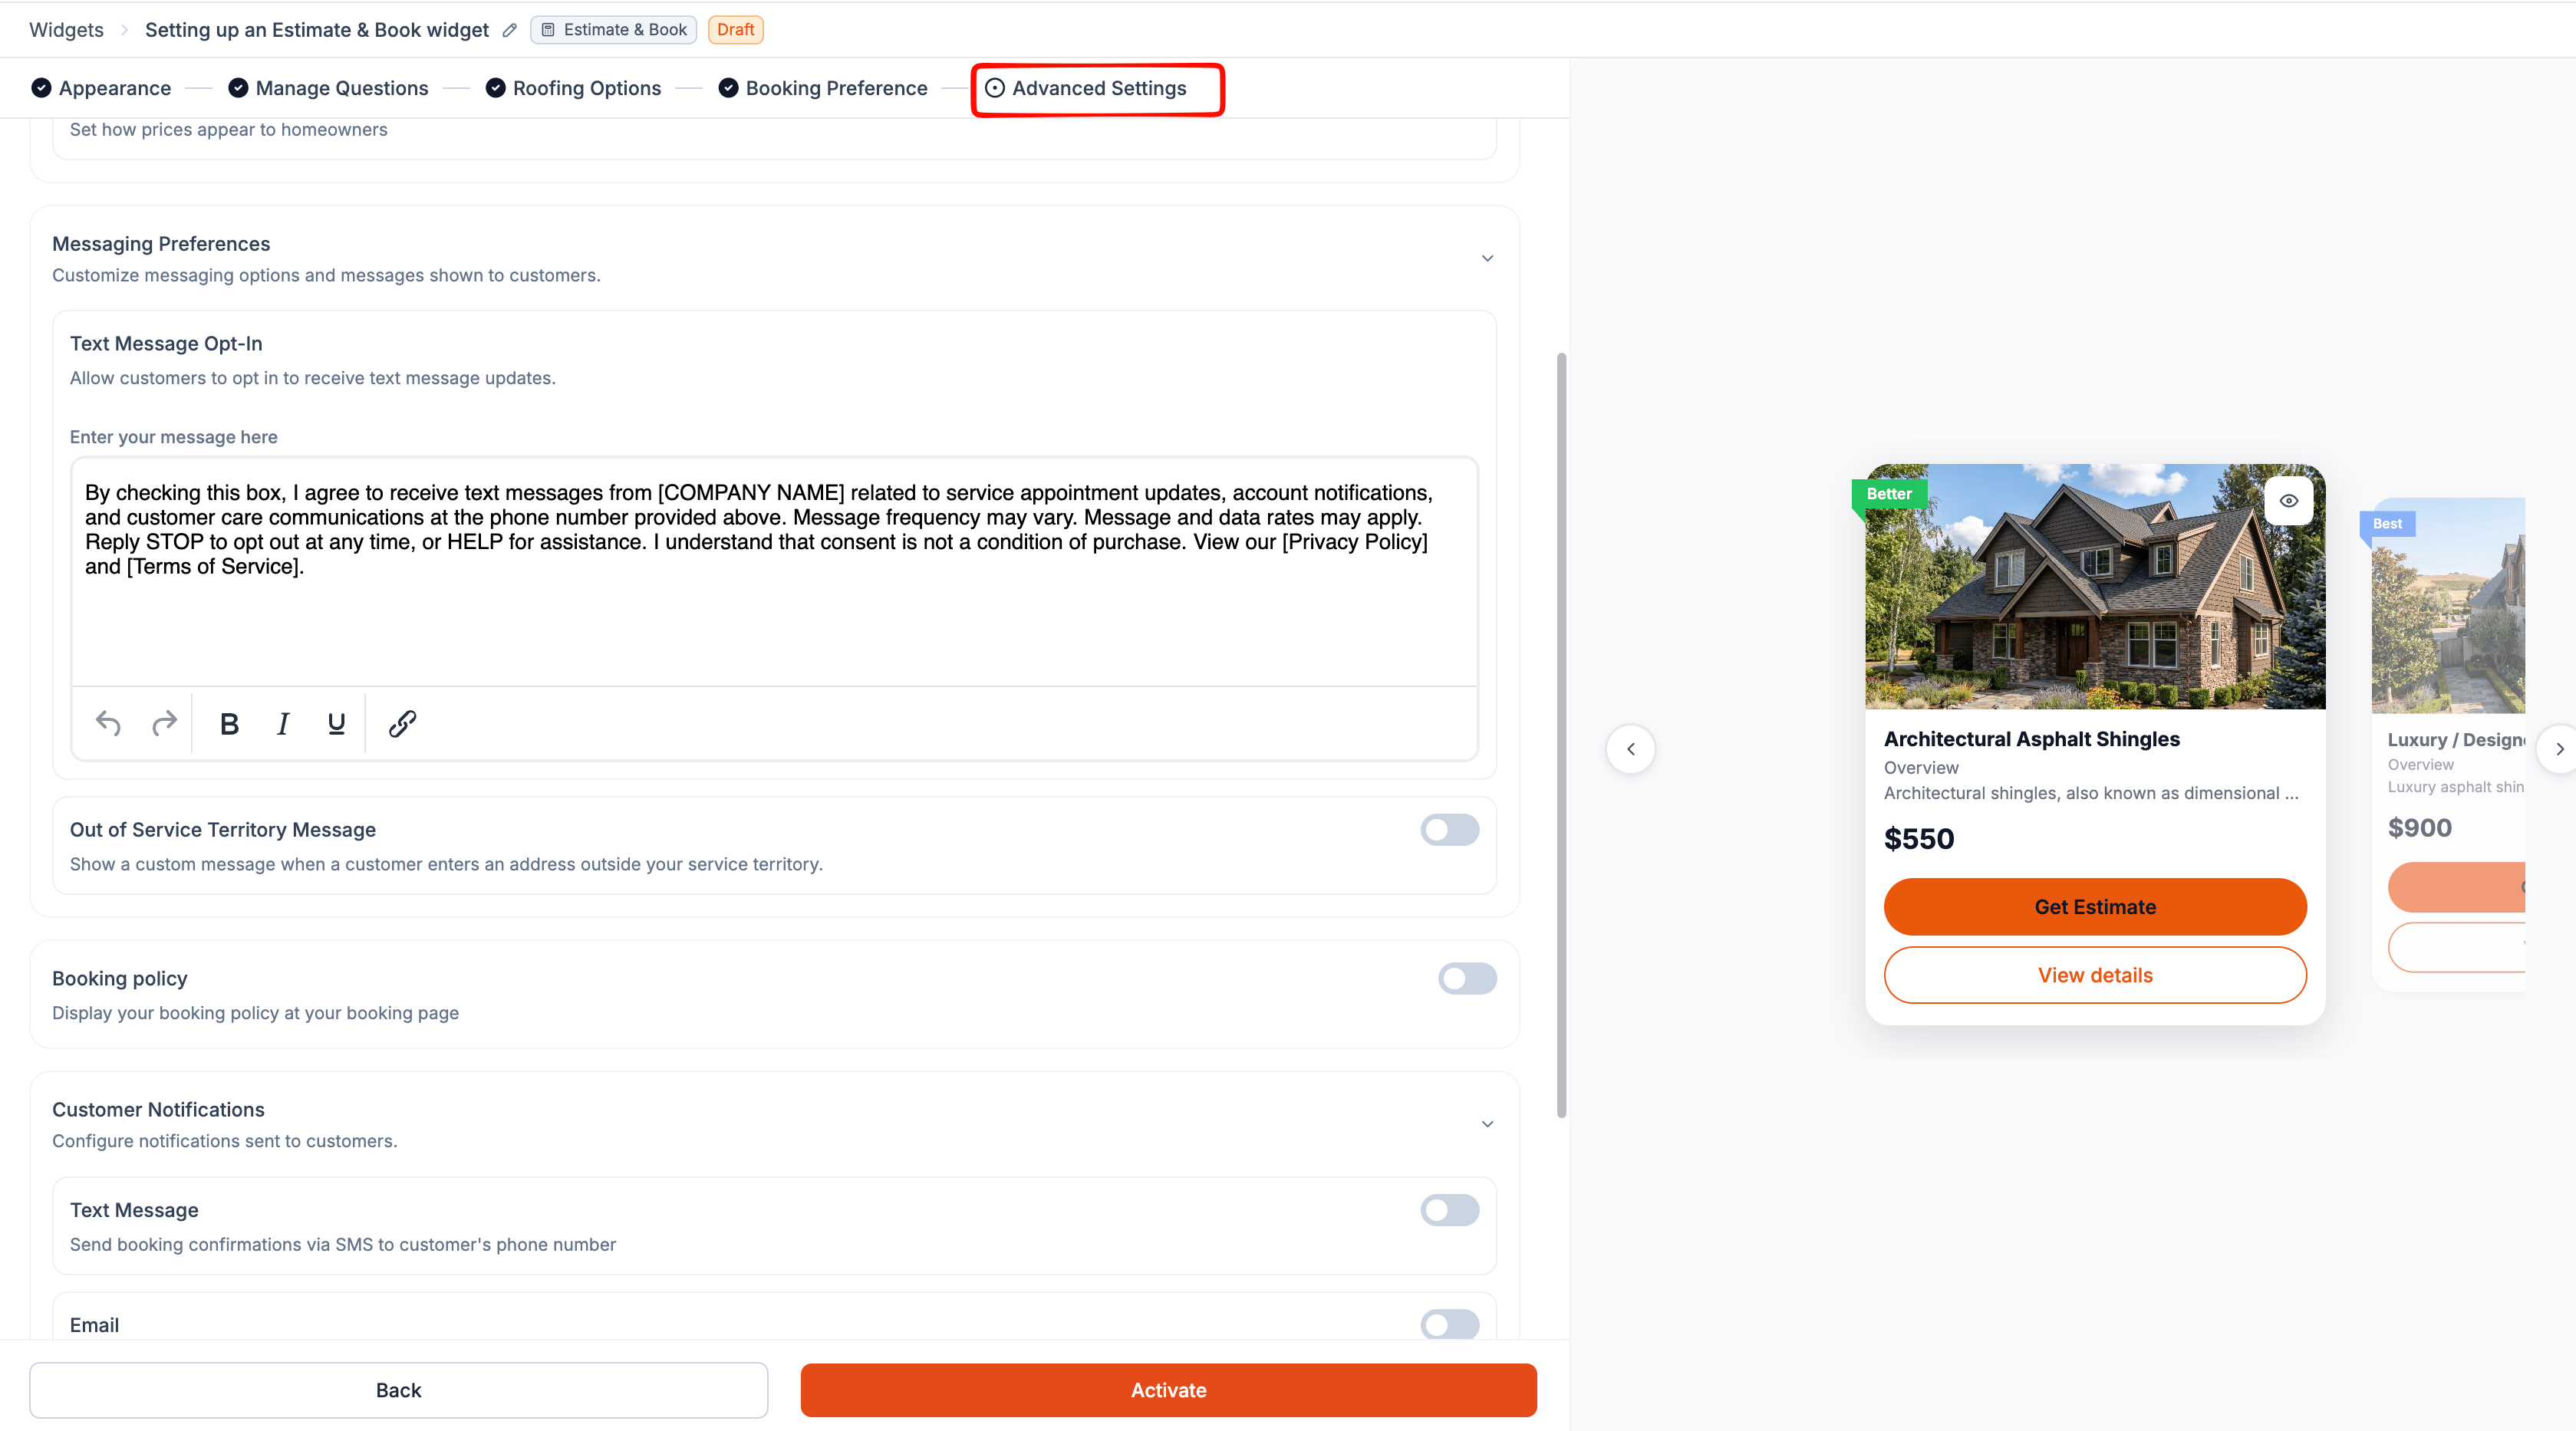 These settings work the same way as other Website Widgets. For detailed configuration steps, see Setting up an Online Booking widget.
## Activate your widget
When you're ready:
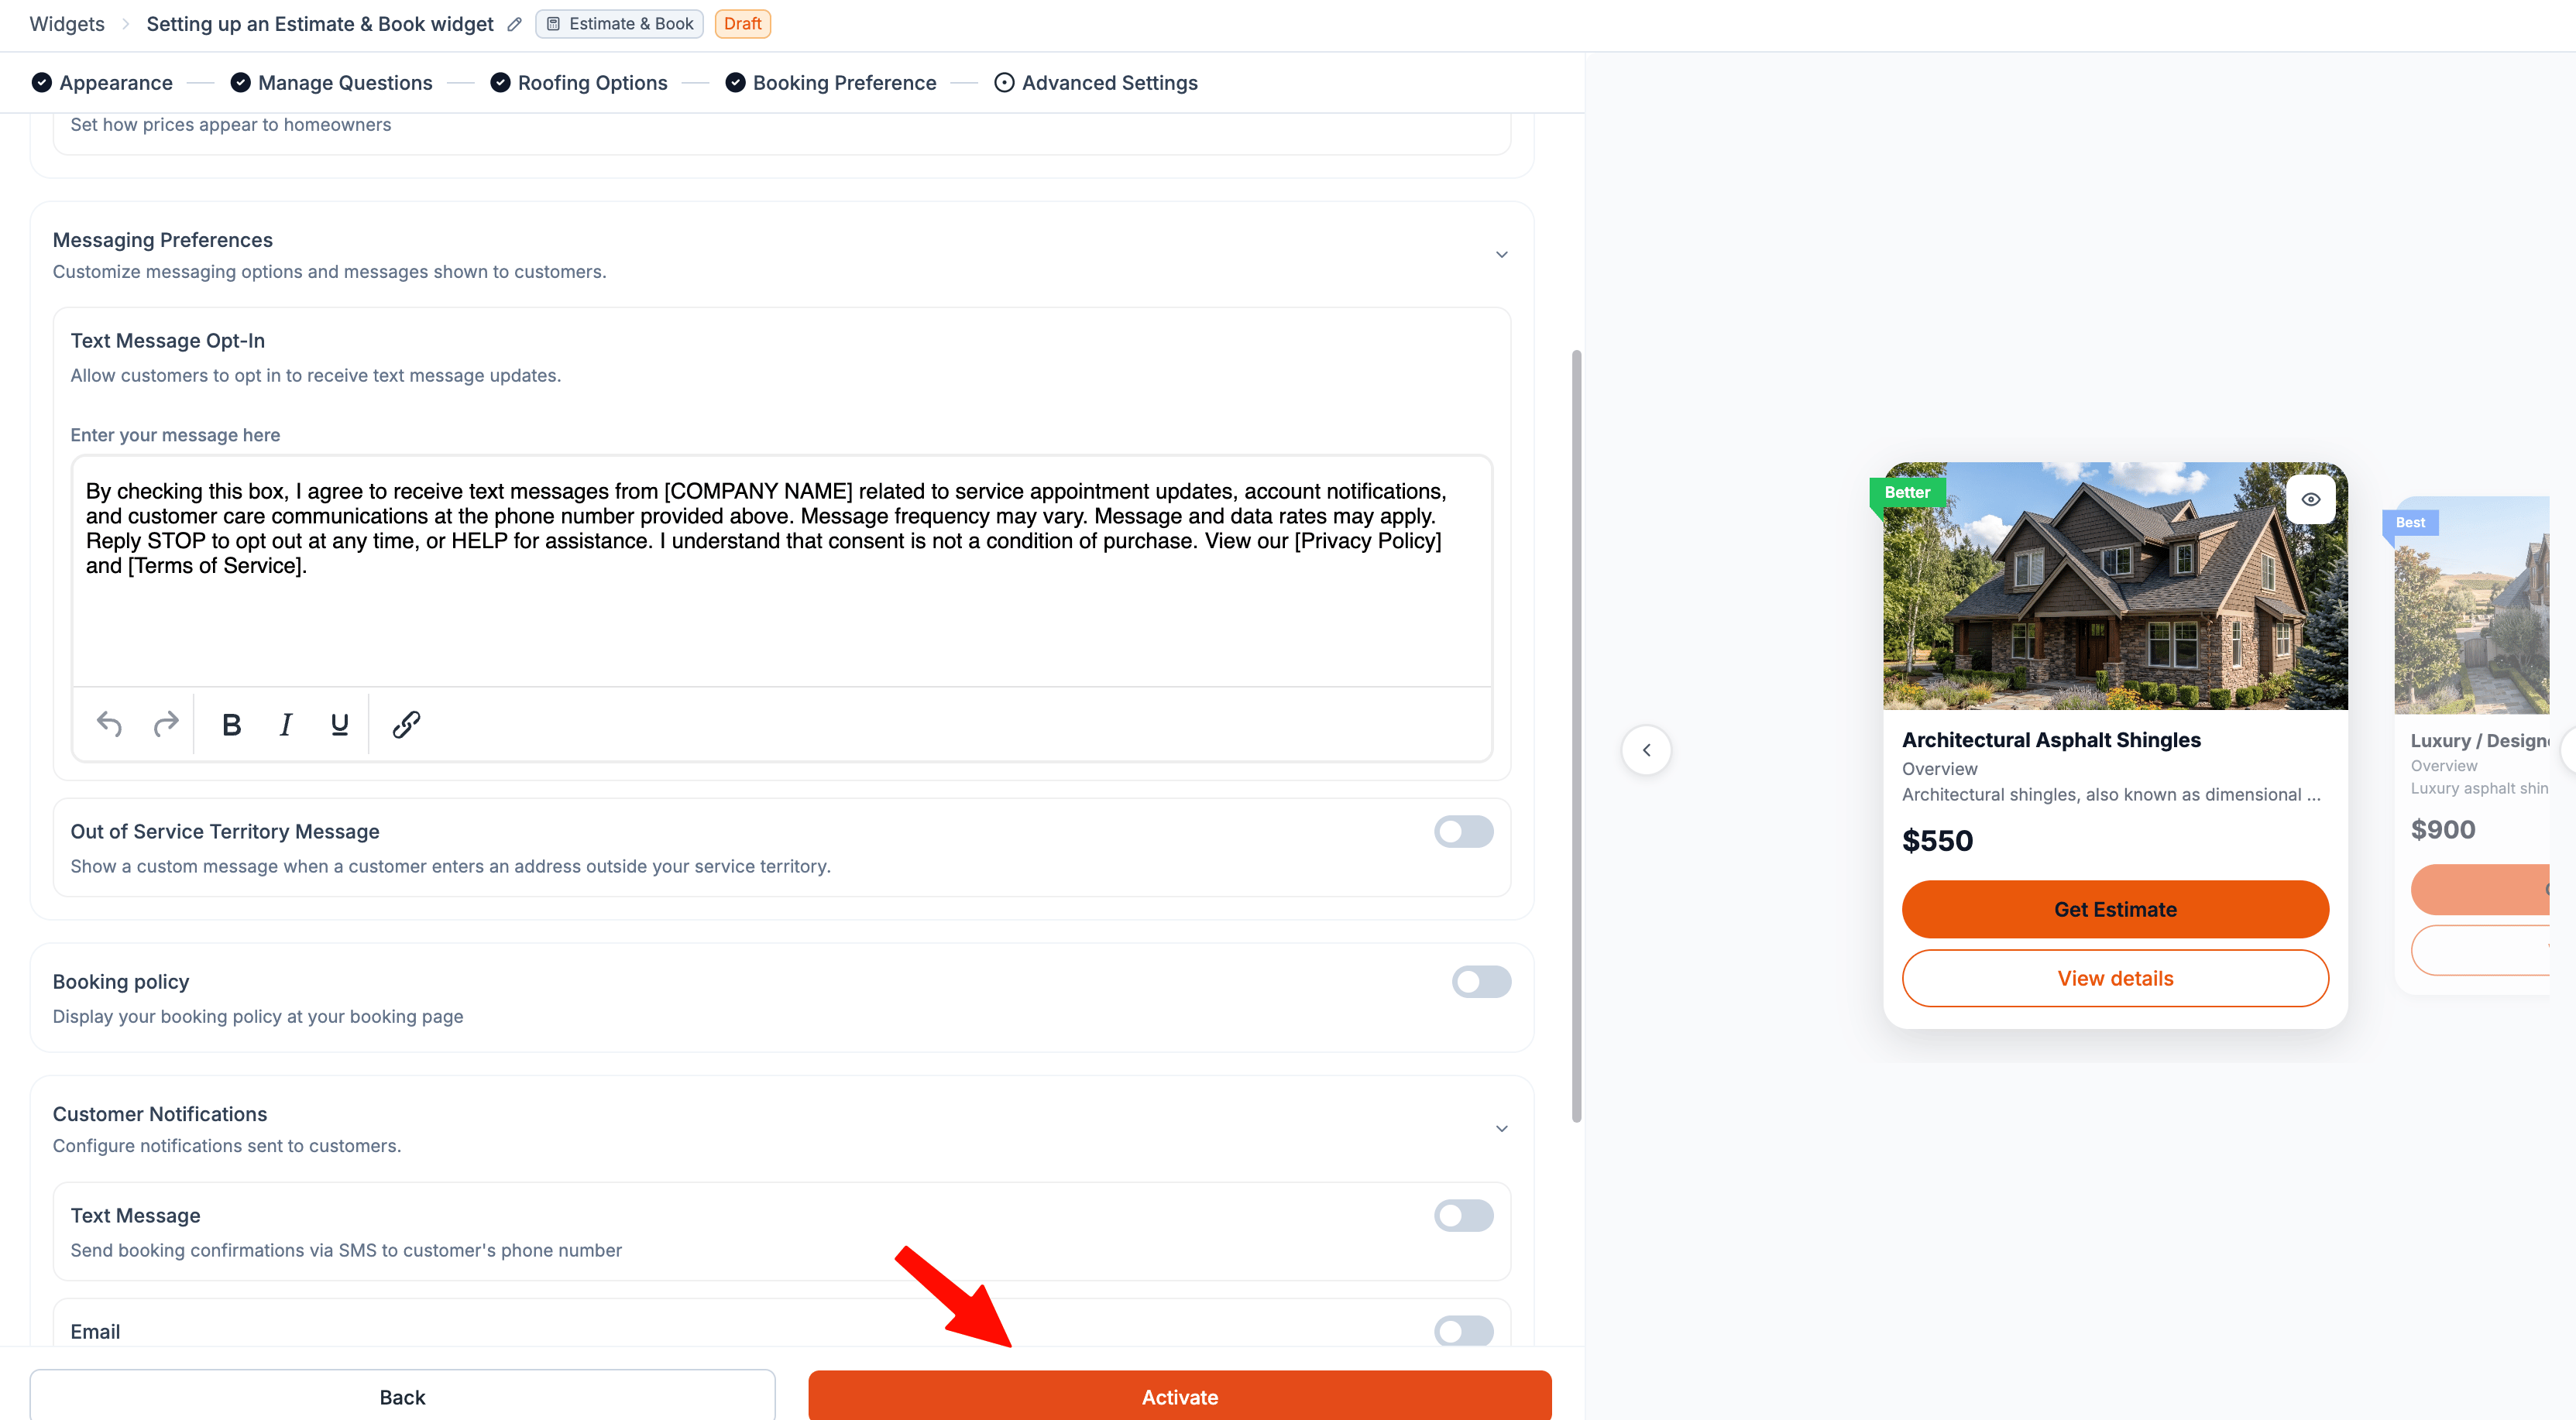
1. Select **Activate**.
These settings work the same way as other Website Widgets. For detailed configuration steps, see Setting up an Online Booking widget.
## Activate your widget
When you're ready:
1. Select **Activate**.
 2. Copy the public link, QR code, or embed code.
3. Add the widget to your website or share it directly with homeowners.
2. Copy the public link, QR code, or embed code.
3. Add the widget to your website or share it directly with homeowners.
