> ## Documentation Index
> Fetch the complete documentation index at: https://docs.zuper.co/llms.txt
> Use this file to discover all available pages before exploring further.
# Customer Portal
Once the customer portal is turned on in company policy, users can configure it, including branding, appearance, navigation, etc.
**Navigation**: *Settings -> Customer Portal*
## a. Customization
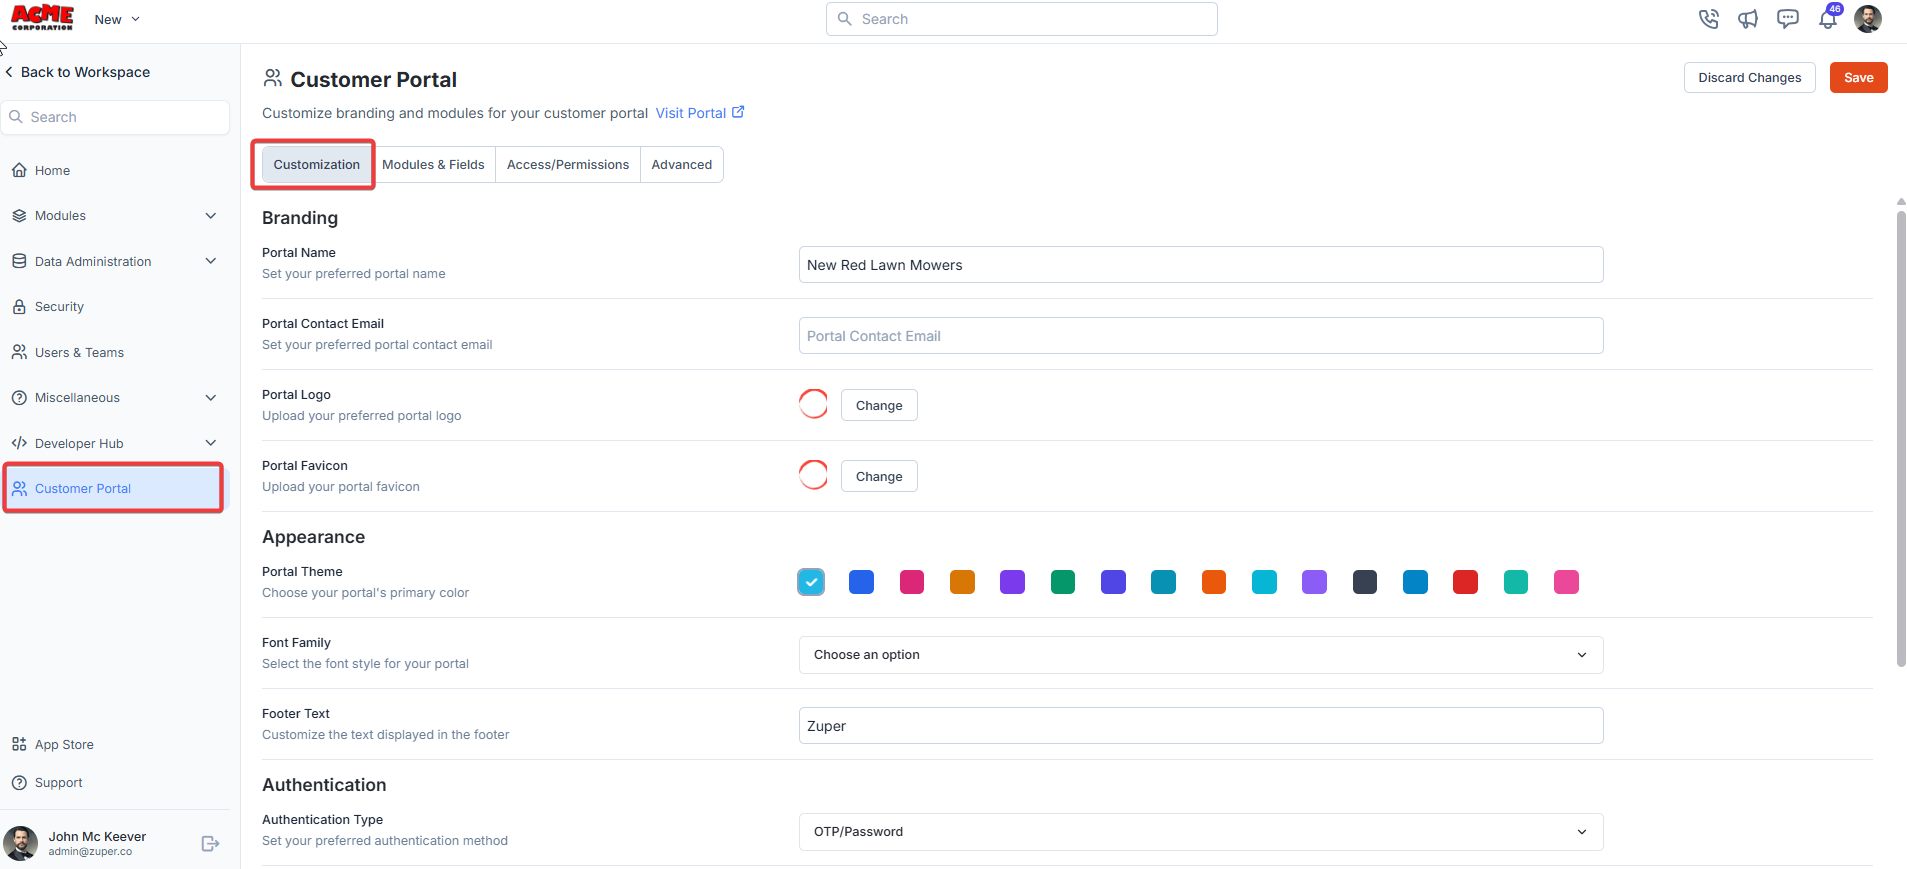
1. Select the “**Settings**” module from the left panel. Under the “**Customer Portal**,” choose the “**Customization**” tab.
**Branding**
From the “**Branding**” section, fill in the following details.
| **Fields** | **Description** |
| :------------------- | :------------------------------------------------------------------------- |
| Portal Name | Enter the name that is to be displayed in the customer portal’s title bar. |
| Portal Contact Email | The contact email ID of the portal. |
| Portal Logo | The logo of the customer portal. |
| Portal Favicon | The icon that is displayed in the title bar of the customer portal. |
**Appearance**
From the “**Appearance**" section, fill in the following details.
| **Fields** | **Description** |
| :----------- | :---------------------------------------------------------------------------- |
| Portal Theme | From the list, choose the preferred primary color from the color picker list. |
| Font Family | From the drop-down, choose the font. |
| Footer Text | Enter the footer text to be displayed in the customer portal. |
**Authentication**
From the “**Authentication**" section, fill in the following details.
| **Fields** | **Description** |
| :------------------ | :------------------------------------------------------------------------------------------------------------------------ |
| Authentication Type | Authentication is identifying the right user to log in to the system securely. Here, you can choose one of two methods: |
| | - Password - Only the user's email and password can be used to log in. |
| | - Password / OTP - Password and OTP can be used to log in. |
**Note**: External page links help you add your brand-related social media pages.
Select the “**Save**” button to save the customer portal settings.
 ## **b. Modules & Fields:**
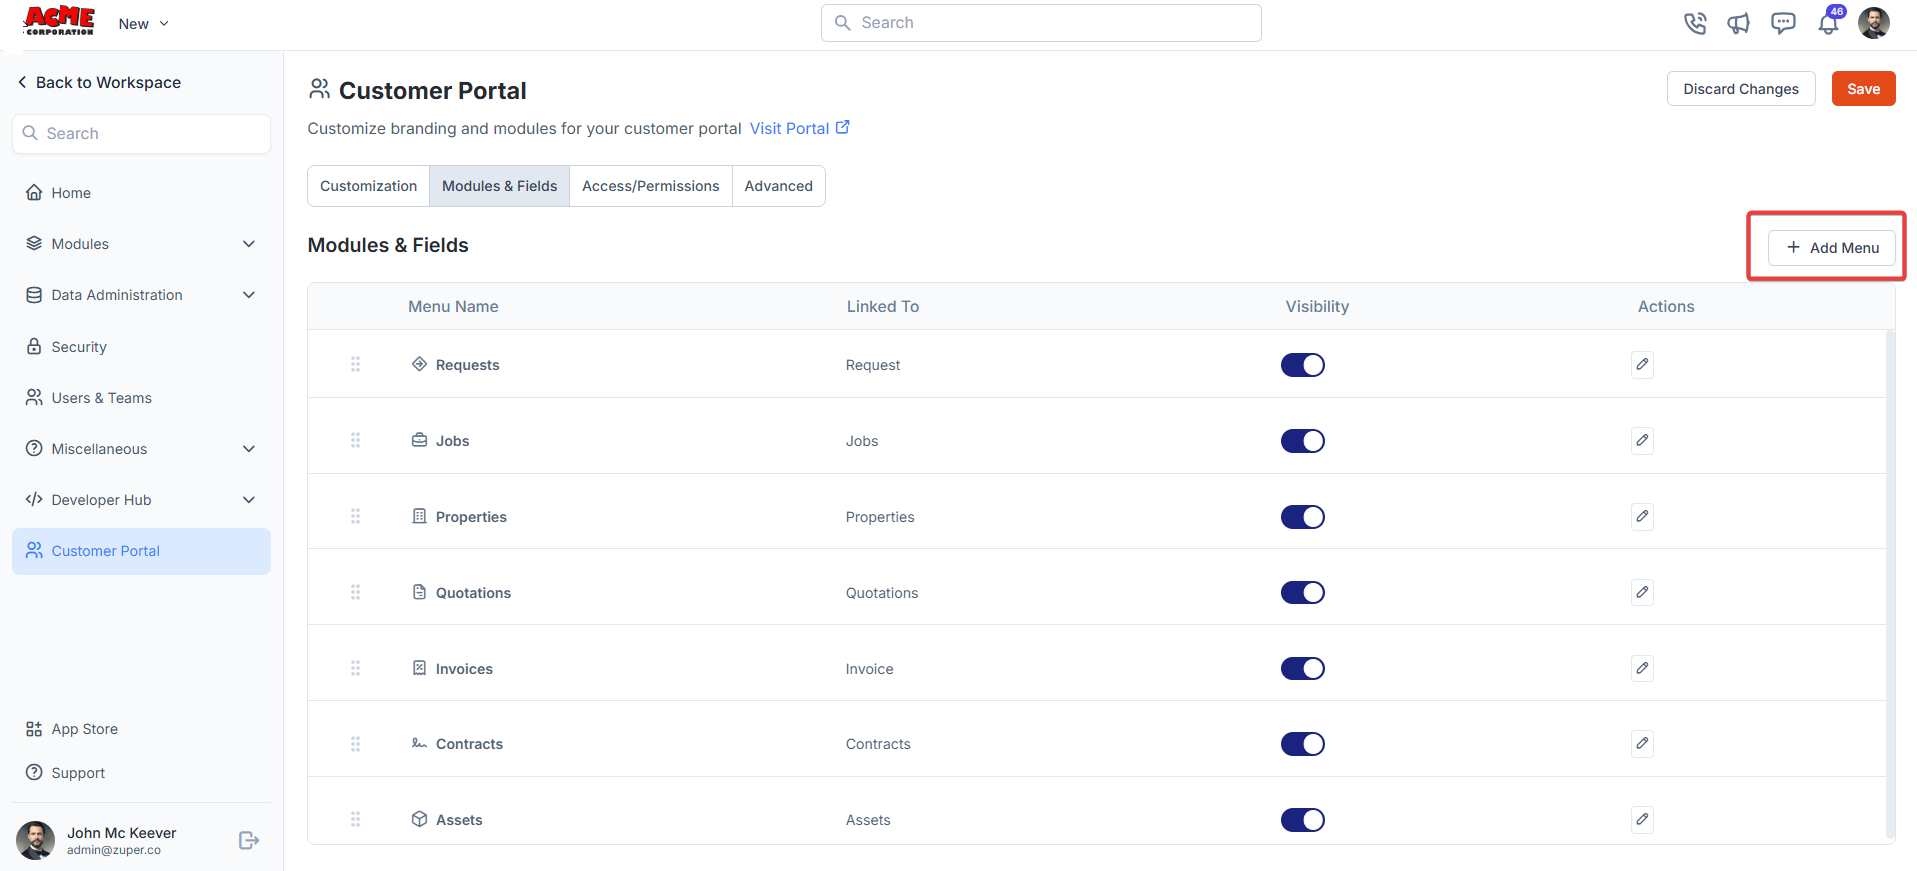
The Modules & Fields help add a side panel menu that needs to be displayed in the customer portal:
1. From the “**Modules & Fields**” section, click “**+Add Menu**” to add the modules.
## **b. Modules & Fields:**
The Modules & Fields help add a side panel menu that needs to be displayed in the customer portal:
1. From the “**Modules & Fields**” section, click “**+Add Menu**” to add the modules.
 2. To add the menu, add the following details for the page:
| **Fields** | **Description** |
| :---------------------- | :----------------------------------------------------------------------------------------------------------------------------------------------------------------------- |
| Menu Name *(Mandatory)* | The menu name is to be displayed. |
| Linked to | Represent the module that is linked to the menu. |
| Visibility | Toggle portal visibility on or off. Add the icon that needs to be displayed in the navigation menu. |
| Actions | Click the "**Edit**" icon to add/modify the icon and menu name. The required field that needs to be visible under the listing and details page can be toggled on or off. |
Click the “**Add**” button to create the new menu.
2. To add the menu, add the following details for the page:
| **Fields** | **Description** |
| :---------------------- | :----------------------------------------------------------------------------------------------------------------------------------------------------------------------- |
| Menu Name *(Mandatory)* | The menu name is to be displayed. |
| Linked to | Represent the module that is linked to the menu. |
| Visibility | Toggle portal visibility on or off. Add the icon that needs to be displayed in the navigation menu. |
| Actions | Click the "**Edit**" icon to add/modify the icon and menu name. The required field that needs to be visible under the listing and details page can be toggled on or off. |
Click the “**Add**” button to create the new menu.
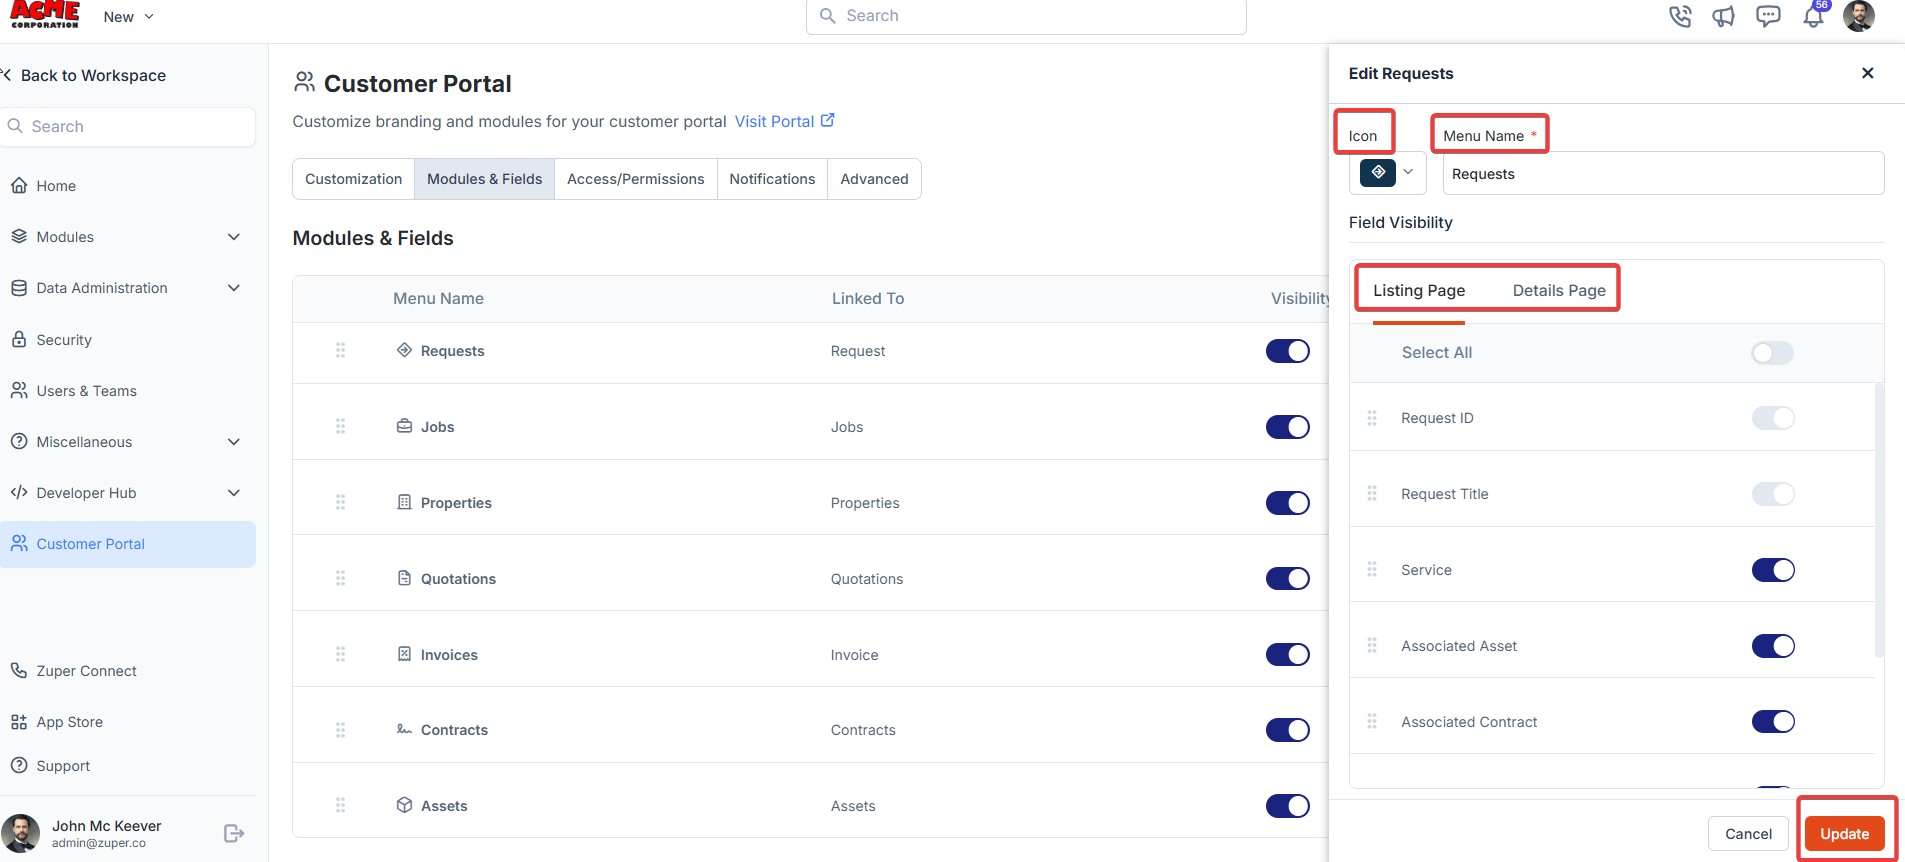 Select the “**Save**” button to save the changes.
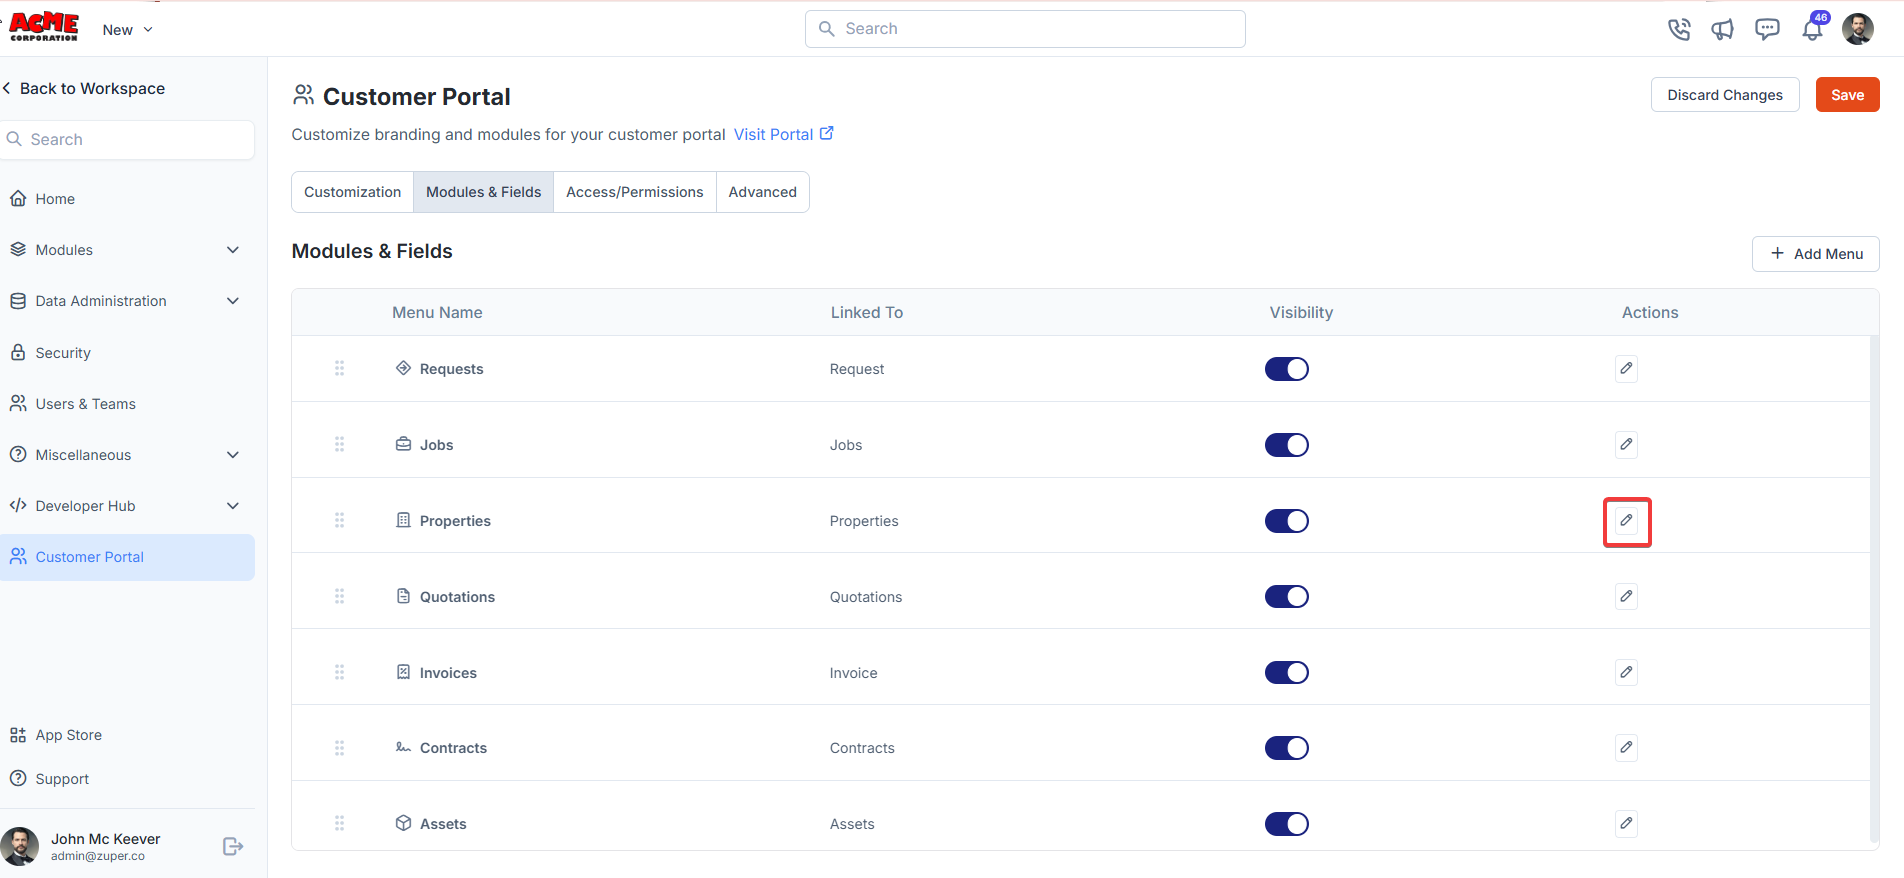
4. You can toggle the list of modules on or off as needed. Use the “**Edit**” icon to modify the navigation menu. Click the icon to re-order the menu items.
Select the “**Save**” button to save the changes.
4. You can toggle the list of modules on or off as needed. Use the “**Edit**” icon to modify the navigation menu. Click the icon to re-order the menu items.
 ## **c. Access / Permissions**
**Enable Portal Access by Default**\
Toggle the switch to **Yes** if you want all customers to have access to the portal by default.
* **Yes**: Grants automatic access to all customers.
* **No**: Requires manual access approval.
**Allow Customers to Add Notes for Jobs**\
Toggle the switch to '**Yes**' to permit customers to add job notes, or '**No**' to restrict this action.
## **c. Access / Permissions**
**Enable Portal Access by Default**\
Toggle the switch to **Yes** if you want all customers to have access to the portal by default.
* **Yes**: Grants automatic access to all customers.
* **No**: Requires manual access approval.
**Allow Customers to Add Notes for Jobs**\
Toggle the switch to '**Yes**' to permit customers to add job notes, or '**No**' to restrict this action.
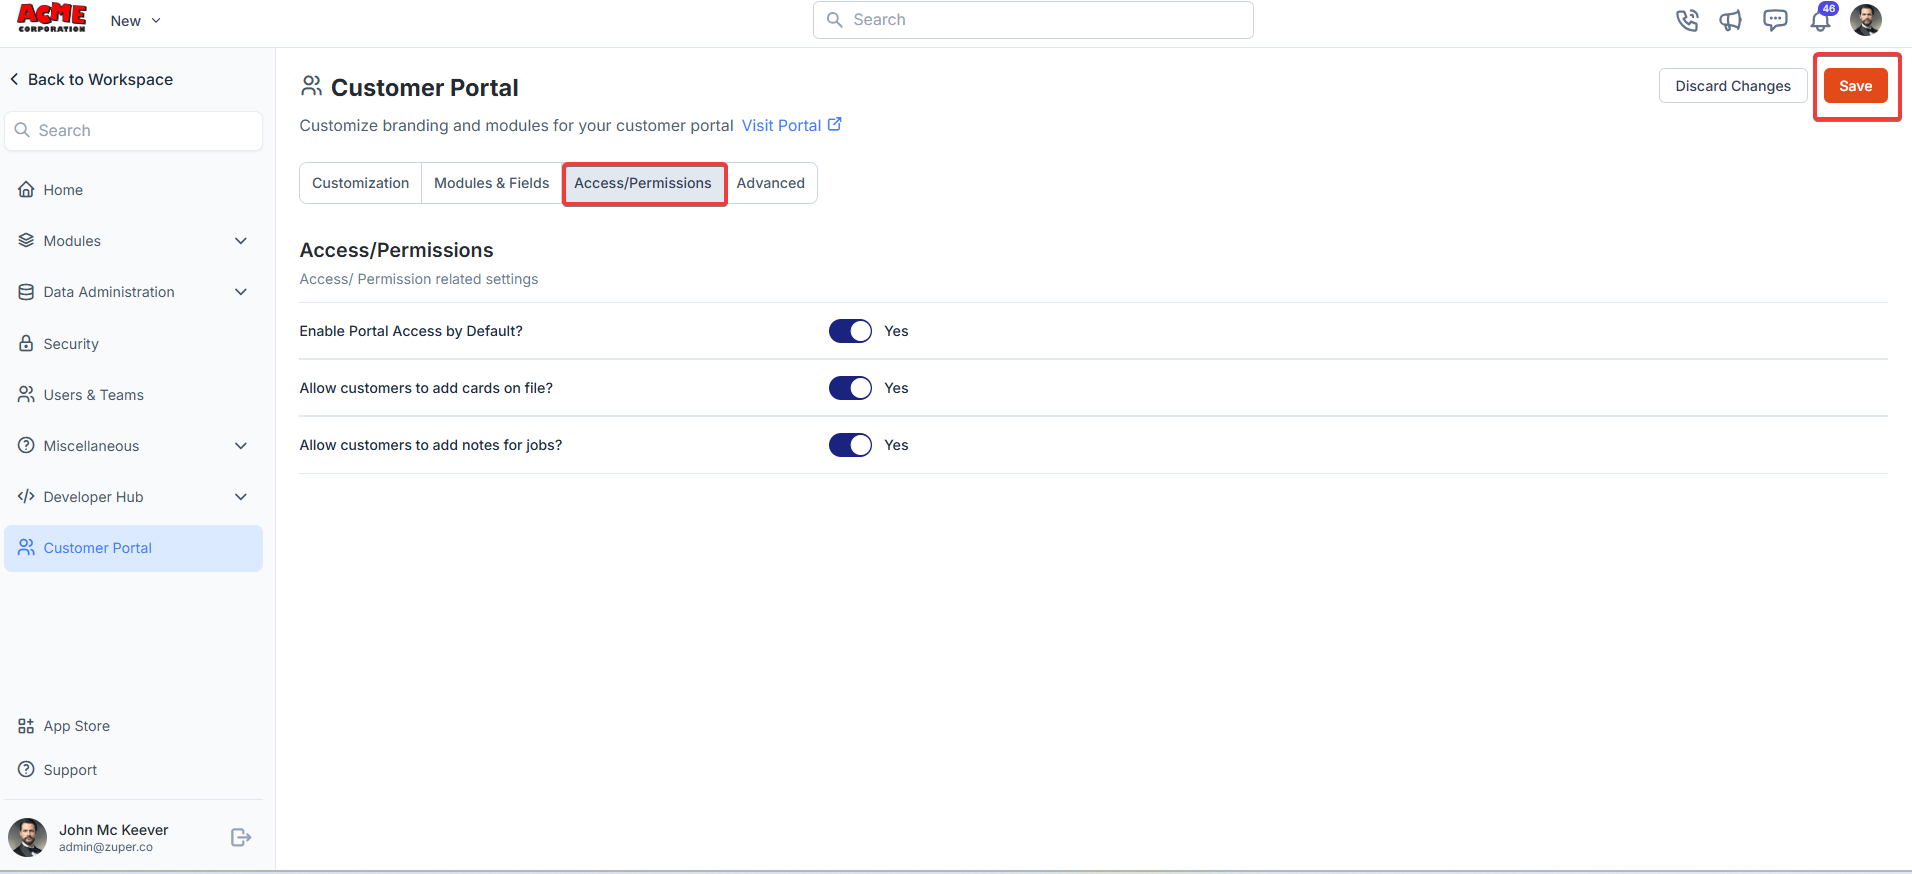 Click the "**Save**" button.
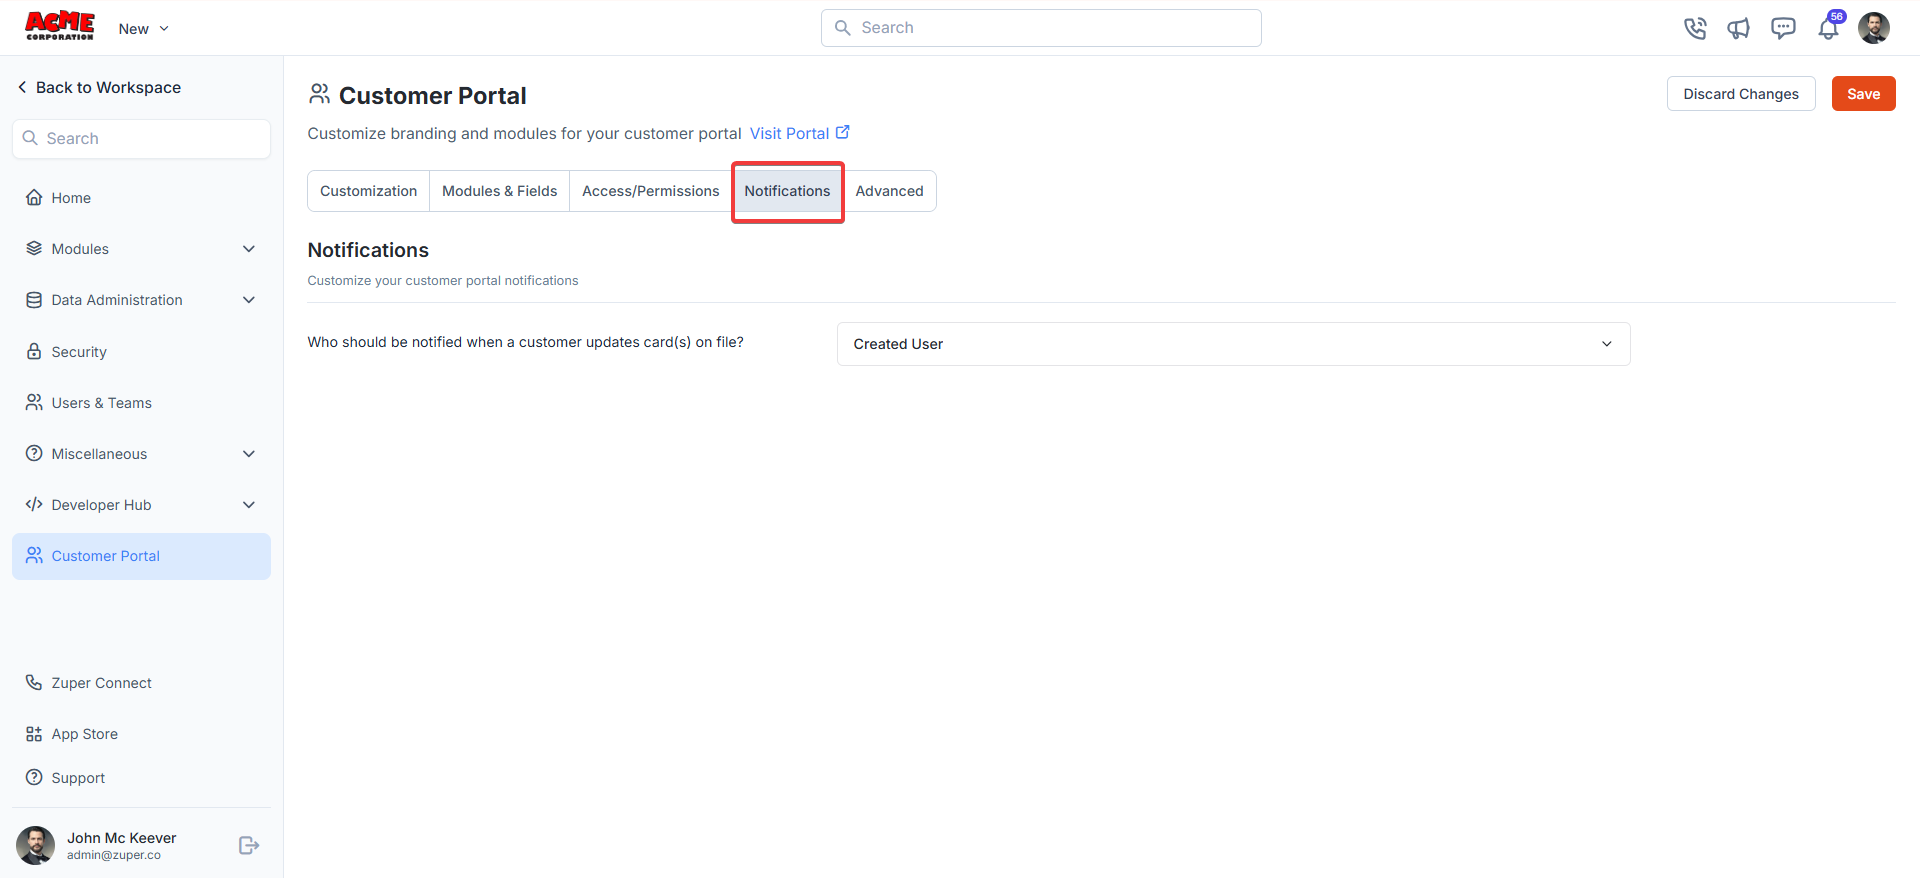
## **d. Notifications**
Who should be notified when a customer updates card(s) on file?
From the dropdown box, select the user to be notified.
Click the "**Save**" button.
## **d. Notifications**
Who should be notified when a customer updates card(s) on file?
From the dropdown box, select the user to be notified.
 ## **e. Advanced**
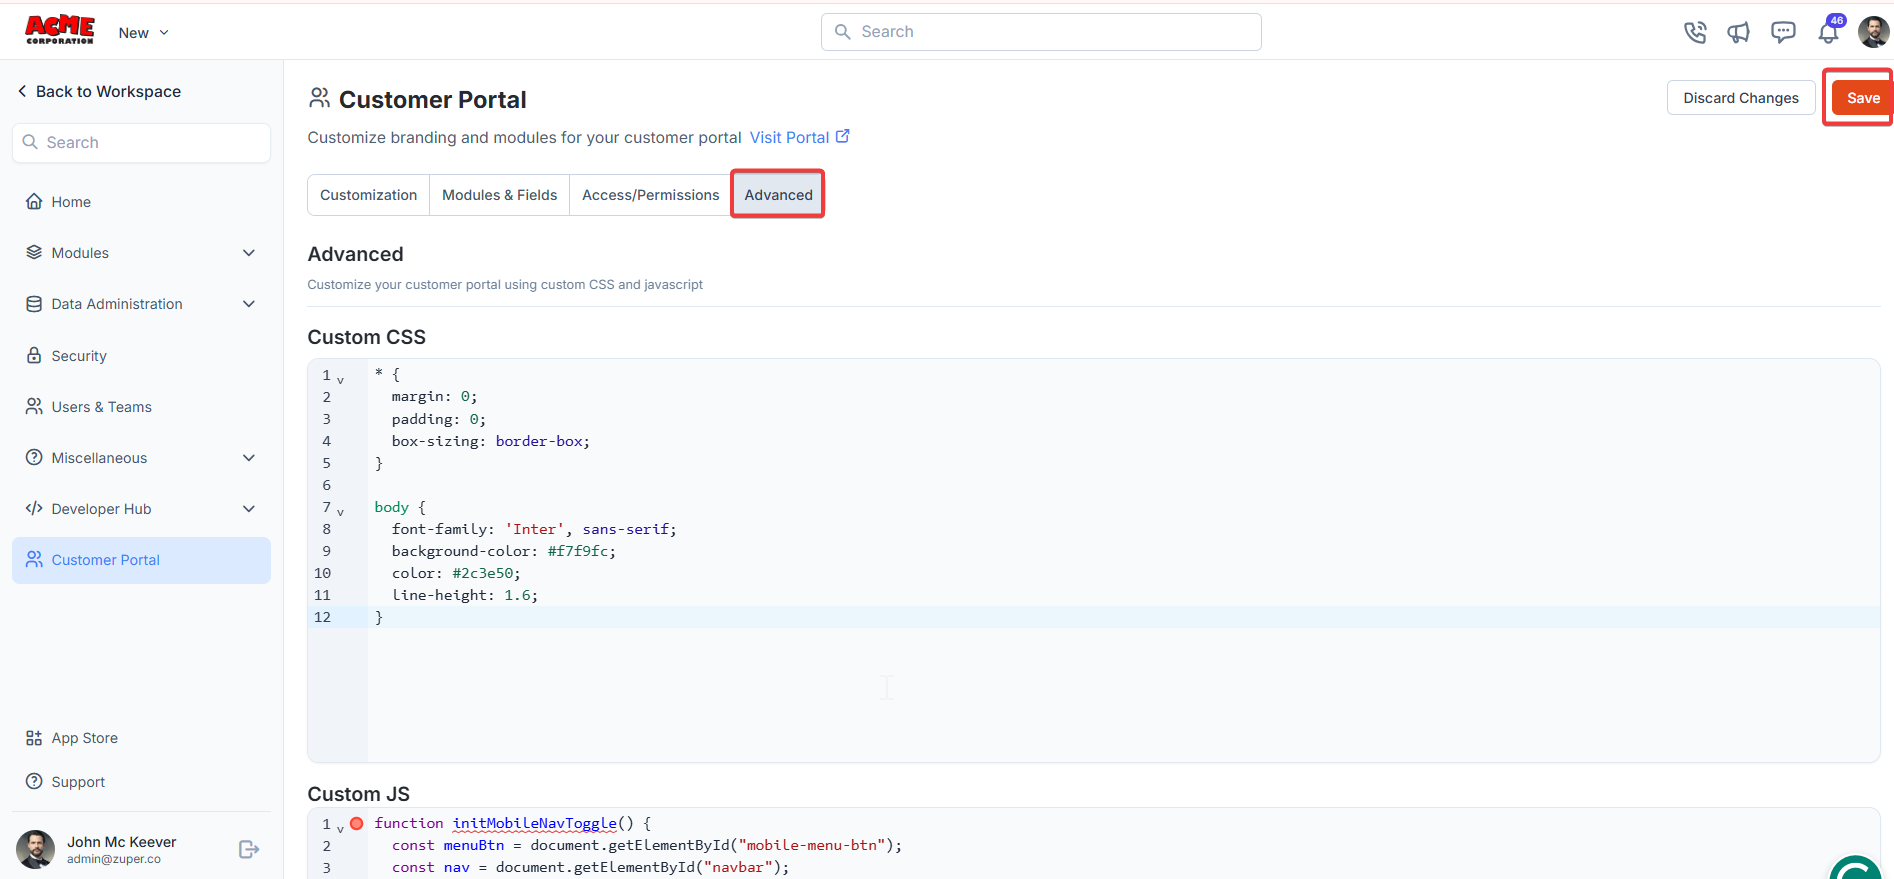
1. The advanced section helps customers add custom CSS.
Once you add the code, click the “**Save**” button.
## **e. Advanced**
1. The advanced section helps customers add custom CSS.
Once you add the code, click the “**Save**” button.
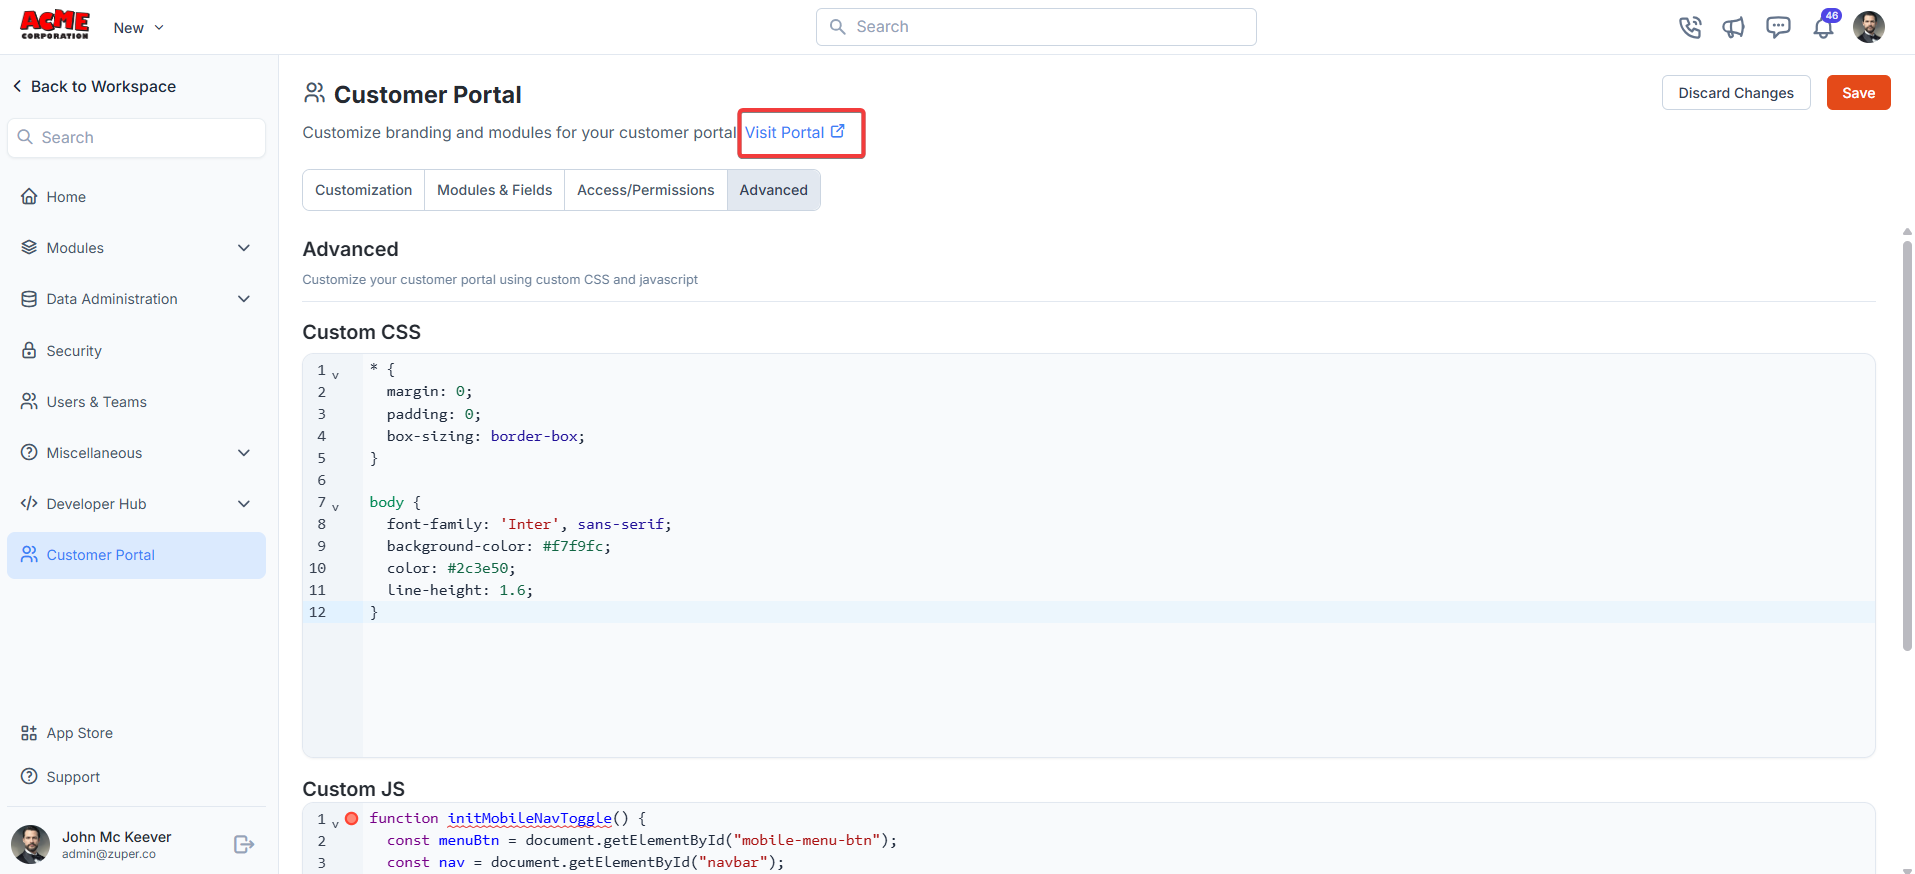
 2. Select the “**Open Portal**” option to launch the customer portal.
 ### Troubleshooting:
### OTP Email Not Received
If the portal shows "OTP sent" but the email never arrives:
1. **Portal Access** — Open the customer's contact record and confirm Portal Access is set to **Yes**.
2. **Duplicate emails** — Make sure the email address isn't used by more than one contact in your Zuper account.
3. **Spam folder** — Ask the customer to check their spam or junk folder.
4. **Wrong email** — Confirm the customer is using the exact email linked to their portal account.
## Customer Portal User Manual link
[**Login to your customer portal**](https://docs.zuper.co/Customer_Portal/Login_to_customer_portal)
[**Adding and Managing Cards in Your Wallet**](https://docs.zuper.co/Customer_Portal/Cards)
To learn more about the Customer Portal usage, click [here](https://drive.google.com/file/d/10KQUozMwYmoUhS7GEsjY0QG_ACSIz2Ib/view?usp=sharing)
With customer portal settings, businesses can personalize their customer portal, including theme, font, and logo.
### Troubleshooting:
### OTP Email Not Received
If the portal shows "OTP sent" but the email never arrives:
1. **Portal Access** — Open the customer's contact record and confirm Portal Access is set to **Yes**.
2. **Duplicate emails** — Make sure the email address isn't used by more than one contact in your Zuper account.
3. **Spam folder** — Ask the customer to check their spam or junk folder.
4. **Wrong email** — Confirm the customer is using the exact email linked to their portal account.
## Customer Portal User Manual link
[**Login to your customer portal**](https://docs.zuper.co/Customer_Portal/Login_to_customer_portal)
[**Adding and Managing Cards in Your Wallet**](https://docs.zuper.co/Customer_Portal/Cards)
To learn more about the Customer Portal usage, click [here](https://drive.google.com/file/d/10KQUozMwYmoUhS7GEsjY0QG_ACSIz2Ib/view?usp=sharing)
With customer portal settings, businesses can personalize their customer portal, including theme, font, and logo.