> ## Documentation Index
> Fetch the complete documentation index at: https://docs.zuper.co/llms.txt
> Use this file to discover all available pages before exploring further.
# Zendesk Support
The Zendesk-Zuper integration helps the user connect the Zendesk support tickets with Zuper. The bi-directional data flow based on the settings allows the user to update the ticket details on both Zendesk and Zuper.
We are going to see two different setups:
**Zendesk – Zuper Integration**
**Zuper – Zendesk Integration**
## Pre-Requisites:
API Keys. Click [here](https://docs.zuper.co/Settings/Developer_Hub/API_Keys#api-keys) to know how to create and use API keys
## A. Zendesk-Zuper Integration:
You need to land on the Zendesk support page and integrate the Zuper with Zendesk by following the steps:
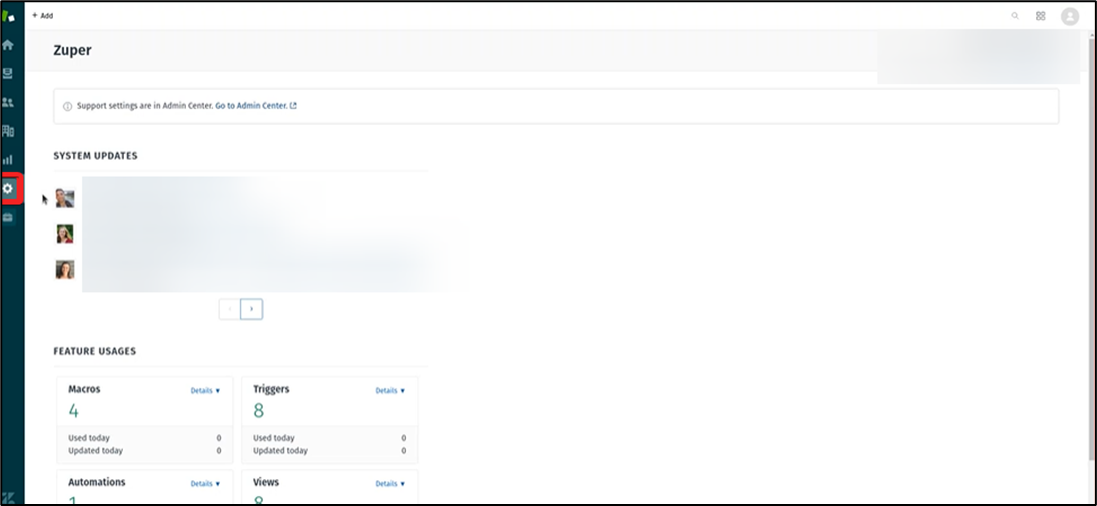
1. Select the “**Settings**” module from the left panel.
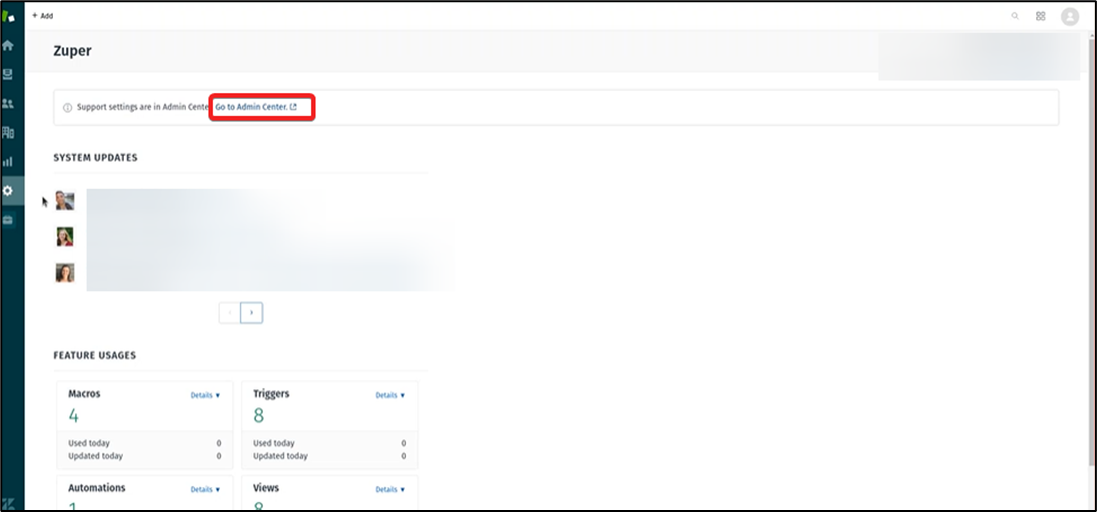
 2. Select the “**Go to Admin Centre**” option.
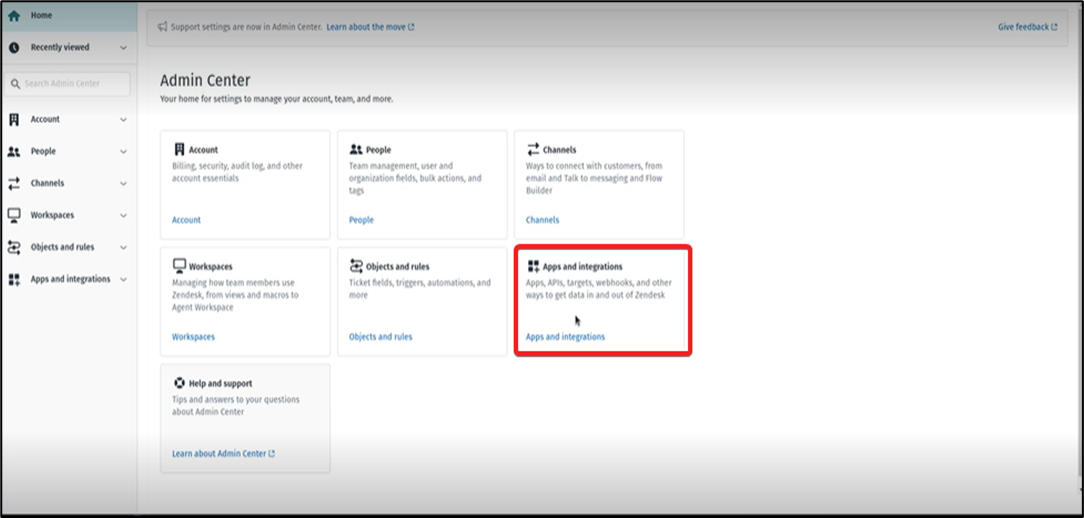
 3. Choose the “**Apps and Integrations**” subsection under the “**Admin Center**” section.
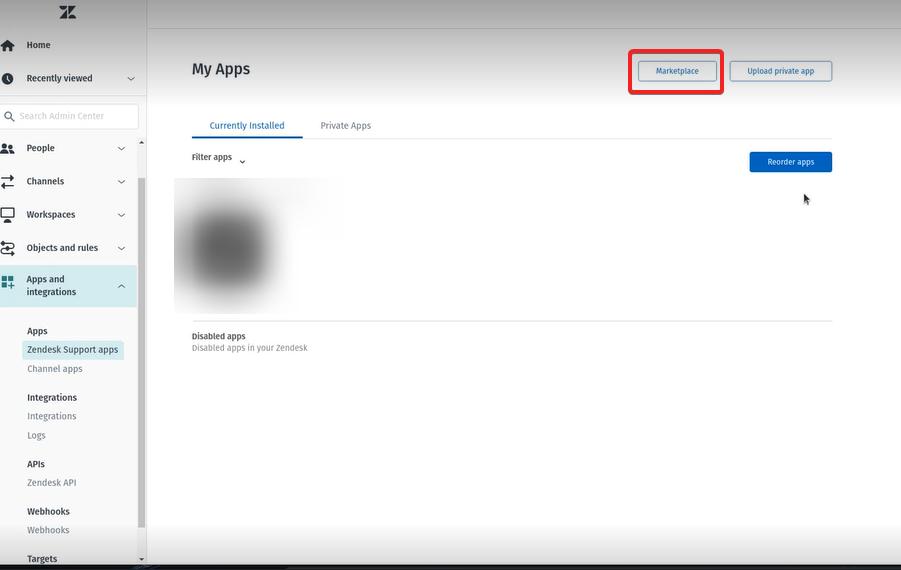
 4. Select the “**Market Place**” option present at the top of the page.
 5. Search for the "**Zuper**" app under the filters option.
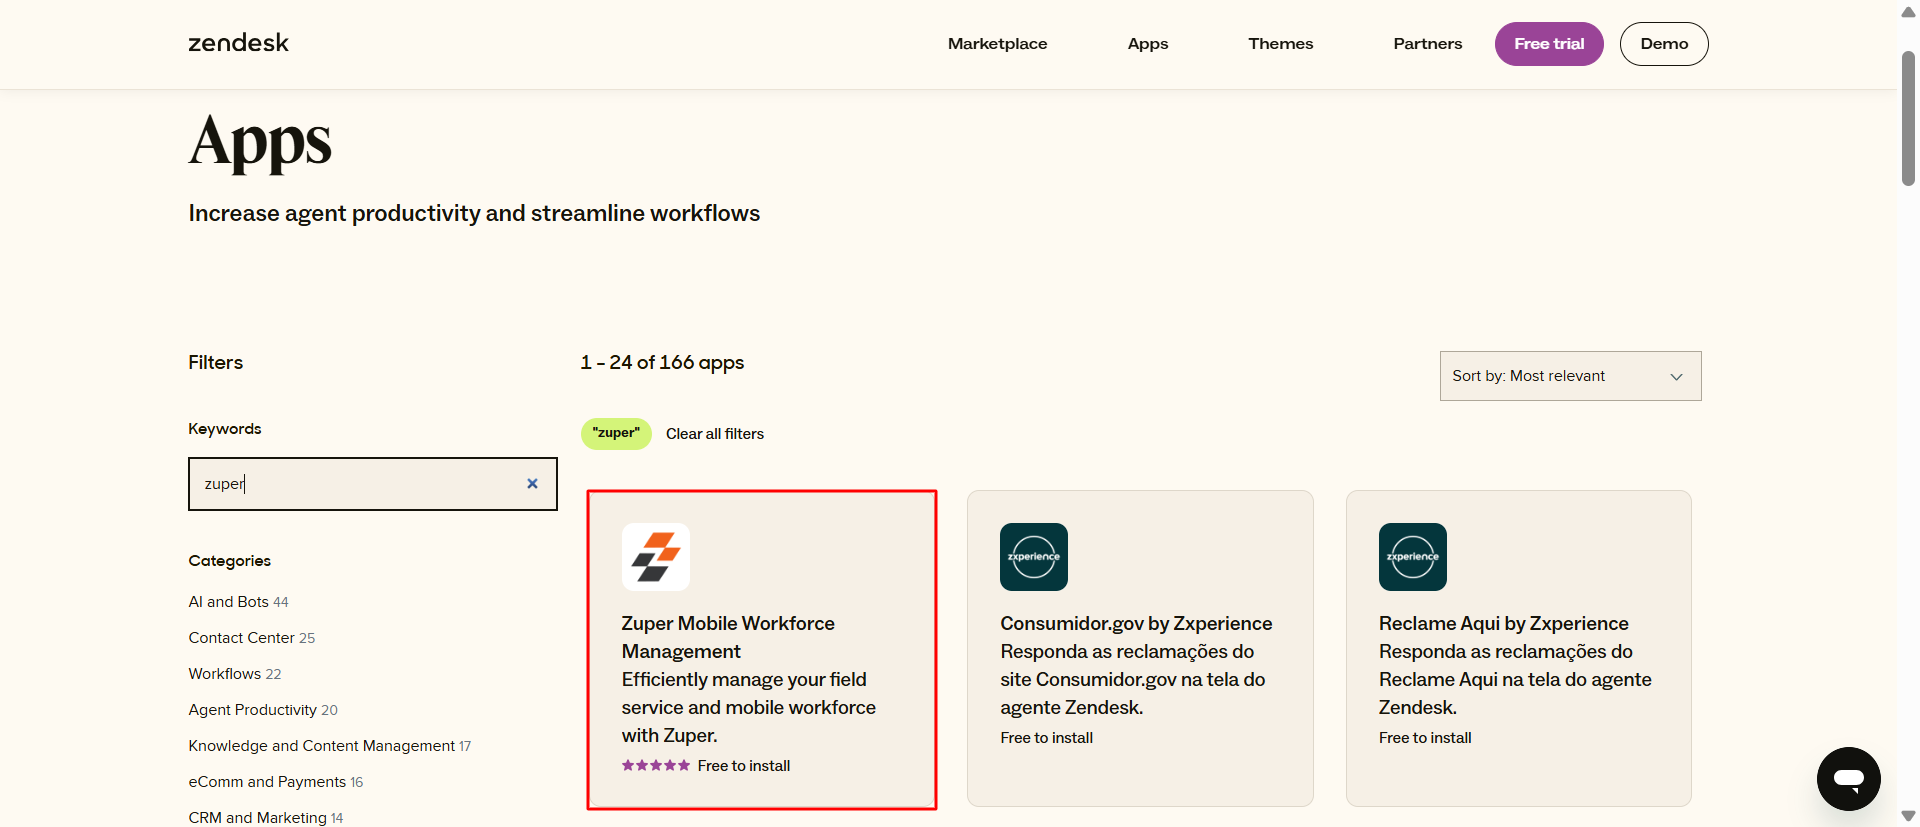
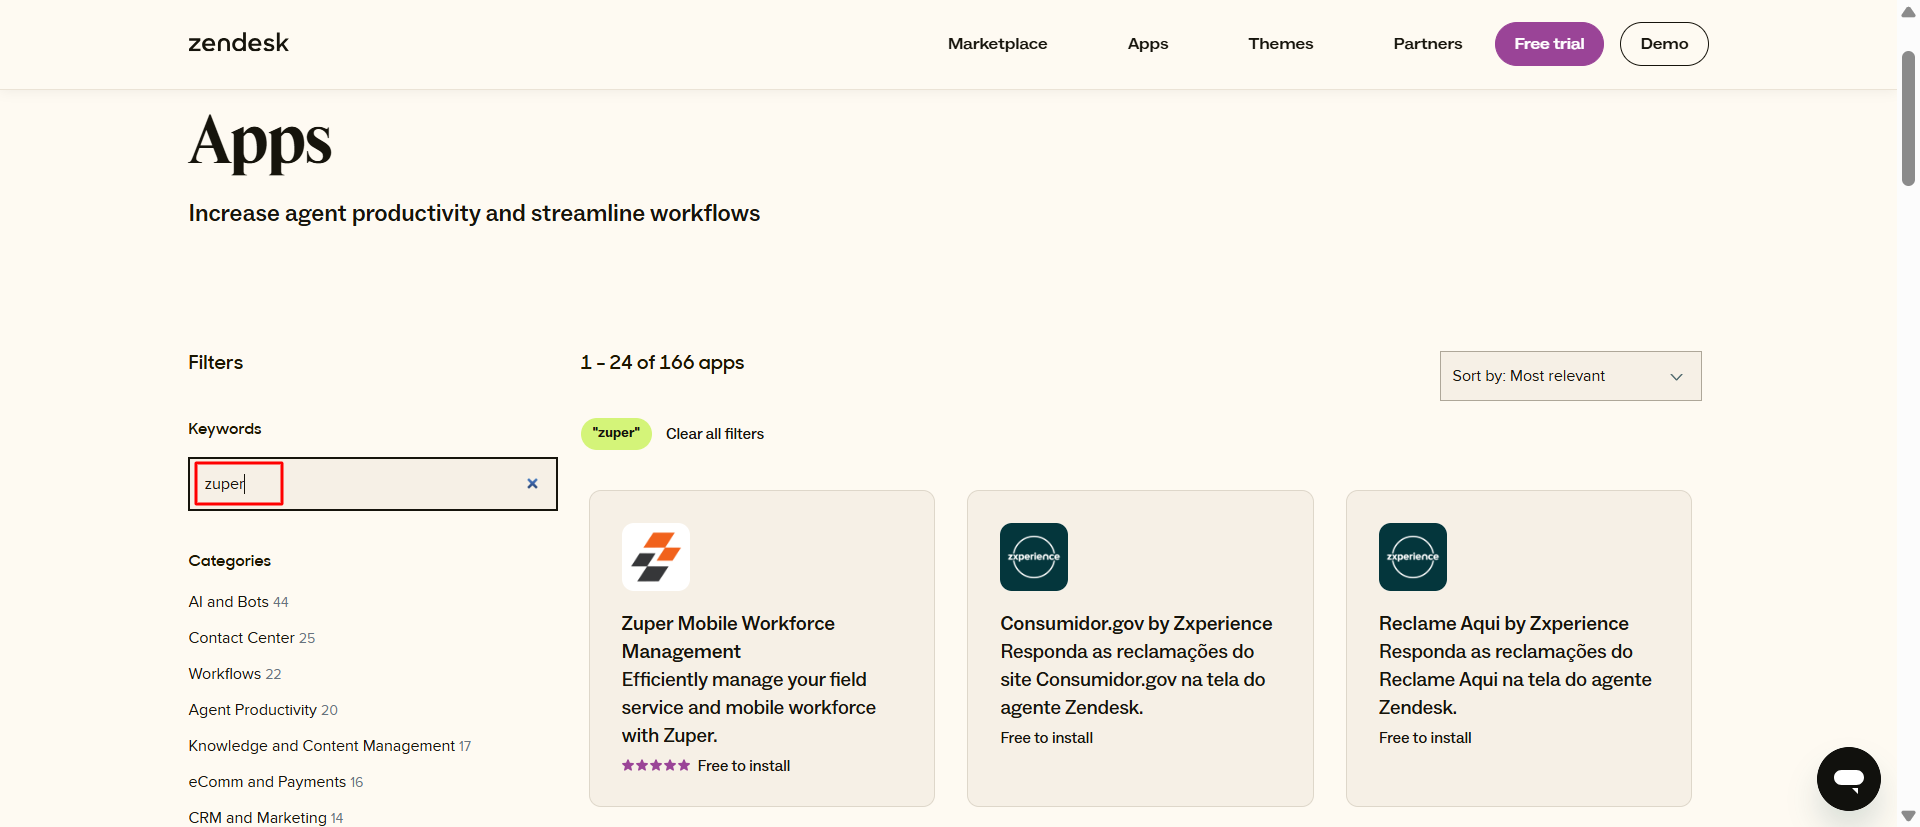 6. Select the “**Zuper**” app from the list.
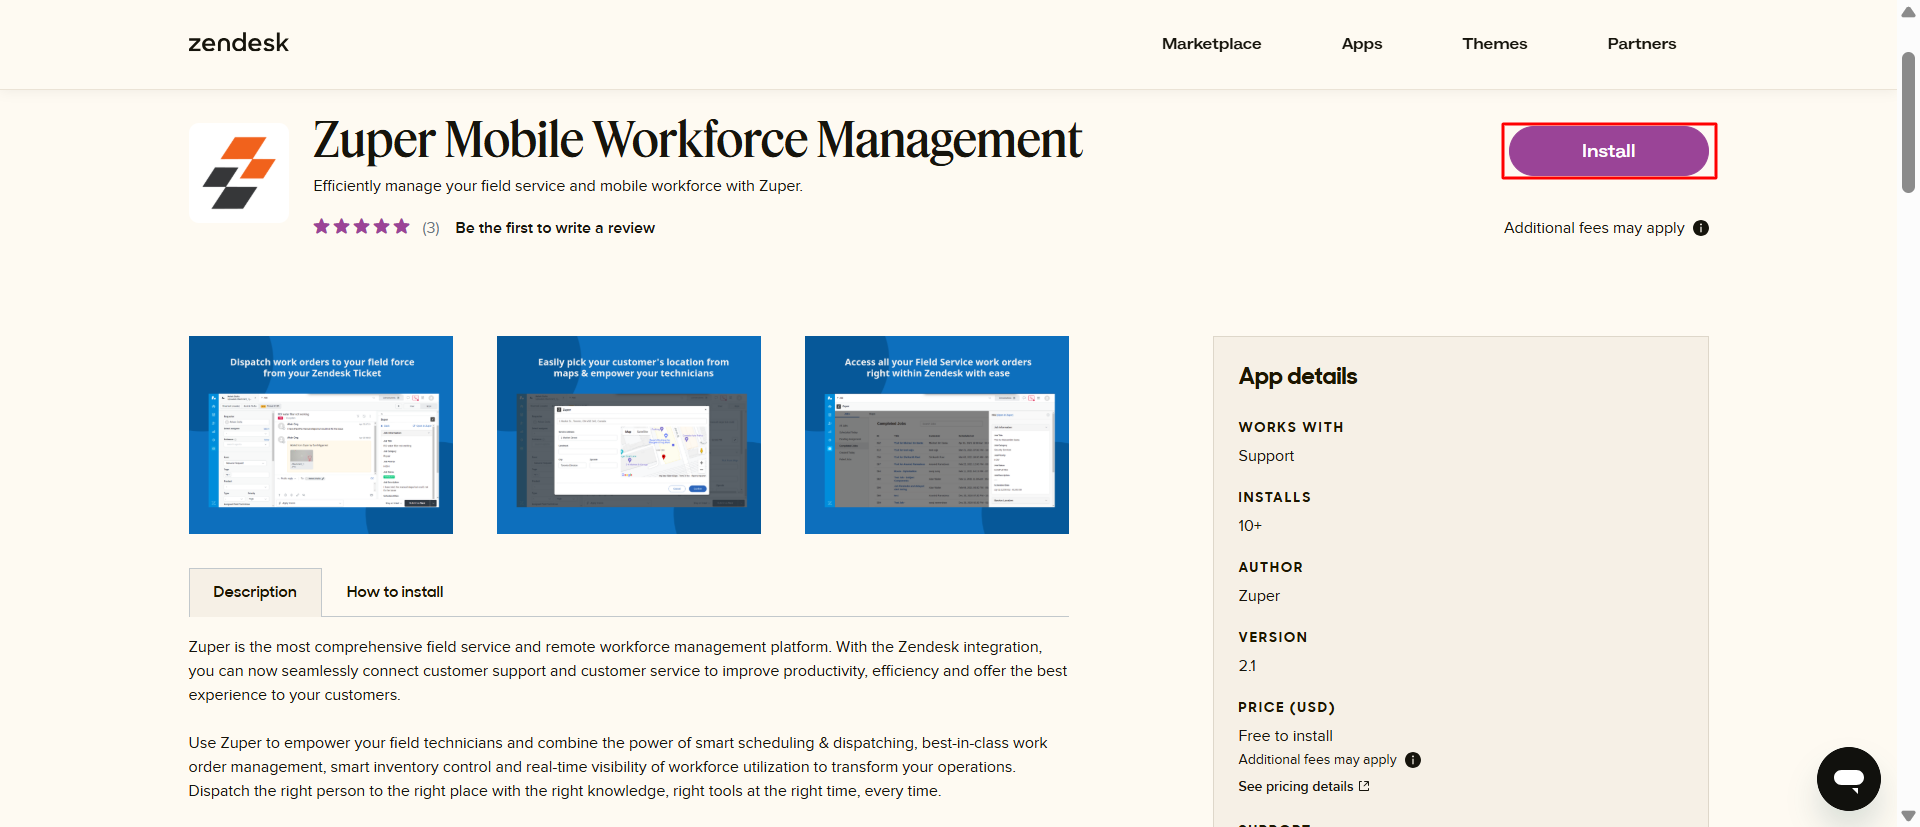
 7. Select the “**Install**” option to set up the Zuper integration.
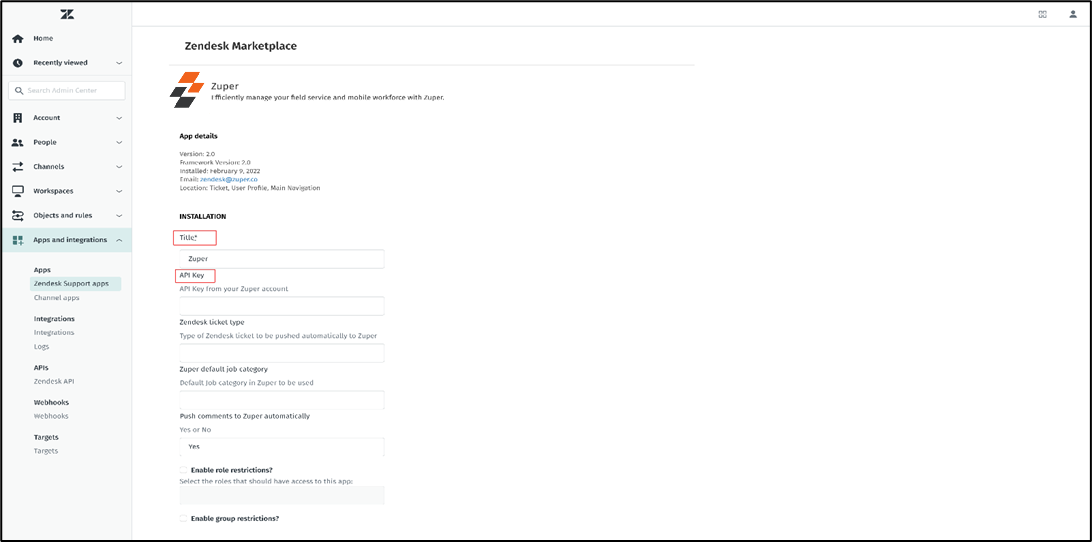
 8. Enter the Mandatory fields: “**Title**” and “**API Key**” (Zuper’s API key), and if required, fill in the Optional fields: “**Zendesk Ticket Type**,” “**Zuper Default Job Category**,” “**Push Comments to Zuper Automatically**,” “**Enable Role Restrictions**,” “**Enable Group Restrictions**.”
 9. Select the “**Update**” button to save the preferences.
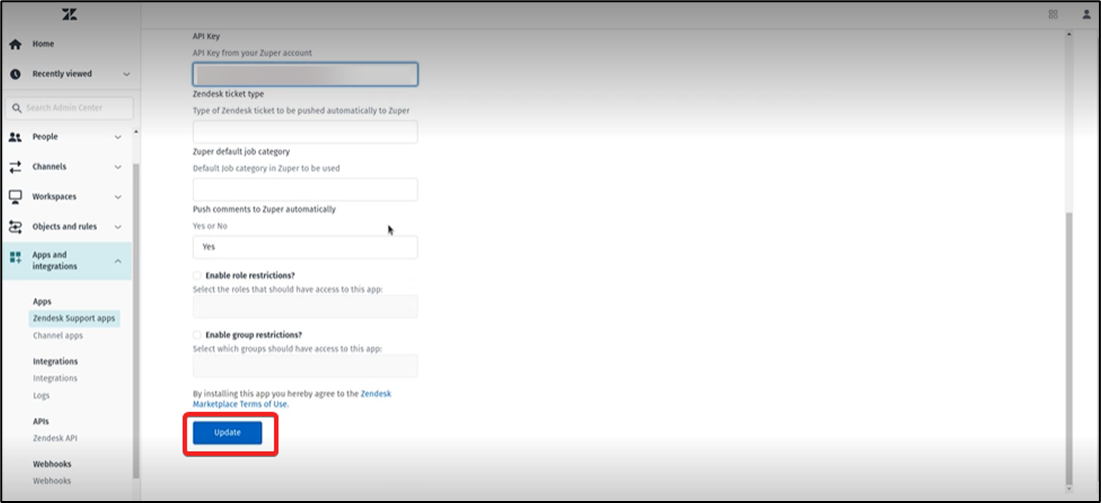 By following the steps above, you can easily integrate Zuper with Zendesk.
## B. Zuper – Zendesk Integration:
To get the API keys for Zuper-Zendesk Integration, follow the steps below:
1. Click on “**Go to Admin Center**” under “**Settings**” from the left panel.
By following the steps above, you can easily integrate Zuper with Zendesk.
## B. Zuper – Zendesk Integration:
To get the API keys for Zuper-Zendesk Integration, follow the steps below:
1. Click on “**Go to Admin Center**” under “**Settings**” from the left panel.
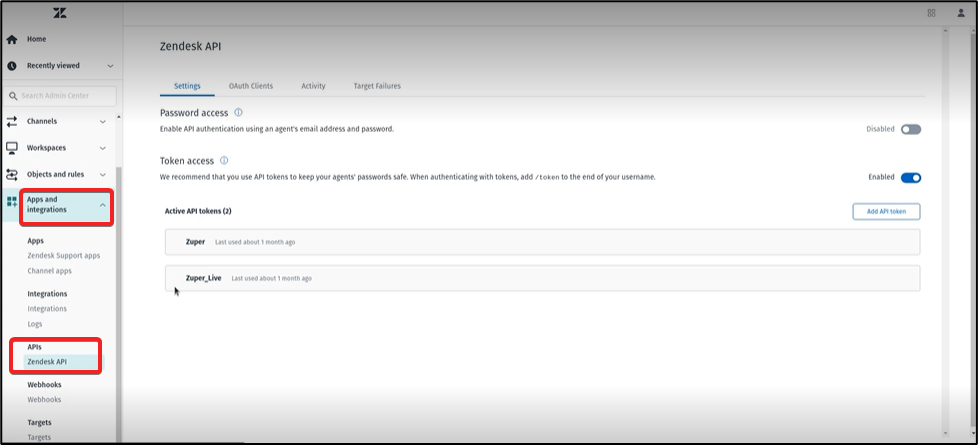
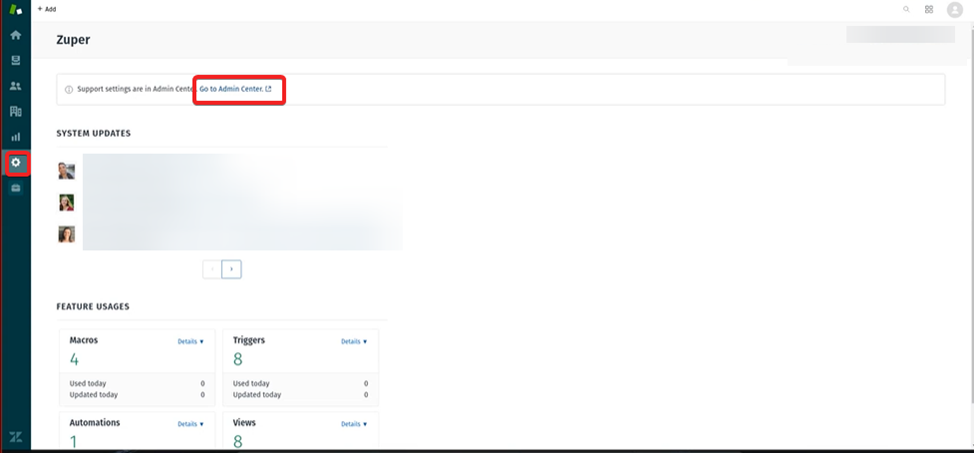 2. Now select “**Apps and Integrations**” and click on “**Zendesk API**.”
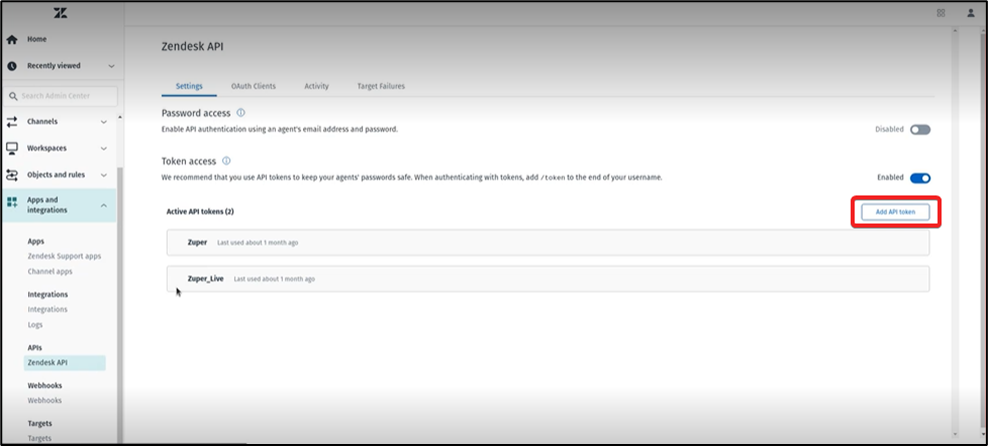
 3. Select “**Add API Token**” to create the new API key.
 4. Type the API Token Description name as “**Zuper**” and copy the “**API Key**.”
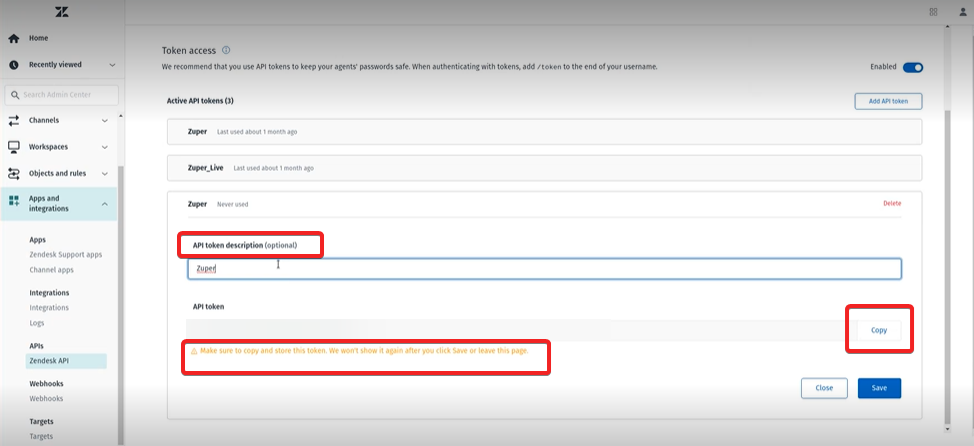 **Note**: Make sure to copy and store this API token. Zendesk will not display it again after clicking Save or leaving this page.
## How to Install?
You need to land on the Zuper web app and integrate Zendesk with Zuper by following the steps:
1. Click on your profile picture on the top right corner of the page, which will open the list of options. Next, click on the “**App Store**” link.
**Note**: Make sure to copy and store this API token. Zendesk will not display it again after clicking Save or leaving this page.
## How to Install?
You need to land on the Zuper web app and integrate Zendesk with Zuper by following the steps:
1. Click on your profile picture on the top right corner of the page, which will open the list of options. Next, click on the “**App Store**” link.
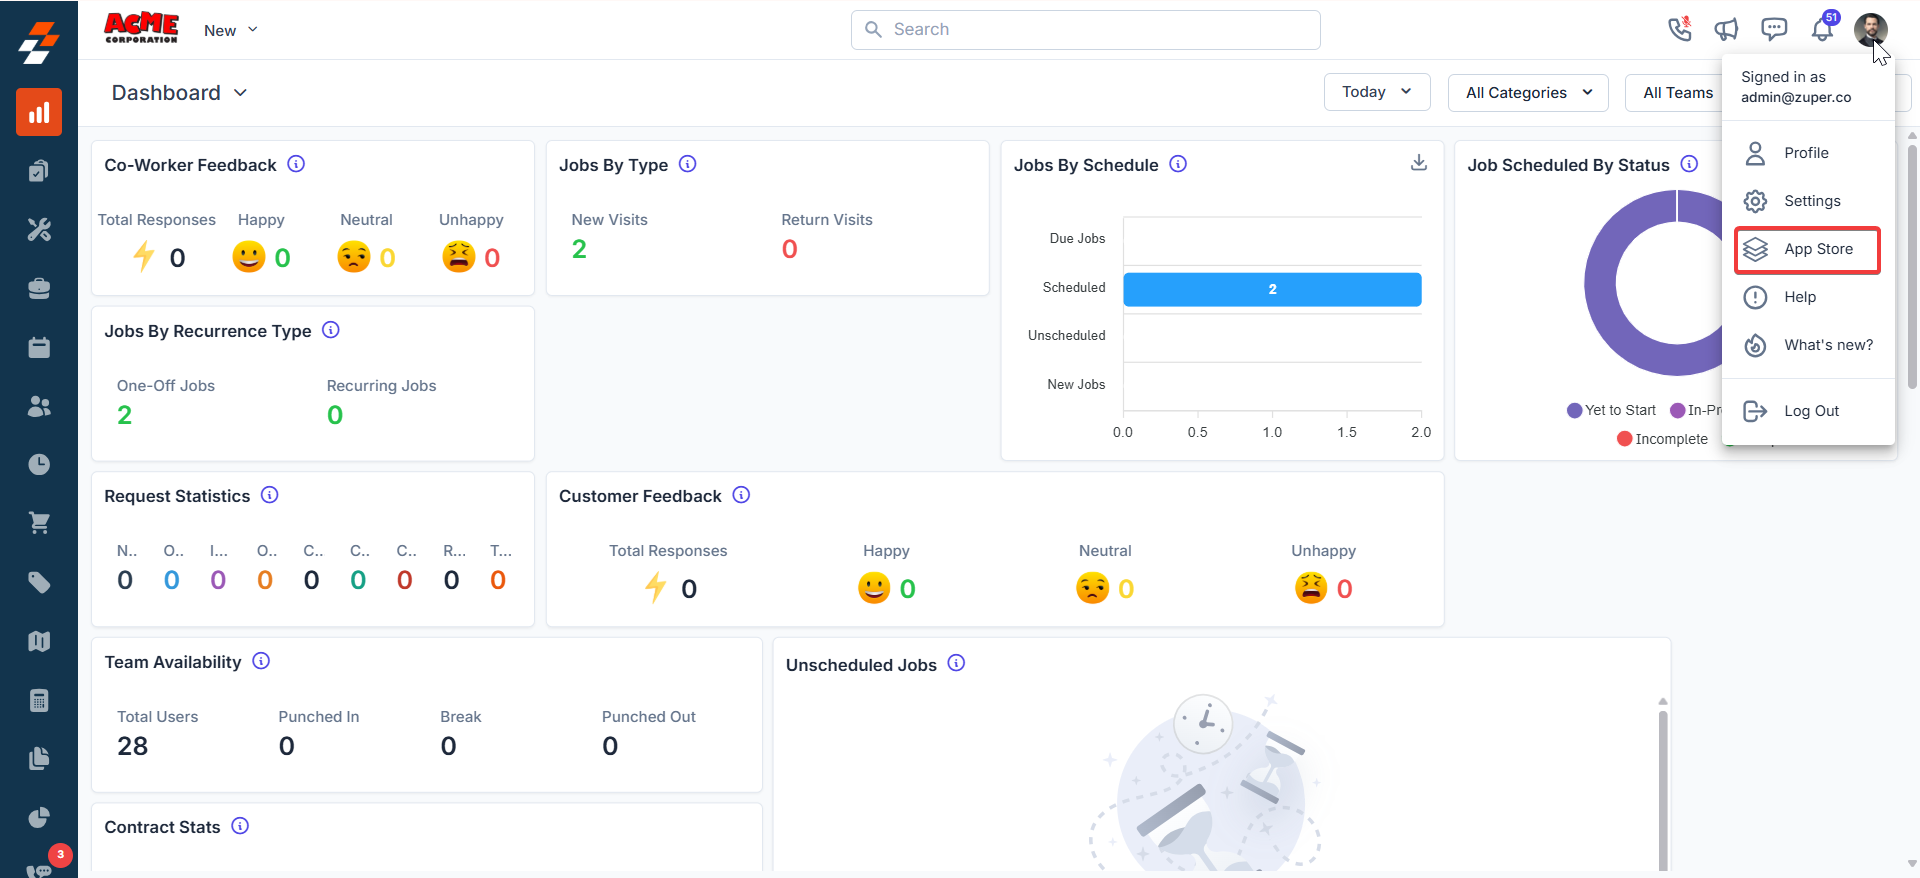 2. You will be redirected to the “**App Store**.” Click on “**CRM**” under “**Browse by Category**” on your left and click “**Zendesk**.”
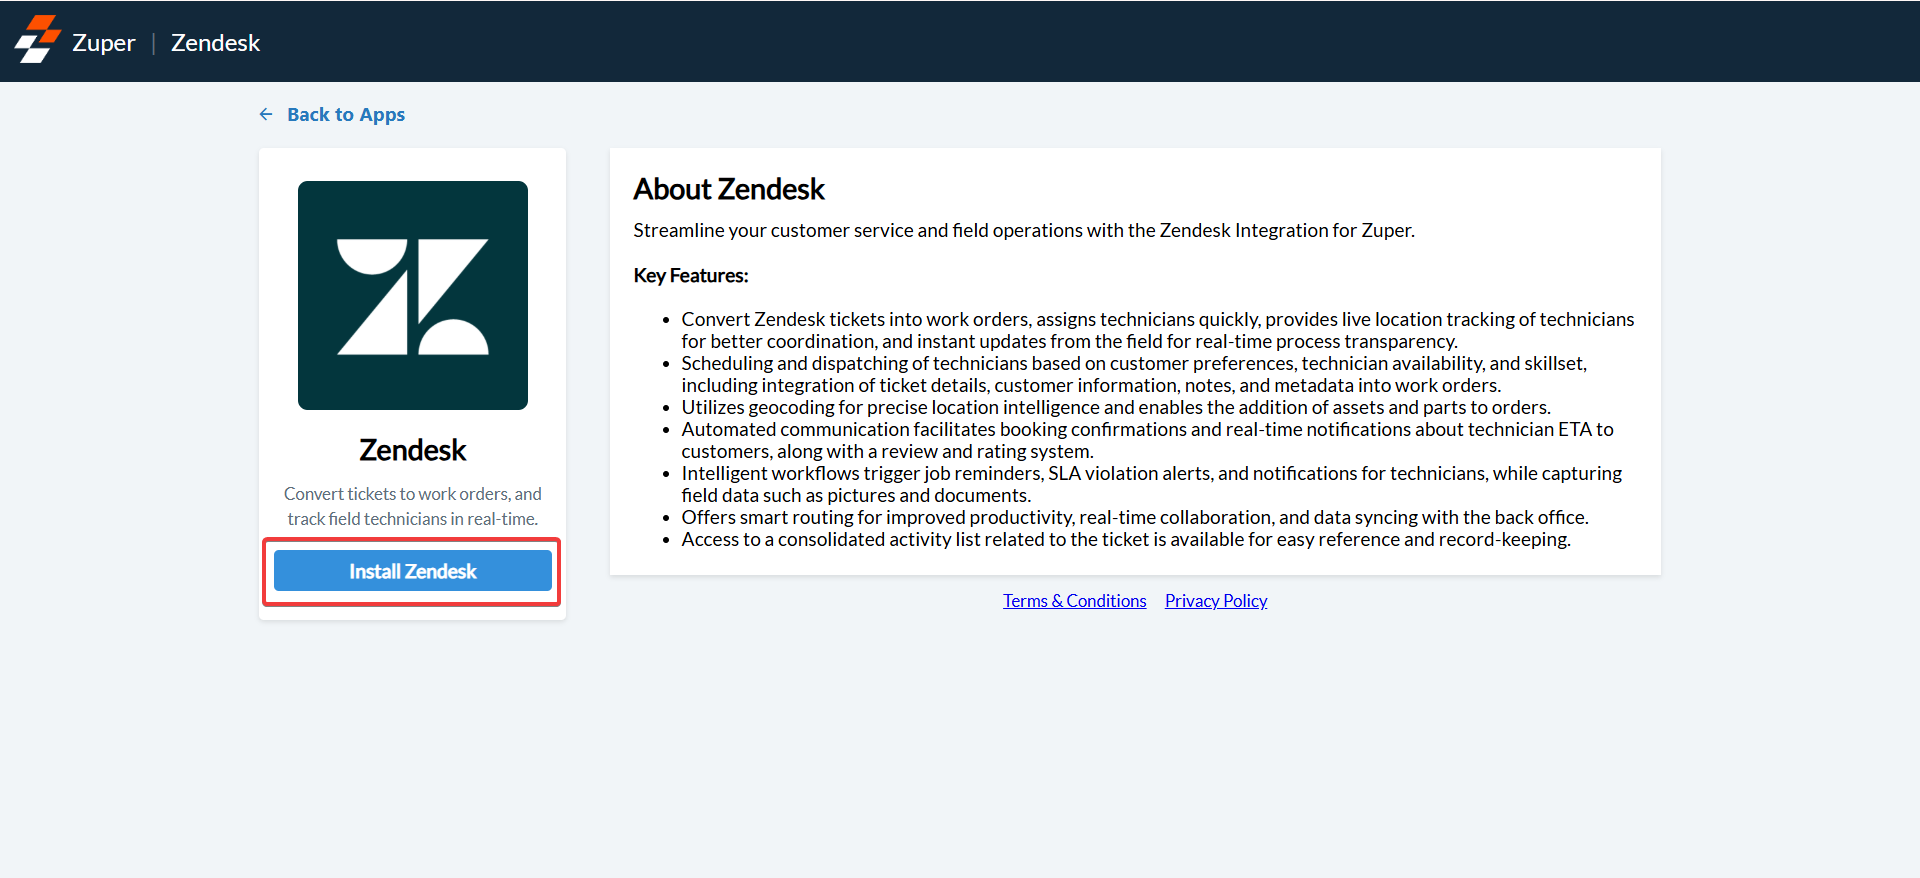 3. In the dialog box, enter the **Zendesk subdomain** of the account you want to connect to Zuper.
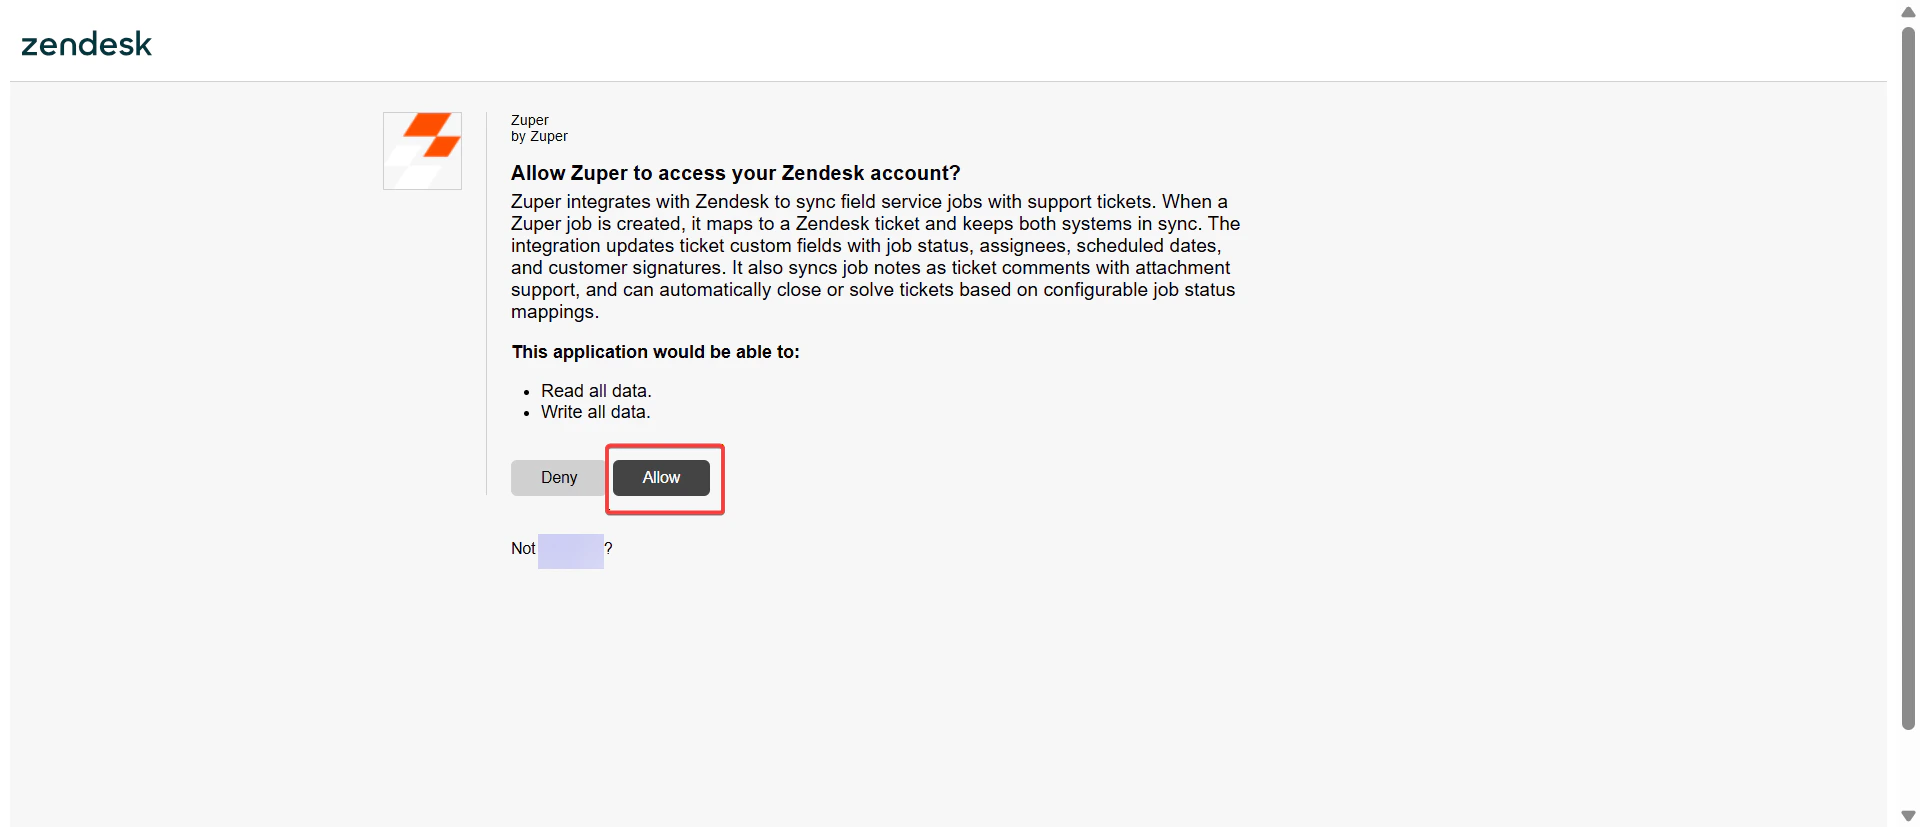
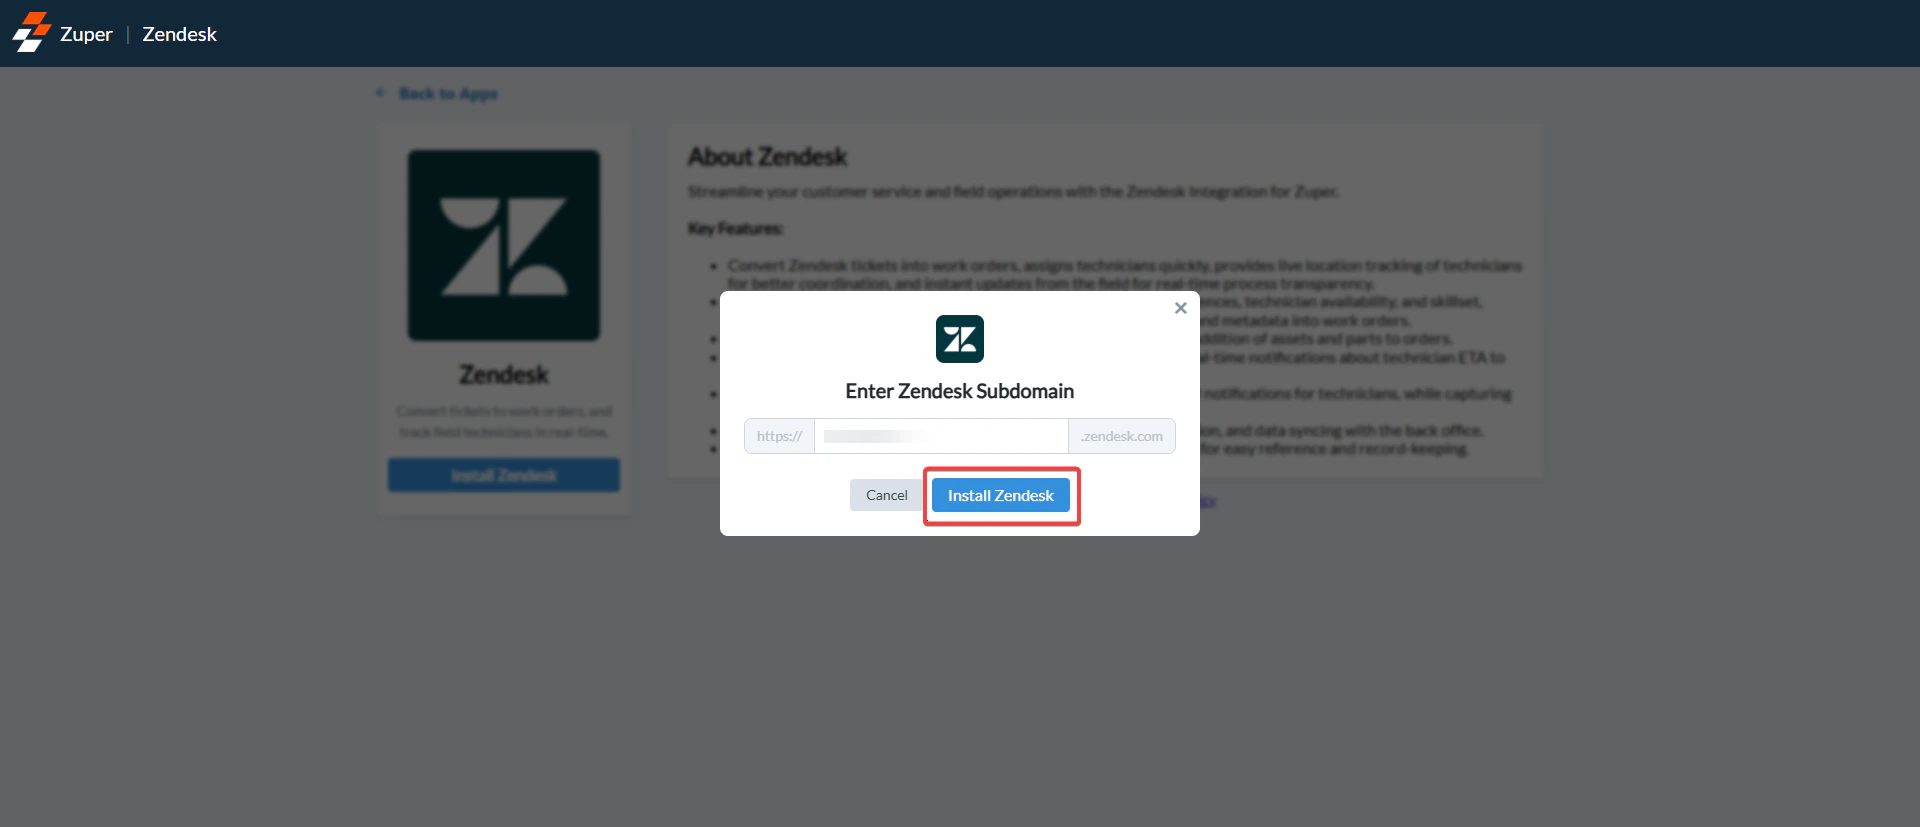 4. Zendesk displays a dialog box **“Allow Zuper to access your Zendesk account?”**
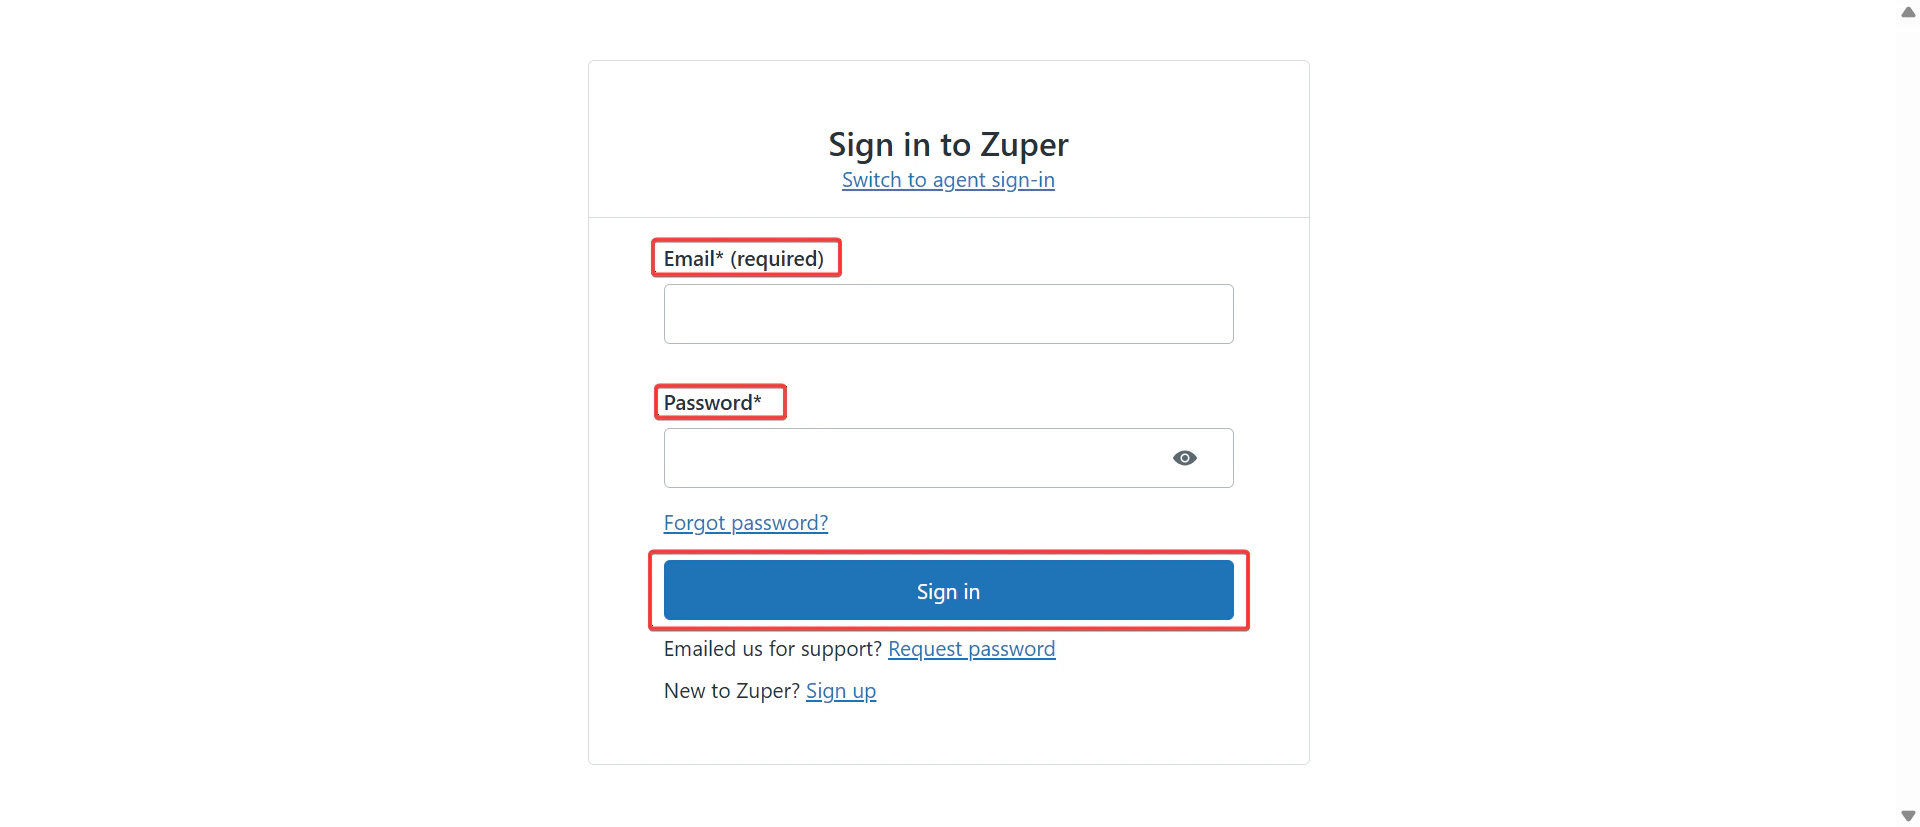
 5. Enter the Email and Password.
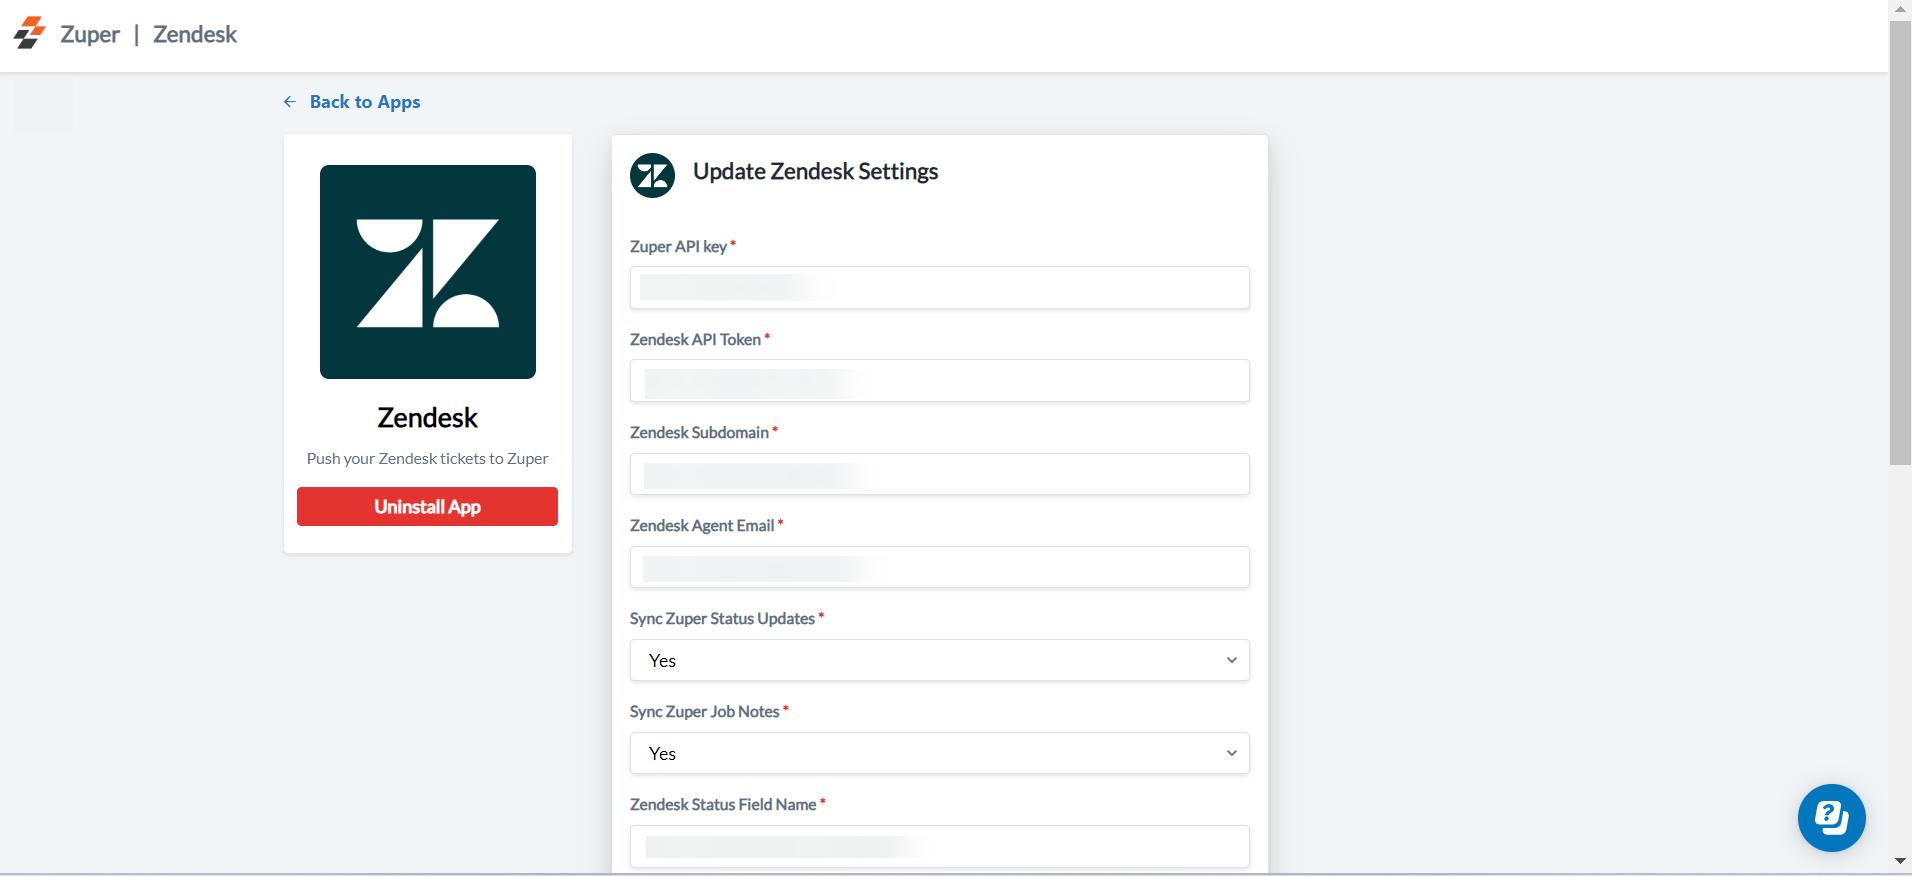
 6. Enter the Mandatory Fields: Zuper API Key, Zendesk API Token, Zendesk Agent Email, Sync Zuper Status Updates, Sync Zuper Job Status, Zendesk Status Field Name.
 7. Enter the Optional Fields on the Zuper from the field details taken from the
Zendesk support page: **Zendesk Assignees Field Name, Zendesk Start Date**
Field Name. Zendesk End Date Field Name, Zendesk Customer Signature Field Name, Zendesk Ticket Closure Statuses.
7. Enter the Optional Fields on the Zuper from the field details taken from the
Zendesk support page: **Zendesk Assignees Field Name, Zendesk Start Date**
Field Name. Zendesk End Date Field Name, Zendesk Customer Signature Field Name, Zendesk Ticket Closure Statuses.
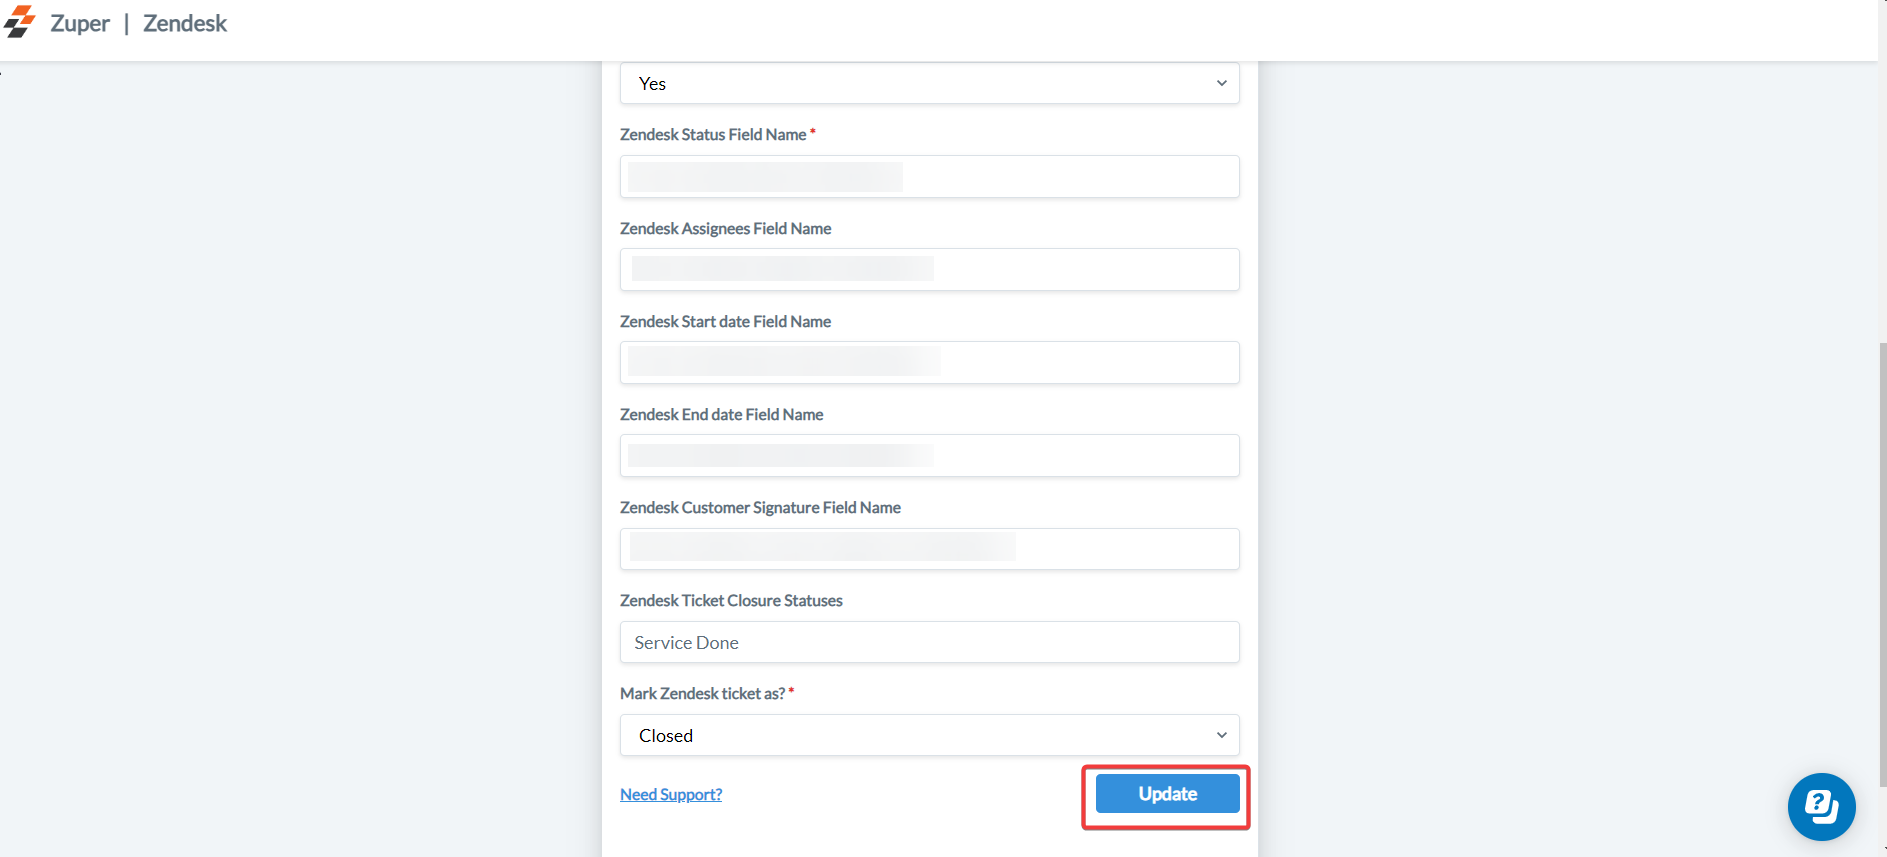 Select the “**Update**” button to save the preferences.
**What Happens After Authorization**
After successful authorization:
* Map Zuper jobs to Zendesk tickets.
* Automatically update ticket custom fields with job status, assigned technician, scheduled date, and customer signatures.
* Job notes sync as Zendesk ticket comments, including any attachments.
* Tickets can automatically resolve or close based on mapped job statuses.
**Best Practices**
* Authorize the integration using a Zendesk admin account to avoid permission issues.
* Configure the required Zendesk custom fields for job mapping before connecting.
* Do not disconnect the OAuth authorization unless you need to reset the integration.
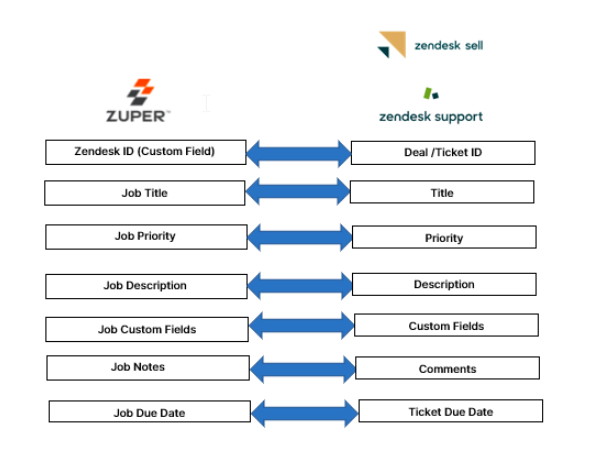
## C. Zuper - Zendesk Sell/ Support Field Equivalents:
Deal ID / Zendesk ID - The deal ID / Zendesk ID is a unique ID of Zendesk Sell / Support that is getting pushed to the Custom Field of Zuper for identification purposes.
Select the “**Update**” button to save the preferences.
**What Happens After Authorization**
After successful authorization:
* Map Zuper jobs to Zendesk tickets.
* Automatically update ticket custom fields with job status, assigned technician, scheduled date, and customer signatures.
* Job notes sync as Zendesk ticket comments, including any attachments.
* Tickets can automatically resolve or close based on mapped job statuses.
**Best Practices**
* Authorize the integration using a Zendesk admin account to avoid permission issues.
* Configure the required Zendesk custom fields for job mapping before connecting.
* Do not disconnect the OAuth authorization unless you need to reset the integration.
## C. Zuper - Zendesk Sell/ Support Field Equivalents:
Deal ID / Zendesk ID - The deal ID / Zendesk ID is a unique ID of Zendesk Sell / Support that is getting pushed to the Custom Field of Zuper for identification purposes.
 ## D. How does Job creation work in Zendesk?
1. From the right panel of Zendesk, Choose “**Create Job**” to create a new job. You need to fill the following tabs :
**Customer Details Tab** - Enter the client’s details.
\*\*Job Details Tab \*\*- Enter the work order details.
**Assign Employees** - Assign the field technicians using assisted scheduling option.
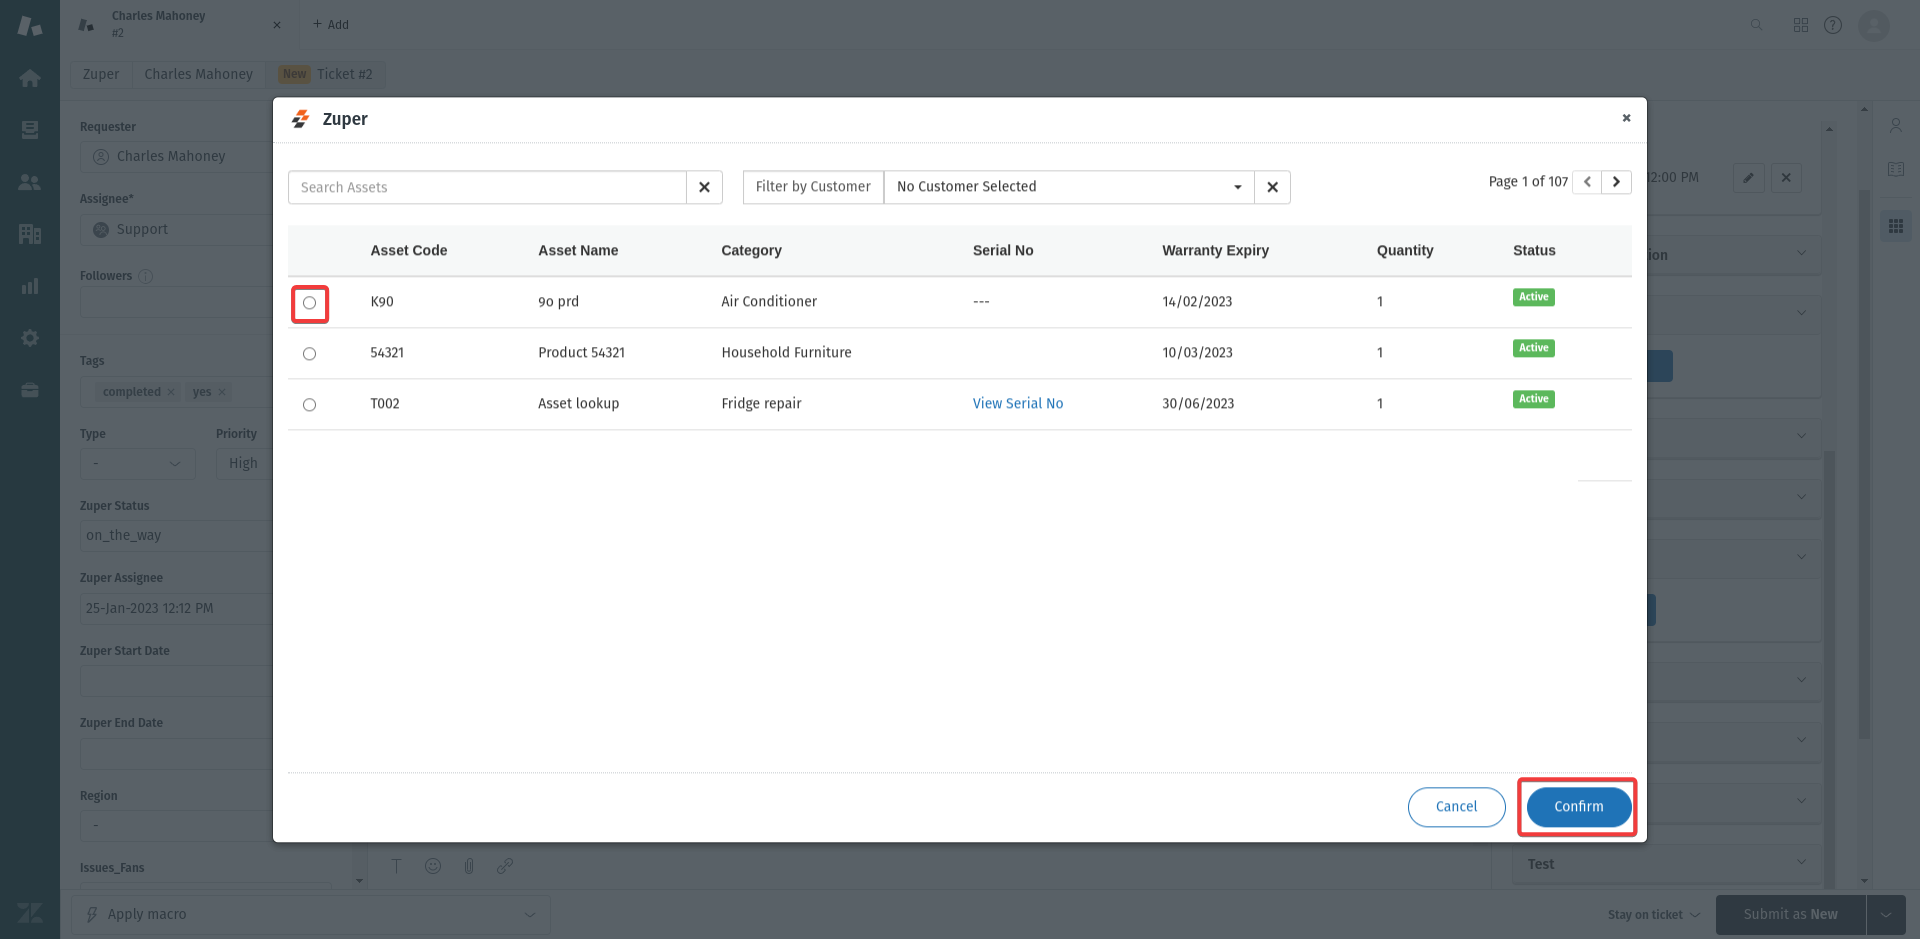
2. Asset Picker helps you to select the resources from Zuper’s Jobs module of Zendesk.
## D. How does Job creation work in Zendesk?
1. From the right panel of Zendesk, Choose “**Create Job**” to create a new job. You need to fill the following tabs :
**Customer Details Tab** - Enter the client’s details.
\*\*Job Details Tab \*\*- Enter the work order details.
**Assign Employees** - Assign the field technicians using assisted scheduling option.
2. Asset Picker helps you to select the resources from Zuper’s Jobs module of Zendesk.
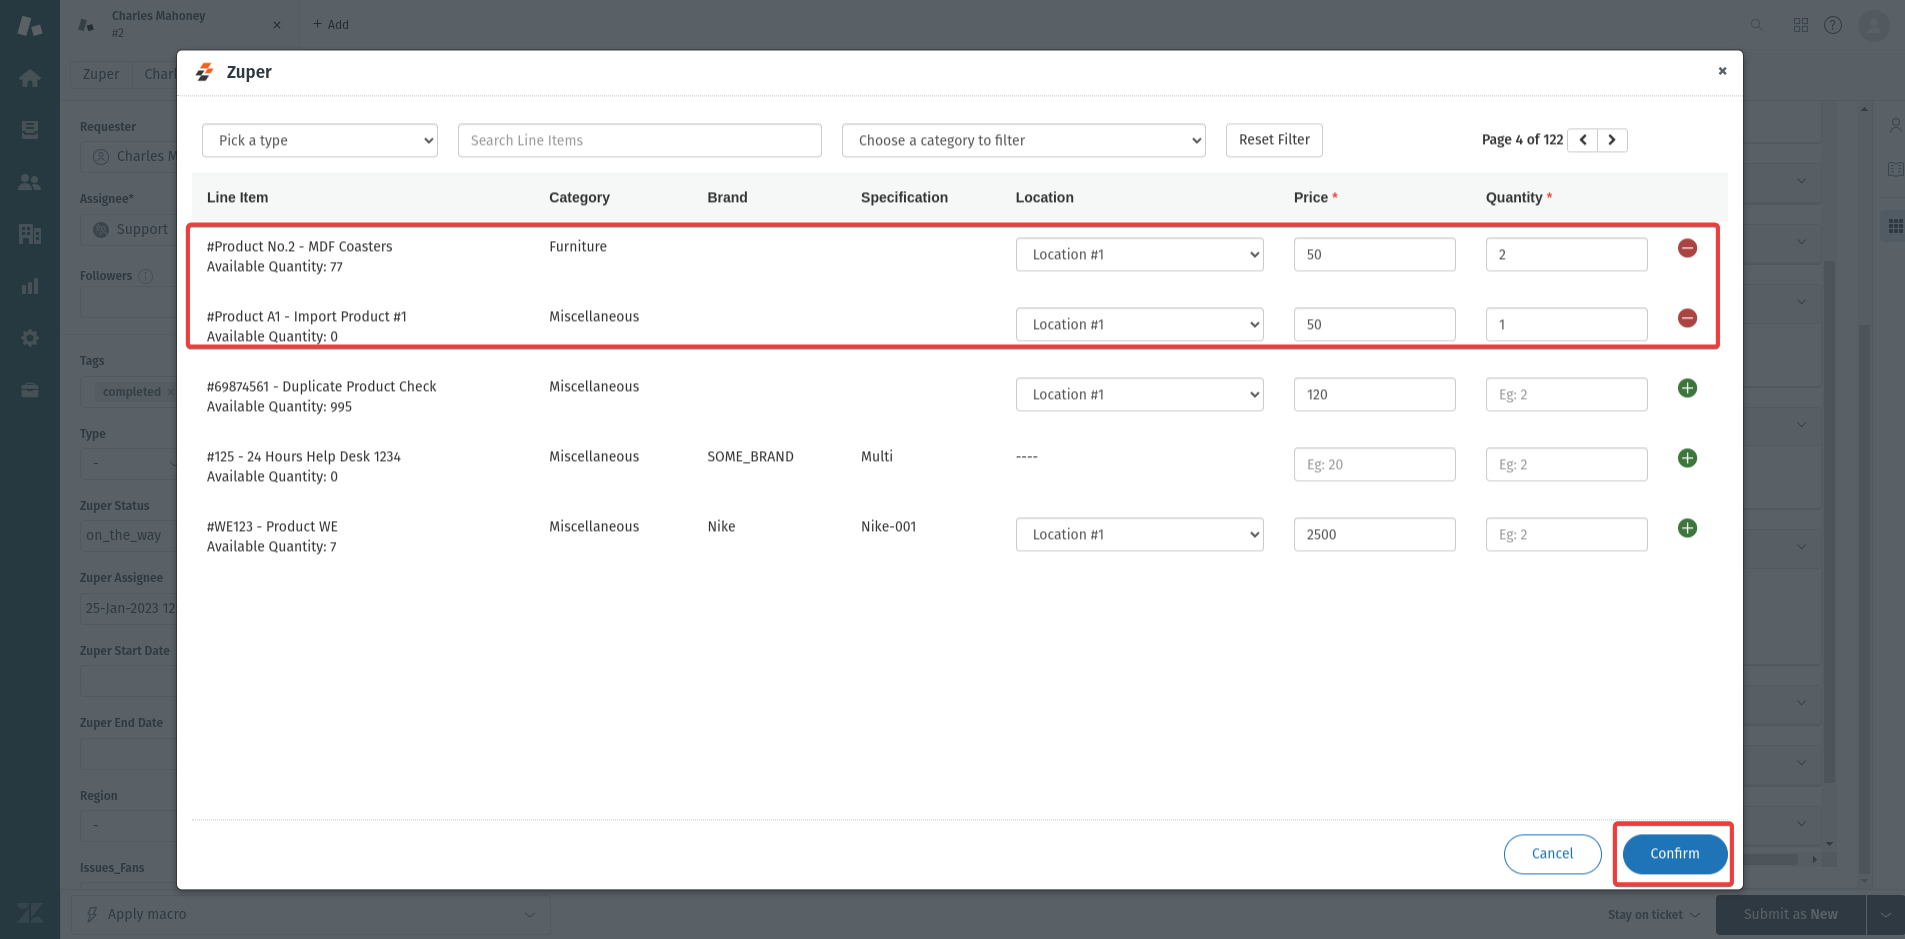
 3. Parts Picker helps you select the parts from the Zuper’s Jobs module of Zendesk.
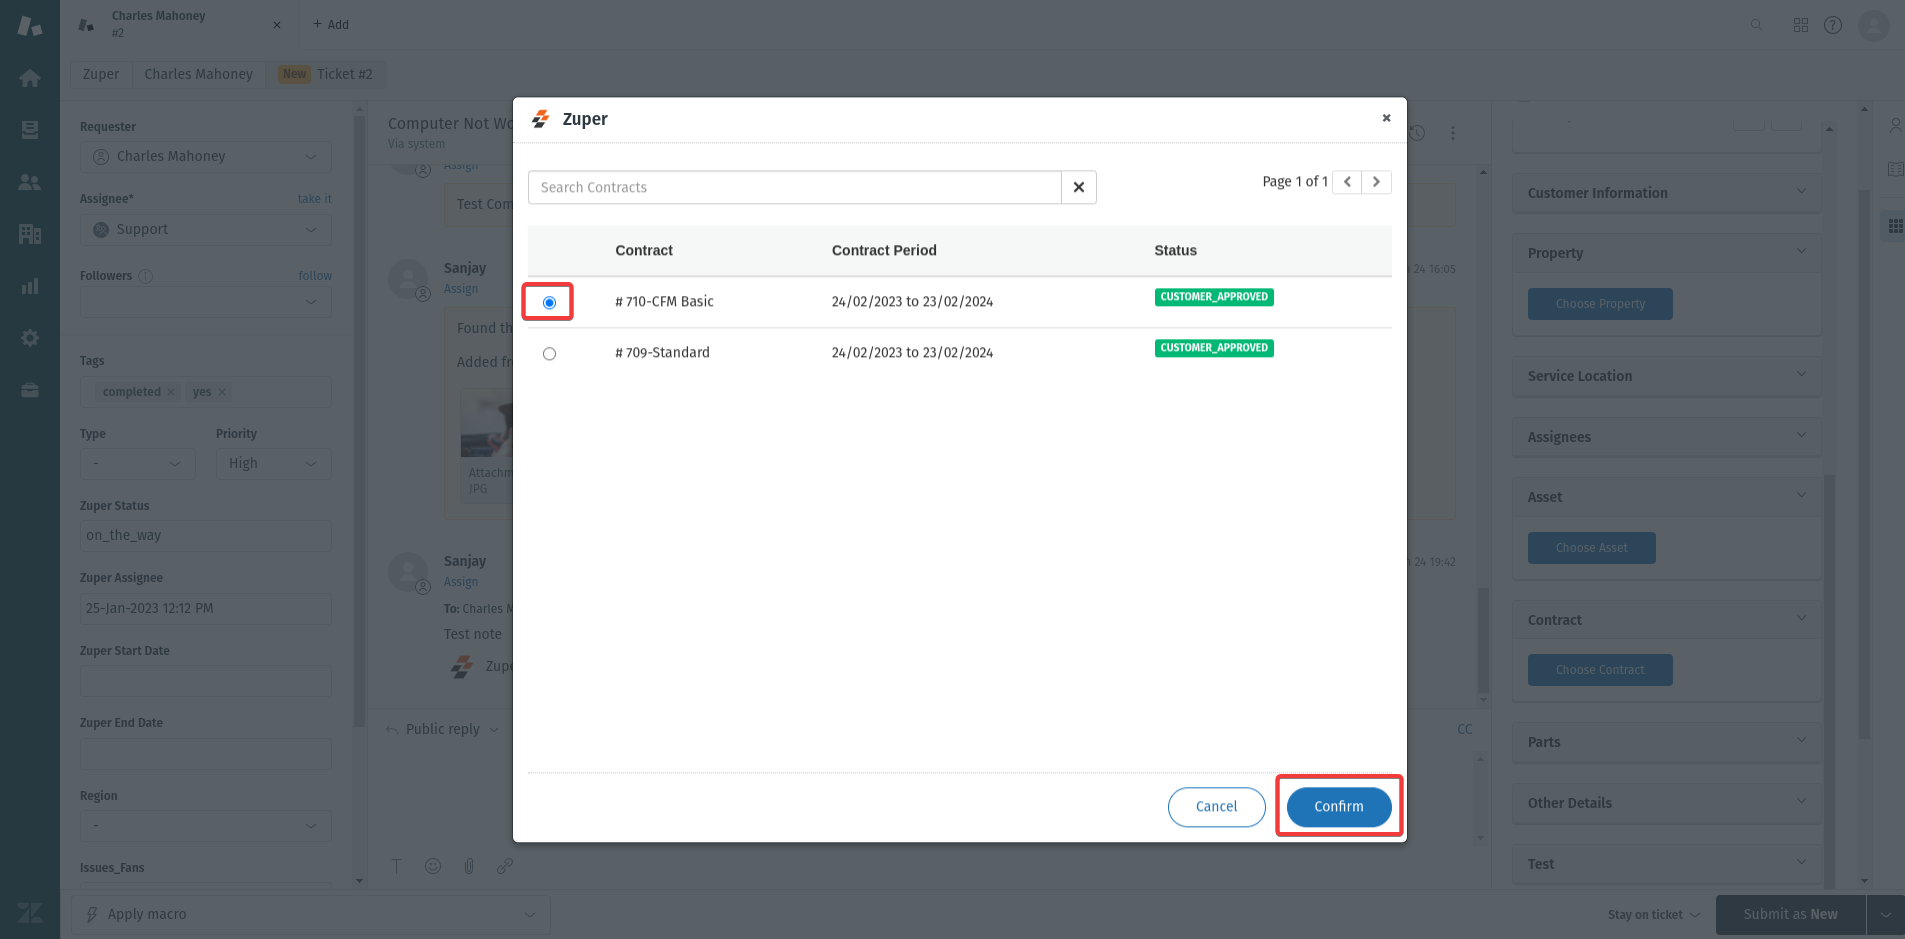
 4. Contract Picker helps you select the agreements from Zuper’s Jobs module of Zendesk.
 5. By default, the timezone is displayed according to the organization’s or customer’s preferences set in Zuper. Now, users can create a new job based on their preferred time zone or switch to a different one.
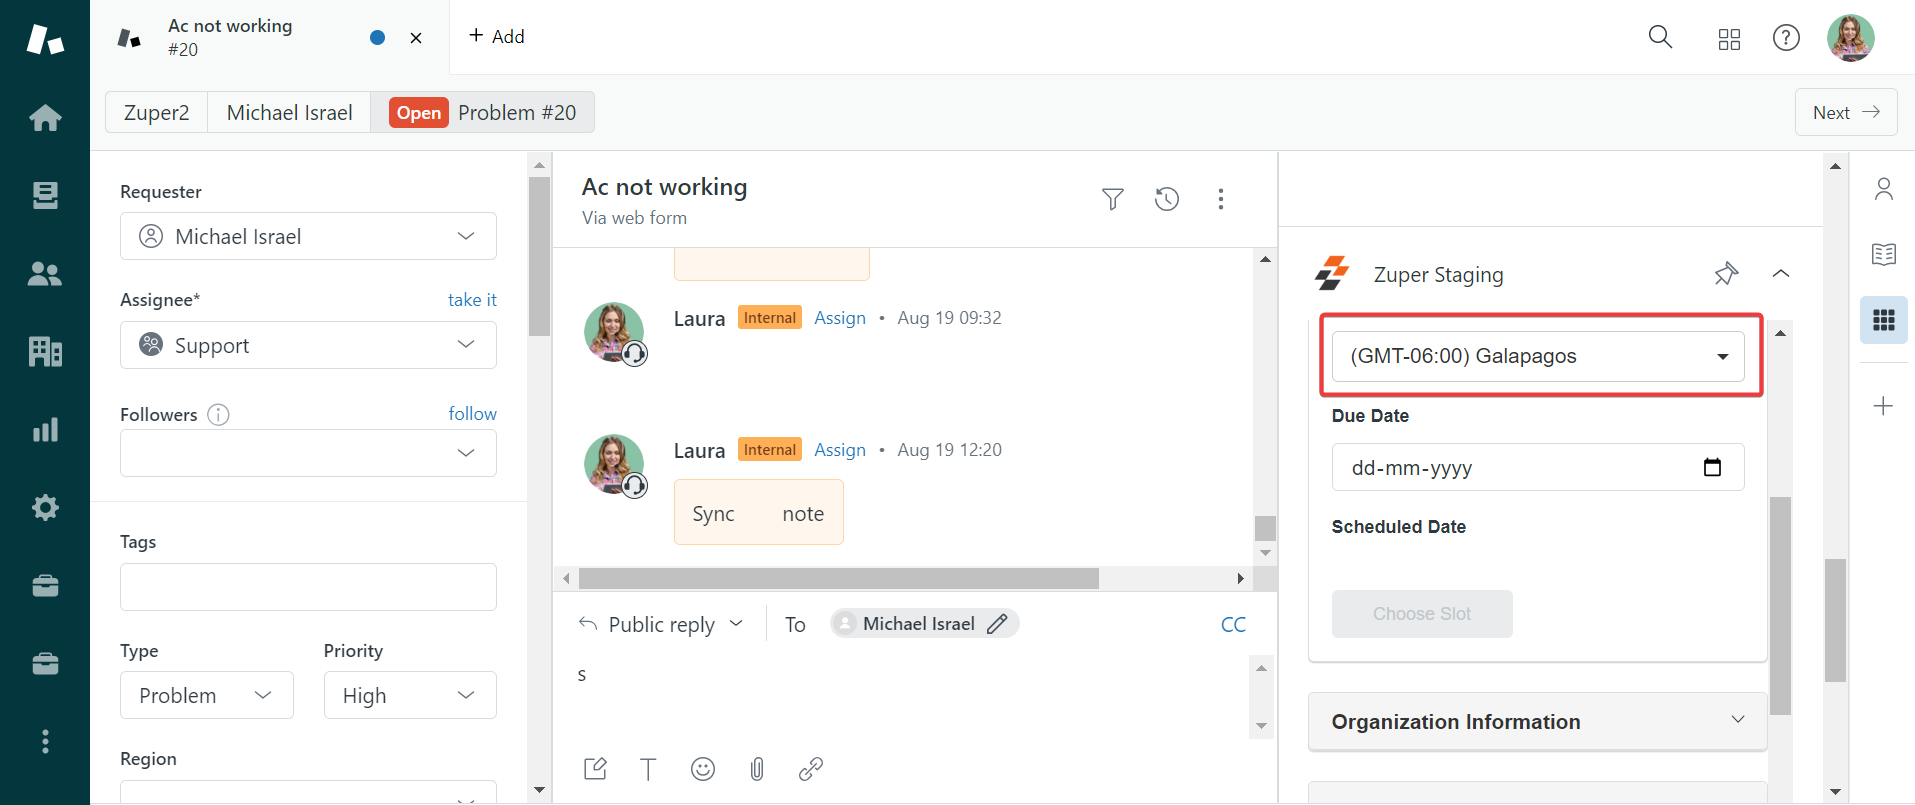 **Note**: If both the organization and customer have preferred time zones, the customer's preferred time zone would be pre-filled.
### Assisted Scheduling:
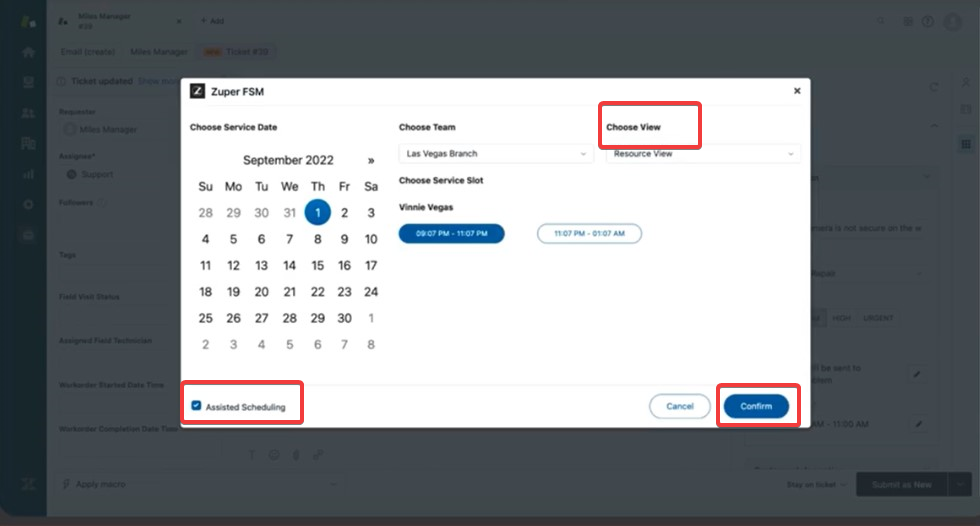
Assisted Scheduling helps you choose the time slots based on the Slot View or Resource View.
**Slot View** - Based on the chosen category, time slots are displayed.
**Resource View** - Based on the users availability.
**Note**: If both the organization and customer have preferred time zones, the customer's preferred time zone would be pre-filled.
### Assisted Scheduling:
Assisted Scheduling helps you choose the time slots based on the Slot View or Resource View.
**Slot View** - Based on the chosen category, time slots are displayed.
**Resource View** - Based on the users availability.
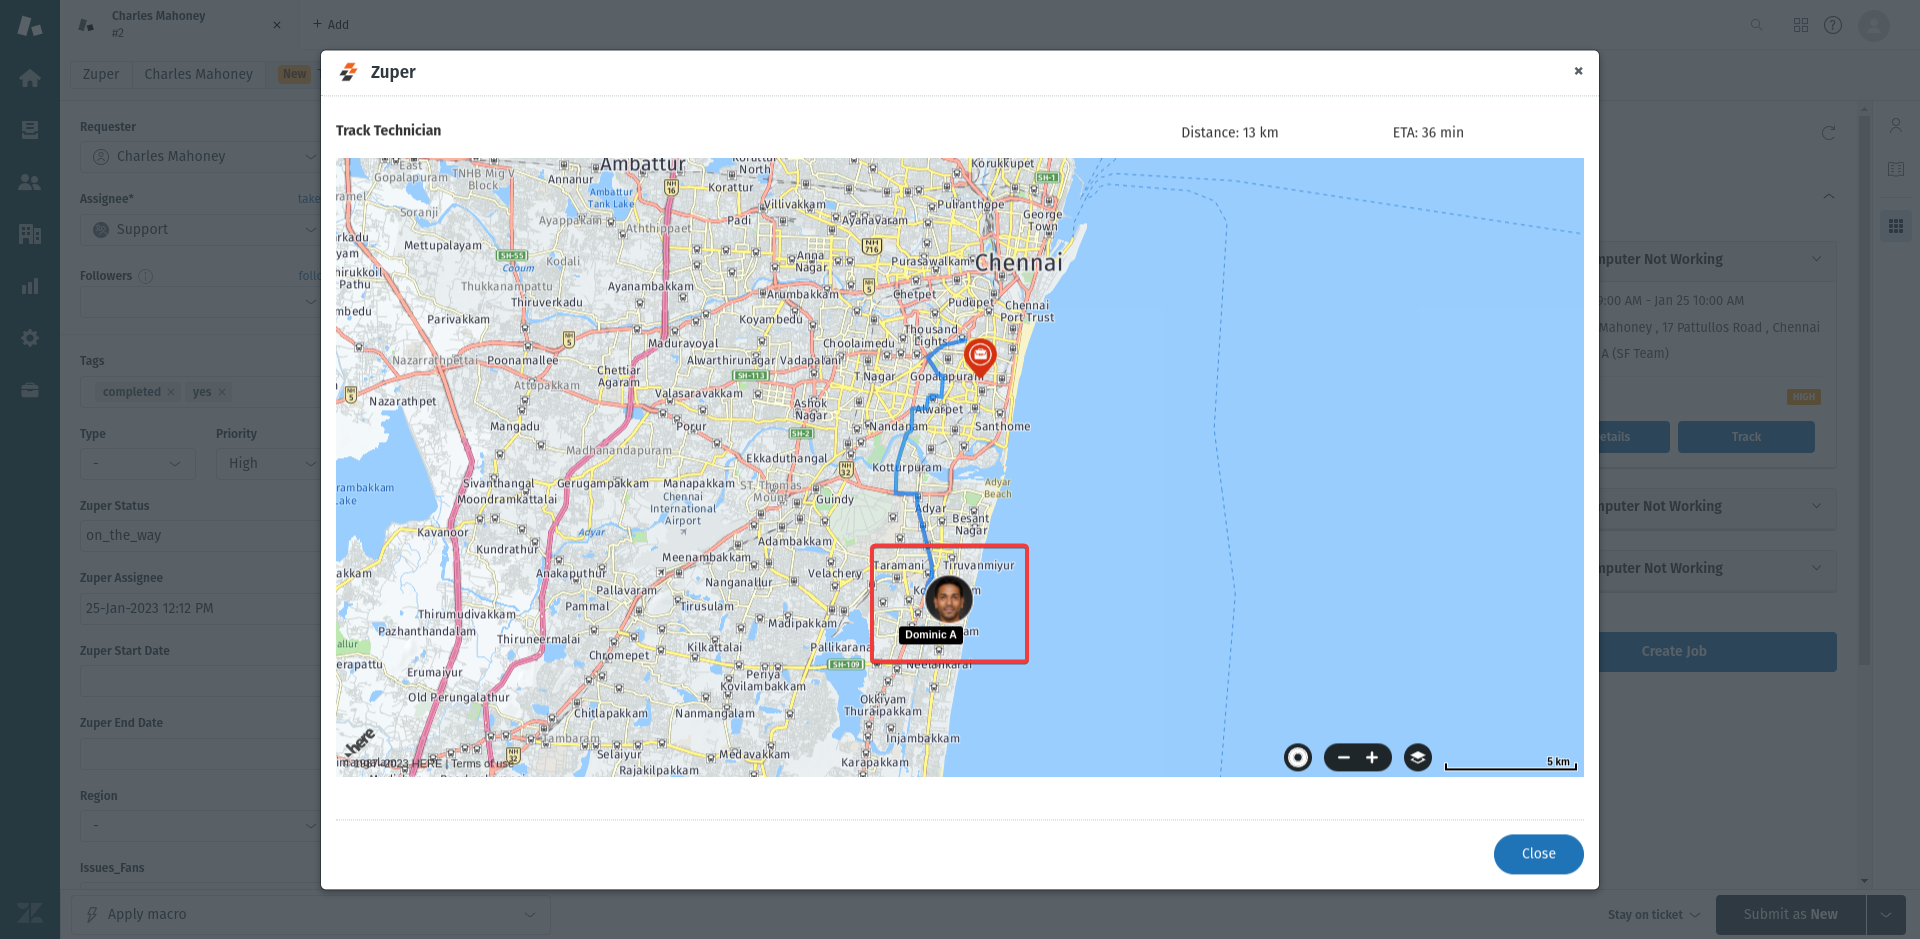
 6. Live Tracking: Live tracking of field executives can be performed from the Jobs module in Zendesk.
You can use the assisted scheduling feature from Zuper while creating a Job in Zendesk.
6. Live Tracking: Live tracking of field executives can be performed from the Jobs module in Zendesk.
You can use the assisted scheduling feature from Zuper while creating a Job in Zendesk.
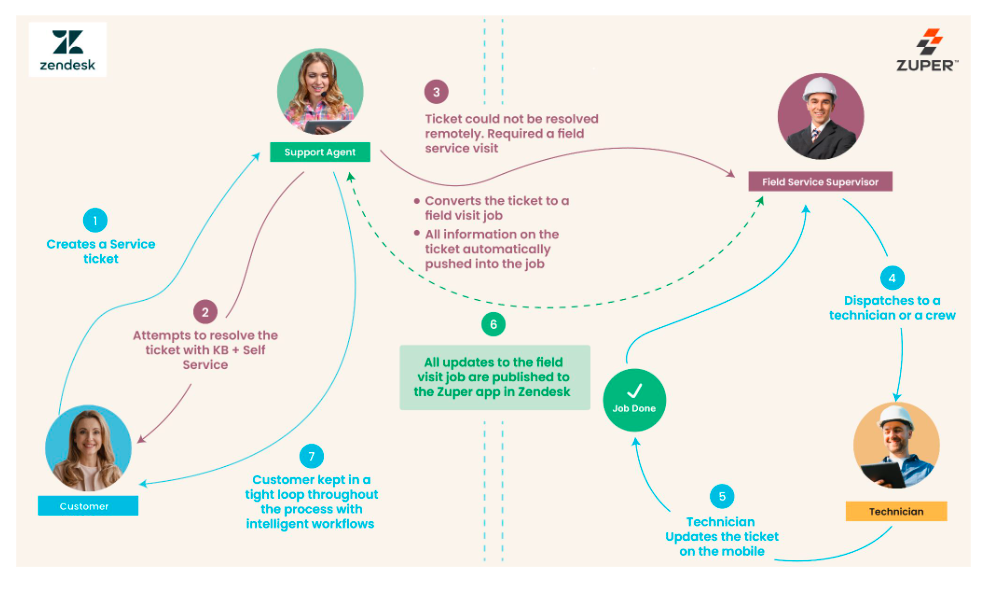
 ## E. Overall Flow
 ## How to Uninstall?
1. Open a new tab in your browser and once you are logged in to your Zuper Account, click on your Profile Picture on the top right corner of the screen and click on “**App Store**.”
## How to Uninstall?
1. Open a new tab in your browser and once you are logged in to your Zuper Account, click on your Profile Picture on the top right corner of the screen and click on “**App Store**.”
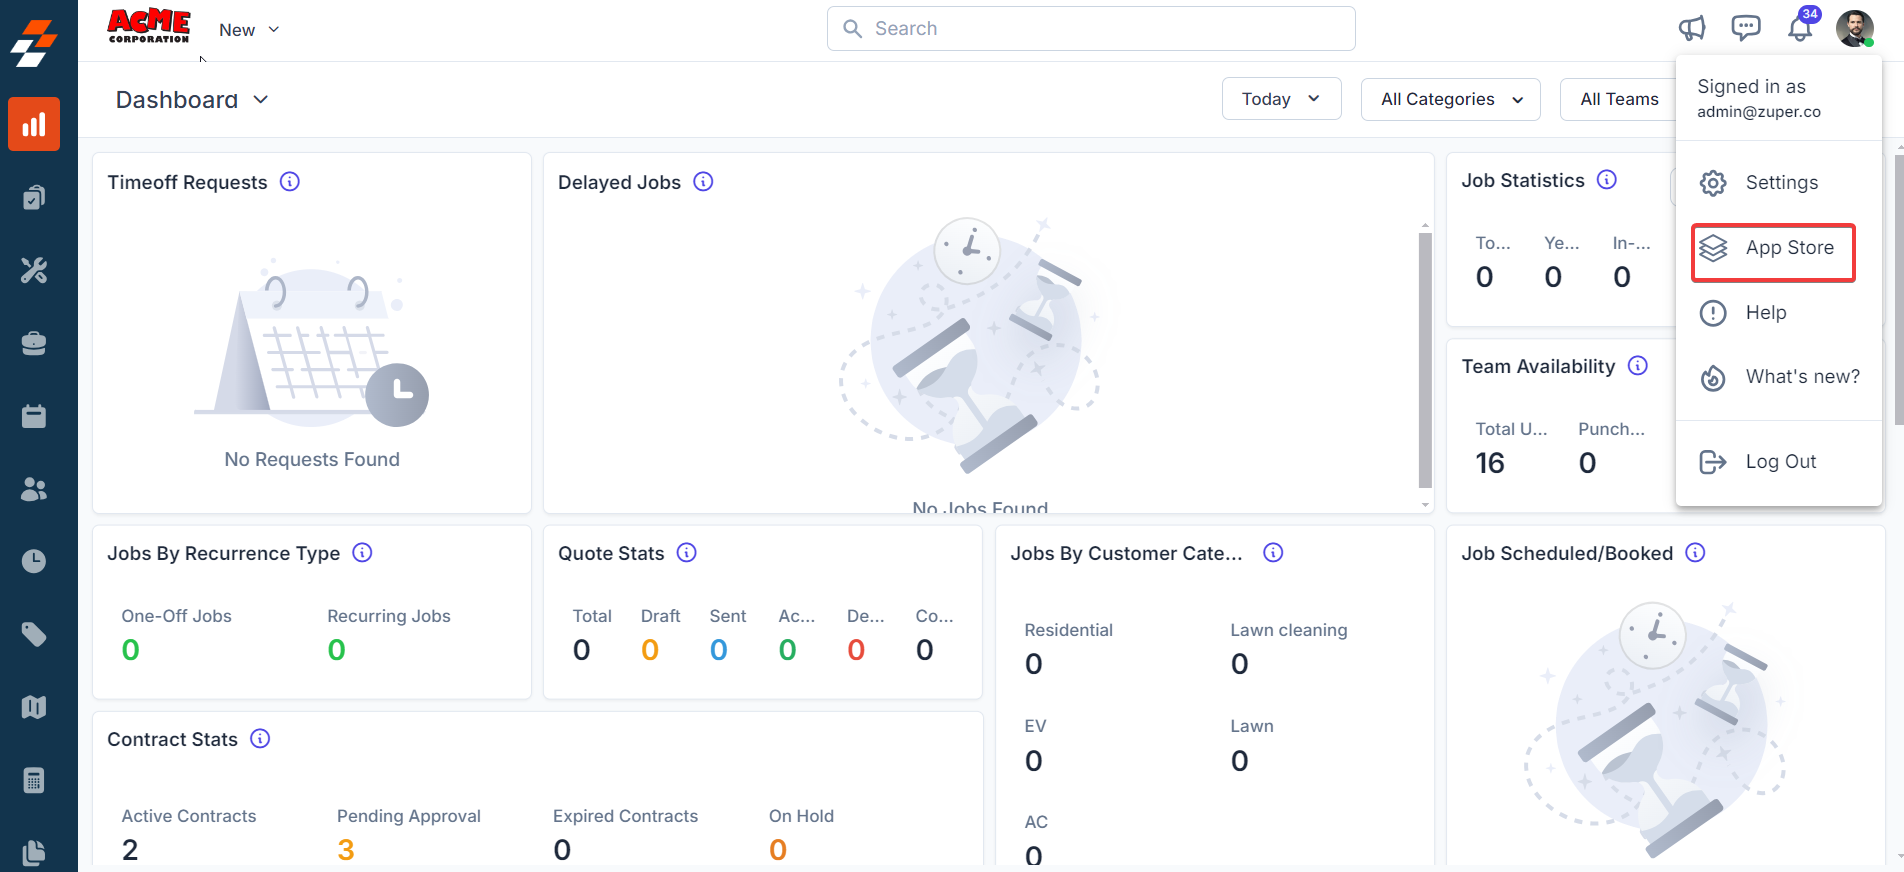 2. You will be redirected to the “**App Store**.” Click on “**CRM**” under “**Browse by Category**” on your left and click “**Zendesk**.”
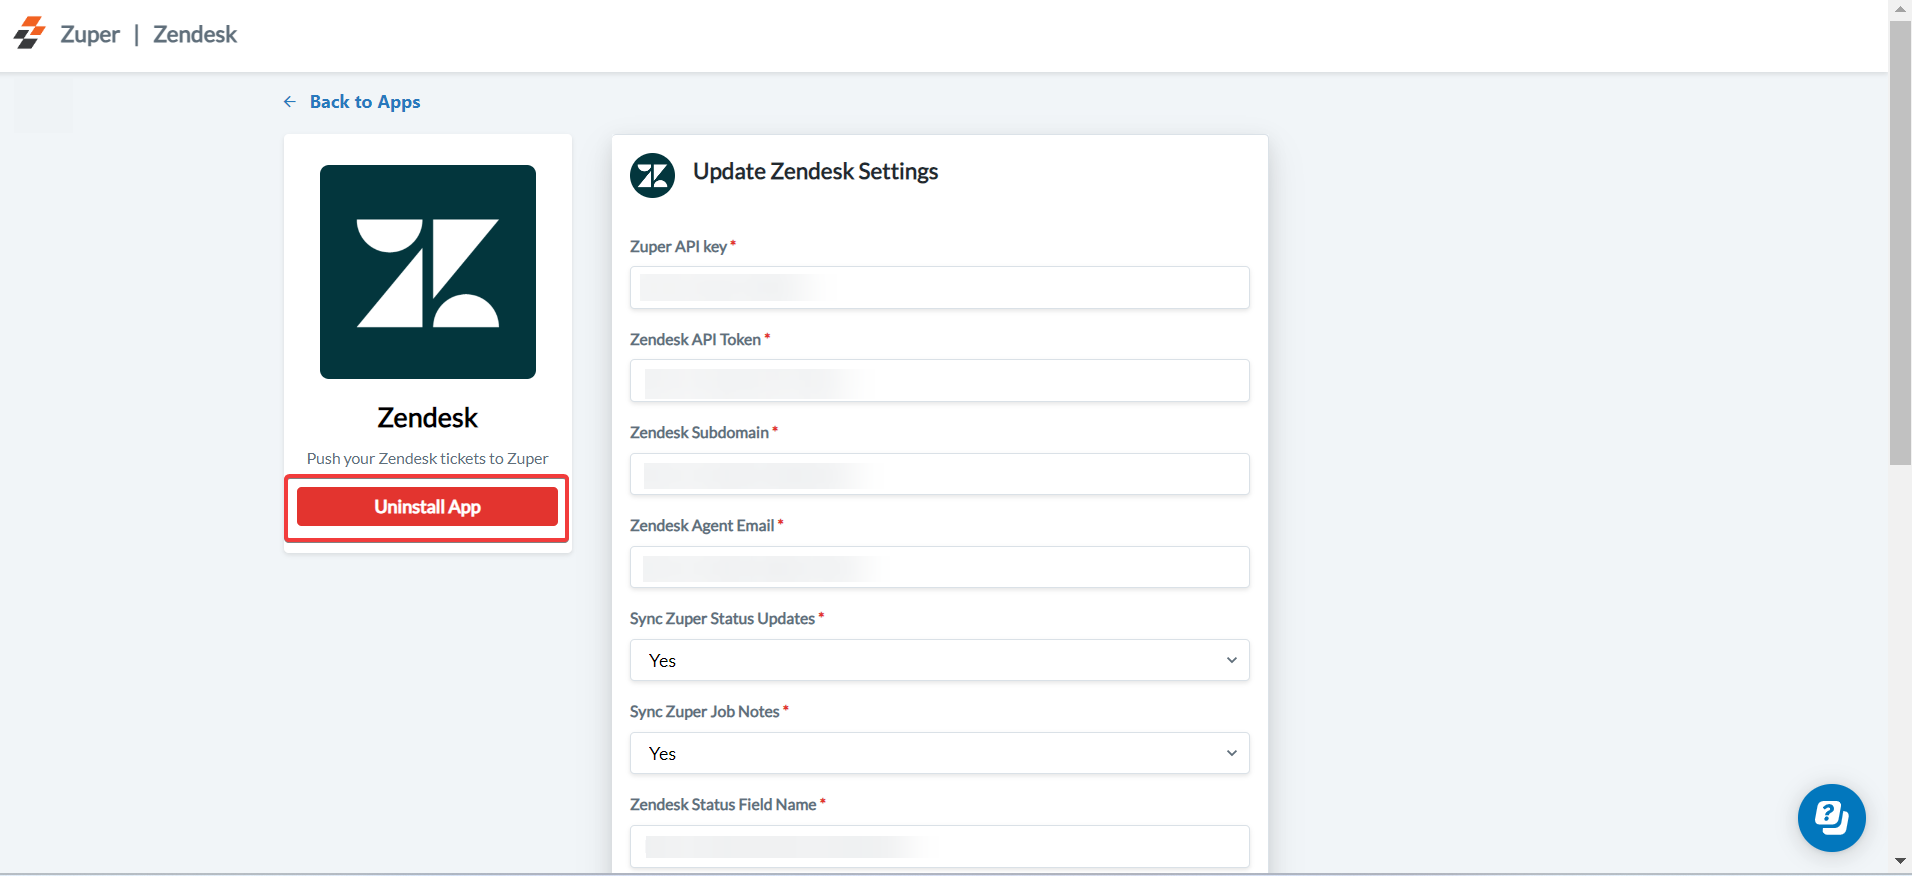 3. Click “**Uninstall App**” button.
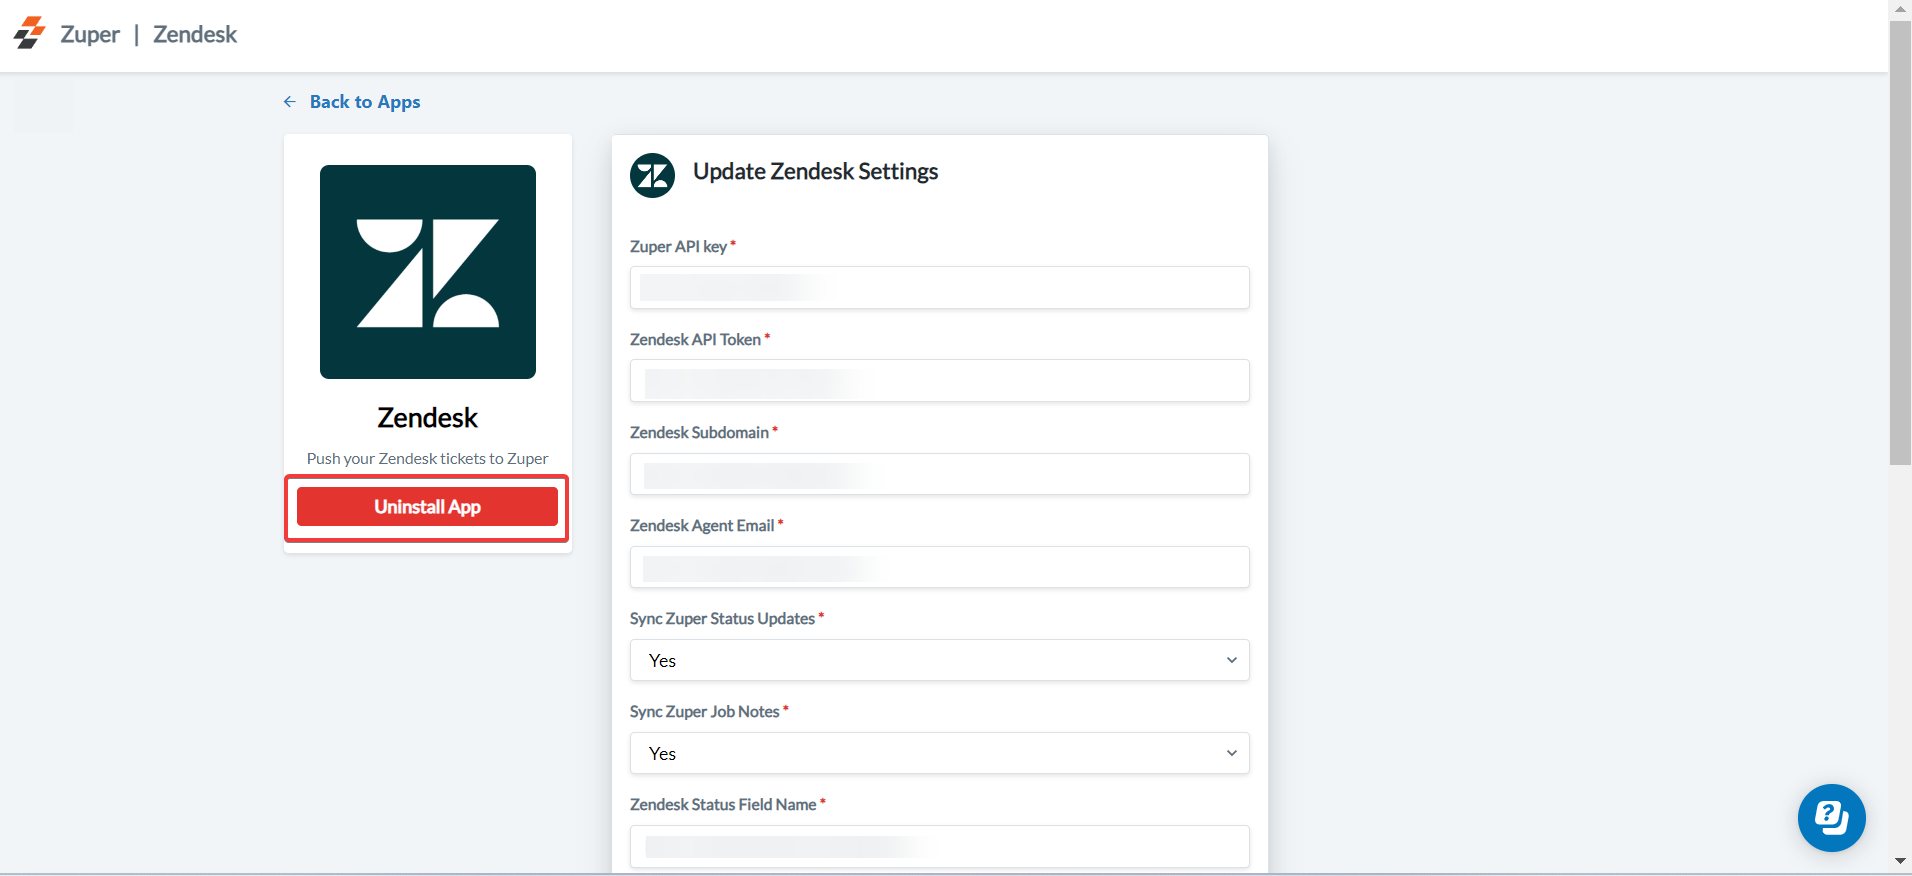 4. The uninstall is successful.
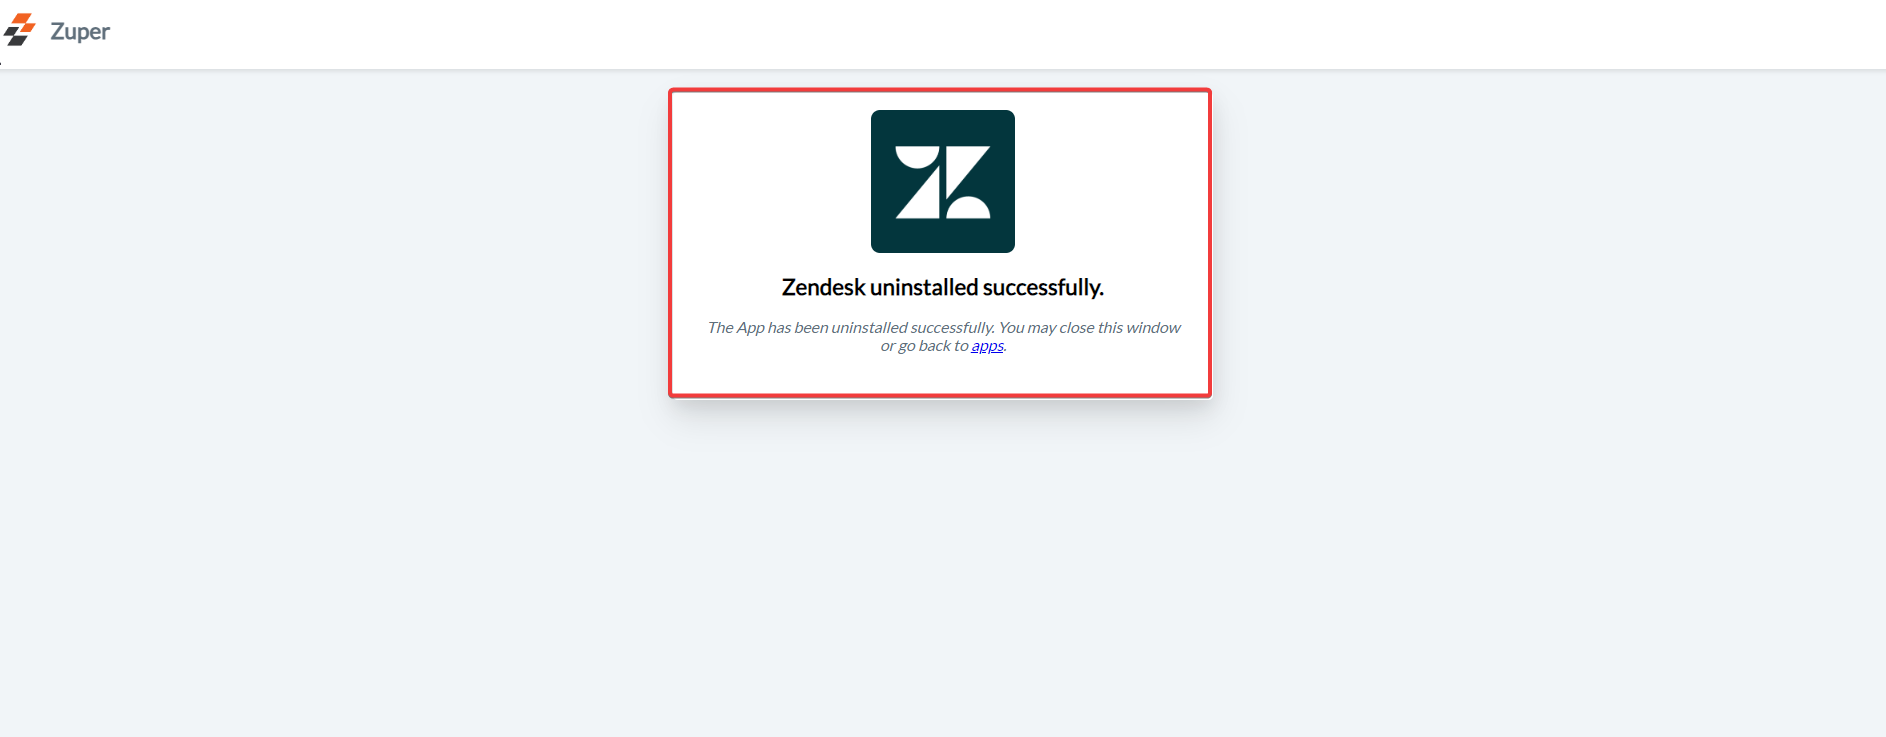 By following the above steps, you can now easily integrate Zendesk with Zuper.