> ## Documentation Index
> Fetch the complete documentation index at: https://docs.zuper.co/llms.txt
> Use this file to discover all available pages before exploring further.
# FreshDesk
With Zuper’s first-class integration with Freshdesk, it seamlessly helps push Freshdesk tickets to Zuper, delivering an exceptional customer experience. You can create a Job from a Freshdesk ticket with a bi-directional sync.
The three major sections we are going to discuss here are:
A. How to connect Zuper with Freshdesk?
B. How to connect Freshdesk with Zuper?
C. How does Zuper –Freshdesk Integration work?
D. How to uninstall Freshdesk from Zuper?
**A. How to connect your Zuper with Freshdesk?**
1. Open a new tab in your browser once you are logged in to your Freshdesk, and select the Freshdesk **App Store**.
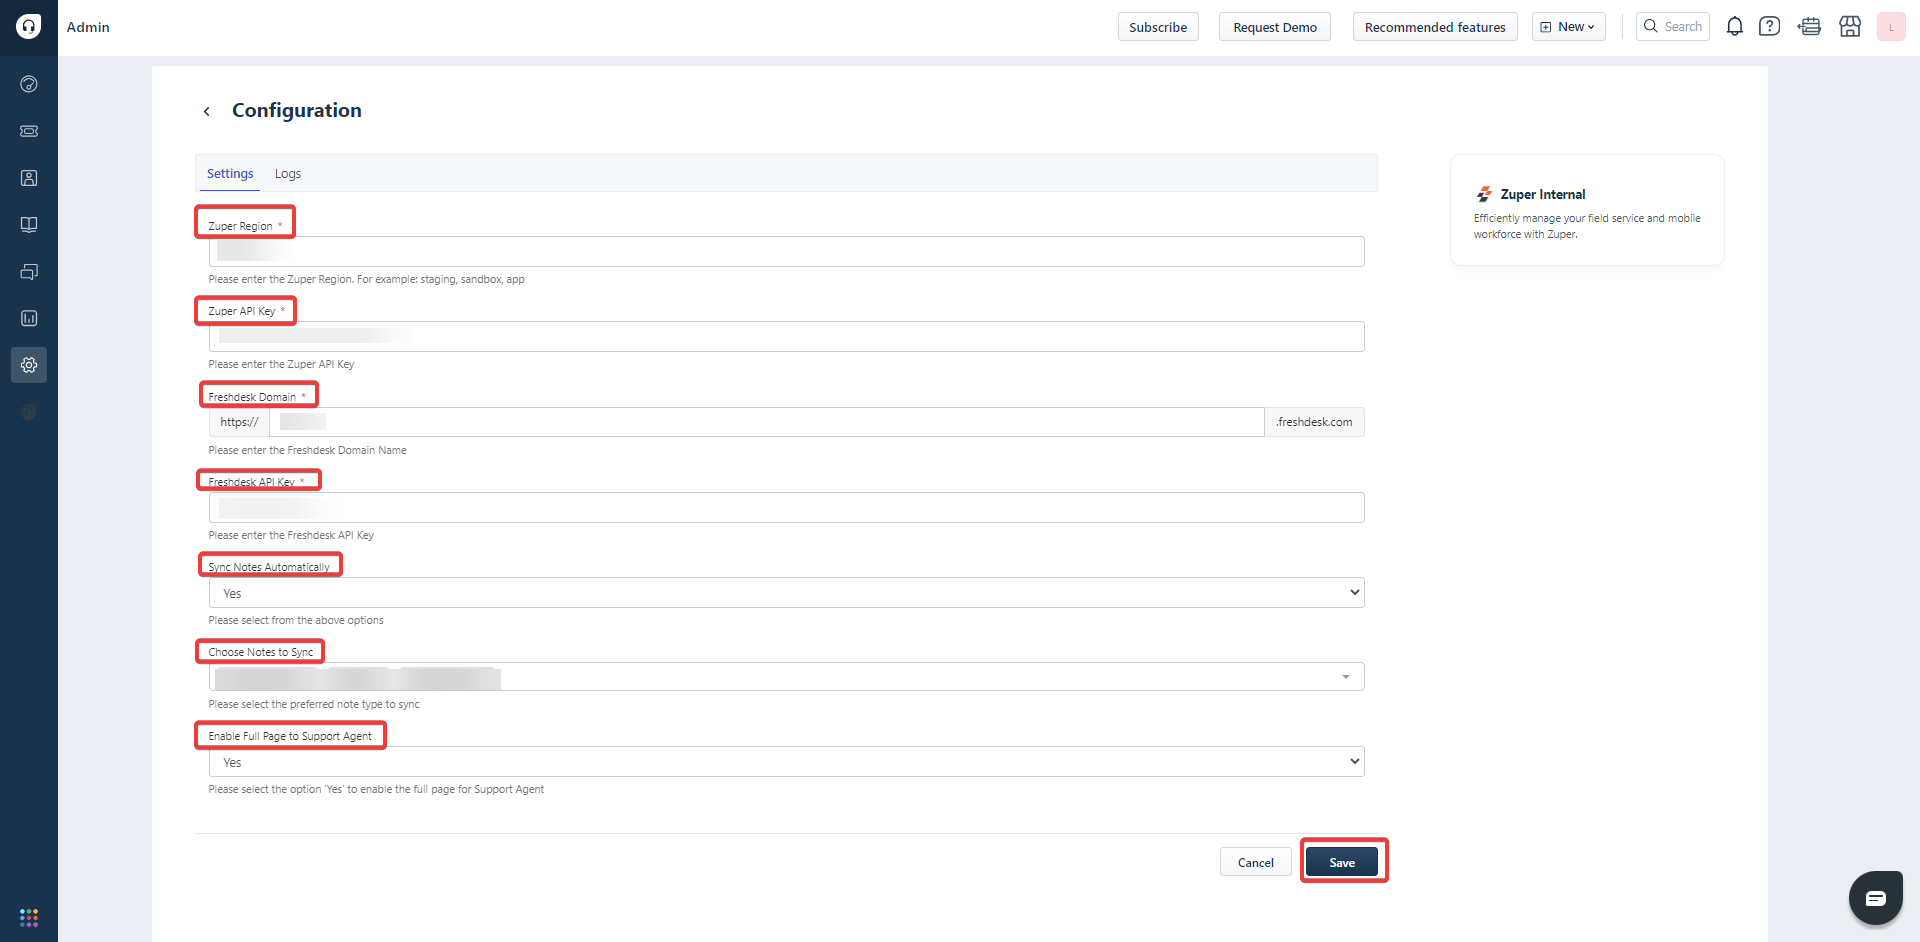
a. **Zuper Region** (Mandatory) – Enter the region of Zuper for which Freshdesk integration is applicable.
b. **Zuper API Key** (Mandatory) - To create the Zuper API key, Click [**here**](https://docs.zuper.co/Settings/Developer_Hub/API_Keys#api-keys) to know how to create and use API keys
c. **Freshdesk Domain** (Mandatory) - Enter Freshdesk’s URL.
d. **Freshdesk API Key** (Mandatory) – Copy-paste the Freshdesk API key from your Freshdesk account (How to find your API key).
e. **Sync Notes Automatically** – You can choose either “**Yes**” or “**No**” to sync or unsync Zuper Job Notes with Freshdesk.
f. Choose Notes to Sync – You can choose the type of notes for which the sync should happen from Freshdesk to Zuper. Options available are **Private Note**, **Public Note**, and **Reply**.
g. Enable Full Page to Support Agent – You can choose either “**Yes**” or “**No**” to set permissions for the Support Agents to the Full Page app access within Freshdesk.
 ## B. How to connect your Freshdesk with Zuper?
1. Open a new tab in your browser once you are logged in to your Zuper Account. Click on your Profile Picture in the top right corner of the screen and select the “**App Store**.”
## B. How to connect your Freshdesk with Zuper?
1. Open a new tab in your browser once you are logged in to your Zuper Account. Click on your Profile Picture in the top right corner of the screen and select the “**App Store**.”
 2. Under the “**Browse by Category**,” select the “**CRM**” option and choose “**Freshdesk**.”
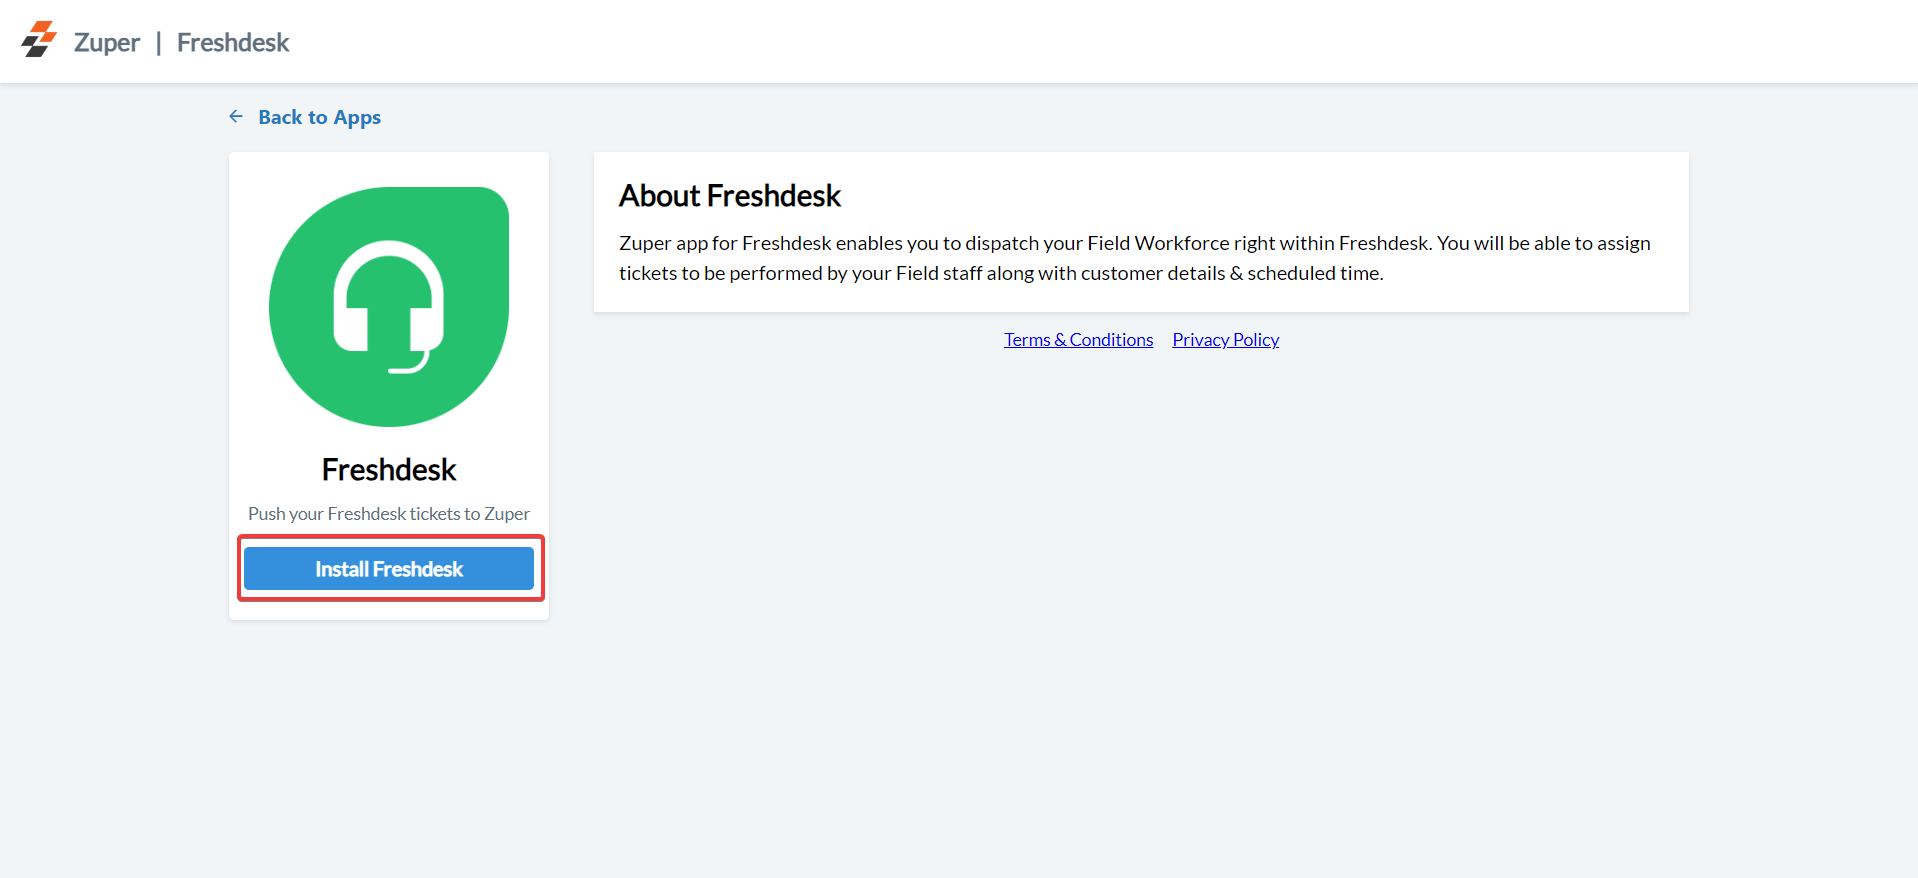
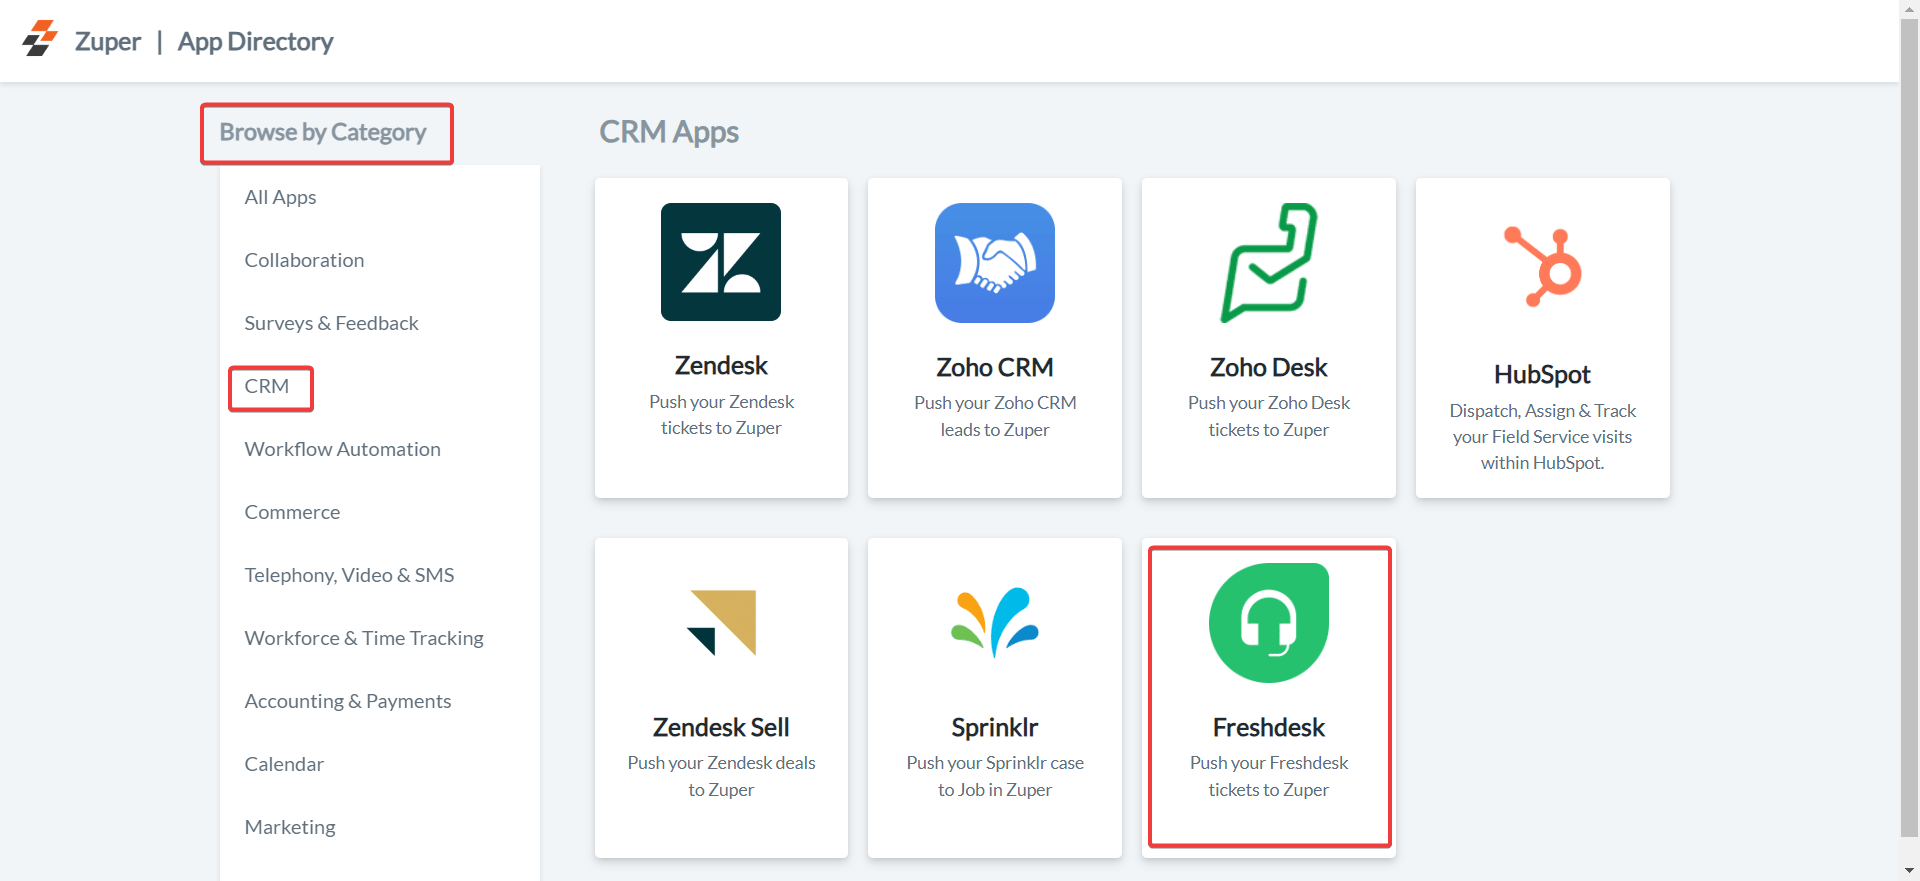 3. Click on the “**Install Freshdesk**” button.
 4. Update Zuper Settings by configuring the following fields:
a. Zuper API Key (Mandatory) – To create the Zuper API key, Click [**here**](https://docs.zuper.co/Settings/Developer_Hub/API_Keys#api-keys) to know how to create and use API keys.
b. Freshdesk API Key (Mandatory) – Copy paste the Freshdesk API key from Freshdesk account ([How to find your API key](https://support.freshdesk.com/en/support/solutions/articles/215517-how-to-find-your-api-key)).
c. Freshdesk Subdomain (Mandatory) - Enter the Freshdesk Subdomain details here.
d. Sync Zuper Status Updates - You can choose either “**Yes**” or “**No**” to sync or unsync Zuper Status updates with Freshdesk.
e. Sync Zuper Custom Fields - You can choose either “**Yes**” or “**No**” to sync or unsync Zuper Custom Fields with Freshdesk.
f. Sync Zuper Job Notes - You can choose either “**Yes**” or “**No**” to sync or unsync Zuper Job Notes with Freshdesk.
g. Freshdesk Status Field Name - You need to enter the Freshdesk Field Name for which Zuper gets synced.
h. Freshdesk Assignees Field Name - You need to enter the Freshdesk Assignees Field Name for which Zuper gets synced.
i. Freshdesk Start Date Field Name - You need to enter the Freshdesk Start Date Field Name for which Zuper gets synced.
j. Freshdesk End Date Field Name - You need to enter the Freshdesk End Date Field Name for which Zuper gets synced.
k. Freshdesk Customer Signature Field Name - You need to enter the Customer Signature for which Zuper gets synced.
l. Freshdesk Ticket Close Statuses - You need to enter the list of Freshdesk Ticket Close Statuses for which Zuper status get synced (Use a comma separator to add multiple statuses).
m. Mark Freshdesk ticket as? - You need to choose the status of the Freshdesk ticket from the dropdown list - **None**, **Closed**, or **Resolved**.
4. Update Zuper Settings by configuring the following fields:
a. Zuper API Key (Mandatory) – To create the Zuper API key, Click [**here**](https://docs.zuper.co/Settings/Developer_Hub/API_Keys#api-keys) to know how to create and use API keys.
b. Freshdesk API Key (Mandatory) – Copy paste the Freshdesk API key from Freshdesk account ([How to find your API key](https://support.freshdesk.com/en/support/solutions/articles/215517-how-to-find-your-api-key)).
c. Freshdesk Subdomain (Mandatory) - Enter the Freshdesk Subdomain details here.
d. Sync Zuper Status Updates - You can choose either “**Yes**” or “**No**” to sync or unsync Zuper Status updates with Freshdesk.
e. Sync Zuper Custom Fields - You can choose either “**Yes**” or “**No**” to sync or unsync Zuper Custom Fields with Freshdesk.
f. Sync Zuper Job Notes - You can choose either “**Yes**” or “**No**” to sync or unsync Zuper Job Notes with Freshdesk.
g. Freshdesk Status Field Name - You need to enter the Freshdesk Field Name for which Zuper gets synced.
h. Freshdesk Assignees Field Name - You need to enter the Freshdesk Assignees Field Name for which Zuper gets synced.
i. Freshdesk Start Date Field Name - You need to enter the Freshdesk Start Date Field Name for which Zuper gets synced.
j. Freshdesk End Date Field Name - You need to enter the Freshdesk End Date Field Name for which Zuper gets synced.
k. Freshdesk Customer Signature Field Name - You need to enter the Customer Signature for which Zuper gets synced.
l. Freshdesk Ticket Close Statuses - You need to enter the list of Freshdesk Ticket Close Statuses for which Zuper status get synced (Use a comma separator to add multiple statuses).
m. Mark Freshdesk ticket as? - You need to choose the status of the Freshdesk ticket from the dropdown list - **None**, **Closed**, or **Resolved**.
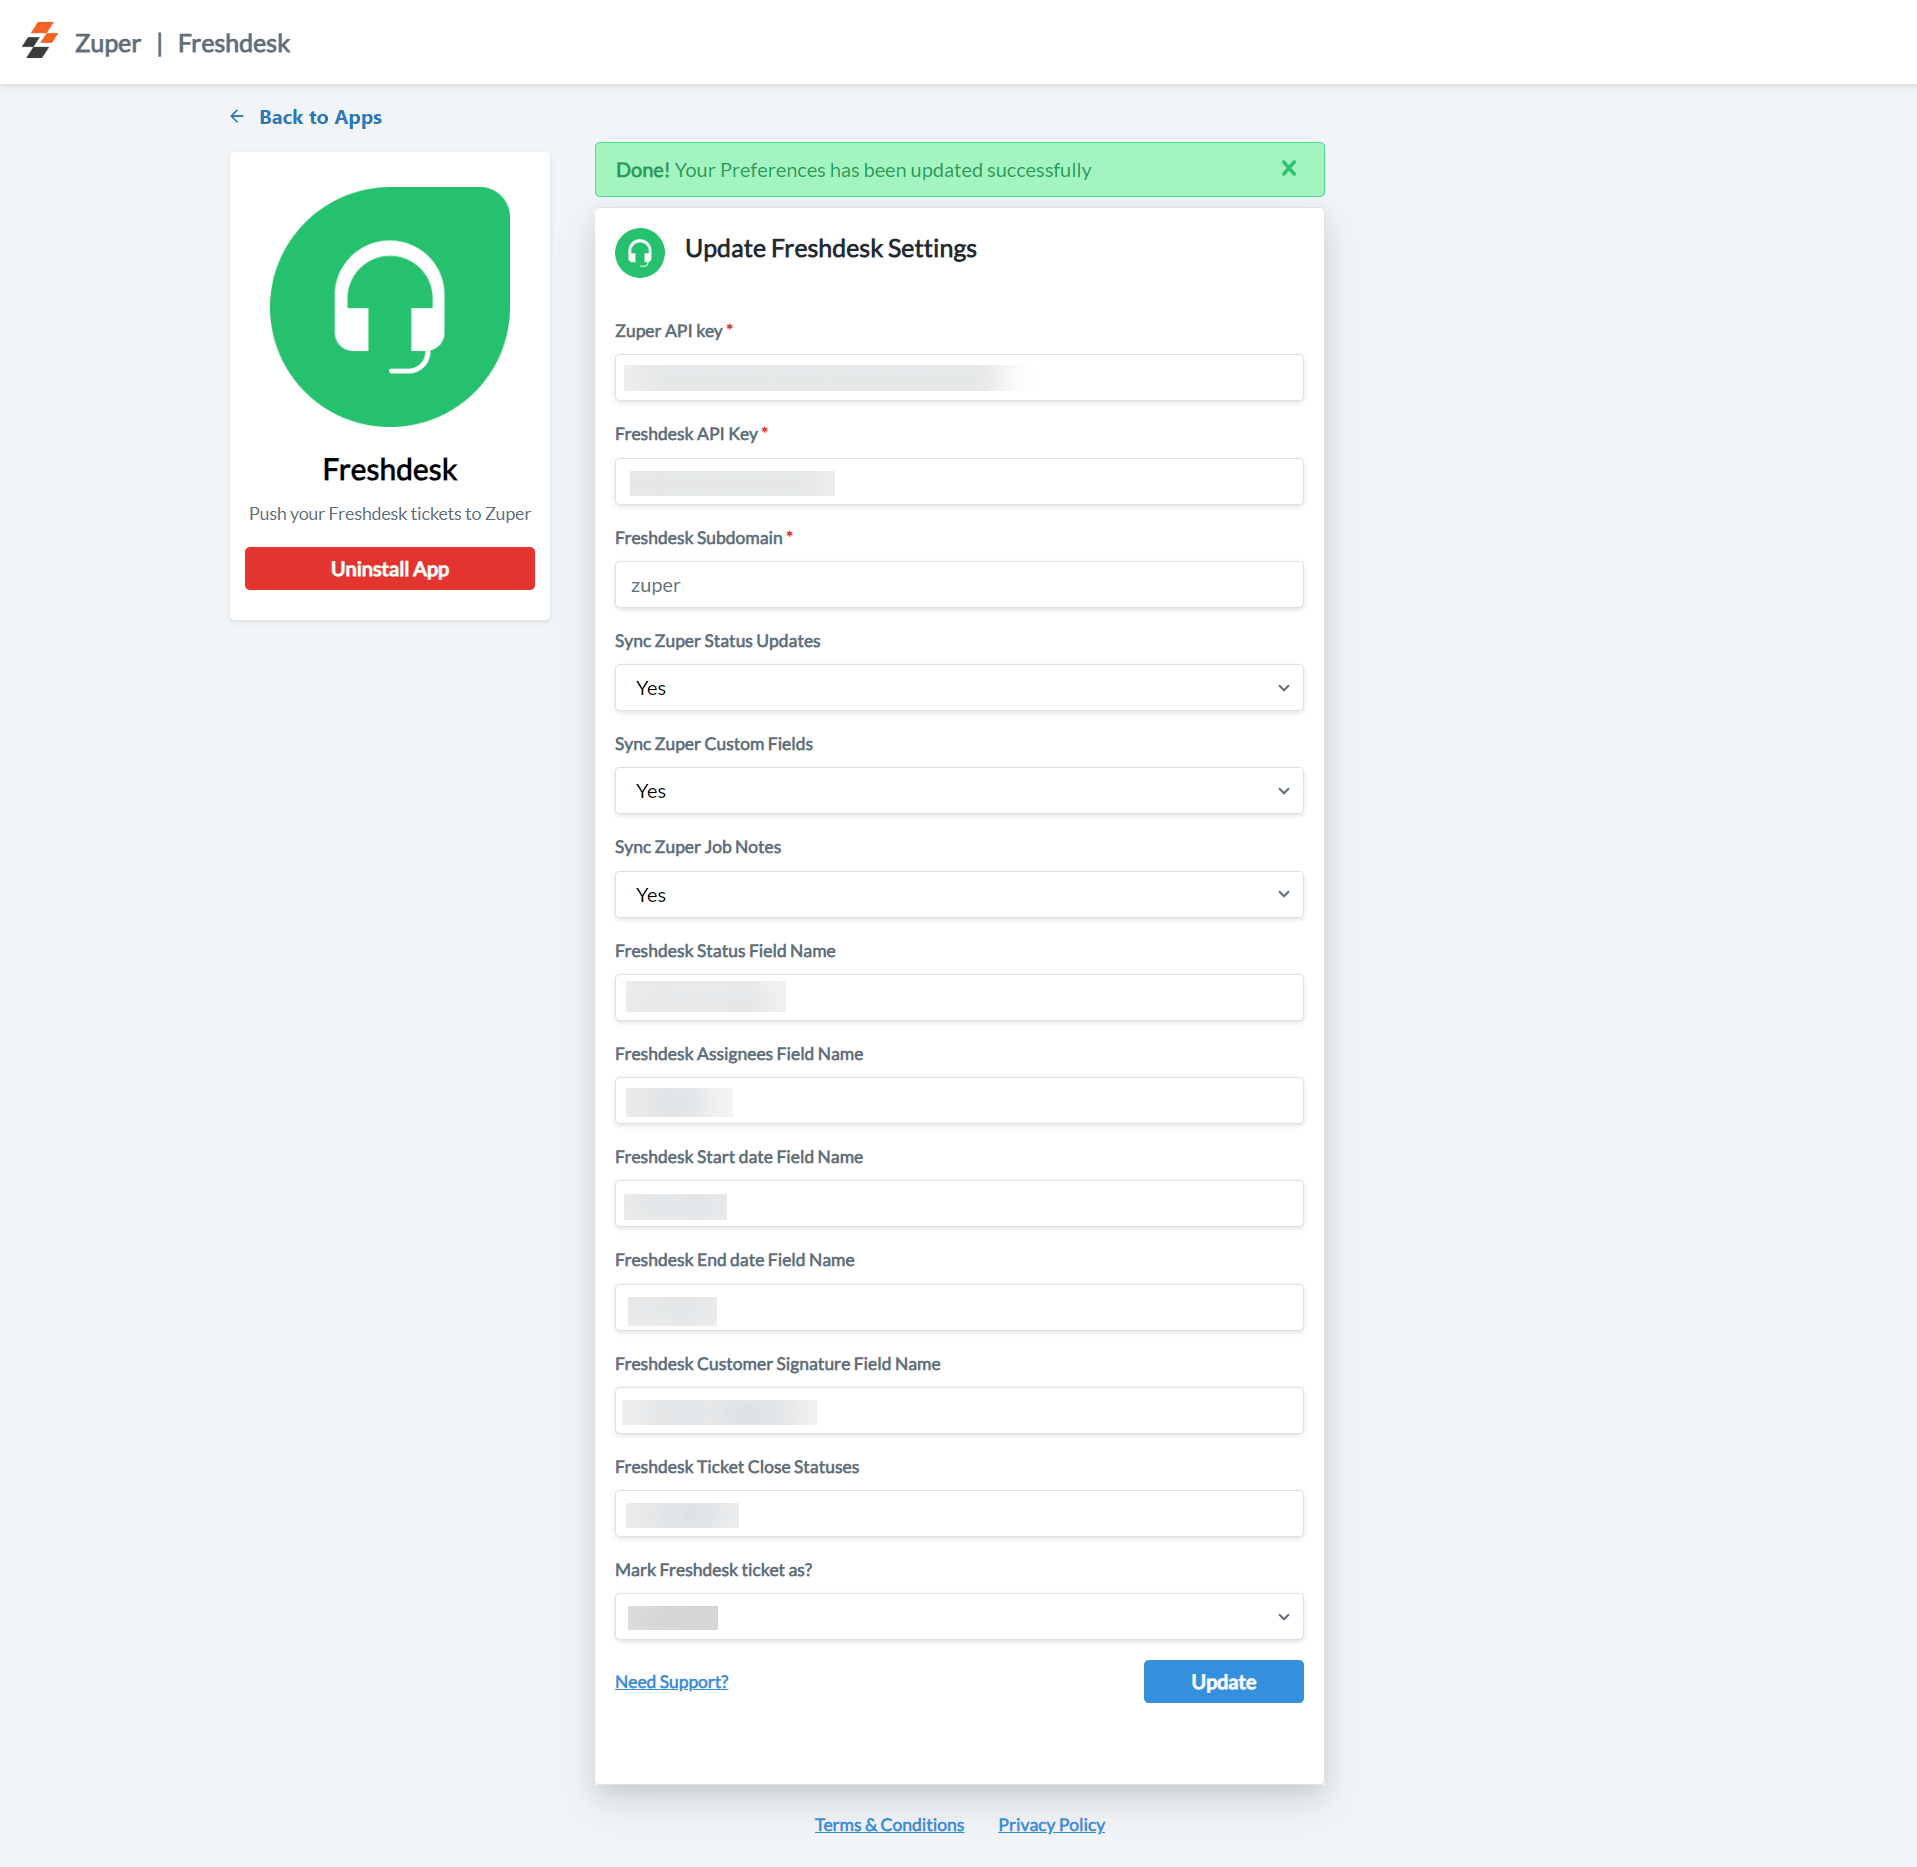 Select the “**Update**” button to connect Freshdesk with Zuper.
## C. How does Zuper – Freshdesk work?
**Create a Job from Zuper**:
1. Log in to your Freshdesk account, and in the right sidebar widget, you can view the ticket for which a Job has not been created in Zuper.
Select the “**Update**” button to connect Freshdesk with Zuper.
## C. How does Zuper – Freshdesk work?
**Create a Job from Zuper**:
1. Log in to your Freshdesk account, and in the right sidebar widget, you can view the ticket for which a Job has not been created in Zuper.
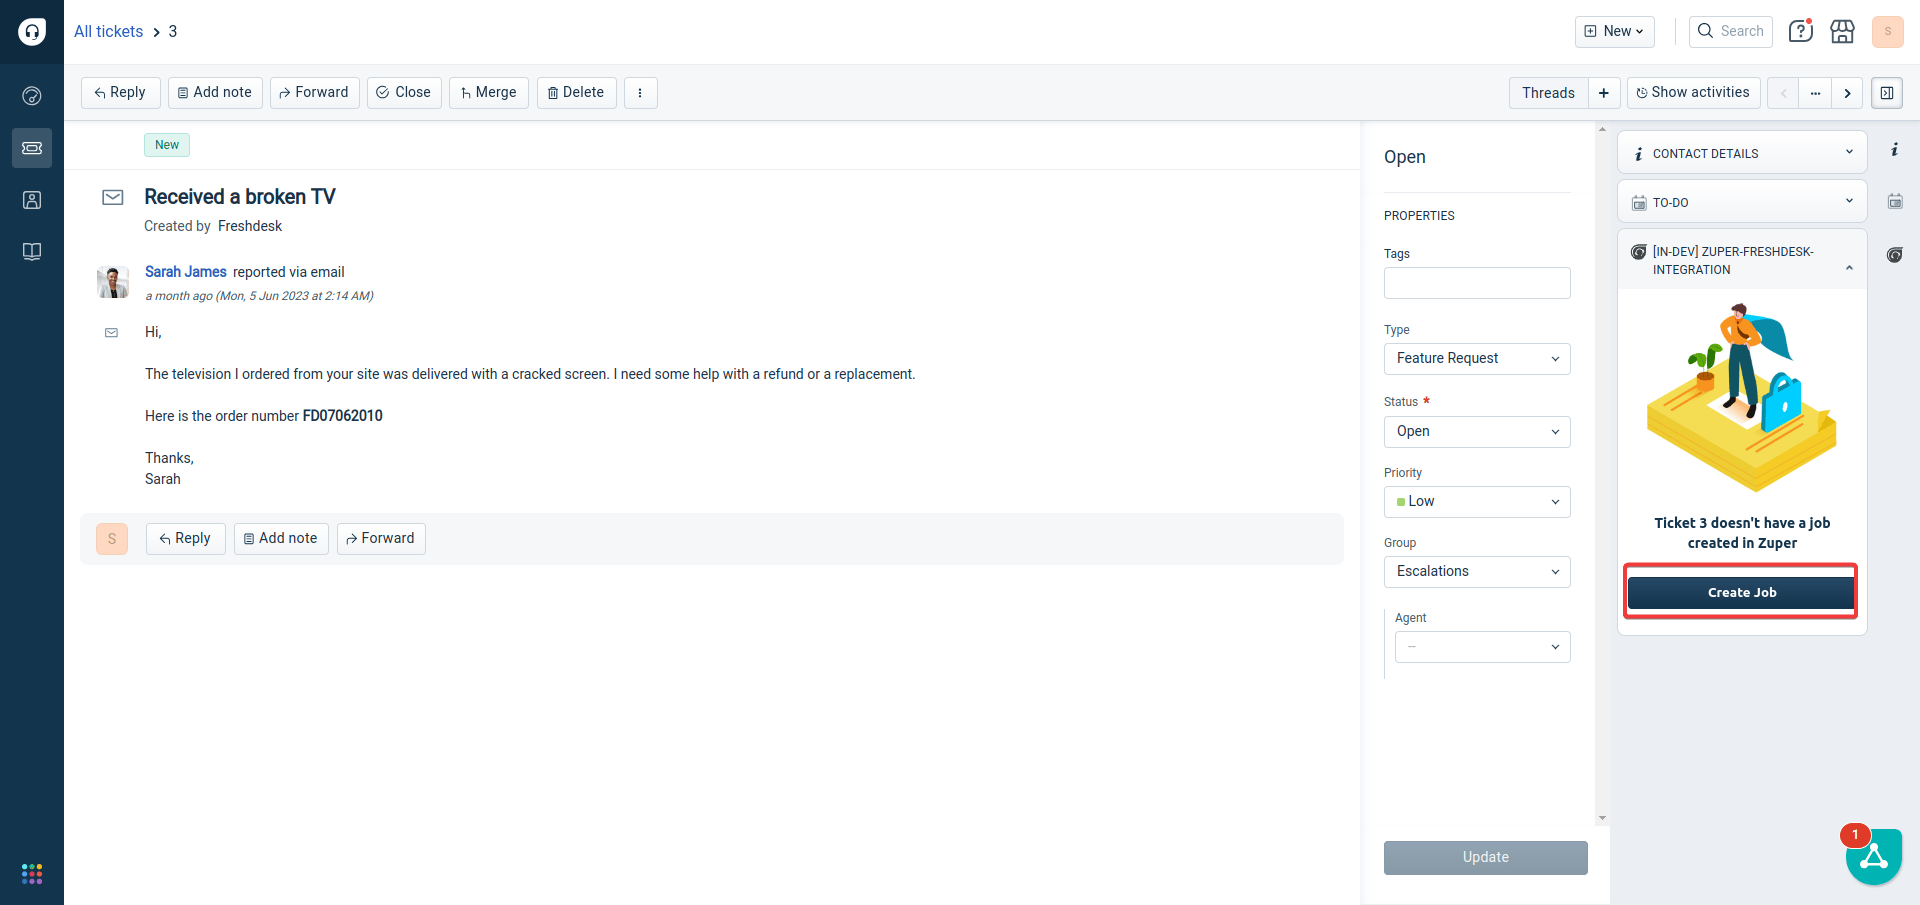 Click the "**Create Job**" button to create a new job for the pending Freshdesk ticket.
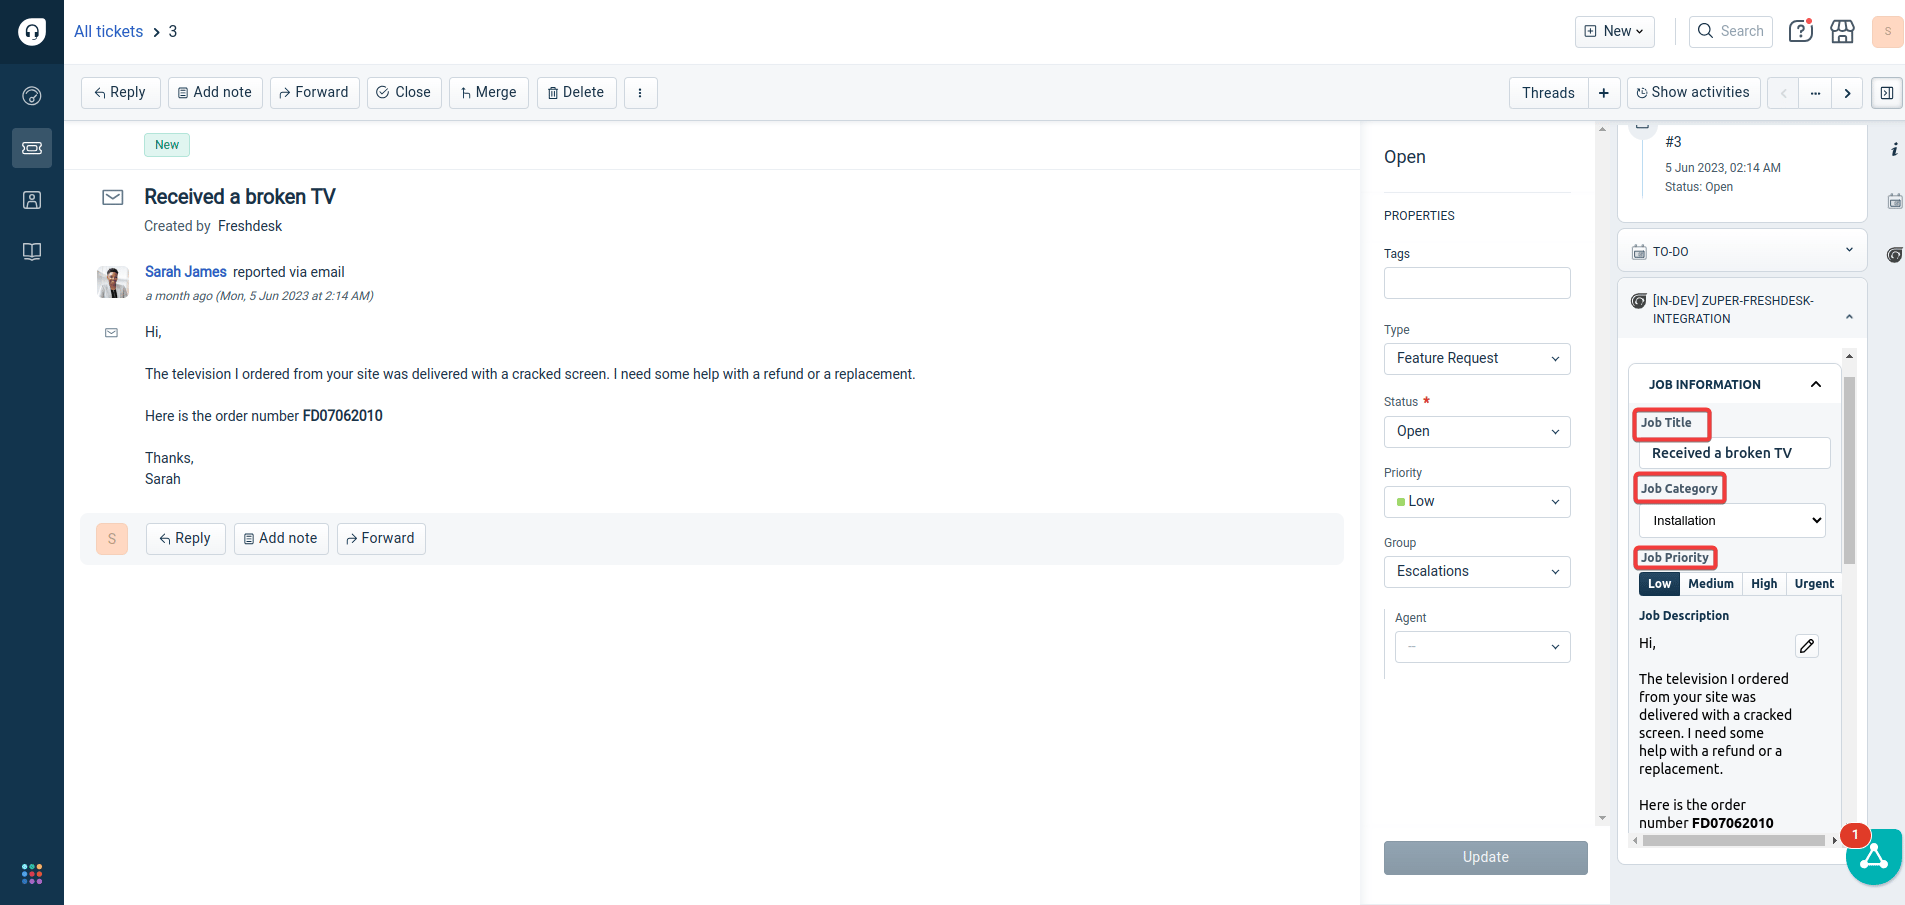
2. The Job Title, Job Category, and Job Priority are automatically picked. The agent has added the Job description and chosen the time slot.
Click the "**Create Job**" button to create a new job for the pending Freshdesk ticket.
2. The Job Title, Job Category, and Job Priority are automatically picked. The agent has added the Job description and chosen the time slot.
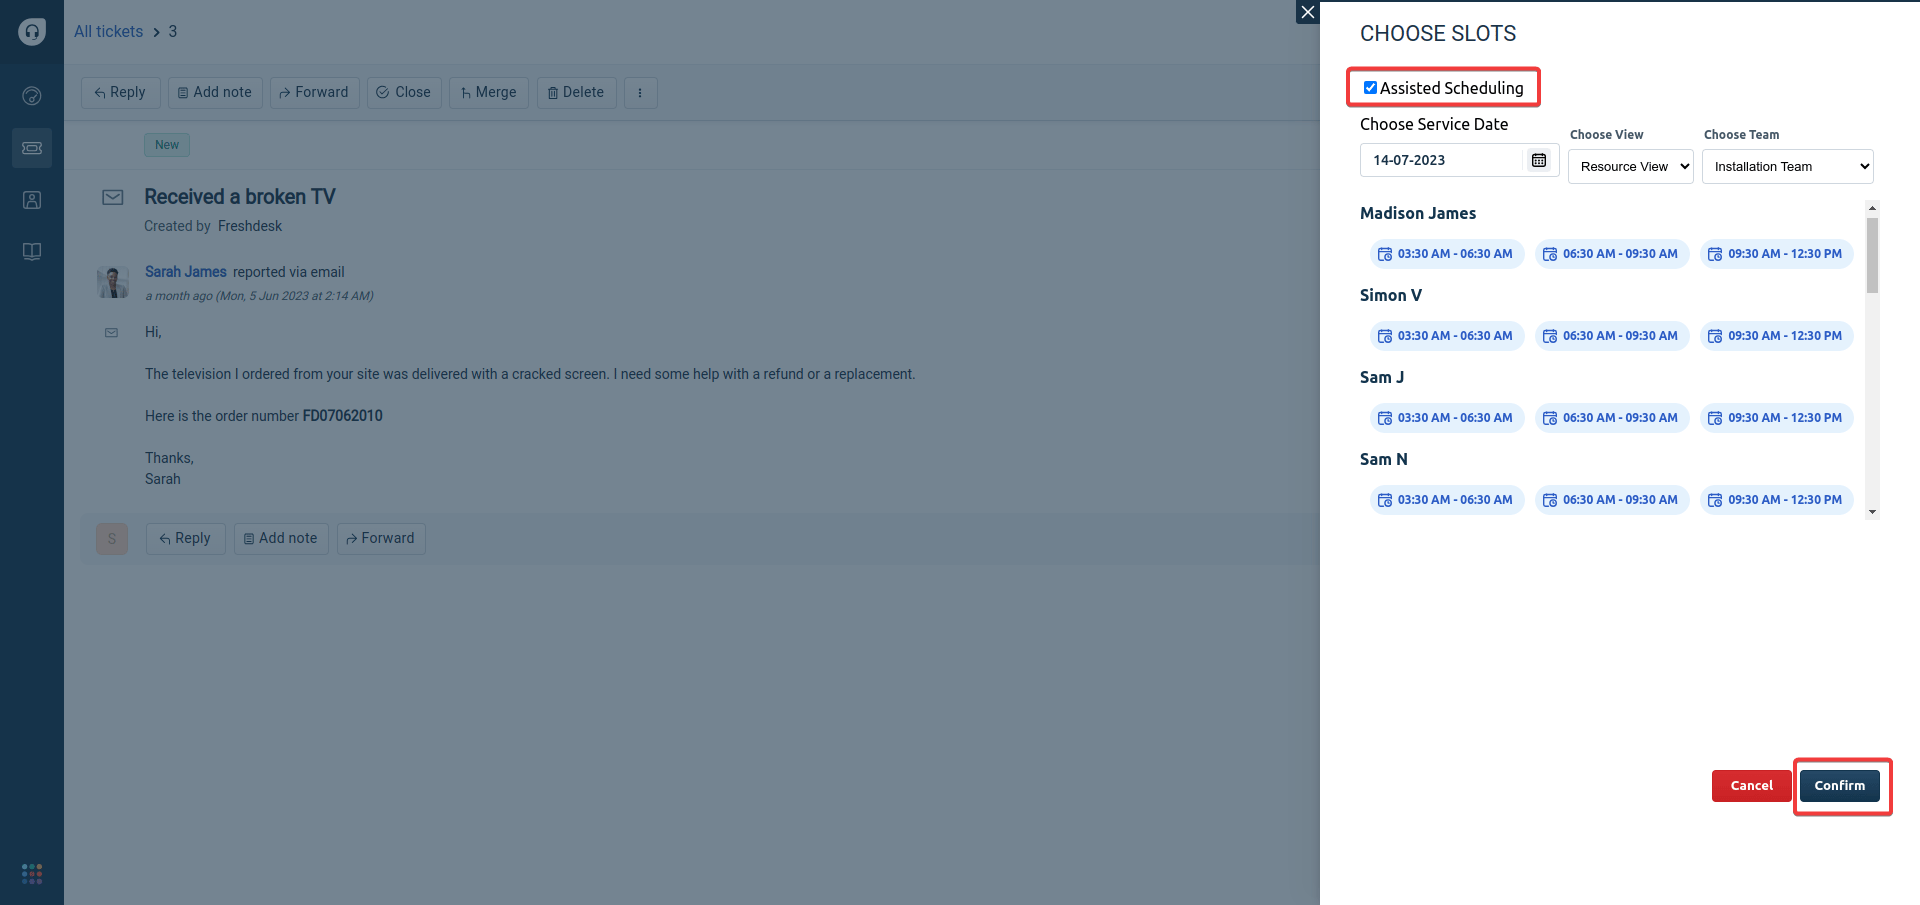
 3. Use the "**Assisted Scheduling**" feature to choose the slots and click the "**Confirm**" button.
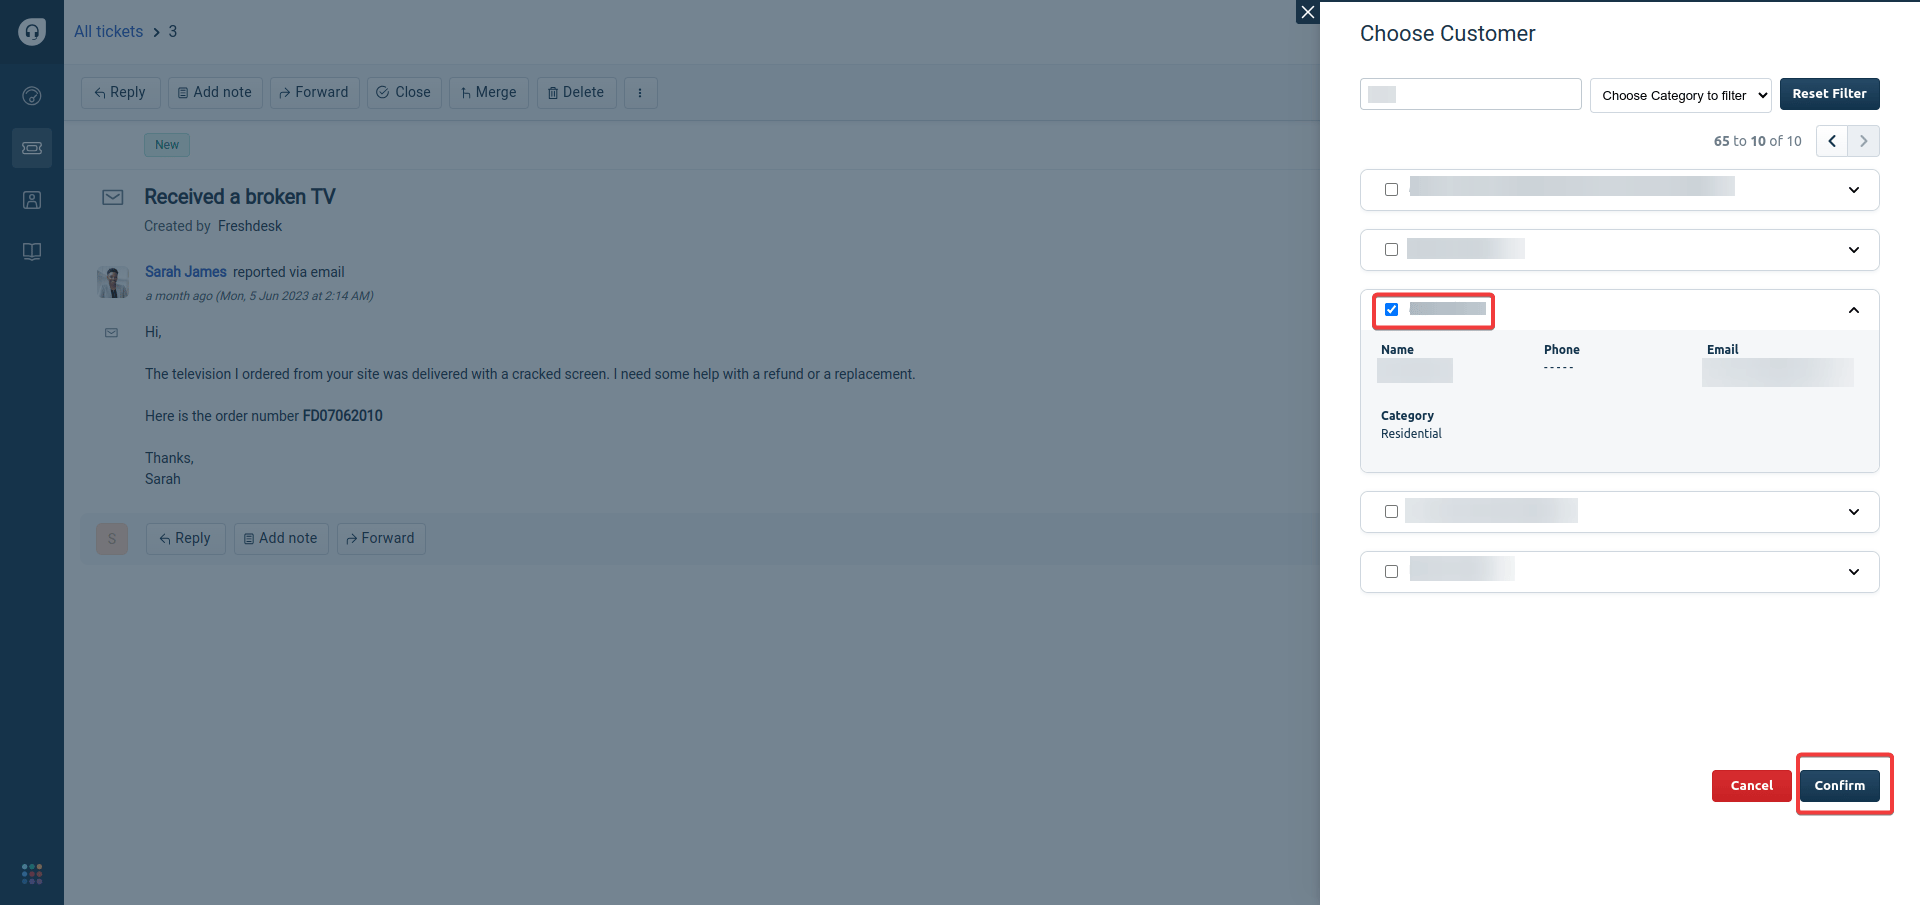
 4.The Freshdesk ticket contact will be created as a Customer in Zuper.
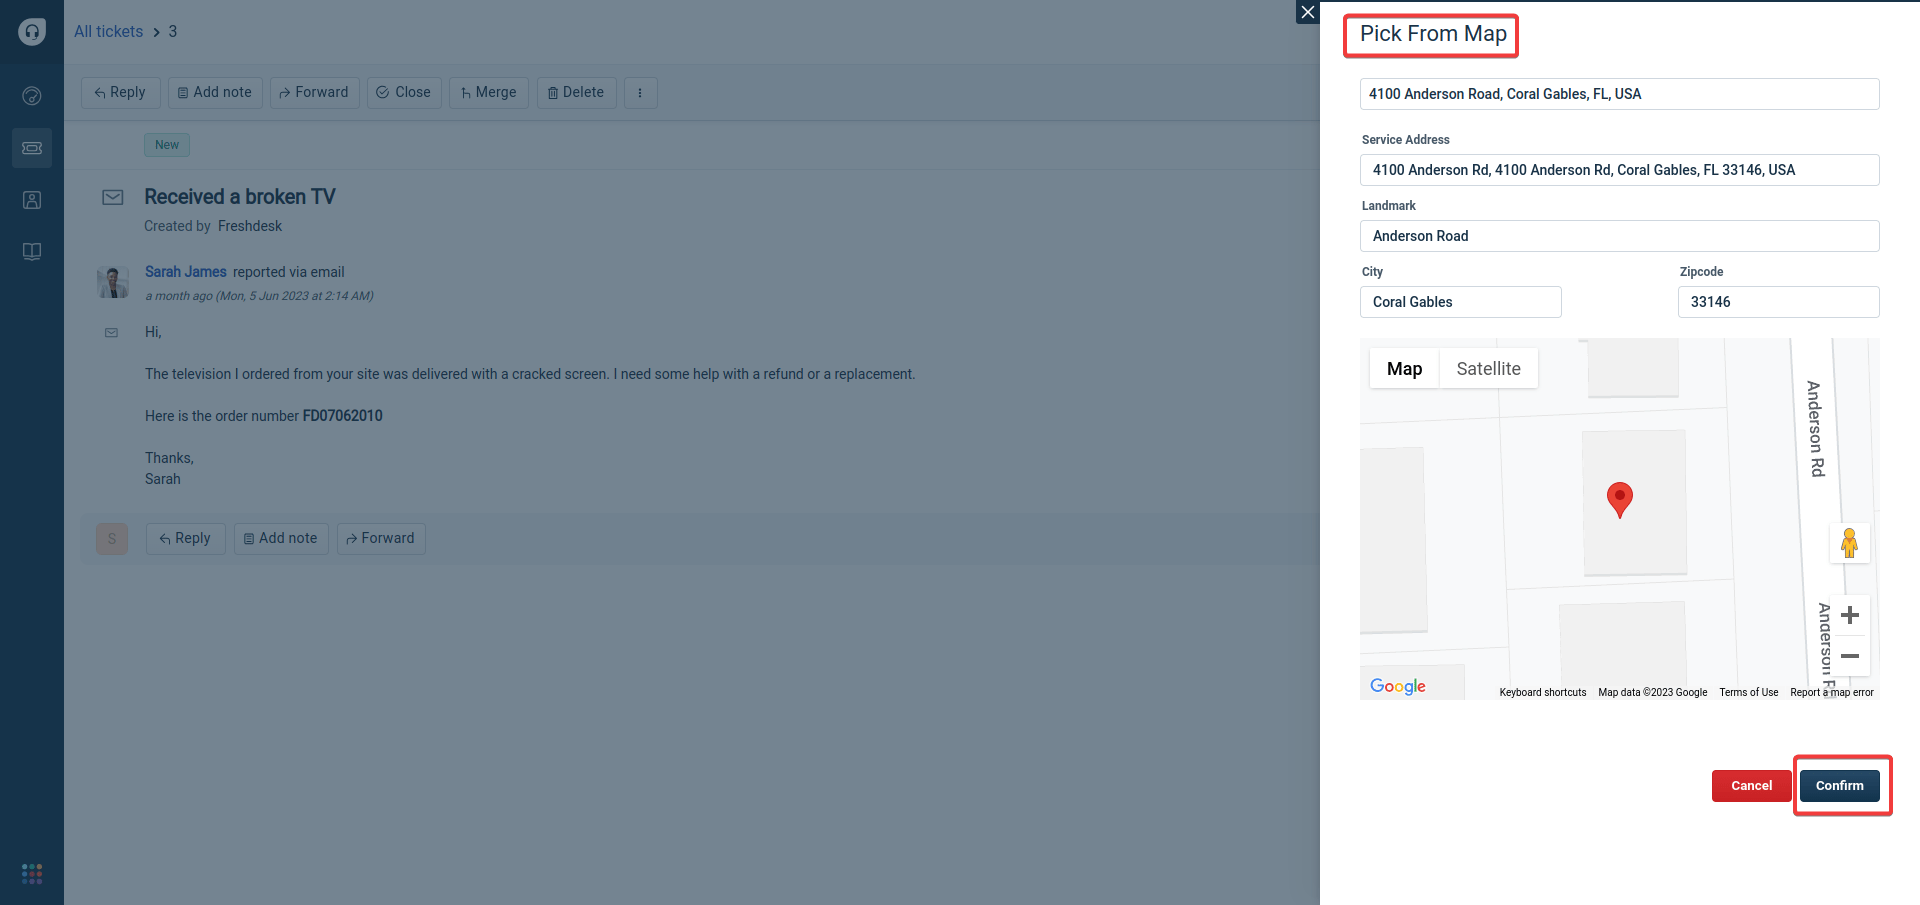
 5. Use the "**Pick From Map**" option to capture the exact customer address with proper geo-coordinates.
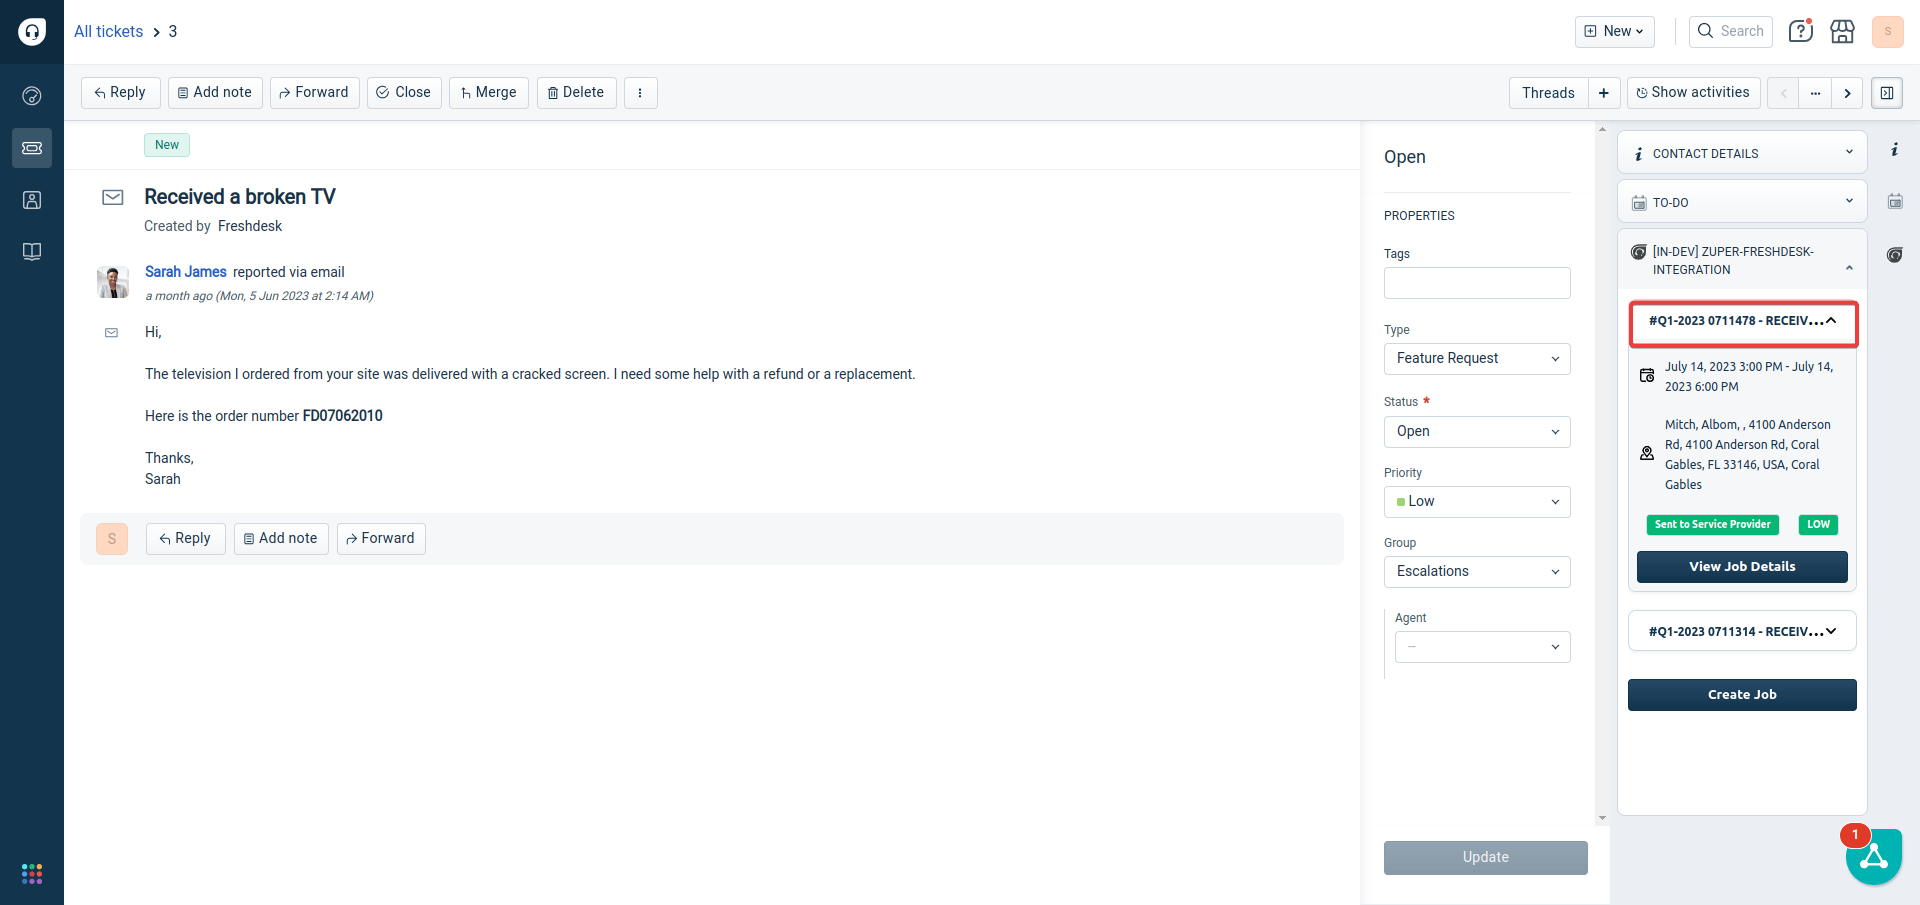
 6. The new job is successfully created from the Freshdesk sidebar.
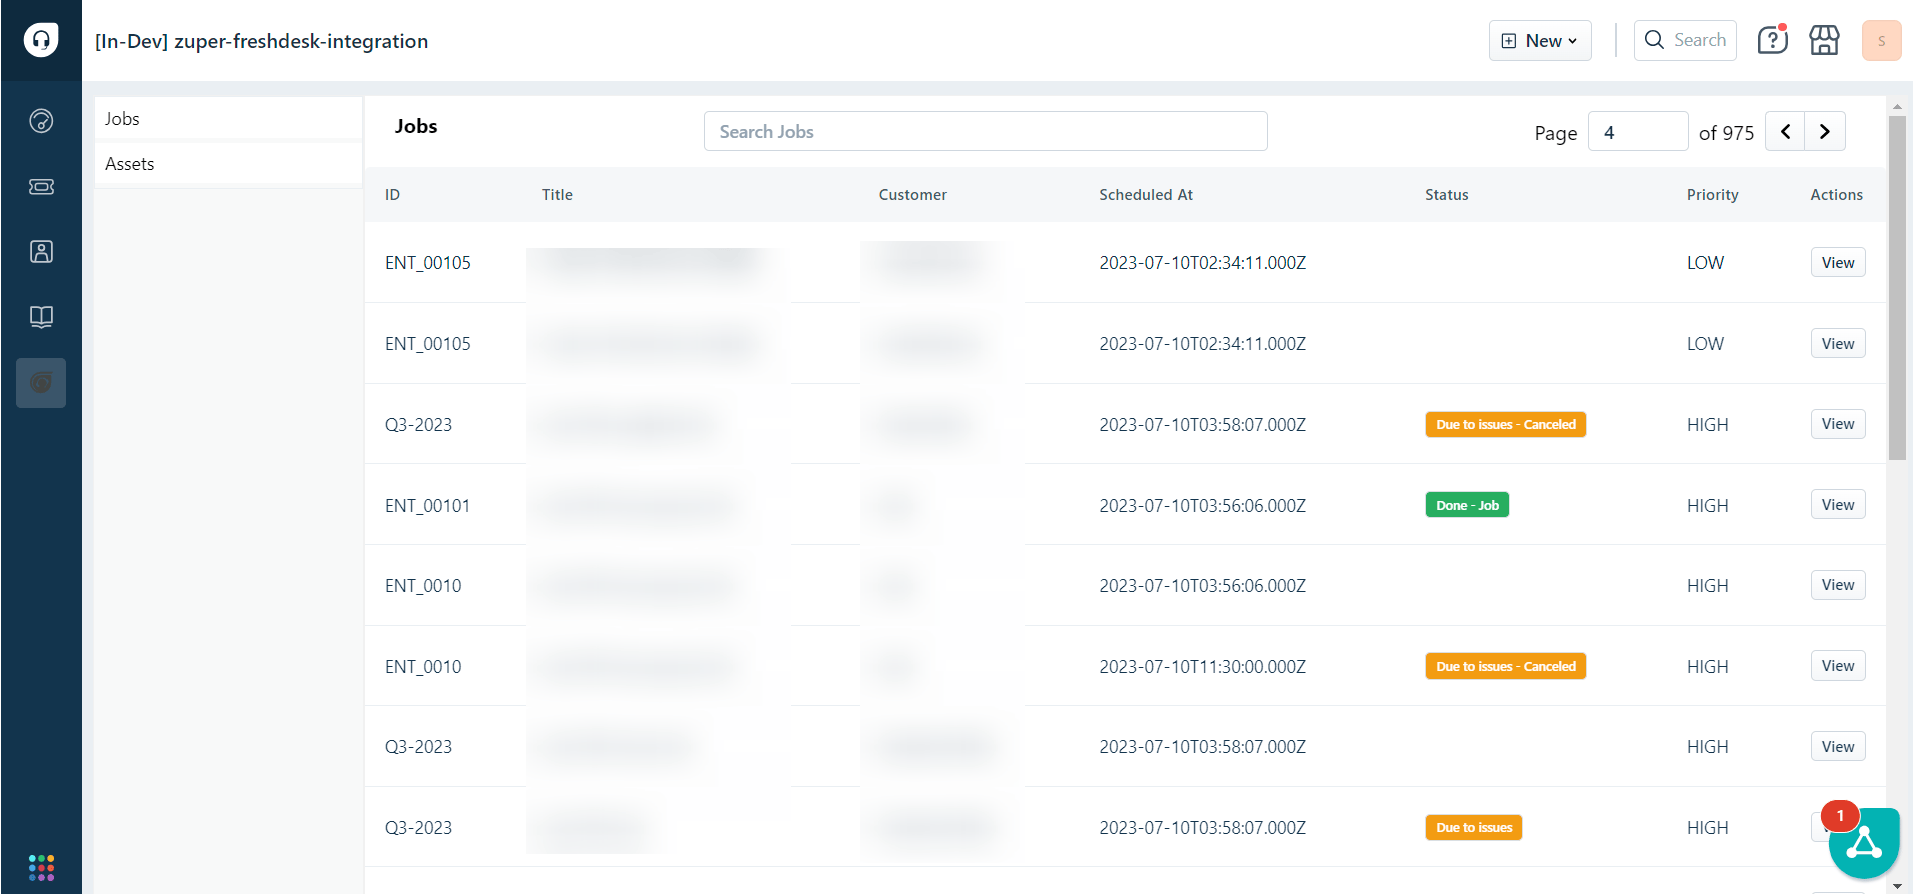
 7. You can view the list of Jobs created using Zuper-Freshdesk integration, and you can also view all jobs in the associated Zuper account.
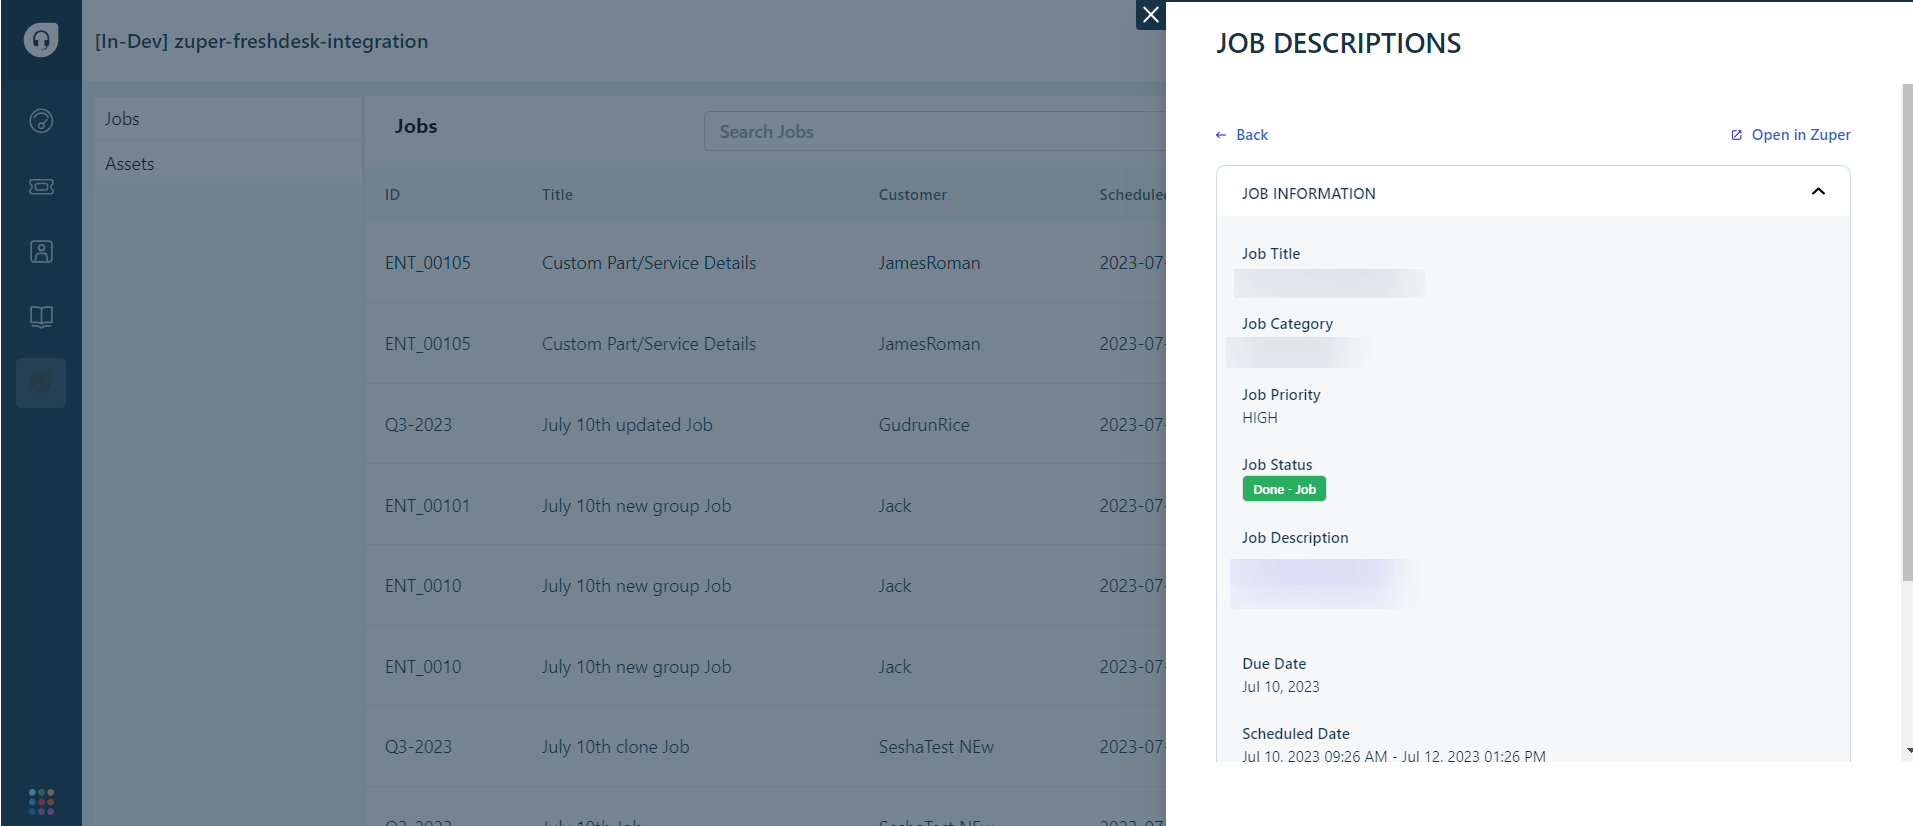
 8. Click any one of the line items to view the Job details.
 ### Custom fields
If custom field values you saved in Zuper are not appearing in Freshdesk, check the following:
1. Confirm **Sync Zuper Custom Fields** is set to **Yes** in your Freshdesk integration settings.
2. Check whether the Freshdesk ticket was already closed before you saved the custom fields in Zuper. If so, reopen the ticket in Freshdesk, then re-save the custom fields in Zuper to trigger the sync.
3. Confirm the field names match exactly in both systems. Only fields with identical names sync automatically.
If the issue continues, contact [Support](mailto:support@zuper.co).
### Workflow execution history
Check workflow execution history for errors
If a workflow linked to this integration is not running as expected, you can check its execution history to find where it failed.
1. Go to the **Jobs** module and open the relevant job.
2. In the right panel, locate **Workflow Activity** and select **View History**.
3. Review the **Status** column. Select any failed run to see the error message and the node where the failure occurred.
4. To retry a failed run, select the **Retry** icon next to the execution.
5. If you have resolved the issue manually, select **Acknowledge** to mark the run as reviewed.
### Zuper inside Freshdesk App:
You can use the major Zuper capabilities in the Freshdesk App.
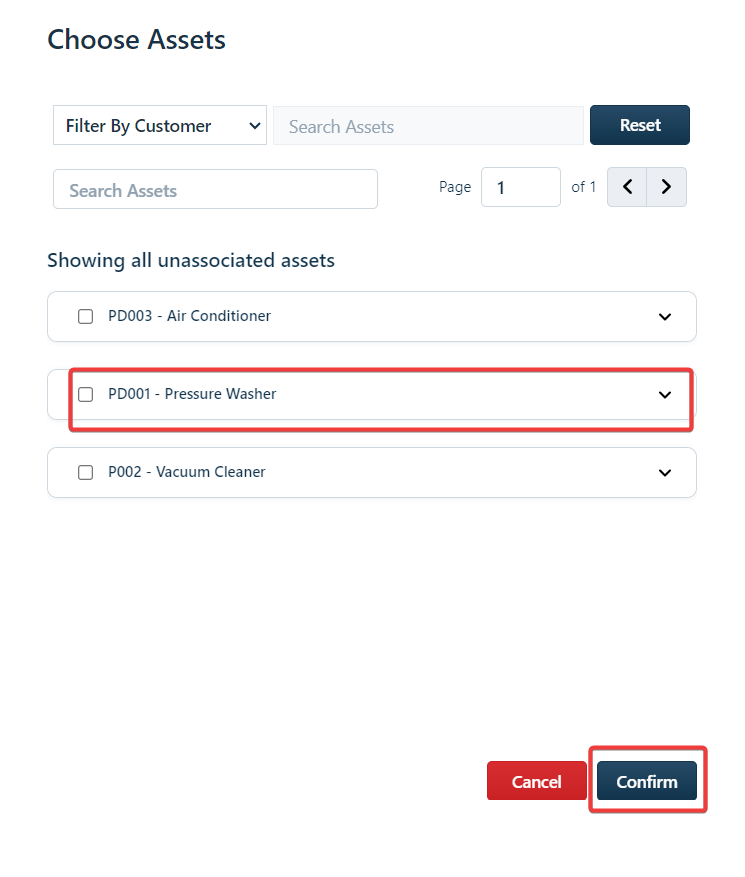
1. The Assets Picker helps you to add the Assets needed for the Job. Choose the Asset and click the "**Confirm**" button.
**Note**: You can include the required unassociated assets to Job based on your need and click the "Confirm" button.
### Custom fields
If custom field values you saved in Zuper are not appearing in Freshdesk, check the following:
1. Confirm **Sync Zuper Custom Fields** is set to **Yes** in your Freshdesk integration settings.
2. Check whether the Freshdesk ticket was already closed before you saved the custom fields in Zuper. If so, reopen the ticket in Freshdesk, then re-save the custom fields in Zuper to trigger the sync.
3. Confirm the field names match exactly in both systems. Only fields with identical names sync automatically.
If the issue continues, contact [Support](mailto:support@zuper.co).
### Workflow execution history
Check workflow execution history for errors
If a workflow linked to this integration is not running as expected, you can check its execution history to find where it failed.
1. Go to the **Jobs** module and open the relevant job.
2. In the right panel, locate **Workflow Activity** and select **View History**.
3. Review the **Status** column. Select any failed run to see the error message and the node where the failure occurred.
4. To retry a failed run, select the **Retry** icon next to the execution.
5. If you have resolved the issue manually, select **Acknowledge** to mark the run as reviewed.
### Zuper inside Freshdesk App:
You can use the major Zuper capabilities in the Freshdesk App.
1. The Assets Picker helps you to add the Assets needed for the Job. Choose the Asset and click the "**Confirm**" button.
**Note**: You can include the required unassociated assets to Job based on your need and click the "Confirm" button.
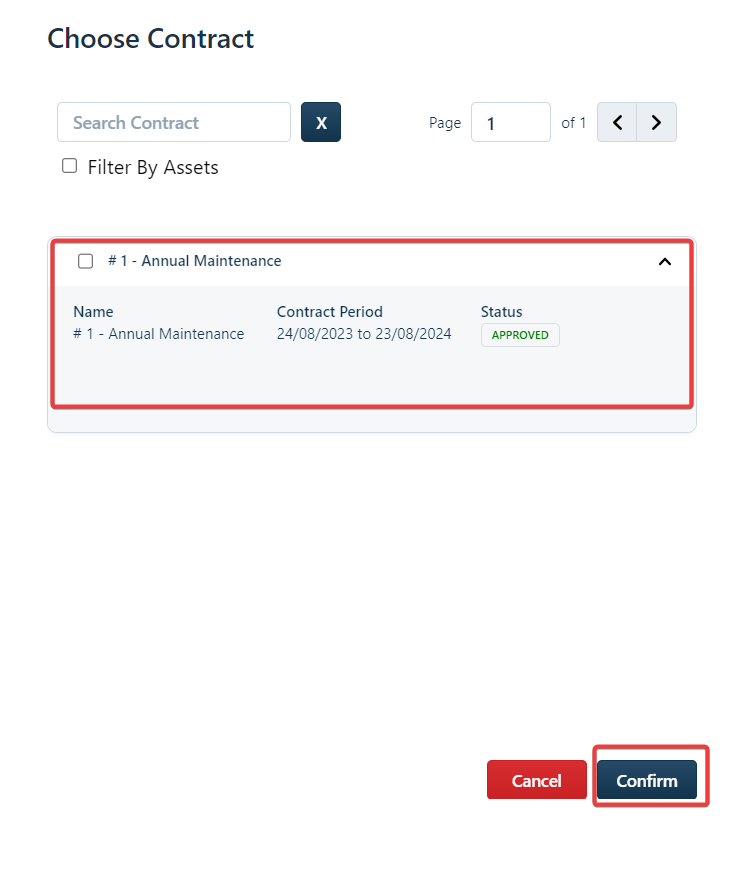
 2. The Contract Picker helps you add the contracts needed for the job. Choose the Contract and click the "**Confirm**" button.
 3. The Part Picker helps you add the parts needed for the job.
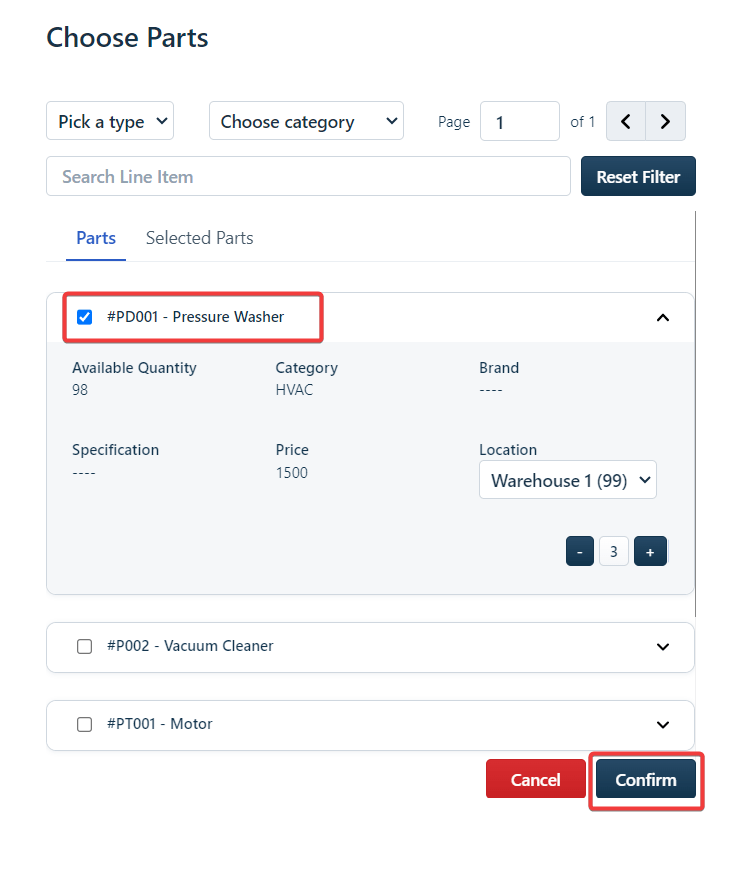 Choose the parts and click the "**Confirm**" button.
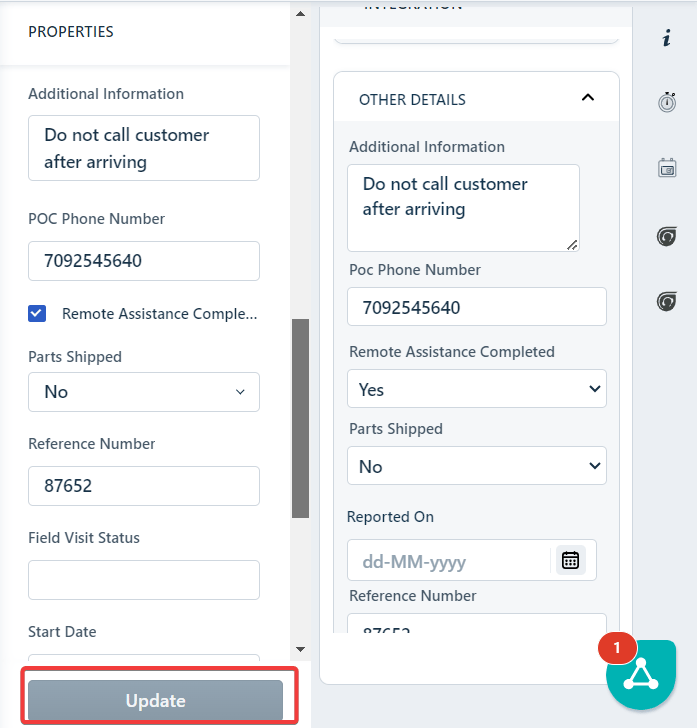
4. The Custom fields are auto-populated only if they match the custom fields that are available in the Freshdesk ticket. Also, the user can fill in manually.
Choose the parts and click the "**Confirm**" button.
4. The Custom fields are auto-populated only if they match the custom fields that are available in the Freshdesk ticket. Also, the user can fill in manually.
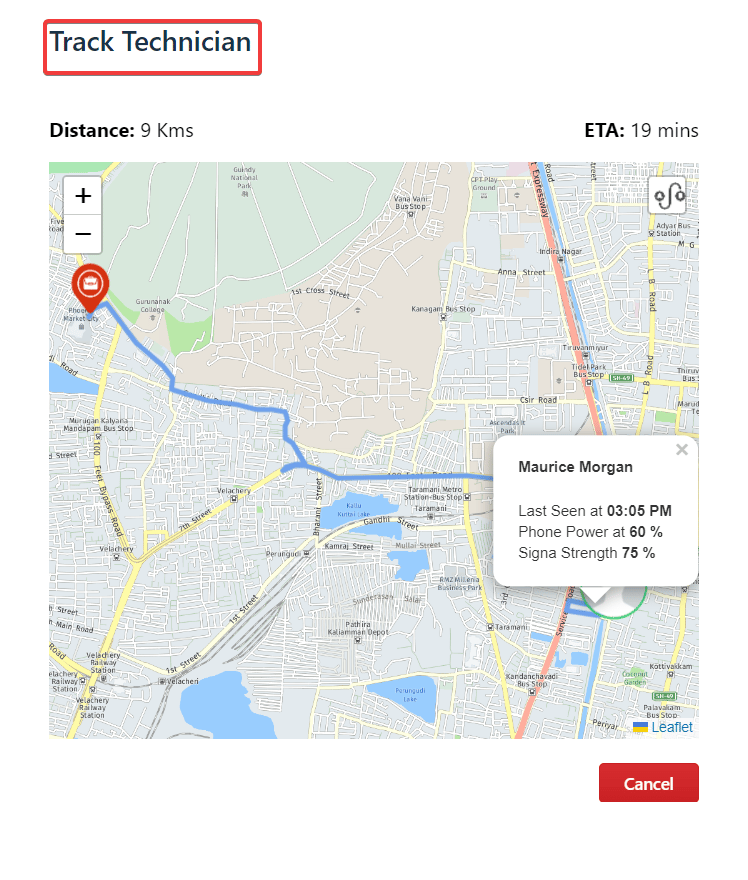
 5. You can track the technician by viewing the live location of the User.
 ## D. How to Uninstall Freshdesk from Zuper?
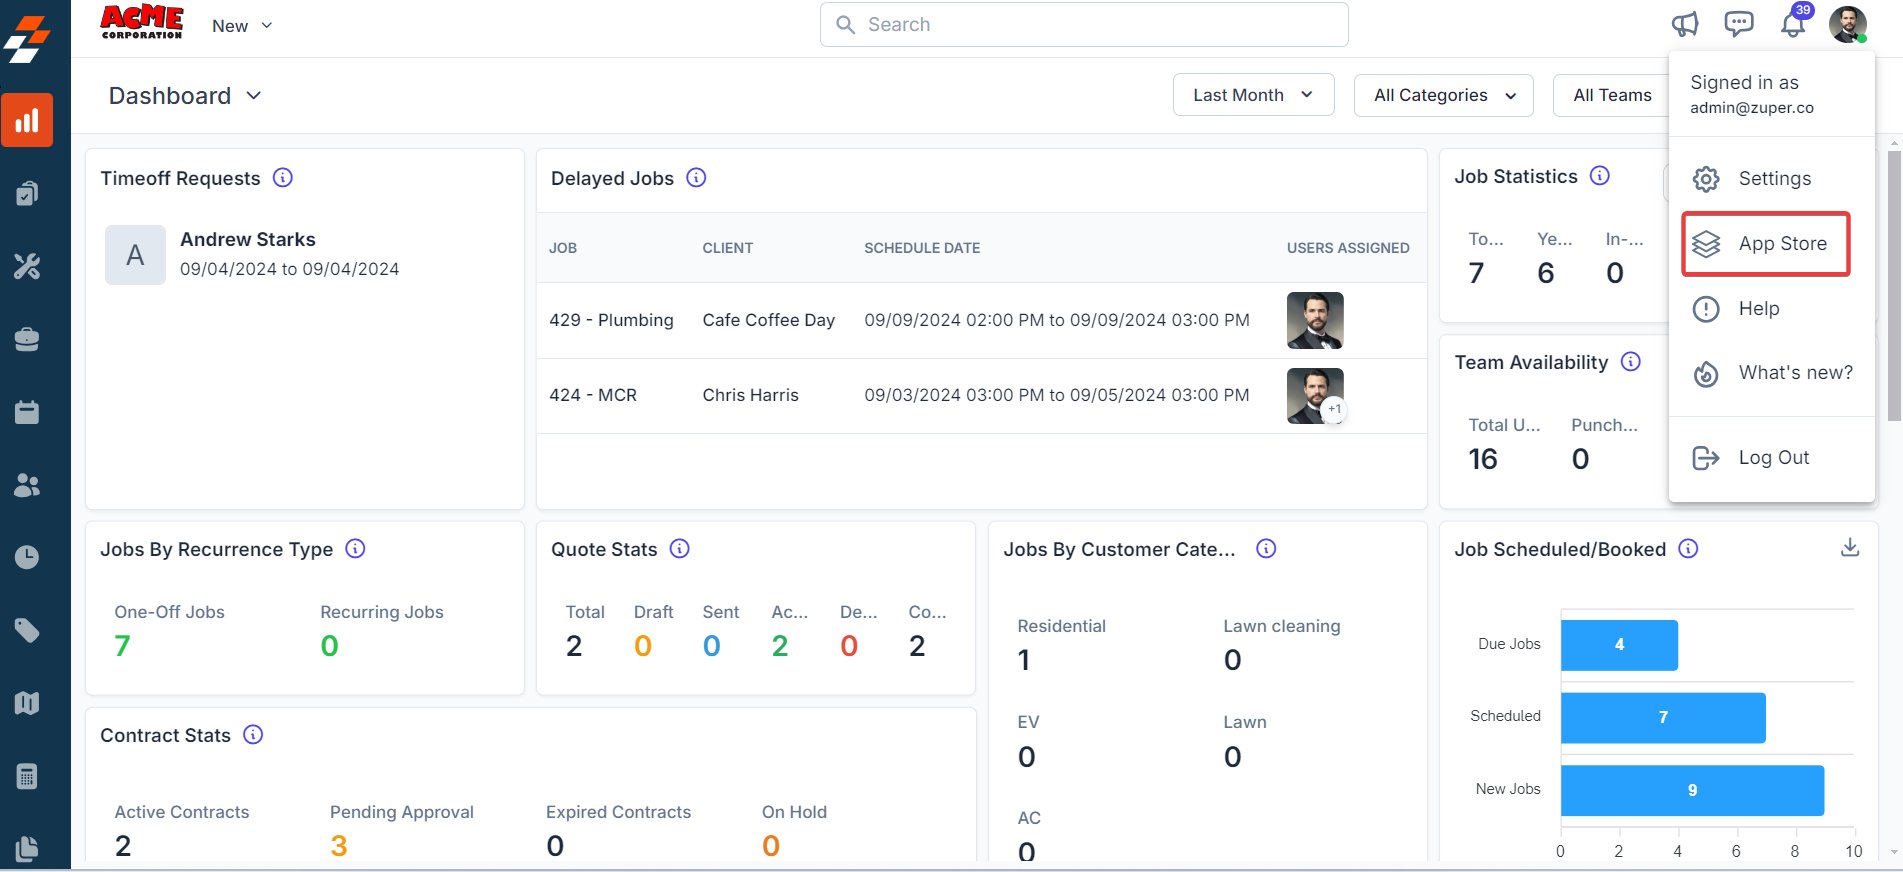
1. Open a new tab in your browser once you are logged in to your Zuper Account. Click on your Profile Picture in the top right corner of the screen and select the “**App Store**.”
## D. How to Uninstall Freshdesk from Zuper?
1. Open a new tab in your browser once you are logged in to your Zuper Account. Click on your Profile Picture in the top right corner of the screen and select the “**App Store**.”
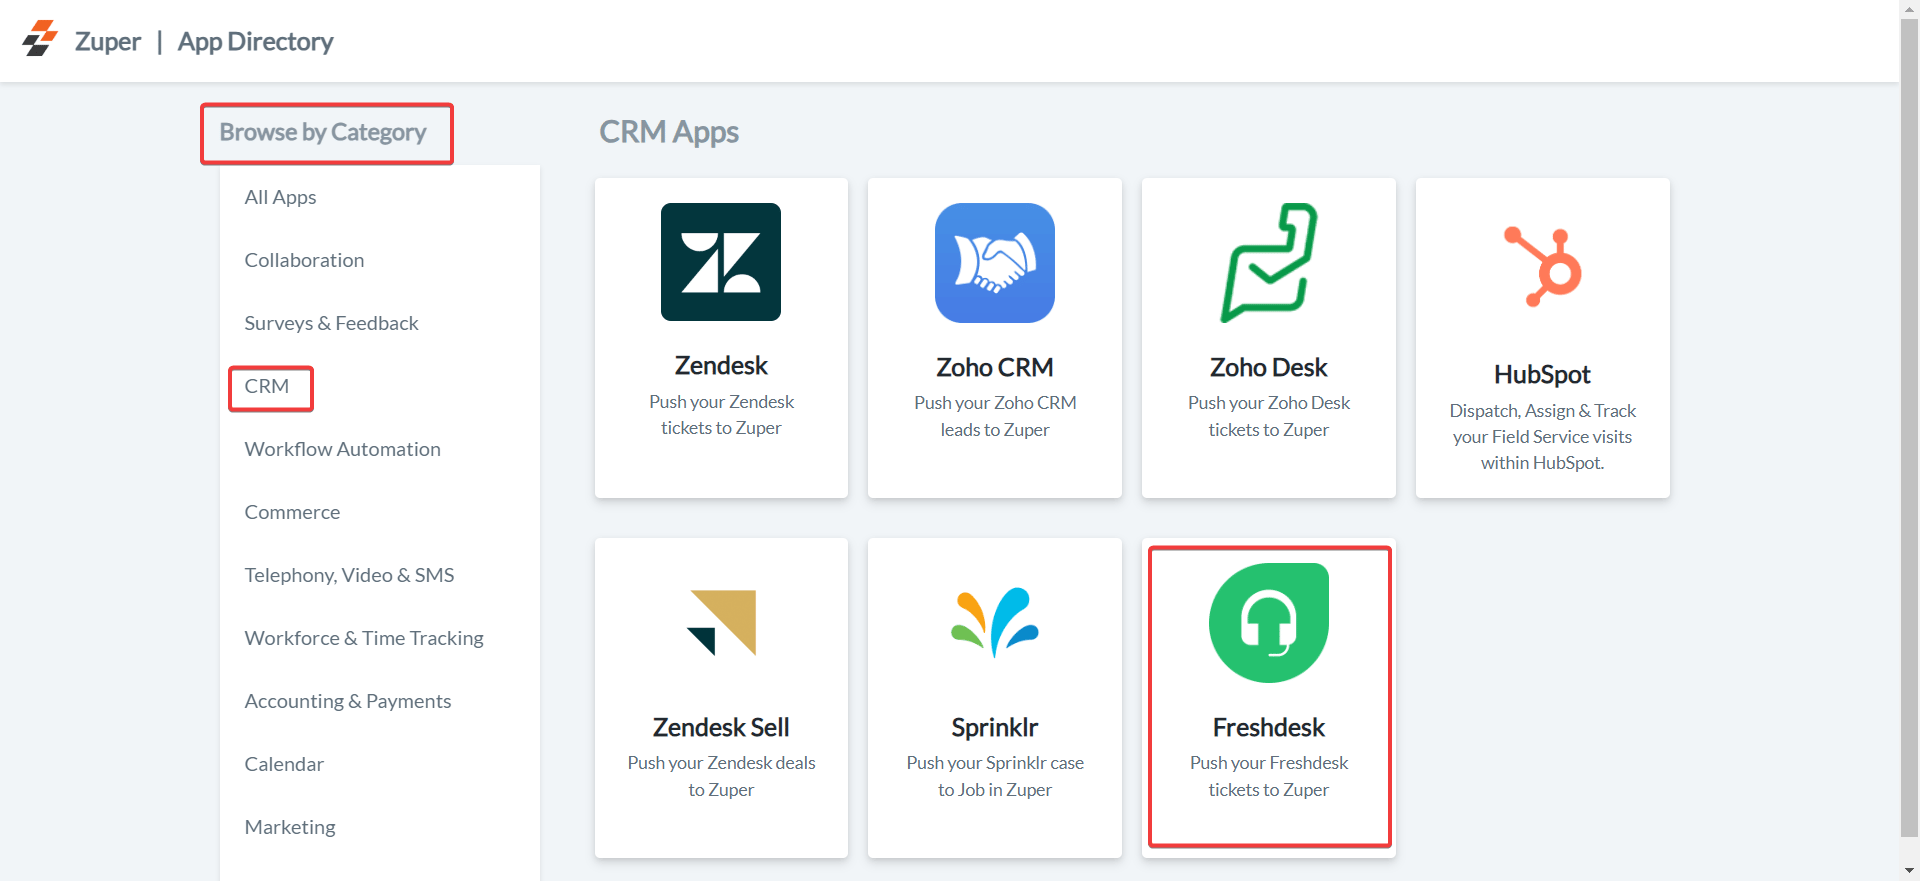
 2. Under the “**Browse by Category**,” select the “**CRM**” option and choose “**Freshdesk**.”
 3. Click on the “**Uninstall App**” button.
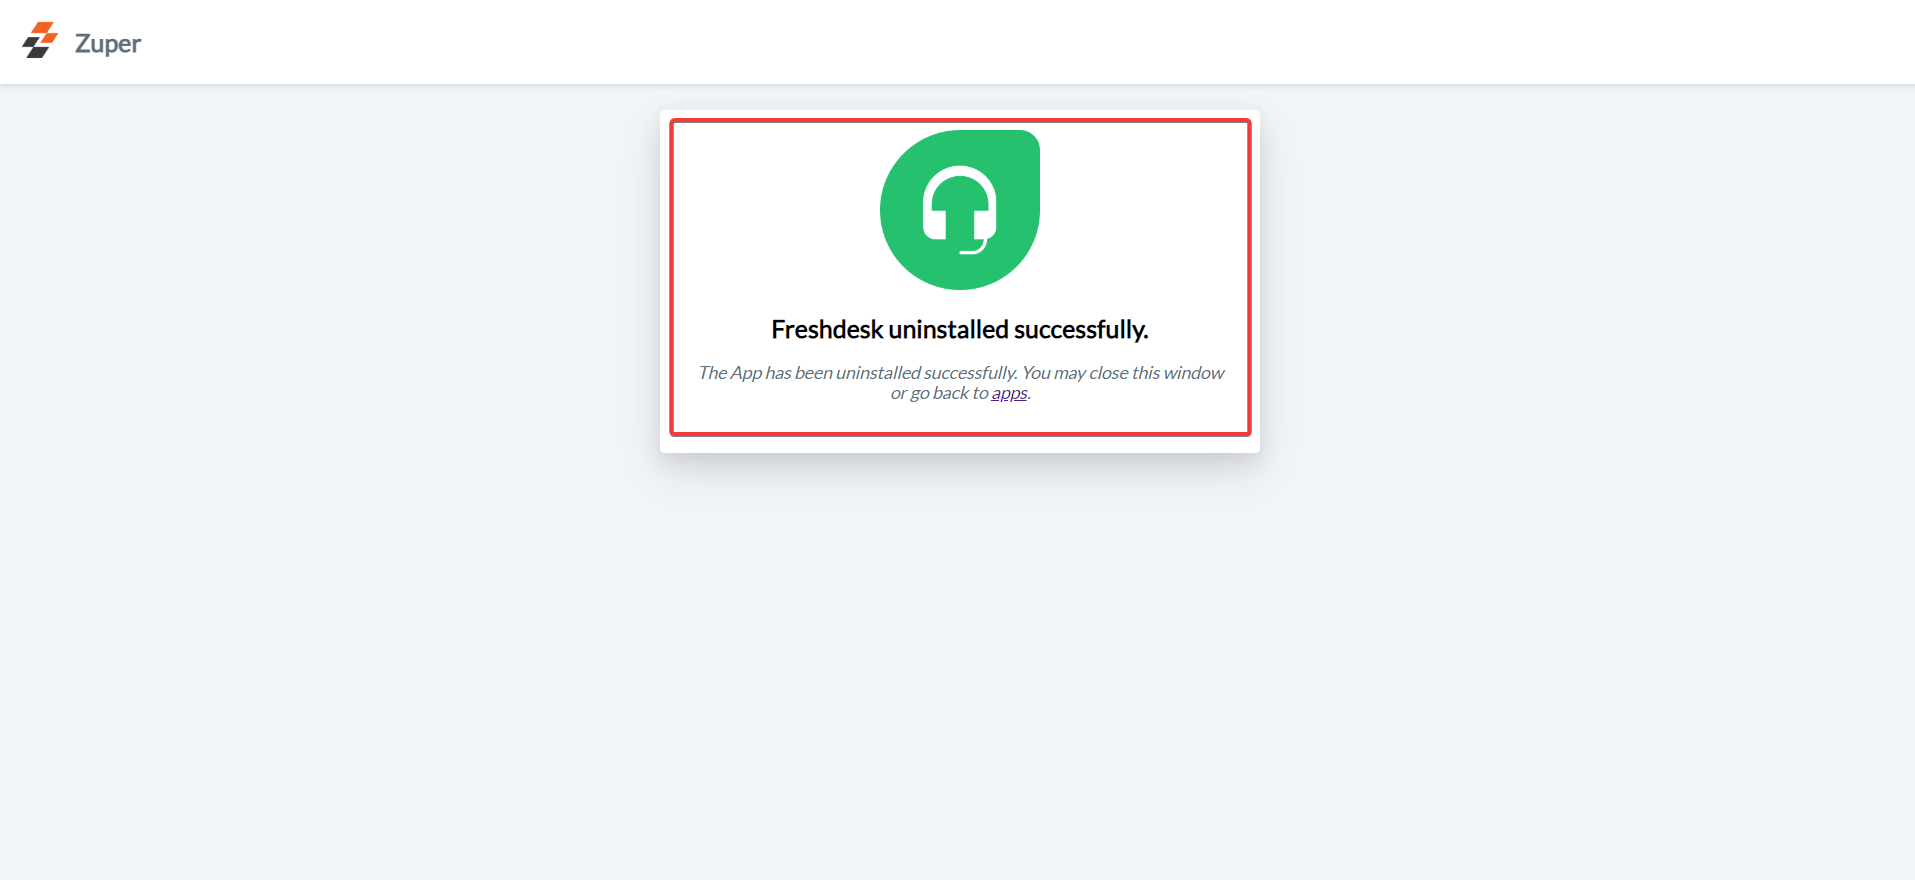
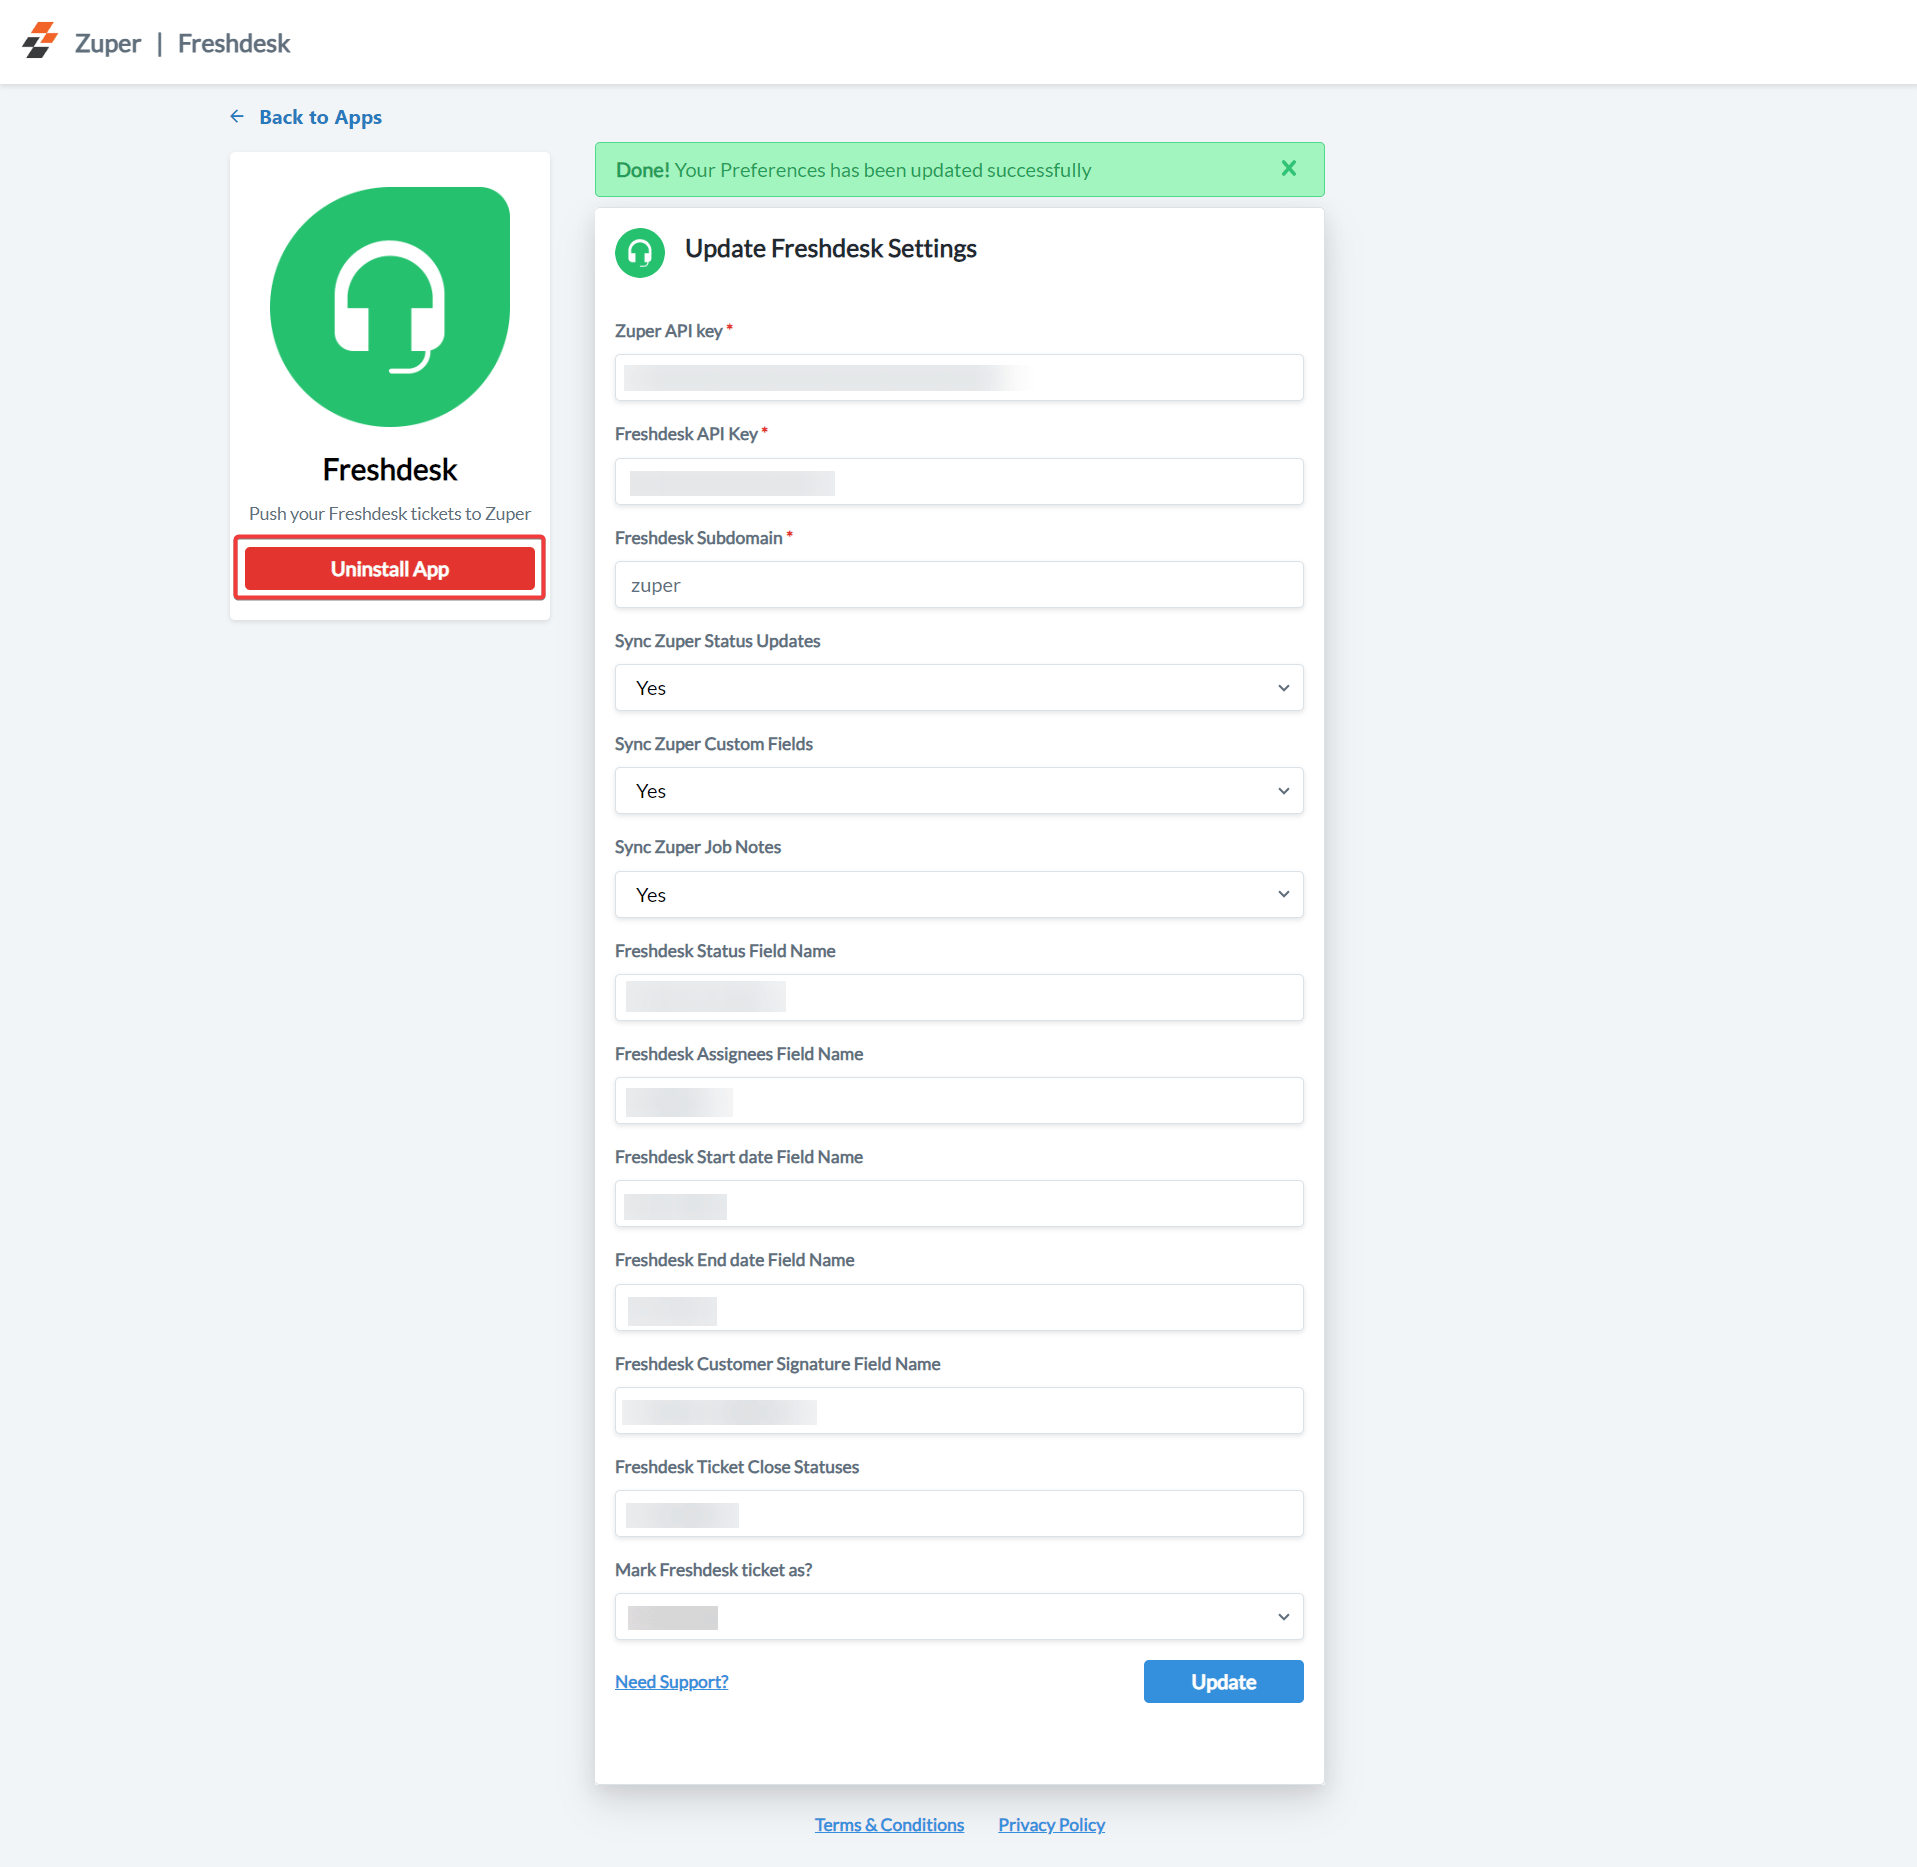 4. The Freshdesk app is uninstalled successfully.
 Using Zuper integration with Freshdesk, you can easily create & dispatch field visit jobs, pick the right slot & technician using Assisted Scheduling directly, and access Zuper Job-status updates within Freshdesk with the Freshdesk tickets.