> ## Documentation Index
> Fetch the complete documentation index at: https://docs.zuper.co/llms.txt
> Use this file to discover all available pages before exploring further.
# Work with appointments in the Zuper Mobile app
An appointment is a scheduled visit for a job. When a job needs more than one visit, each visit can have its own schedule, assignee, and tasks.
From the Zuper Field Service app, you check your scheduled appointments, review the work planned for each visit, and complete the associated tasks.
## Check your appointments for the day
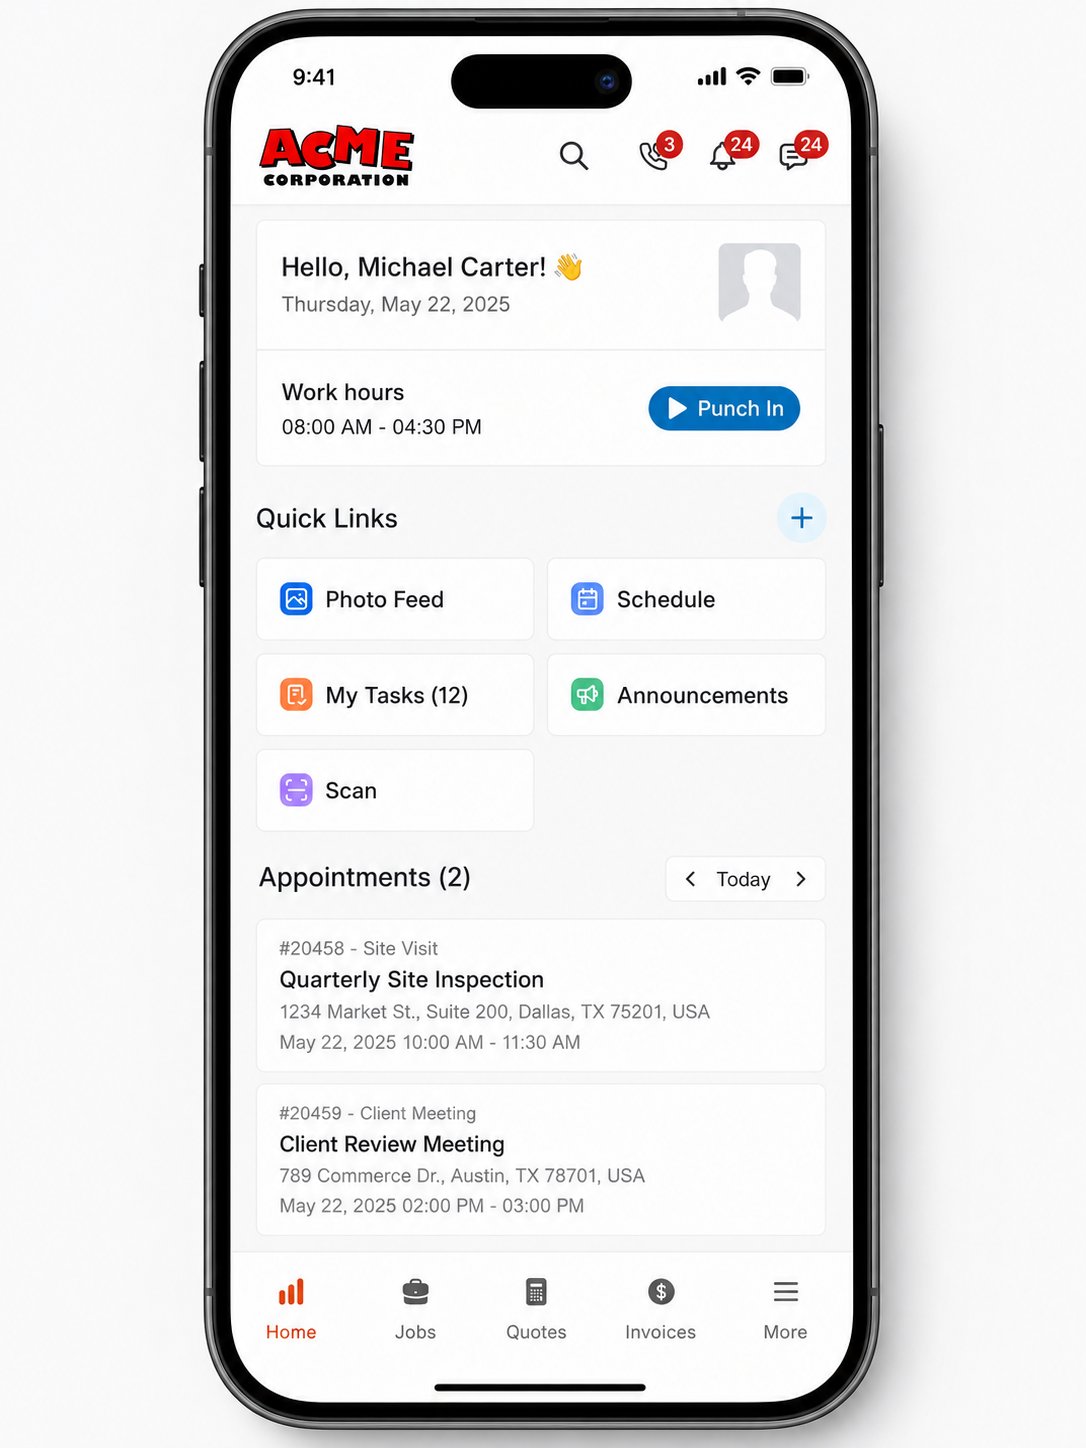
Start your day from the Home screen, where every visit assigned to you is listed so you know where to be and when.
 1. Open the **Zuper Mobile** app.
2. On the **Home** tab, scroll to the **Appointments** section.
3. Review the appointments scheduled for you.
**Tip**: Use the date selector to view appointments for other days.
4. Tap an appointment to open it.
When you open an appointment, Zuper takes you to the related job and displays the selected appointment along with the tasks linked to that visit.
## Complete the tasks for an appointment
Tasks linked to an appointment represent the work planned for that visit. Complete them as you go so your progress stays tied to the right visit.
1. Open the **Zuper Mobile** app.
2. On the **Home** tab, scroll to the **Appointments** section.
3. Review the appointments scheduled for you.
**Tip**: Use the date selector to view appointments for other days.
4. Tap an appointment to open it.
When you open an appointment, Zuper takes you to the related job and displays the selected appointment along with the tasks linked to that visit.
## Complete the tasks for an appointment
Tasks linked to an appointment represent the work planned for that visit. Complete them as you go so your progress stays tied to the right visit.
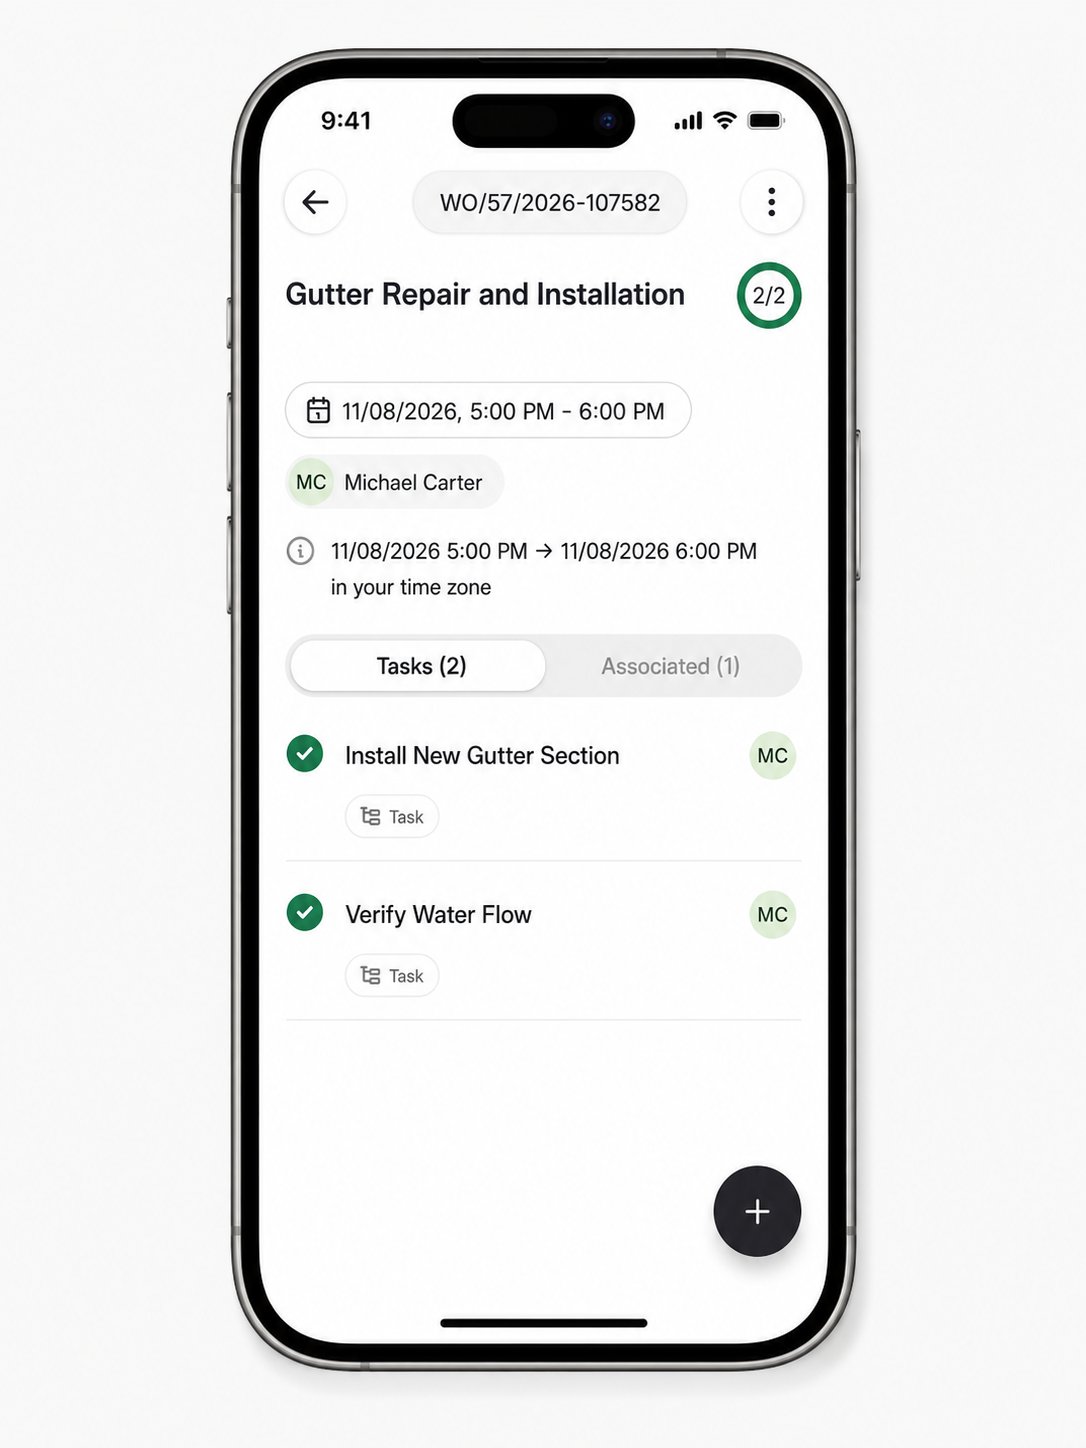 1. On the appointment details page, go to the **Tasks** tab.
2. Tap a task to open it.
3. Perform the task and update the task status.
4. If a checklist or inspection form is attached, complete it before you mark the task as completed. For more information, see [Tasks](/Zuper_Mobile_Apps/Tasks).
## Reschedule an appointment
Reschedule an appointment when the visit needs to move to a different date or time. This lets you manage your own schedule from the field.
1. Open the appointment.
2. Tap the **schedule** icon (date and time), then select **Edit**.
3. On the **Schedule** screen, change the date and time, or turn on **All day** if needed.
1. On the appointment details page, go to the **Tasks** tab.
2. Tap a task to open it.
3. Perform the task and update the task status.
4. If a checklist or inspection form is attached, complete it before you mark the task as completed. For more information, see [Tasks](/Zuper_Mobile_Apps/Tasks).
## Reschedule an appointment
Reschedule an appointment when the visit needs to move to a different date or time. This lets you manage your own schedule from the field.
1. Open the appointment.
2. Tap the **schedule** icon (date and time), then select **Edit**.
3. On the **Schedule** screen, change the date and time, or turn on **All day** if needed.
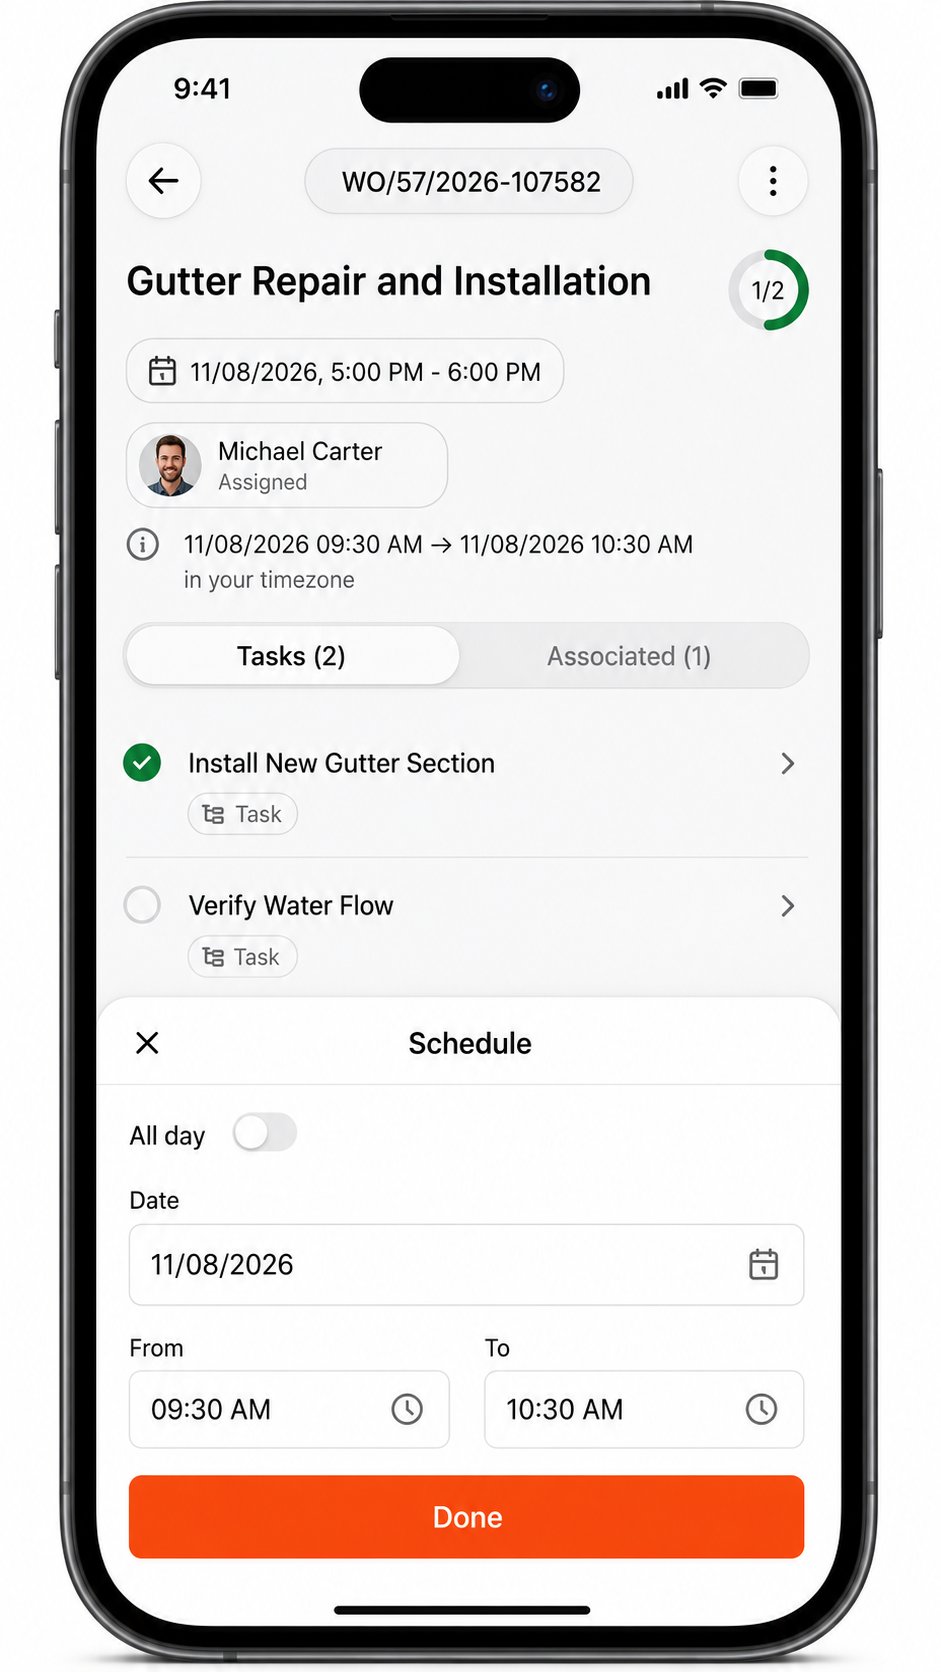 4. Tap **Done** to save your changes.
If you are already dispatched to or arrived at the visit, do not reschedule it. Add a [new appointment](/Appointments/work-with-appointments-in-the-zuper-mobile-app#add-an-appointment) for the additional work instead.
## Assign technicians to an appointment
Bring another technician onto a visit when the work needs more than one person. You can add technicians to any appointment assigned to you.
1. On the appointment details page, tap the **Assign** icon. Your name appears here as the current assignee.
2. Choose **Assign users** to pick team members yourself, or **Assisted schedule** to let Zuper suggest available users.
4. Tap **Done** to save your changes.
If you are already dispatched to or arrived at the visit, do not reschedule it. Add a [new appointment](/Appointments/work-with-appointments-in-the-zuper-mobile-app#add-an-appointment) for the additional work instead.
## Assign technicians to an appointment
Bring another technician onto a visit when the work needs more than one person. You can add technicians to any appointment assigned to you.
1. On the appointment details page, tap the **Assign** icon. Your name appears here as the current assignee.
2. Choose **Assign users** to pick team members yourself, or **Assisted schedule** to let Zuper suggest available users.
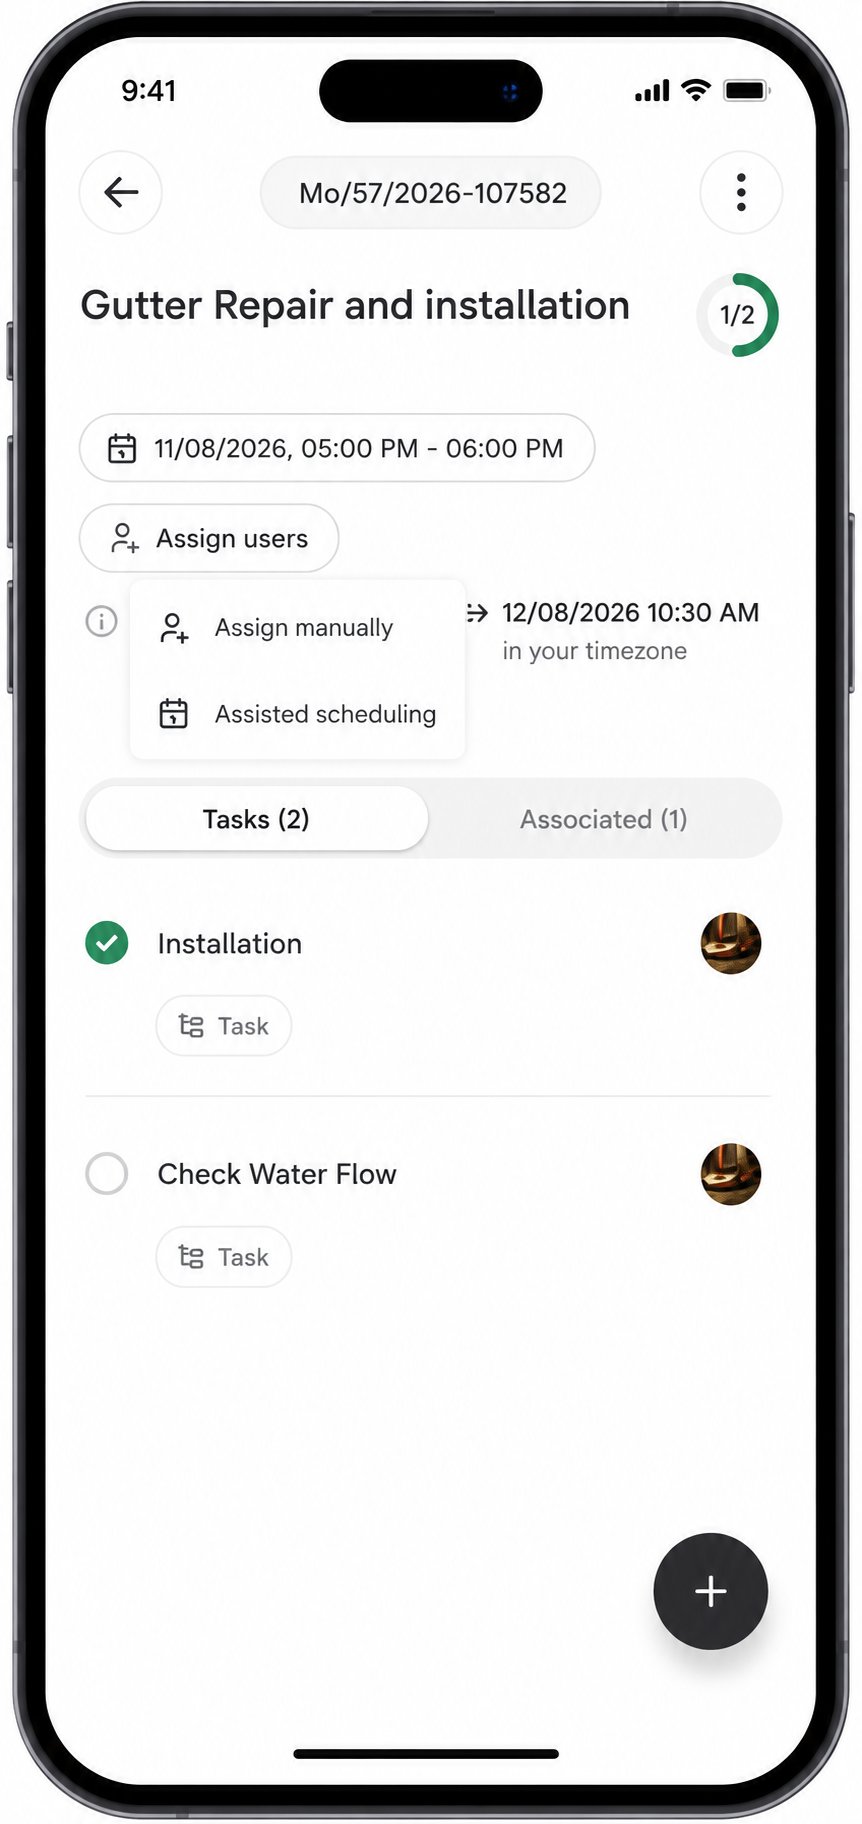 3. Select the users you want to add to the appointment.
## Add an appointment
Create a new appointment when a job needs another visit, or hand it to the office to schedule for you.
**Note**: Creating an appointment requires the appropriate permission for your role. Contact your administrator if you need access.
1. Open the job and go to the **Details** tab.
2. In the **Appointments** section, tap the **+** icon.
3. On the **New Appointment** screen, enter an **Appointment title**.
4. Enter a **Description**. This step is optional.
5. Tap **Assign users**, then choose **Assign users** to pick team members yourself, or **Assisted schedule** to let Zuper suggest available users.
6. Tap **Select date & time**. On the **Schedule** sheet, turn on **All day**, or set the **Date**, **From**, and **To** times, then tap **Done**.
7. Tap **Create**.
3. Select the users you want to add to the appointment.
## Add an appointment
Create a new appointment when a job needs another visit, or hand it to the office to schedule for you.
**Note**: Creating an appointment requires the appropriate permission for your role. Contact your administrator if you need access.
1. Open the job and go to the **Details** tab.
2. In the **Appointments** section, tap the **+** icon.
3. On the **New Appointment** screen, enter an **Appointment title**.
4. Enter a **Description**. This step is optional.
5. Tap **Assign users**, then choose **Assign users** to pick team members yourself, or **Assisted schedule** to let Zuper suggest available users.
6. Tap **Select date & time**. On the **Schedule** sheet, turn on **All day**, or set the **Date**, **From**, and **To** times, then tap **Done**.
7. Tap **Create**.
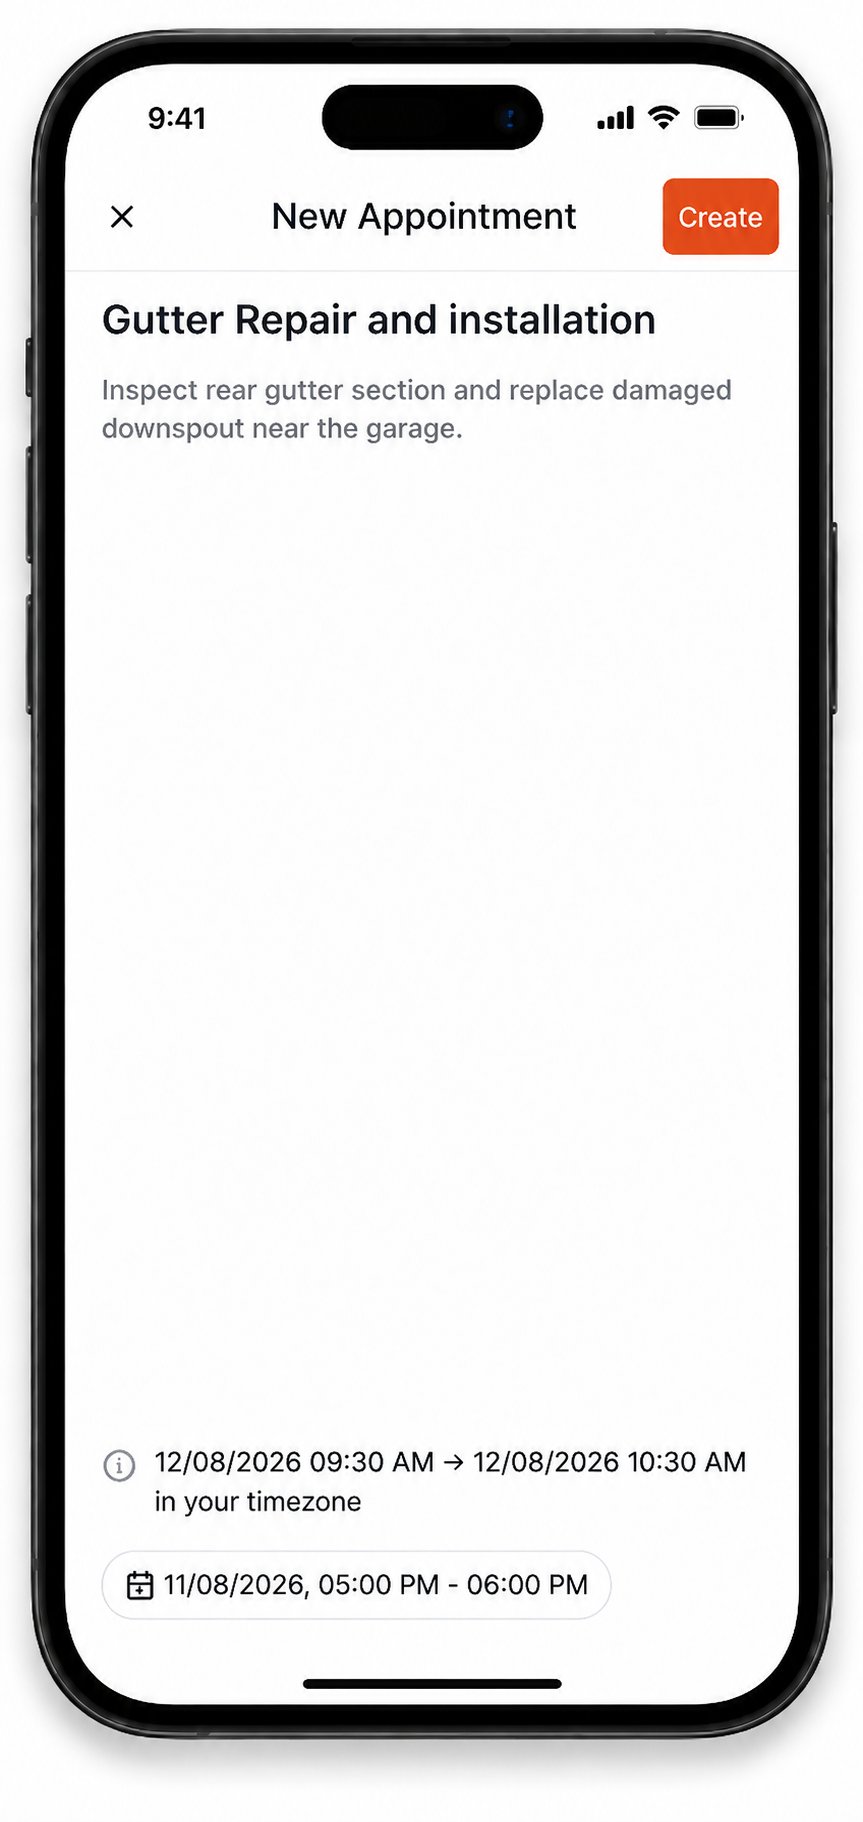 Your new appointment appears in the job's **Appointments** section.
## Frequently asked questions
Complete the tasks associated with the appointment, then update the job to match your organization's workflow.
Yes. You can add another appointment from the **Appointments** section of the job.
Yes. Open the appointment, tap the **More options** icon, and select **Edit**.
On the job's **Details** page, go to the **Tasks** tab and turn on **All Tasks** to list every task associated with the job.
Your new appointment appears in the job's **Appointments** section.
## Frequently asked questions
Complete the tasks associated with the appointment, then update the job to match your organization's workflow.
Yes. You can add another appointment from the **Appointments** section of the job.
Yes. Open the appointment, tap the **More options** icon, and select **Edit**.
On the job's **Details** page, go to the **Tasks** tab and turn on **All Tasks** to list every task associated with the job.